


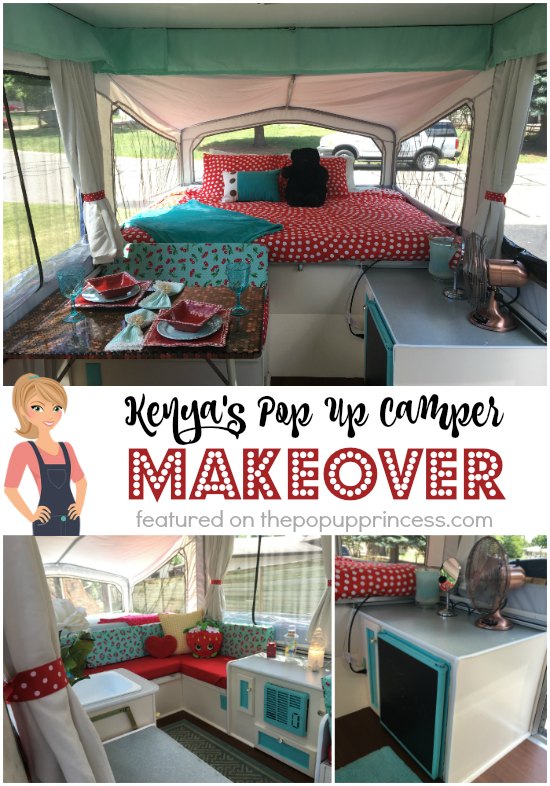
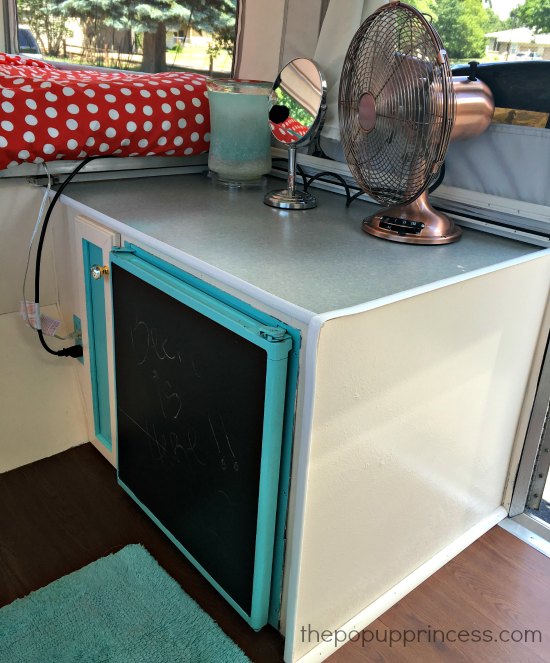
 Kenya used Behr Marquee one coat paint from Home Depot to paint her cabinets. She lightly sanded all of the cabinet surfaces, wiped them clean with an all purpose cleaner and started painting. Even though the paint said it covered in one coat, Kenya still needed at least two coats (in some places three) to cover the cabinets. That was a bit disappointing since the paint is a little pricey at $40 dollars a gallon. (Note that Kenya didn’t use a primer. You can eliminate the need for multiple coats with a good primer. 🙂 ) The turquoise color on the cabinet doors is spray paint. She found the adorable jeweled door pulls on Amazon for $8 dollars for a pack of 12. Kenya saved and reused all of the original hinges and covered the front of the fridge in adhesive chalkboard paper that she found at Hancock Fabrics. They were having a going out of business sale, so she scored that for 60% off! Nice!
 The table that came with the camper was homemade and two of the edges were not finished, so Kenya knew she needed to do something with it. She began searching Pinterest and came up with the penny table idea. Kenya tells me that the table is by far her favorite part of the camper, although it is fairly heavy and may not make it to the campground. Kenya collected pennies from everyone she knew, keeping a cup in her office and asking everyone she worked with to empty their pockets of pennies every time they came in. She started by painting the table with a coat of black primer that she had laying around. Then she used Gorilla super glue to glue the pennies on. A couple of of Kenya’s coworkers used a grinder to smooth out the edges before mixing and pouring the resin on the top. They let the table sit to cure for three days and used the grinder again to remove the drips. The table weighs about 10-15 pounds, but it definitely is beautiful.
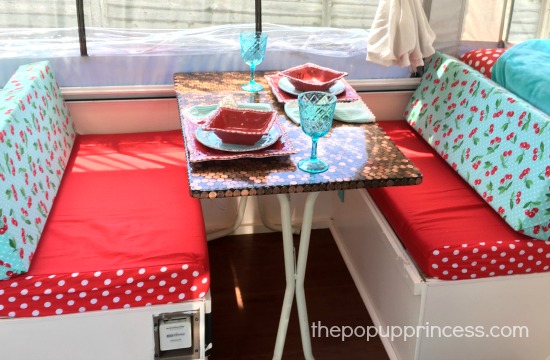
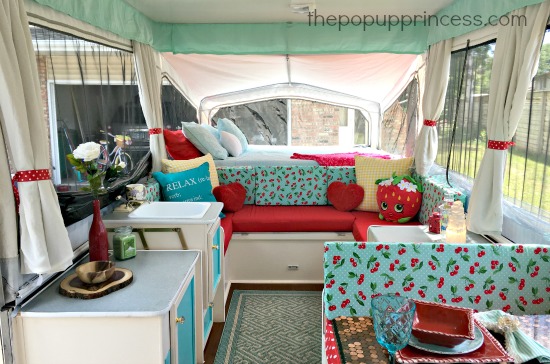 Kenya decided to recover the original curtains, so she wouldn’t have to mess with reattaching the curtain clips. She layered a cream muslin and a sheer organza and sewed them right on to the original curtains. The polka dot tie backs were a last minute fix because she didn’t finish the other tie backs she was going to make. 😉 Sometimes last minute fixes are the best!
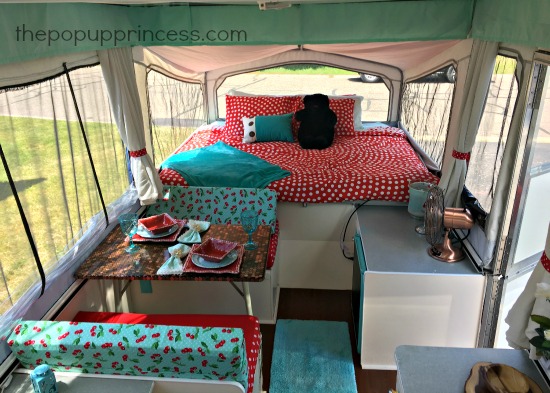
Kenya had an original budget of $500, and she would have stayed right on track but along the way, she broke the camper’s lift system. She tried cranking it up with one of the corners still latched. 🙁 Thankfully the part was only $13 and took about an hour to install. She had to replace the tires and also discovered that her original vehicle would not tow the camper. Of course, she had to buy a new (used) truck to tow her new (used) PUP. Lesson learned. If you are trying to stick to a budget, it is always a good idea to set aside some of your budget money for unexpected expenses.
Kenya tells me that even though she ran in to a few hurdles while taking on this project, she couldn’t be happier with the outcome. She has already taken The Dolllhouse out on three trips this summer, and loves it.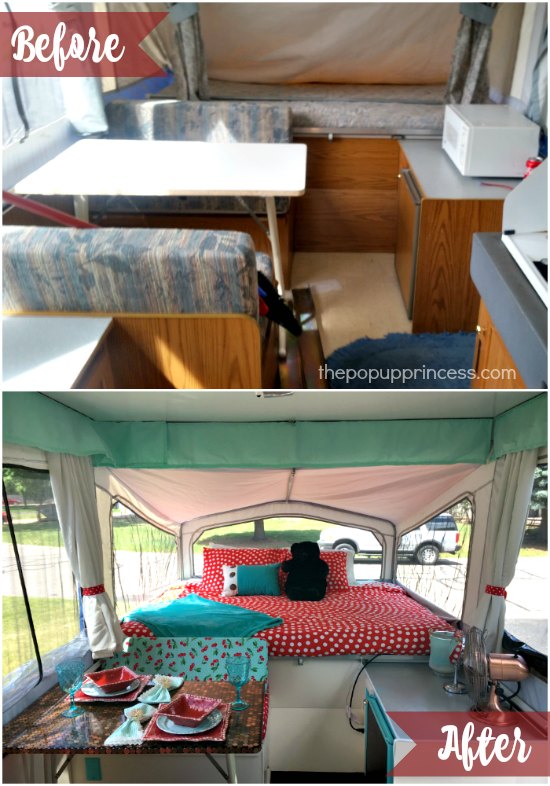 And how could you not love that? What a cute little camper! If I didn’t have any boys in my house, I’d be taking on a girly makeover, too. 😀 Nice job, Kenya! Thank you so much for sharing your remodel with us.
Happy Camping!

WAY TO GO KENYA!!!
Adorable!
Hello, what a great remodel! I am wondering if you have any pointers on how to cover the corner cushion of the lounge area?
I used a seam ripper to take the original corner cushions apart, then i used the pieces as patterns to cut the new pieces. I skipped the zipper and used velcro on one end. It was much easier than I thought it would be!
Hello everyone, I just bought a pop up and plan on revamping it. Kenya you are such an inspiration. I also am single and am very nervous about taking the camper out by myself. Any tips would be appreciated. Thank you!
Very nice 👌🏻