


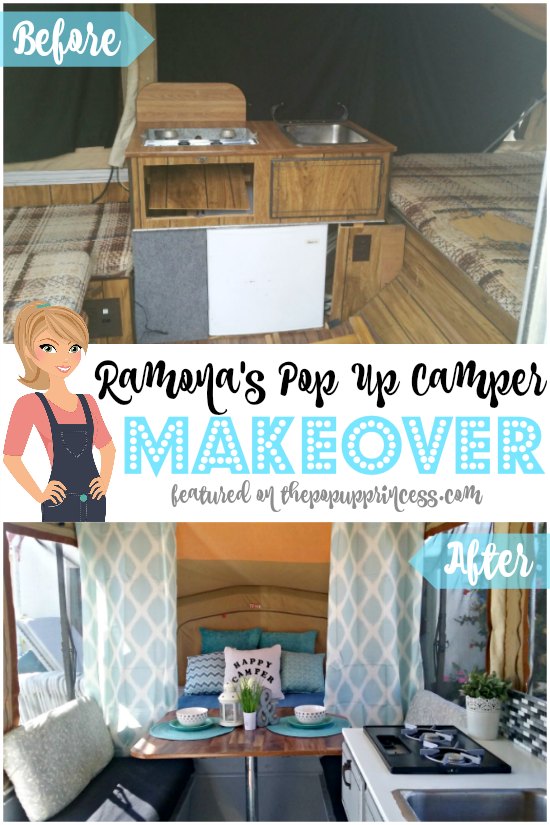
 If you’ve ever shopped for a pop up camper, you know that during your hunt for the perfect one, you’ll come across more than a few that are in sorry shape. Most people would pass on those little gems, but there are a few of us out there that can see the potential that lies under all that 80’s wood paneling. I received an e-mail from a reader named Ramona, and she and her husband are my kind of people. They took one of those dilapidated campers and brought it back to life. It’s absolutely amazing! Here’s what they started with…
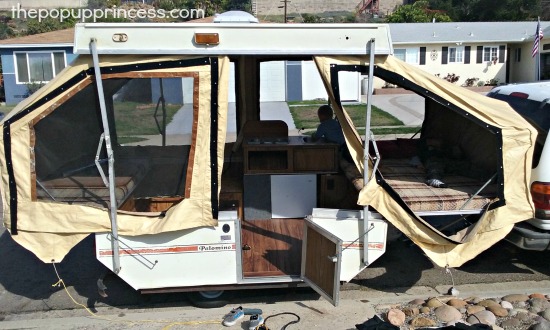 Ramona’s camper is a small 1985 Palomino. It’s only 6ft long and weighs a mere 400lbs. She and her husband purchased it for $700, with the intention of fixing it up. It had missing and torn screens when they bought it and a structural issue, causing a sag on one side. Look at that before picture… 😛
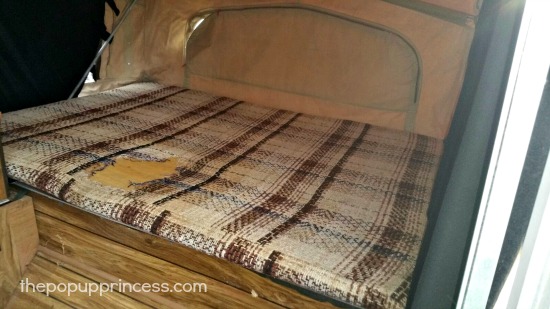 They started by removing the canvas to have new screens professionally sewed in. Ramona cleaned the exterior vinyl with LA’s Totally Awesome Cleaner, which is available on Amazon and at DollarTree. Her husband and father-in-law reinforced the structural problem and applied new caulking and Topside Waterproof Marine Paint in white to the exterior. Then her father-in-law added a matching stripe, and to give it a personal touch, Ramona hand-painted a custom logo on the side. It’s already looking 100% better, but wait until you see the inside transformation! 😀
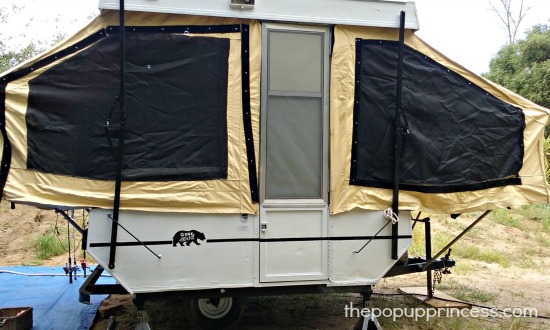 Ramona sewed new cushion covers for the dinette seat backs, but she told me that she way underestimated how much fabric she needed. She ended up sewing fitted sheet style covers with elastic on the back. To hold them in place, she used the good old staple method. While her mother-in-law watched her 7-month-old baby, Ramona was able to paint the interior grey with some leftover paint from another project.
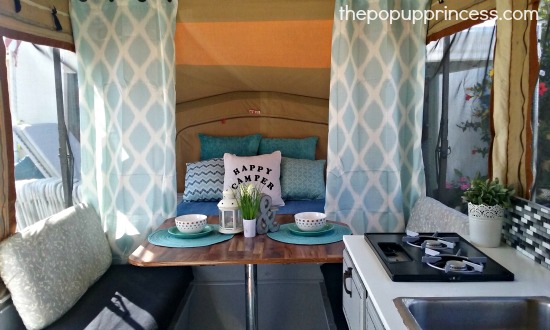
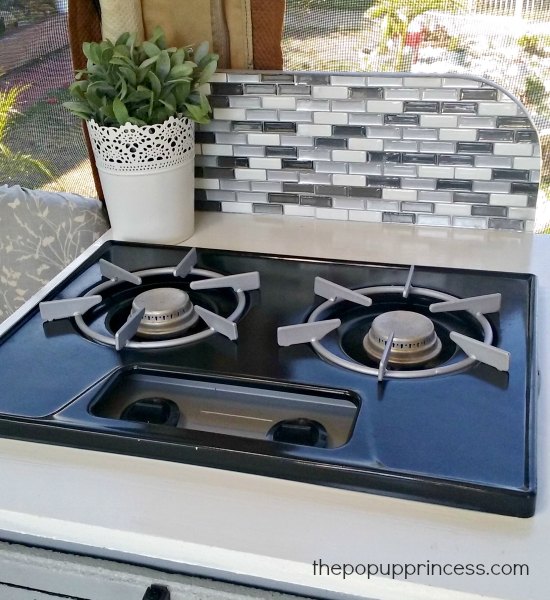 Then Ramona and her husband spray painted the stove black and silver and installed “peel-and-stick” vinyl tiles on the backsplash. If you need more info on the backsplash project, you can find our tutorial here. I just love how sleek and modern that kitchen area looks now. Amazing, right?
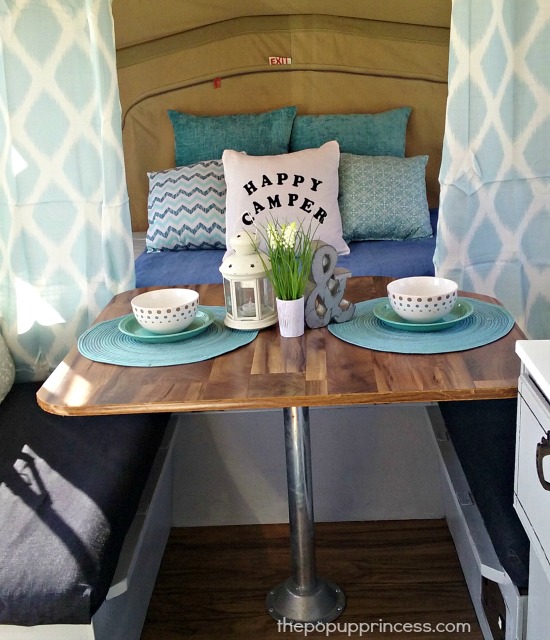
The table and floors look custom, but Ramona says they were already in the camper when she and her husband purchased it. It looks as though the previous owner had done a little bit of remodeling before they sold the camper. They certainly match Ramona’s makeover beautifully! 😀
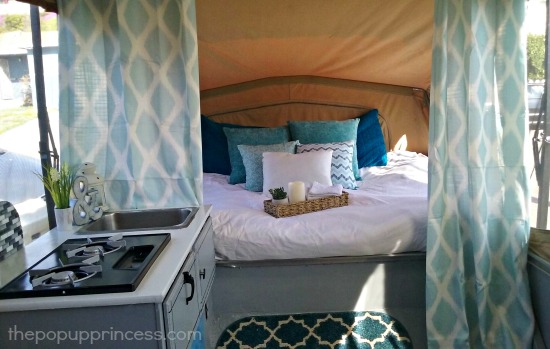
Ramona purchased ready-made curtains from Walmart and cut them to the length she wanted. She used comforters and fabrics she already had around her home for the pillows and bedding. It helped her stay within her budget, and also made her camper feel like an extension of her home.
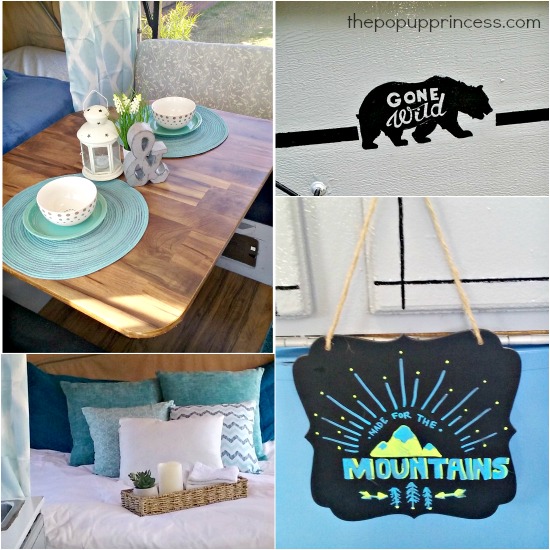
But what I really love about Ramona’s makeover is all the little personal touches. She used her creativity and resources to make her space feel comfortable on a tiny budget. She hand-painted cute accessories and used knick-knacks from around the house. It really helped keep her costs down… and are you ready to hear her budget?
Ramona and her husband had a total budget of $1200. They spent $700 on their camper, and used the remaining $500 for remodeling expenses. Can you believe it? For $1200, they got a camper that totally fits their style–and they don’t have a monthly payment following them around. I love it! That means more money for camping. 😉 Nice job, Ramona! Enjoy your new little vacation home.
Have you refurbished your camper on a tiny budget? I’d love to hear about it! Check out our Get Featured page for all the details on submitting your remodel for a future feature.
Disclaimer: This post contains Amazon affiliate links. The Pop Up Princess is a participant in the Amazon Services LLC Associates Program, an affiliate advertising program designed to provide a means for sites to earn advertising fees by advertising and linking to Amazon.com. This means that if you choose to purchase an item from a link in this post, The Pop Up Princess earns a small advertising fee to help pay for future projects and posts… so thank you! 🙂
Happy Camping!

How cute! It looks great! It makes me want to finish ours much quicker 🙂 what paint was used for the stove?
Wow, wonderful job! What did they do to fix the structural problem? It worked! I love her decorating choices and whatever she did to make the different pieces works so well, I can’t tell what she bought and what she made. It’s adorable.
Wow! I love that it is so light weight, too! I tow a Livin Lite Quicksilver for the light weight. Great job!
How easy was it to take your decals off? I have a 1991 and those decals are a pain in my neck to get off….any suggestions? Also, do you think spray paint would work for the outside paint job rather than marine paint? Love the make-over!
Here’s a link to our tutorial on removing your decals, Meagan. It will really depend on how old and weathered the decals are. On our remodel, the ones that were in fair shape were easily removed. The ones that had been weathered and cracked took a little more work. If yours are giving you a lot of trouble, you might try an eraser wheel on the end of your drill, like Robert did. You can find his remodel here.
Removing Your Camper Decals Tutorial
We used automotive paint and a spray gun to give our camper a fresh new look. You *can* use spray paint, but it will look like spray paint. It all depends on how much money you want to put into your camper and what kind of look you are going for. 🙂
Can you paint the stove? Isn’t the paint flammable? Just curious because it looks so good! If it’s safe I’d like to do that.
Try using high heat grill spray paint from the hardware store
So excited to find your blog! We purchased a 1995 Coleman Destiny Royale this weekend. Looking forward to fun times with our grandchildren- reliving our pop up years when their daddies were little!
The camper is actually in great shape for the age and just needs some cleaning up. I was glad to find the helpful tips. However this morning when we went to roll the awning up the whole thing fell off. The awning itself is in good shape as is the bag it is stored in. The break was due to dry rot of stitching. It was sewn to what looks like a plastic strip that is in a channel between two metal pieces that are attached to the camper. We are going to try and get that strip out. It would not slide out. Then get it stitched back onto awning. Has anyone else done something like this? I’m thinking it is too heavy for my sewing machine. Once we figure out how to get that strip out I thought I’d try to find a canvas shop of some sort. Any suggestions appreciated.
Thanks
Sue
Congrats on the new camper, Sue! That awning gimp is pretty tricky. It will often dry rot. Sometimes it comes unstitched from the bag, too. If the bag and awning itself are in good condition, I’d take it down to an upholstery or awning shop to see if they can replace the gimp for you. Often they will have that gimp in stock already. It will be far more economical to find someone local than to send the bag off to one of the canvas shops for repair. 🙂
The zipper on our awning bag needed replacement which was professionally done but our local RV sales and service center. My favorite local upholstery and awning shop specializes in boat refurbishing so I know they have the best know how to make long lasting repairs to fight sun, wind, water etc.
Good luck!
That is so darling! We just bought our first PUP, (a 1993 Jayco,) and I can’t wait to get to work on it. She needs quite a bit of TLC as well, but my husband and I are both excited about it. Congrats on a job well done!
We have a 1987 Starcraft and my husband I have been remodeling. We would love to get new vinyl windows put in, like Ramona did. Any recommendations on finding a place in Southern California, who can replace the vinyl?
I don’t have any specific recommendations, Tonya. We are in Arizona. When we needed a repair done, we called our local dealership. They were able to recommend the canvas repair shop they use. Call around to upholstery shops, too, though. You don’t need a trailer shop to do the repairs. An upholstery shop may be able to do the repairs just as well. 🙂
I’m wondering about the matresses. Do you think Ramona just recovered them or did she purchase new ones?
Looks Fantastic ! Am working on my Palomino Shetland currently. Where did u get your new canvas from at such a great cost ? Or is the cost of new canvas replacement not included ? Thanks.
I’m looking at one of these little Palominos today. How do you like the external lift arms? Have you kept the originals?