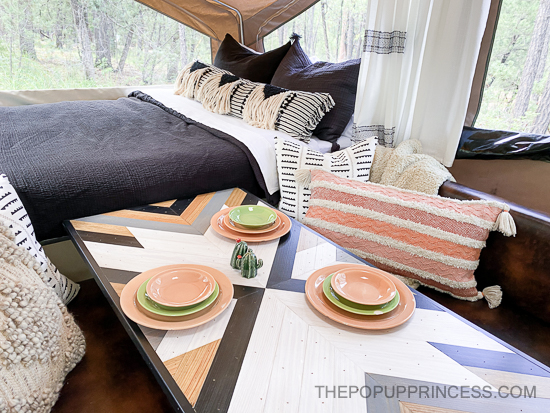
 If you follow us on Instagram, you know we’ve been sharing little snippets of the Rockwood camper. Yep! She’s all finished. I know, I know! It took us long enough. Truth is, life has thrown some curveballs at us. I’m sure everyone knows how that goes lately, but we were bound and determined to get this gal done. As you can see, we did it–and we had so many questions on Instagram about this table, we decided to share it first.
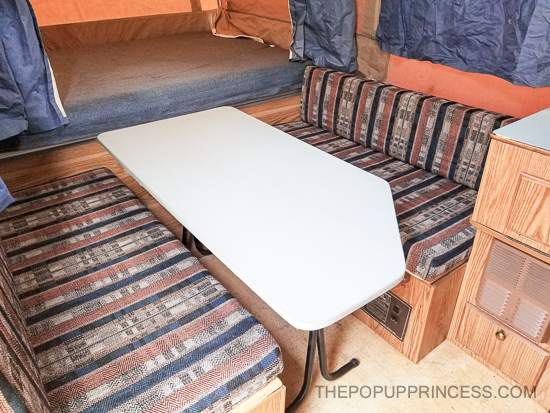 Since it has been so long since we started this project, here’s a little before picture to refresh your memory. This is what we inherited when we brought home the Rockwood. (You can see all her lovely before photos HERE. 😆 ) She was in decent shape on the inside, but oh so ugly. We knew that we’d eventually have to replace that table. It was made of MDF, so the screws had started pulling away from the underside of the table. This means not only was the table ugly, it was also pretty wobbly.
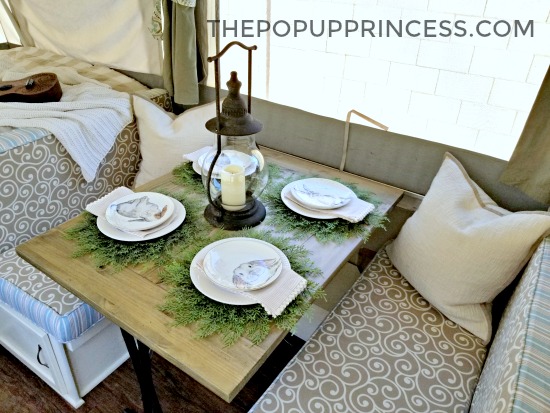 We’re no strangers to building new camper tables. We built this little farmhouse table for the Santa Fe a couple years ago. There’s really not much to them, you just need the appropriate pair of folding legs. It also helps to use the original table dimensions, if you want to be able to turn the dinette into an extra bed.
CUTTING THE TABLETOP
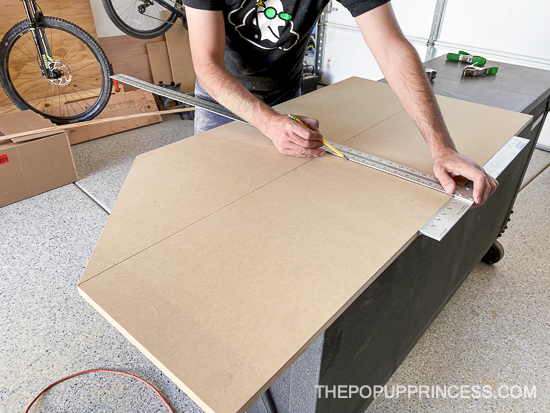 Since we wanted to be able to use the dinette as a bed if needed, we took the original table top, removed the legs, and used it as a template to cut our new table. The original table top was cut from 3/4″ MDF, so that is what we used for the new table. Then we marked the center of the table with a t-square, so we’d have guides for our wood strips.
Something to note: If your table has one corner cut off to make sliding into the far bench easier, take note of which side it is on. We realized when we had finished the table top, that we flipped the template and the cut is now on the opposite side. This makes it a PITA to get into that far bench, but it is what it is. 🙁 Learn from our mistake!
ADDING THE CHEVRON OVERLAY
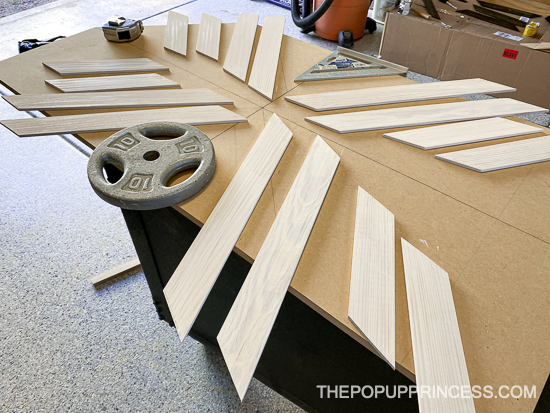 Once we had the new table cut, we decided to use 2 1/4″ pine lattice, which we purchased at Lowe’s, to make a chevron pattern. We were inspired by the woodworking art pieces of Aleksandra Lee. If you haven’t seen her stuff, you should definitely check it out. She has a great tutorial here on the chevron art she makes. Since I wasn’t entirely sure how I wanted my pattern to look, I cut some pieces at 45 degree angles first to lay them out while I brainstormed.
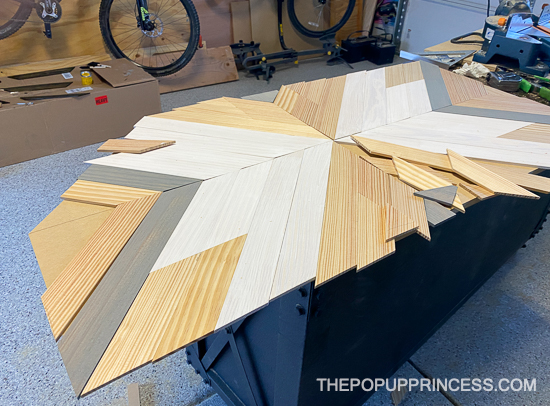
I definitely wanted the very center pieces to be white, so I started with those. To paint the wood lattice, I took some acrylic craft paint and watered it down a bit so the wood grain would show through. I painted some pieces white, some black, and a few gray. All the natural wood colored slats got a coat of my favorite Minwax Driftwood stain. Then I began laying out my pattern until I was satisfied with how it all came together.
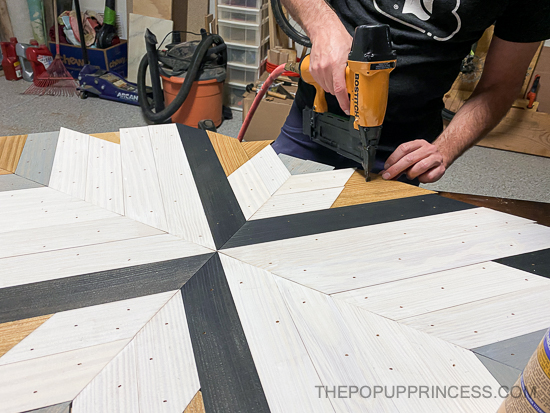 To attach the lattice pieces, we put a bit of wood glue on the back side of each piece and popped a few brad nails in to hold them in place while the glue dried. I actually liked the rustic look of the nail holes, but if you aren’t a fan, you could either fill them with wood filler and repaint or leave weights on the slats until the glue dries. Be extra careful with your nails on the tiny end pieces. They tend to split easily if you get too close to the edge.
ADDING THE TRIM
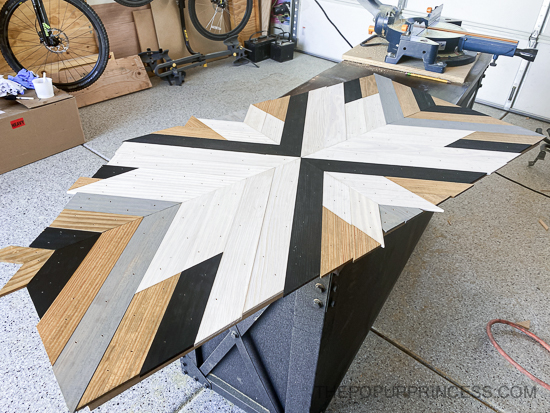 We let the glue dry for 24 hours, and then it was time to trim out the edges. We weren’t concerned with neat edges when we were building the table, because we knew we’d get a cleaner edge if we trimmed everything up at the end. I placed a clean towel on the work bench, flipped the table top over on top of the towel, and Justin used our circular saw to clean up the edges.
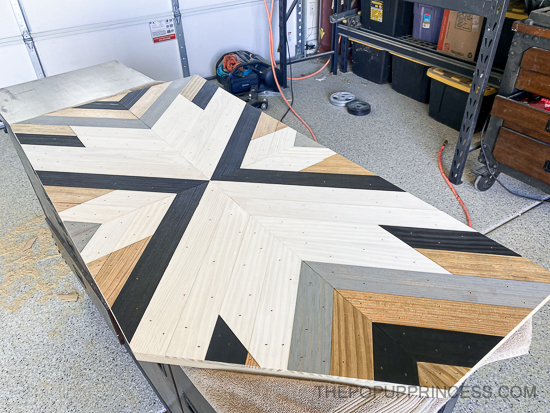 It worked out great! Thank goodness Justin has a steady hand and a Kreg Jig circular saw guide (you can check that out here). It made short work of the job. Now we had a perfectly straight edge to attach the trim.
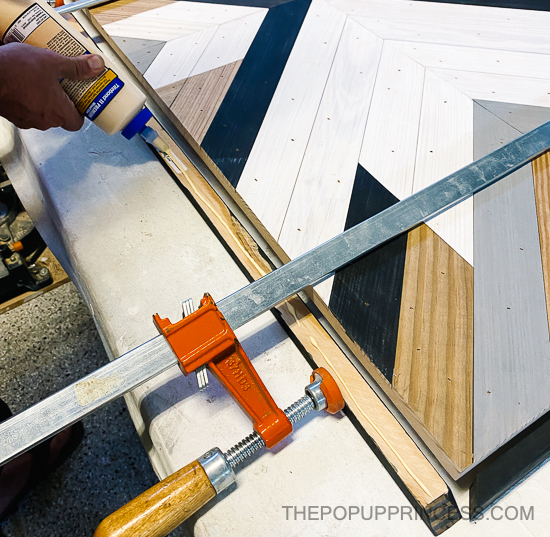 For the trim, we used 1″ pine stop from Home Depot, which I have since been unable to find at my store. Otherwise, I’d include a link. That cutoff corner made Justin get a little crafty with some of his cuts, but he made it work. The other three corners had easy 45 degree miters, so they weren’t a big deal. Once we had our trim cut, it got a coat of the black acrylic paint, too.
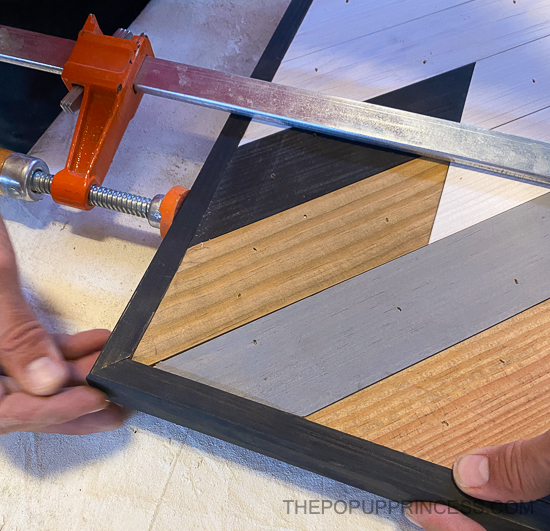 Then we used wood glue (here is our favorite), a few clamps, and some brad nails to attach it to the edge of the table. TA-DA! A couple coats of matte polycrylic, and she was ready for her legs. (Note: We like to use this matte polycrylic, which you can find at Lowe’s, because it wears well, and it doesn’t yellow over time. If you use white paint on your table, make sure to use a water-based topcoat to prevent yellowing.)
THE FINISHING TOUCHES
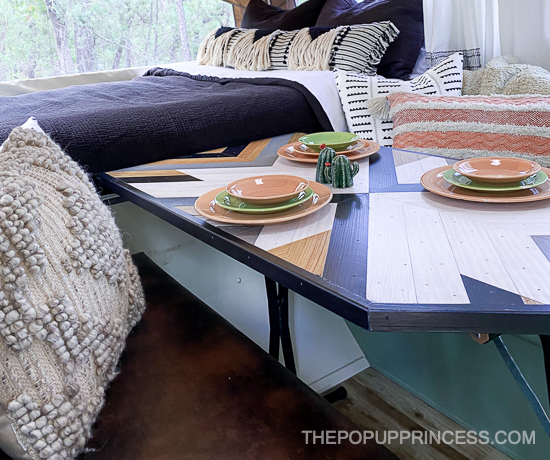 We reused our original table legs, because they were still in good condition. Folding table legs are great, because they make taking the table down for storage easy. If you need a new pair for your table project, we like these on Amazon. They are about $50 for a pair, but they are great quality. You can check out our farmhouse table post if you need to see how they are attached. Unfortunately, we put the camper away before I got any pictures of the underside. Isn’t that always how it goes? 😉
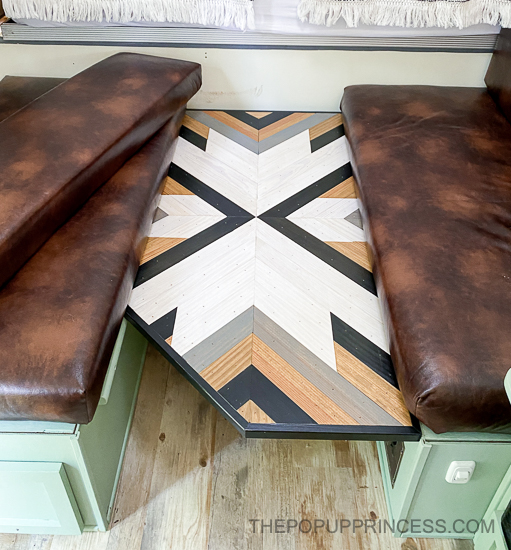 The table folds up and stores away in the dinette when we close the camper. It also serves as an additional bed. Our original table was 3/4″ MDF. The new table has a 3/4″ base, and the wood lattice strips are 1/4″ thick. That means the new table is 1/4″ thicker than the original. If you don’t want your dinette bed to be 1/4″ higher in the middle, you’ll have to adjust the table braces on the dinette benches to accommodate the taller height. Depending on your cushions, you may not notice the difference, but since we were building our cabinets from scratch, we opted to take that extra 1/4″ into consideration when placing the braces.
It’s also worth noting that the new table is slightly heavier than the original. We replaced our old heavy foam mattresses with lighter ones, replaced the heavy fridge, and made the new cabinets slightly lighter than the originals as well. This helps us stay within the recommended weight for our trailer, but if you are making a new table, you should always take weight into consideration.
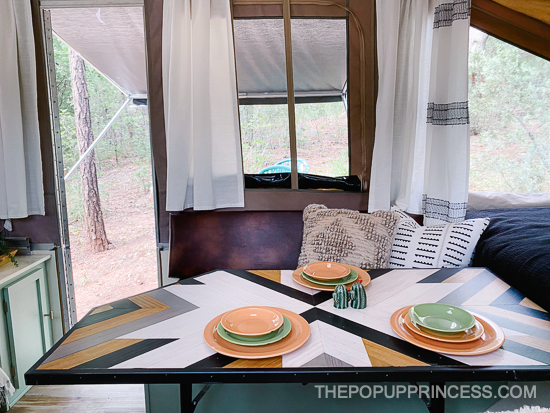 Overall, we are pretty pleased with how it turned out. I mean, other than screwing up that cutoff end, it’s pretty perfect. 😆 It’s also a pretty easy statement piece. Everyone who pokes their heads into this tiny camper comments on the table. With a space this small, you definitely need a statement piece, and this little table fits the bill perfectly. Stay tuned for the big reveal of the entire camper. We hope to have it up next week. If you can’t wait, be sure to hop on to our Instagram account. We’ll be posting sneak peeks there.
Disclaimer: This post contains Amazon affiliate links. The Pop Up Princess is a participant in the Amazon Services LLC Associates Program, an affiliate advertising program designed to provide a means for sites to earn advertising fees by advertising and linking to Amazon.com. This means that if you choose to purchase an item from a link in this post, The Pop Up Princess earns a small advertising fee to help pay for future projects and posts… so thank you!
Happy Camping!


I always love what you do. This is no different! Can’t wait to see the whole camper.
Beautiful! I’m hoping this is the winter we get to remodel our pop up!