 Now that I’m fairly happy with the interior of our pop up camper, I decided this would be the year to work on the exterior. Yes, that is the sound of Mr. TypeTwoFun groaning and rolling his eyes–and yes, I know that eye-rolling technically doesn’t make a sound. 😉
Last year, we fixed the ABS roof (you can read about that here) and coated it with Grizzly Grip. It made such a big difference that we decided to do the same thing to the front and rear ABS panels. Mr. TypeTwoFun removed the panels, and you can find a post on that whole process here.
While the panels were off, I decided it would be a perfect time to paint the exterior. Can you hear the groaning again? Our first order of business was to prep the sides for paint, and that involved removing the old decals from the camper. I scoured the Internet to find the easiest way to remove decals from an RV. Most of the tutorials out there suggest using an eraser wheel attachment for a drill. I’d heard a lot of feedback, though, that it wasn’t the most effective way to remove the adhesive backing, and you are often left with sticky residue. A couple of people on the Pop Up Portal forums (gotta love that place!) recommended using a heat gun and plastic razor blades. That seemed like the best method to us… so we headed off to Harbor Freight to find a cheap heat gun.
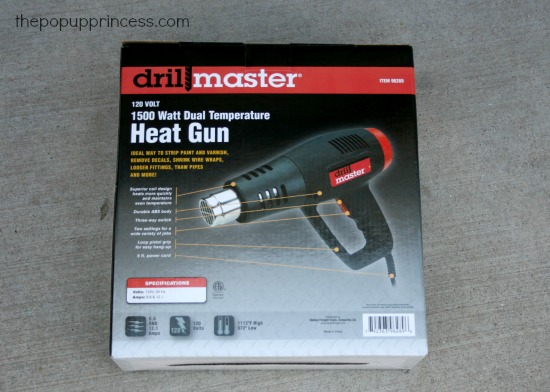
This is the gun we ended up buying. It was $15 at Harbor Freight, but if you don’t have a store locally, you can buy it on Amazon here. It was super easy to use and worked great!
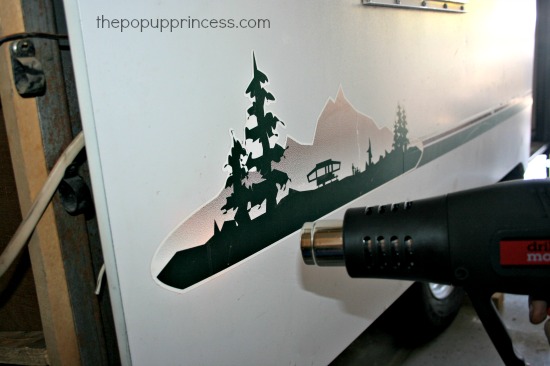
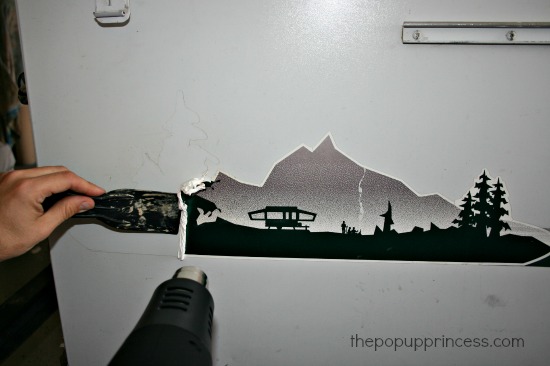
We started off by running the gun across the whole decal on the high setting to help warm up the adhesive and make it pliable. Don’t hold the gun too close, as it will melt the paint. A couple of inches from the decal is good. Mr. TypeTwoFun says to be very careful with the heat gun because it gets really hot. If you have gloves, you might consider wearing them.
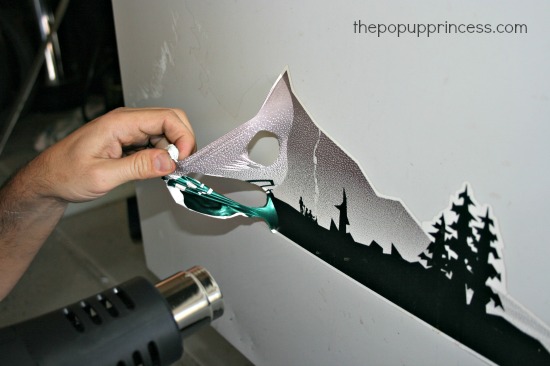
Then use your plastic razor blade to peel up a corner of the decal–we couldn’t find plastic razor blades locally, so we used a plastic putty knife, and it worked just fine. Be very careful not to dig too hard into the paint, as it will leave scratches. We didn’t mind too much because we knew we’d be repainting the exterior, but if you have no plans to repaint, be very careful with your plastic tools.
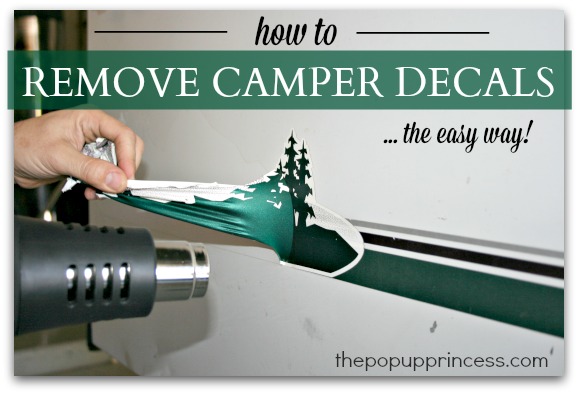
Once you’ve got a corner peeled up, you can gently pull the decal off. Make sure you run the heat gun on a lower setting a few inches ahead of where you are peeling to keep the adhesive warm and pliable. Our decals just peeled right up and left no residue behind. We made a little video clip so you can see just how we did it and how easy it actually was.
Easy-peasy! I’m so pleased with how it turned out. You can see how much of a difference getting rid of those faded graphics makes.
The plan is to give her a fresh coat of white paint and some pretty new decals very soon. Has anyone else given their PUP an exterior makeover? We’d love to hear how you did it–sound off in the comments section below!
Happy Camping!
Disclaimer: This post contains Amazon affiliate links. The Pop Up Princess is a participant in the Amazon Services LLC Associates Program, an affiliate advertising program designed to provide a means for sites to earn advertising fees by advertising and linking to Amazon.com. This means that if you choose to purchase an item from a link in this post, The Pop Up Princess earns a small advertising fee to help pay for future projects and posts… so thank you! 🙂
Happy Camping!




Have to replace the access door lock on my ’98 Coleman…sourced the part…source had a link to your site detailing the procedure…found your info helpful. Thx.
Thanks, Bob! 🙂
hello, love the site alot of great ideas..me and my husband are also diy’s.. we are remodeling a 1983 rockwood 1080 pop up with its original canvas since new ones aer so expensive..so far we have put new paneling in and i also made my own curtains and we r getting ready to paint the interior and remove the vinyl decals from the outside and give it a nice new coat of paint and also laying down new floor tiles as well i still also have to make new cushion covers which i am not looking forward too ( lol) and your site has helped me out alot as well ty for your great ideas to add to mine …i will post some pictures when we are done with the remodel..
How exciting, Trish! I can’t wait to see pictures! And don’t stress the cushion covers too much. They were way easier than I expected. 😉
Hi there, I purchased a camper a few months ago… I have only given the camper a wipe down and basic clean. I will upload a before and after photo once I get there…. It is hard wall pop up camper no canvas. I made a start last week on pulling out the furniture out to start remodeling, at the moment it is ugly veneer…. I decided to paint spray them and it is a lot harder than I thought. I have ugly run marks so I will have to sand again and re spray….I would really like to know how the finish was on your furniture im thinking of changing tactics. Also the internal roof coverings are removed and im left with bits of foam and glue. that I will have to somehow clean off…I was wondering what a good material would be to recover this… I was thinking of headliner material but someone may have another proven material…im a complete amateur at this so any info the better. I love this site by the way some great info.
So cool, Sarah! Did you purchase an Apache camper? I’ve never actually seen a hard wall pop up in person, although I’ve always wanted to buy one. 😉
Spray painting definitely requires some skill. Mr. TypeTwoFun is fabulous at it, and our cabinets turned out pretty awesome. He did the first few and taught me how to do the rest. First of all, make sure you are using a good primer. Second, I’ve found that if you put on your paint too heavily, you’ll get runs. We suggest several light coats, and you should be holding the can 8-10″ away from the surface you are spraying. You want to give the surface a light coat and move on. We always use a spray paint handle or grip to ensure an even spray pattern, too… An added bonus is that it saves your hand from the dreaded spray paint cramp. We suggest practicing on a scrap piece of wood to perfect your technique. Having said that, lots of people are getting great finishes from rolling or brushing an oil based paint onto their cabinets. If you are changing painting methods, I would sand your cabinets well and reapply your primer, though.
I’m sorry I don’t have any advice on the ceiling. You should check the Pop Up Portal, though. I’m sure there are some people there who could answer your questions. That place is awesome!
Best of luck on the remodel, and I can’t wait to see pictures! 😀
Thank you so much for your response I will have to get some practice with scrap pieces of wood before I revisit spaying the furniture again 🙂 the primer is zinzeer great stuff that, my awful result is from thinking It would be a piece of cake to spray paint lol….
The camper is a chevron light weight expander camper. I am based in New Zealand not to sure if they sell these overseas. it completely pops up same as your camper and then the sides expand out to create to beds all metal walls. unfortunately the internal walls is that ugly veneer again so that will need painting, with a brush though 🙂 I will give the portal a go and hopefully someone has recovered the roof 🙂 thanks for your time 🙂
We don’t have those over here, Sarah! I’d love to see pictures, though. You can e-mail me at thepopupprincess@gmail.com anytime, and I’d be happy to answer any questions that I can. 😉
Forgive me for asking this in what might not be the right area, but I didn’t know where else to ask. My little popup is 20 years old and I’d like to fix it up a little. The walls inside are dingy grey from the campfires outside and the many candles we burned. Is there anything I can do to brighten them up? Would bleach water work? I don’t think I can paint them. Any ideas you can share, please?
Are you talking about the cabinets and walls of the camper or the canvas, Deb? If you aren’t talking about the canvas, I think I might try using a Clorox spray type product and a Magic Eraser. I’d use the bleach spray and then wipe down with clean water. Depending on the type of grime you’ve got, though, you may not get the walls white again. Any particular reason why you can’t repaint them?
Thank you for replying. It’s the vinyl walls of the camper that are greying. The cabinets are okay, but the veneer is lifting. Repainting probably would make the “waviness” show up more, right? I can’t paint the actual vinyl “walls” that lift up, can I? Again, I really appreciate your sharing your expertise!
Thanks SO MUCH, I’ll try the bleach spray and Magic Eraser! I’ve been using the usual household sprays (fail) and your combination just might do the trick! Thank you ever so!
Larissa-
What kind of paint are you using on the camper exterior? Wondering what is the best type of paint and method.
We hit our local auto paint store and are going to be using a high quality auto paint with a spray gun. I’ve heard of people using Rustoleum oil based paints and enamels, though, with no problems. I’ve even heard of people rolling on an oil based enamel. I don’t think my OCD could handle roller marks, though, so we are using a spray gun. 😛 I think that as long as you choose an oil based paint, you should be fine.
Did you document the painting process of your PUP? I think DIY painting your PUP is a popular idea and there is a lot of conflicting information online about it. Would be a great future post if you did document it!
Not yet, Greyson. We’ve had some trouble finding decals for the outside, so I’ve put the outside makeover on hold. We did use a single stage automotive paint and HPLV sprayer to paint it, and it looks phenomenal. Like a factory finish! Let me know if you have any questions, and I’ll do my best to answer them. 🙂
We are about to use this method of removing decals and re-painting. I too have come up short with a resource for some cool decals. I want something simple.. maybe a little retro. If you come up with any leads I would love to hear! Thanks 🙂
I still haven’t found anything I love, Amanda. I’m picky. Haha. Let me know if you find somewhere good to purchase decals. 😉
Hi, have you ever tried using vinyl stickers on the top outside fiberglass?
I found your website on Pinterest while perusing camper remodel ideas. We have just purchased a !977 Empire camper with plans to remodel it and have found many of your tutorials inspiring and helpful! While ours is not a pop up, there are still many ideas I can use that you have done! Thank you!! I have a feeling there will be lots of groaning and eyerolls coming from my boyfriend during this “adventure”, just like Mr. TypeTwoFun!
How fun, Kaylin! You’ll have to send me pictures. 🙂
Picture a 1976 Starcraft that’s “been ridden kinda hard and out away wet.” Now you have Rusty in mind. It’s been an interesting process. Low and behold, I walked out back last week and hubby had heat gun on a different project of HIS. Lol… I never knew where that gun got stashed, but now it’s out. I plugged it in and started working on removing Starcraft graphics. I didn’t get very far today, but it was a good start. Weather has been wet last few days. So hubby says, “it’s time to drop it” and we did. Today I opened the door to do a quick peak expecting the worst. Rain stayed in outside! yay!! The 1 bed rail wood is rotten so I took a look at that too. Shouldn’t be too tough, but we’ll see.
Larissa,
I didn’t see if you’ve solved your decal problem yet and if not here’s a suggestion that might work.
Hit your local sign shop. A lot, even most, of them are able to make duplicates of most decals, or work from your ideas to a new design you might have in mind. If you realize that a lot of today’s signs are made with vinyl letters and designs you will know what I mean. Sign shops tend to apply vinyl to almost anything, sides of trailers (18 wheeler types), metal, wood, plywood, you name it… should be easy. Good luck.
You could always buy a cameo silhouette to create your own smaller vinyls. For larger vinyls, try a sign shop or a vehicle wrap shop. Hope this helps!
Thank you Larissa.
I came across your post by accident but just what I needed.
I recently purchased an ’81 model pop up Windsor caravan as temporary accommodation. I am fine with inside jobs but my question is what about old cracked brittle decals on aluminum. Will the same method work.
Thanks, Louise
Yep! You can also try a 3M eraser wheel attachment for your drill. I’ve heard those work great, too. 🙂
My husband and I did a pup makeover. We are still making a few repairs hear and there, you know, trial and error. Visited your site many times… love it!