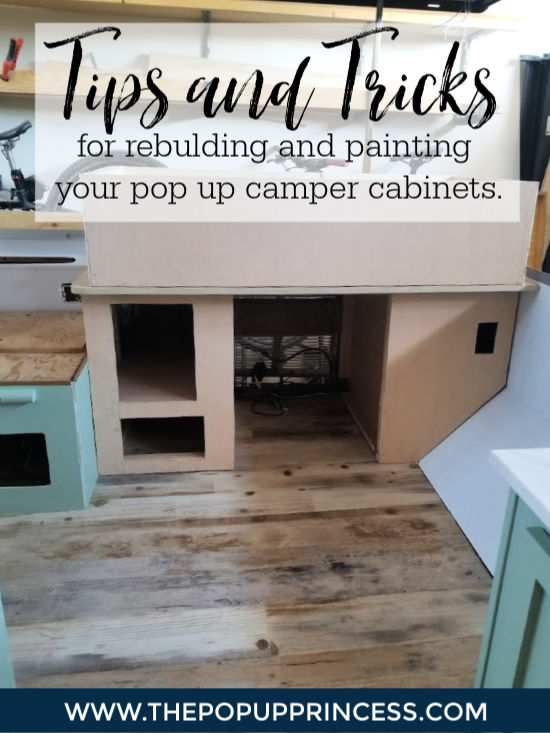
 We’ve been moving a little slowly on the Rockwood project lately. The temperatures are in the 110 degree range here in Arizona, and we have just not wanted to sweat our butts off in the garage. 😆 So we’ve been limited to a few hours of working time in the early weekend mornings. Before things got too hot here, we did get a chance to rebuild and paint the cabinetry. I’m so pleased with the way it all turned out, so I thought I share the process with you guys.
REMOVING THE ORIGINAL CABINETS
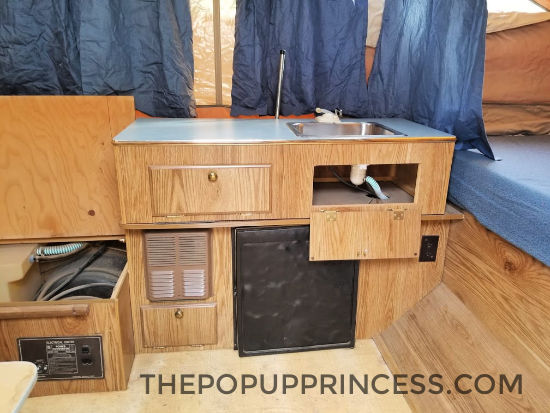 The original cabinetry was pretty beat up. There was some water damage, and several of the cabinets were warped beyond repair. We decided the best course of action was to rebuild the cabinets from scratch. That way, we could reinforce the cabinetry the way we wanted to and make sure everything was sturdy and well made.
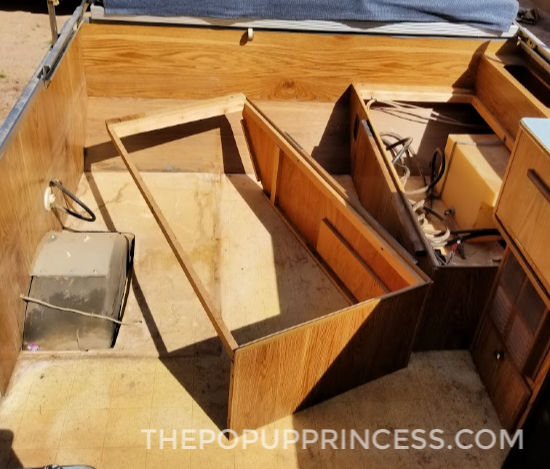 The first step in rebuilding our cabinets was to remove everything from the camper. Most of the cabinets were attached to the walls and floor with long screws. Removing the cabinets was as simple as removing those screws. We also removed the fridge, water tank, and furnace. It was at this point we painted the walls of the camper. You can find more information on how we did all that in this post.
REBUILDING THE CABINETS
 Before we started the rebuild, we took a little time to plan the layout. Initially, we toyed with changing the layout of our small little camper. We eventually decided against it for a couple of reasons. First, the manufacturer has taken overall weight and weight distribution into account when they planned the original layout. If you start to toy with that, you could have issues with safety–particularly with sway–when you tow the finished camper.
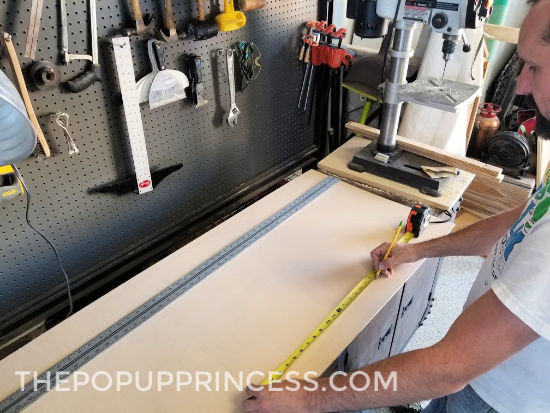 The second reason we decided to stick to the original layout was that when we removed the cabinets, we became very aware of just how little holds these campers together. With the cabinets out of the camper, the trailer was actually not very structurally sound. We could move the walls out of square quite easily. At that point, we decided it was best to trust the original layout and use the original cabinets as templates to build the new ones.
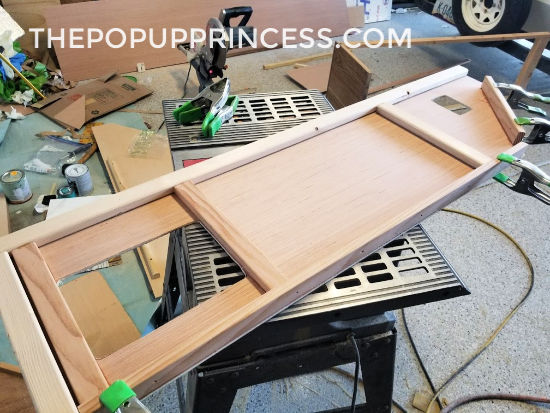 We used materials similar to the ones used in the construction of the original cabinets to build our new ones. Weight is a big issue to consider when you are making any major changes to your camper. You want to make sure you aren’t adding too much weight for the axle to handle, but you also don’t want to change the weight distribution either. We framed out our cabinets with 1 x 2 pine lumber, adding a few more braces for support. The lumber is slightly larger than the 1 x 1 braces used in the original. It did add a bit more weight, but it was minimal. We felt like the benefits of the additional bracing were worth it.
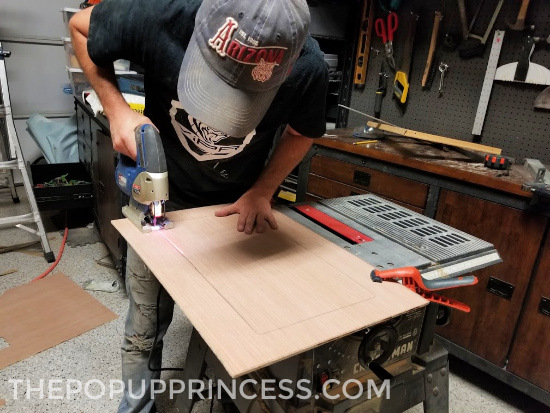
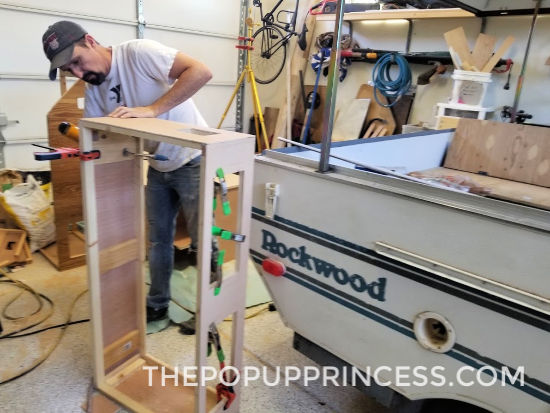 Just like the originals, we faced out the cabinets with 1/4″ luan plywood, cutting openings for doors, converter panels, the furnace, and the fridge. In order to do this, we used the original cabinets as templates. We basically constructed each cabinet in panels, using Gorilla Glue and a nail gun to attach the braces to the luan facing. Then we used the same method to join the panels together, creating our cabinets. Clamps are great for holding everything together while the glue dries.
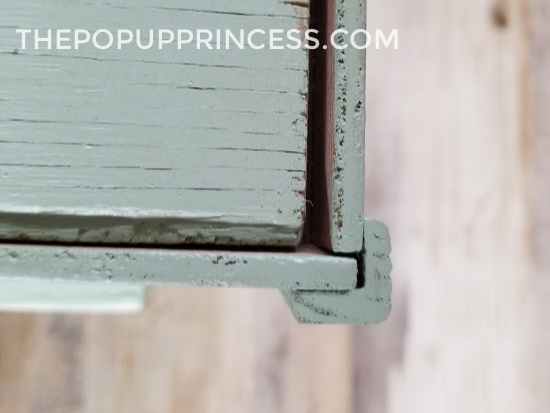 The original cabinets had plastic corners to cover the seams between panels. We didn’t want to use plastic, because it is notoriously hard to paint. Instead, we found some small corner trim at Home Depot. It actually worked quite well, because we were able to prime and paint it the way we did the rest of the cabinetry. We just used our Gorilla Glue and nail gun to attach a length of trim to each corner. Then we used wood filler to fill in any of the nail holes before moving on to paint. The end result is so much prettier than the plastic and less prone to chipping.
CONSTRUCTING THE CABINET DOORS
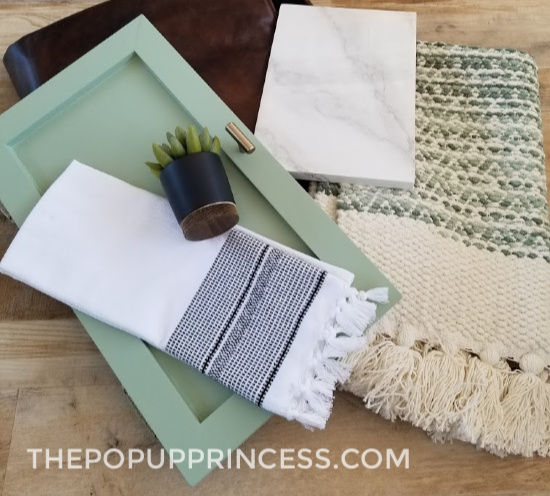 The doors were a little more tricky. We had constructed a door for our previous camper when we added an access hatch to the dinette. You can see that tutorial here. We used that same method to construct the doors for our Rockwood cabinets. Because we didn’t have to match original doors this time and wanted a more modern look for the new camper, we didn’t round the edges of the door frames. This gave the doors a more modern shaker look.
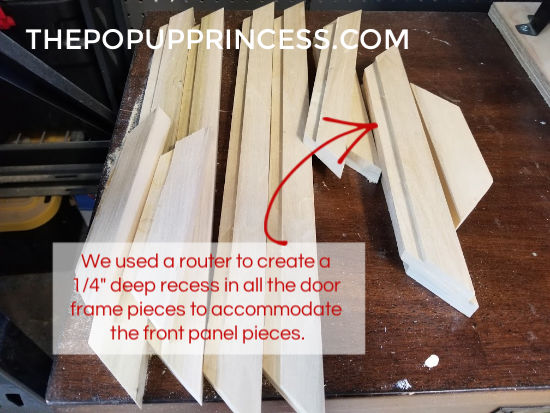 Using premium pine 1 x 2 lumber, we cut frames for each of the cabinet doors. Then we used our router to create a 1/4″ deep channel on the back of each piece. We attached the frame pieces together using Gorilla Glue and a nail gun. Corner clamps like these work great to hold the pieces in place while the glue dries. Then we cut a piece of 1/4″ luan plywood to fit in the door frame, glued it in place, and secured it with a couple of short brads.
PAINTING THE CABINETS
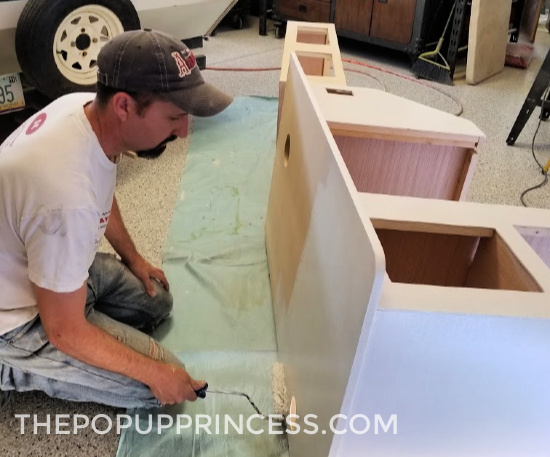 We decided to paint these cabinets a little differently than we did on our first pop up camper remodel. After sanding the finished cabinets and doors, we wiped them down with a tack cloth and gave them a coat of primer. We used Zinsser Cover Stain on these cabinets. We actually gave them two coats of primer, sanding between each coat. If you’ve read this blog for a while, you know we really love Zinsser primers and will wholeheartedly recommend them for painting your camper cabinets.
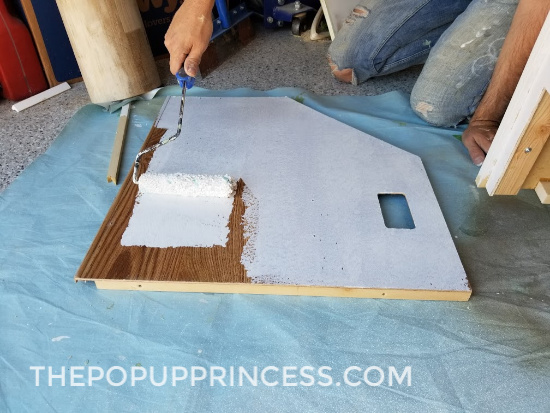 We decided to take one of the panels of the original cabinets and paint it with the same method we used on our new unfinished cabinets. This was to make sure this paint and primer would work for that plastic-paper coating that covers most pop up camper cabinets. I’m pleased to say it worked just perfectly–so if you are planning on painting your existing cabinets, as long as you prep and prime them properly, you can use the same paint we did. It might be tempting to skimp on the prep work, but I promise you’ll regret it in the long run. 😆 Want more info on painting that plastic paper coating? Be sure to check out our frequently asked questions post on that here.
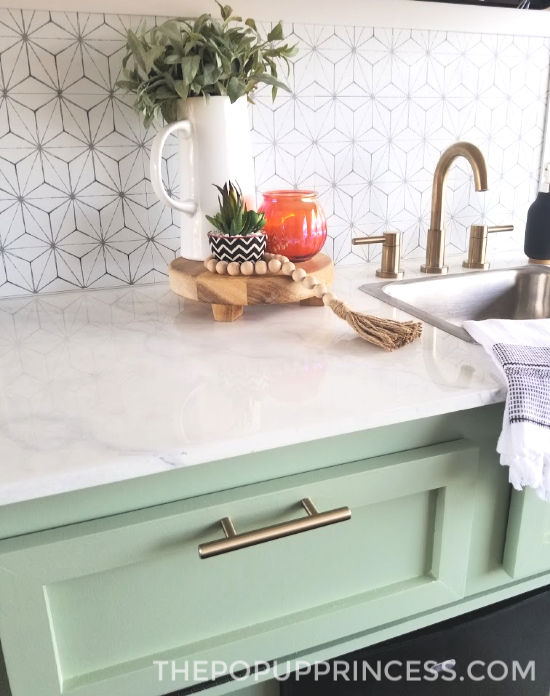
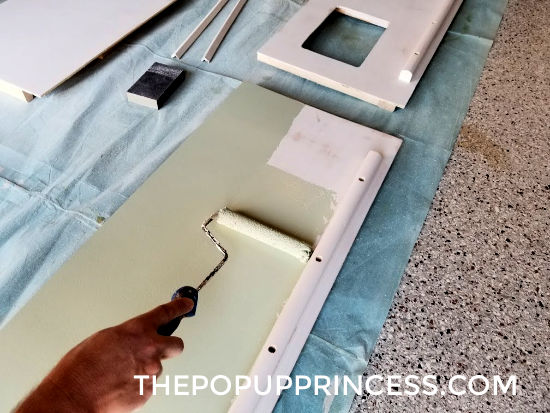 We decided to use a canned paint rather than spray paint this time around. While I love the spray paint on our Coleman cabinets, it was pricey. It took quite a few cans of spray paint to cover the cabinets well, and we had already gotten a little crazy with the budget on this old girl. I also really wanted a custom color, and you have so many more options with a can of paint. I’m a huge fan of Dunn Edwards, so we headed to our local store and picked out a gallon of eggshell Aristoshield paint in the color Fresh Thyme. Aristoshield is a water-based urethane alkyd paint, and it is extremely durable.
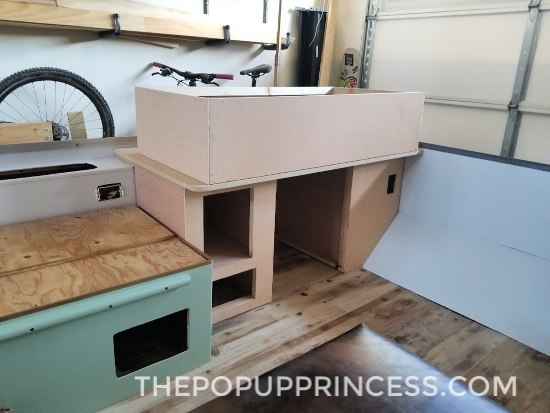 The pictures above don’t do it justice. It’s really hard to photograph, but it is beautiful. And we loved the way this paint went on. We sanded the primer just a bit before we rolled on the first coat of paint. Then we lightly sanded between each coat as well. All in all, we applied three coats of paint to each cabinet–no need for a topcoat. The nice thing about this paint is that it is a hybrid paint. It has the durability of oil-based paint, but it cleans up with water. It really is awesome, and because I know that not everyone has a Dunn Edwards in their area, you can get similar results from a good alkyd paint in another brand.
INSTALLING THE CABINETS
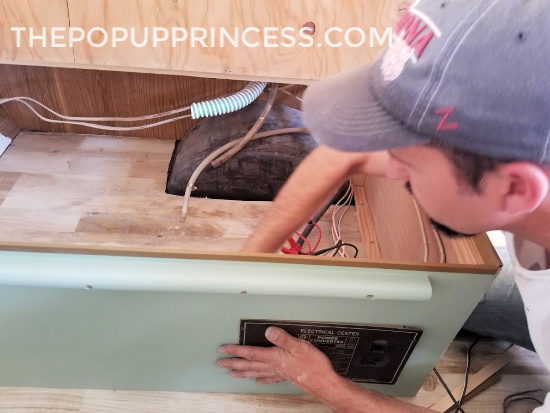 After we let the paint cure for about a week, we installed the cabinets in the camper. We attached them in the same way they were originally installed, by screwing them down to the floor and into the camper walls. This helps stabilize the camper. It became much more sturdy once there was a cabinet in each corner. We reinstalled the converter panel and the furnace with minimal changes. The furnace grate only got a coat of high heat black spray paint, but we did make other major modifications.
 We changed out the old thermostat for a digital one, installed an electric dorm fridge (similar to this one), added a water pump, replaced the pump faucet with a standard bathroom one, and constructed a backsplash. We’ll have tutorials on all those mods very soon. 😉 Then we trimmed out the bottom of the cabinets with inexpensive 1/2″ shoe molding we painted to match. This helped hide any gaps between the cabinets and the floors and gave them a more finished look.
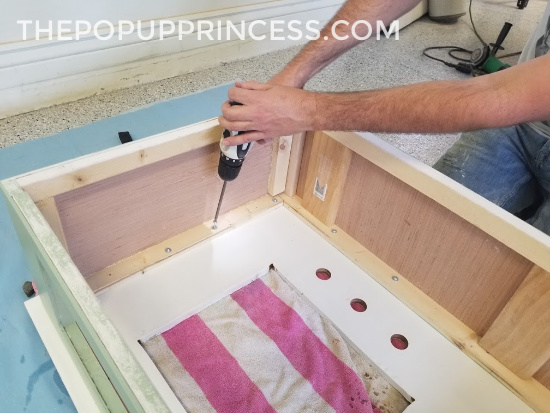 Last, but not least, we attached our pretty new faux marble countertops (you can find that tutorial here) to the two upright cabinets. After a quick scrub with a Scotch Brite pad, we used the old hinges to attach the doors. At Home Depot we found matching brush gold pulls, which were added to all the door fronts. Even though the space is a little tight, and there isn’t a heck of a lot of storage space, I’m still quite happy with how it is all turning out. This camper definitely isn’t one that will easily accomodate us all on long trips, but it is perfect if Justin and I want to take a long weekend trip without the kids.
 And I am actually really excited for that. 😉
That about covers how we constructed the Rockwood’s new cabinetry. If you have any questions, feel free to leave them in the comments section below. And don’t forget to follow us on Instagram. We’re always posting little sneak peeks of our progress on the camper, and we’d love to hear your feedback.
Disclaimer: This post contains Amazon affiliate links. The Pop Up Princess is a participant in the Amazon Services LLC Associates Program, an affiliate advertising program designed to provide a means for sites to earn advertising fees by advertising and linking to Amazon.com. This means that if you choose to purchase an item from a link in this post, The Pop Up Princess earns a small advertising fee to help pay for future projects and posts… so thank you!
Happy Camping!


Beautiful job! I’m impressed that you built the cabinets yourselves! And I love the color. We actually just refinished the cabinets in our kitchen a similar color so I’m a bit biased, haha.
How do you flip the counter with the huge back splash and the faucets attached?
The backsplash is a separate piece. You can find the tutorial for that here.