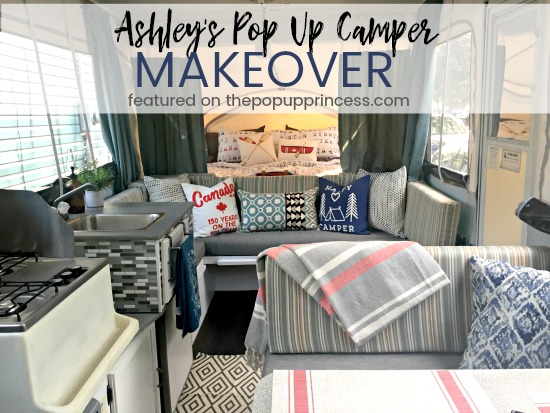
 Ashley and her husband purchased a 1997 Viking pop up camper from a family friend whose parents had traveled from the East Coast all the way to Alaska in it. That little camper had many miles of memories on it but was still in pristine condition. They really felt lucky to have come across a such a great deal.
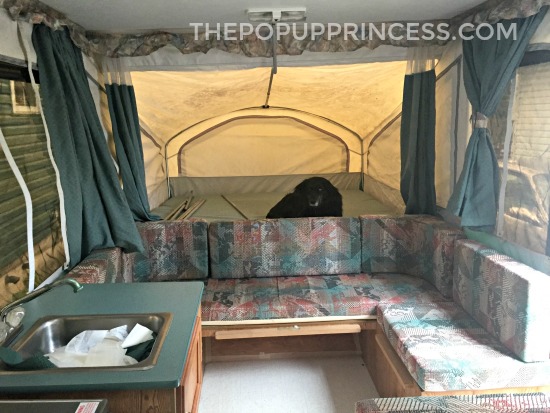
Ashley was pretty excited about her purchase. So excited in fact, that on the first night she owned it, she was already tearing through Pinterest looking for instructions on how to clean up her new Viking pop up camper. She came across this blog, and the rest was history. Ashley was so impressed by the reader features here that she made up her mind to give her own camper a little makeover.
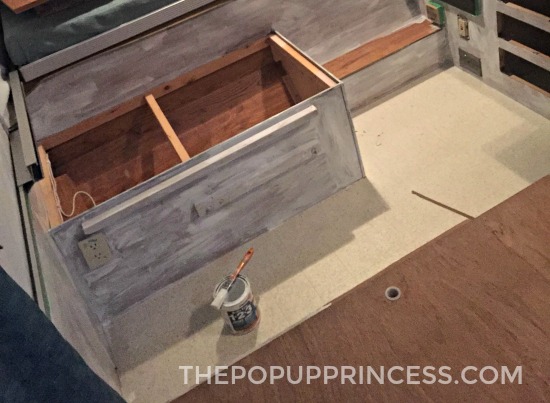
Once she’d cleaned the camper, Ashley taped it off, removing the cabinet doors and hardware. Then she started sanding all the cabinet bases and walls. Since Ashley knew the importance of good prep work, she gave everything she was planning on painting a coat of Zinsser 1-2-3 primer. (If you want more info on painting your cabinets, be sure to check out our post here.) She had some leftover Behr white paint from a home project, so she took advantage of that. Ashley gave all the cabinets and walls a few coats of her Behr white paint. The hardware got sprayed with Rustoleum Dark Bronze spray paint.
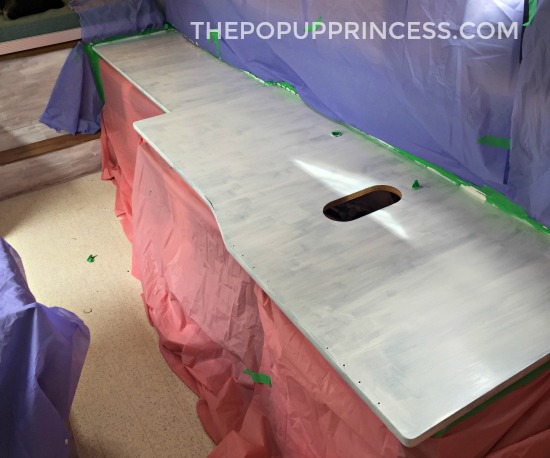
To give the countertops a clean new look, Ashley sanded and primed them. Then she gave them all three coats of grey stone Rustoleum spray paint. To give the surfaces a smooth finish, she sanded the stone paint smooth and applied four coats of Minwax Polycrylic, sanding between each coat. It was a lot of work, but doesn’t it look great?
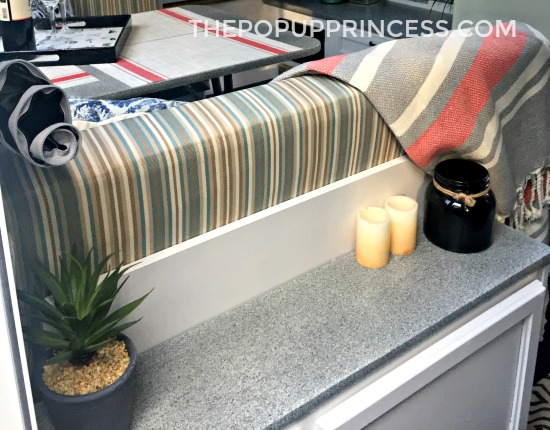
Ashley and her husband used Allure locking vinyl plank flooring in Espresso Oak for the new floor. Ashley said that this was a lot more work than they’d anticipated. Her husband did the actual installation, and although it was a big project, he did a great job. It looks beautiful.
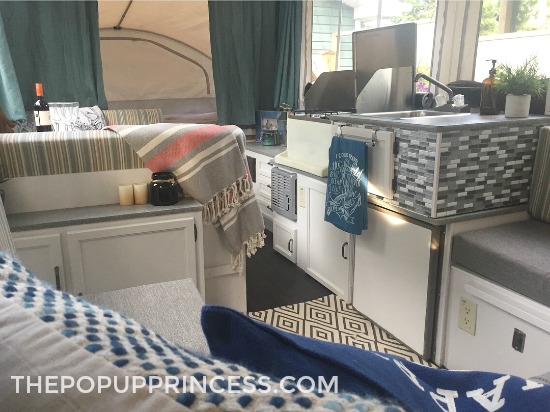
Ashley installed peel and stick tiles around the sink cabinet to add some texture and color. They are really happy with the way this particular project turned out. It really sets the “kitchen area” apart from the rest of the camper. With the all the big stuff out of the way, it was time to get to the fun stuff–decorating!
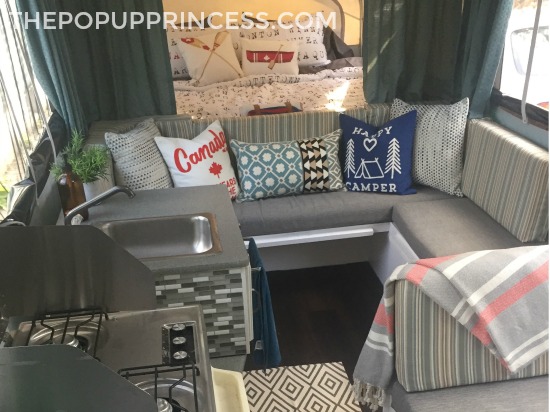
The original curtains were in great shape, so Ashley was able to reuse them. She did want to cover the cushions, but she had never sewed anything before and was wildly intimidated to take on this project. Ashley’s mother-in-law loaned Ashley her sewing machine, taught her how to use it in one night, and then off she went. She made all the cushion covers herself. Not bad for a first-timer, right? 🙂 Those adorable pillows came from Chapters, and the cute rug is a Walmart find.
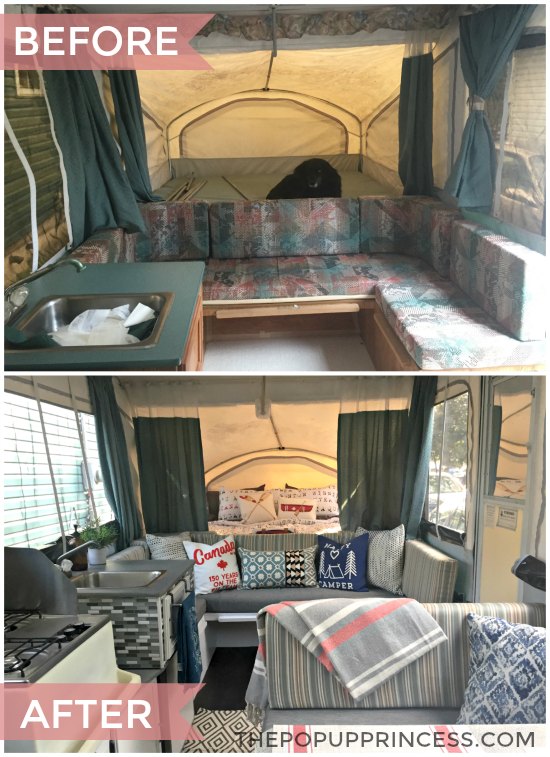
Ashley’s camper makeover took about five weeks. She was able to finish it by her personal deadline of July 1st–Canada Day. To celebrate, she decorated it with some Canadian flare (I love those throw pillows 😀 ) and headed out to camp in it for the first time. It just happened to be on Canada’s 150th Birthday! How fitting!
Beautiful job, Ashley! Thanks so much for sharing your makeover with us. It’s perfect!
Happy Camping!


I’m so excited to see people using the Rustoleum Stone method of redoing counters. We want to do that to ours, but I was having a heck of a time trying to figure out what to put on top of them. This is very motivating. Now if only the weather would stop playing games with my plans so I can paint!
The rustoleum spray was sooo easy! I think the most tedious part was just making sure I had an even spray everywhere. I stained and then topped it off with Minwax Polycrylic. However, the first time I did it I had used an oil based polycrylic.. and it turned YELLOW! Had to re do the whole thing!
We are also using plank flooring and the directions recommend to leave room for expansion of the floors when it gets hot. Did you guys do this step? We are currently doing this but not realize we will need a trim piece to cover up the space left for expansion.
Yes, we left about 1/4″ gap around the edge of the camper. We also attached the trim to the cabinet and not the floor. Now, the cabinets are actually screwed into the floor, so our floor isn’t really floating, but we haven’t had any issues at all in the four years since.
Did she replace the curtain valance with anything? I kinda just want to rip ours out but have nothing to replace it with yet!
Great makeover! We just got our first pop up and our curtains are similar…makes me think I can take curtains off the list for now!
She did not, Becky. She just left them off. 🙂
I am absolutely IN LOVE with this color scheme!!!!!
We have a 1995 Viking with the same color scheme. I took off the valances and left the curtains as well. I also left the teal counters and found an awesome fabric that matched at Hobby Lobby! 🙂
I have those same weird L-shaped cushions on my couch also. I need to know how to recover those! Any help?
Hi, all looks really nice! I was trying to see a picture of the window across from sink area. Is the curtain there split or does it all pull to the bed side? I am remaking my curtains and did not have the old ones to use as a guide so I am relying on pictures. I figured I could do it either way but I wondered about bringing the fabric when open near the door? Then I thought it may be bulky taking it all to the other side by the bed but maybe that is the better choice. Please someone reply and give me a little guidance. Thank you.
This is the question I had! I’m buying a little camper this spring and it’s got those same cushions, I kind of panicked because I didn’t realize that they weren’t the regular bench cushion shape.
When I have recovered cushions in the past, I opened up all the seams, labeled them,pressed them and used them as pattern. If they had zippers I made sure to include them on the new covers so I could remove the covers for washing. I have never remade a curved cushion cover however, that looks like it would be a challenge.
Could you explain how you did the counter tops? I got the rustoleum and something called Varathane diamond wood finish (apparently the miniwax stuff isnt available according to what they told my husband at Home Depot today). I dont have countertops in our pop up but I wanted to do the table with the look of your counter tops. What prep work did you do before spray painting? How many spray paint coats seemed to be needed?
Love the bedding and throw blanket. Where was that purchased?
What was the process for applying the peel and stick tiles around the sink? How is it holding up?