I’m so very excited to share this next reader feature with you all! You may remember that I shared a few pictures of Becca’s amazing pop up camper table on our Facebook page several months ago. Everyone went crazy for how beautiful that table was–and rightly so! It’s the perfect finishing touch to a gorgeous glamper makeover. I just knew I had to share the full story on the blog, and after months of waiting, Becca finally had an opportunity to snap some more pictures of her camper. She and her husband did an amazing job on this transformation, so without any further ado, here’s Becca to tell you all about it! 😀
Hey there!
After using their Coleman pop up for 15 years, my in-laws decided to pass it down to me and my husband! Best gift ever! The only trick was getting it from Houston, Texas to Nashville, Tennessee. My “roadtrip pro” of a husband drove that bad boy 14 hours, and I was chomping at the bit to get started on it!
I had JUST graduated from physician assistant school (WOOHOO!) and had some new found free time on my hands. As soon as the camper arrived in Tennessee, my full-time job became working on the pop up, and I gladly spent my days tearing it apart. The hubs joined in when he got home from work.
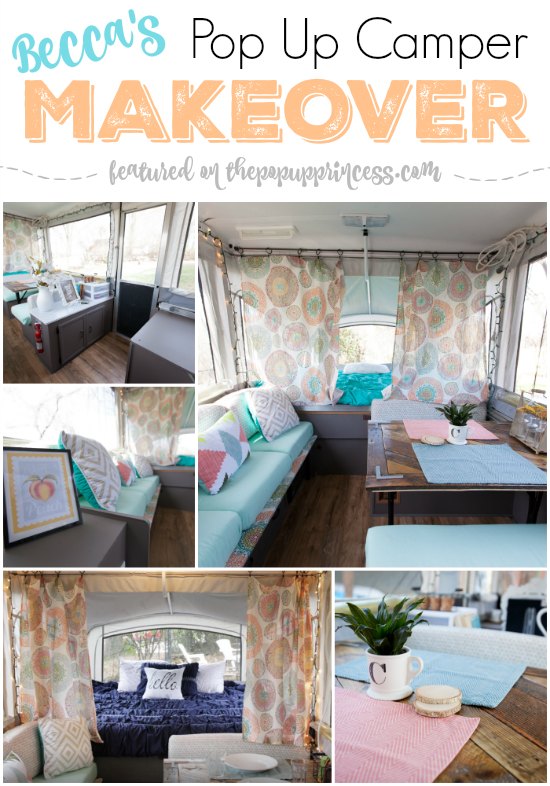
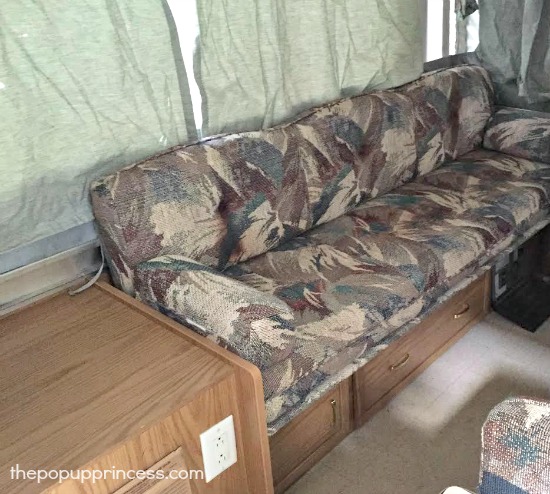
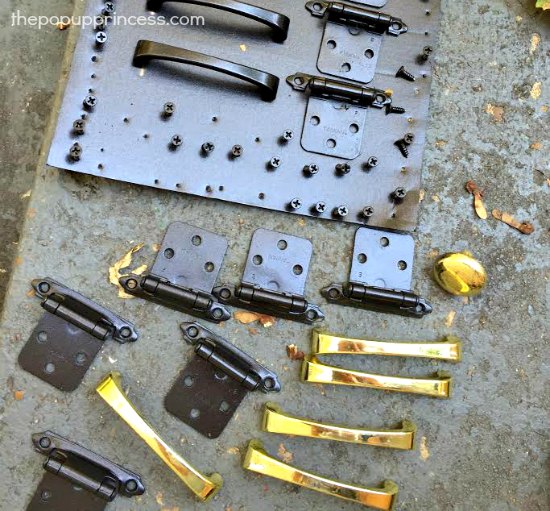
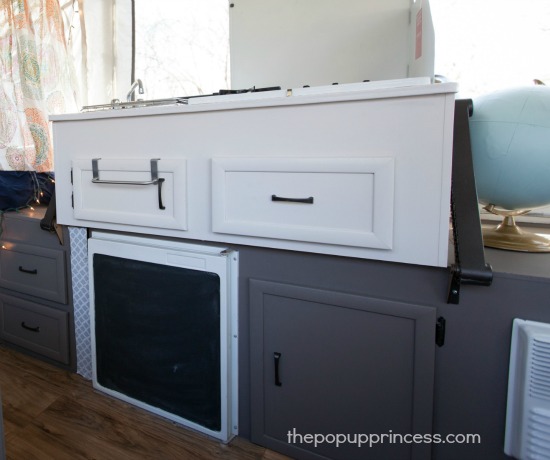
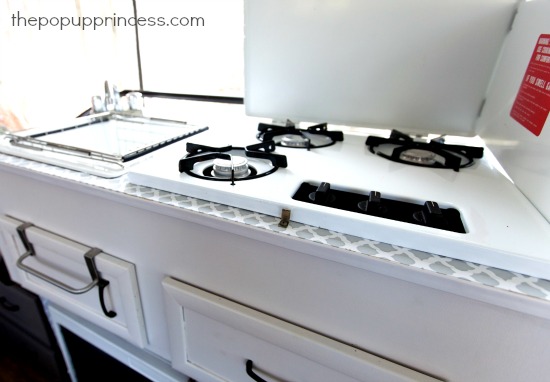
The first step was taking out all the cushions, curtains, cabinet doors and drawers. I went to our local ReStore and grabbed some white and dark grey paint for the cabinets. I decided to use white paint around the sink only and keep it dark on the bottom to hide dirt. I used a Rustoleum oil rubbed bronze to paint all of the hardware–this included the dining room table legs–more on that awesome table later! 🙂
I did some touch-up on the refrigerator and stove using white appliance paint that we had leftover in our garage. I painted the front of the refrigerator with chalkboard paint for fun! The hardest part for me was choosing a color scheme. I looked at every. single. one. of the features on the Pop Up Princess site for inspiration. This site was a lifesaver. (Aw, thanks, Becca! 😉 )
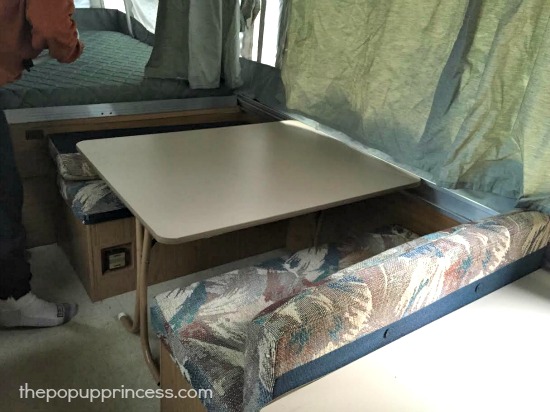
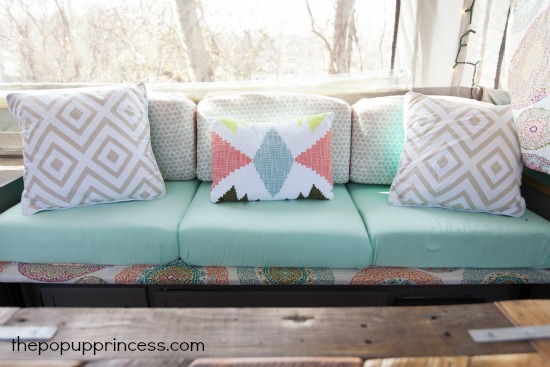
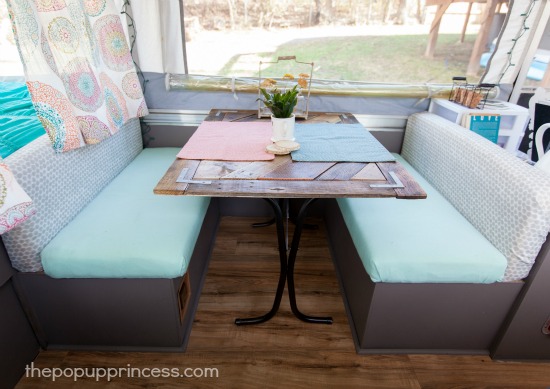
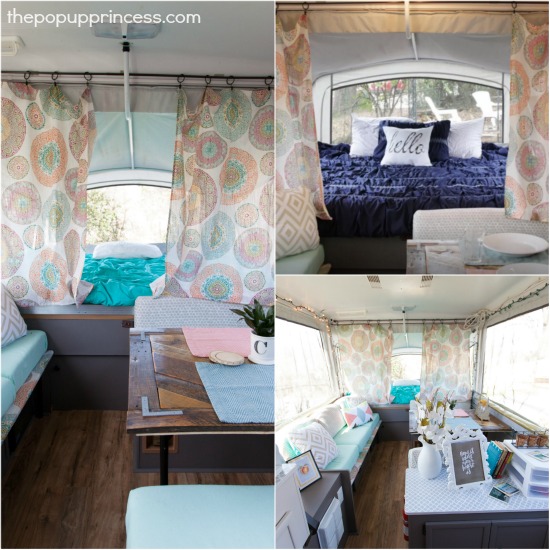
I decided to remove all of the existing fabric and recover just the foam and plywood by wrapping and stapling the new fabric in place. I covered the seat backs with a couple shower curtains I got at Tuesday Mornings and covered the seat cushions with fabric from Hobby Lobby. (That’s also where I snagged that cute “hello” pillow on the bed!)
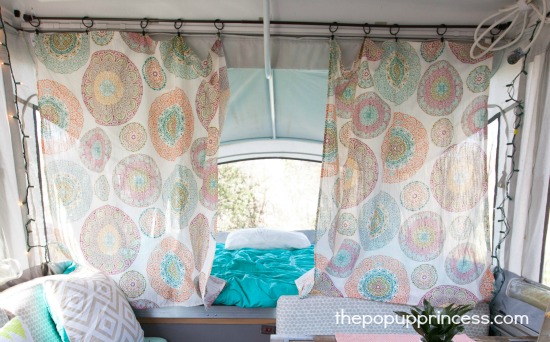
The curtains are made from a couple of tablecloths that I bought at Walmart. I just used a no-sew approach by ironing in the hems using bonding tape from Hobby Lobby. I bought the curtain rods and curtain clips from Family Dollar and hung the rods using Command Strips. They’ve held up so well!!!
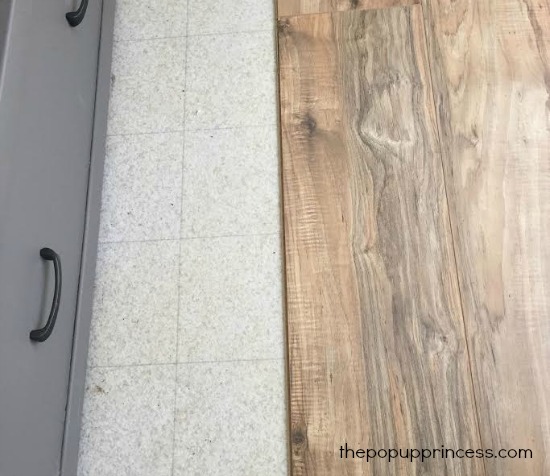
Next up- the floors and countertops! We stumbled upon some cheap flooring at Home Depot and my hubs decided to take on the challenge of installing the new floor. It really wasn’t too hard and didn’t take but about 3 hours. We installed right on top of the old lineoleum floors and finished off the edges with some shoe molding painted to match the cabinets.
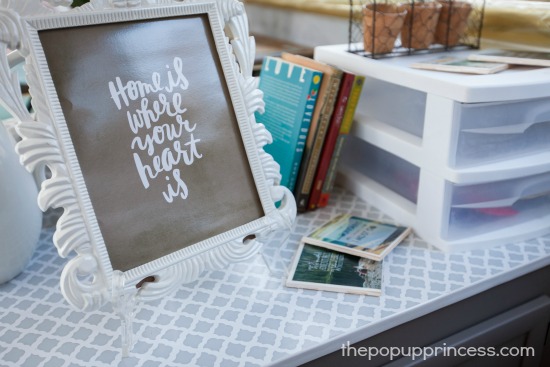
I found some cute contact paper at Family Dollar and simply used that to cover the countertops. I know it probably won’t be a forever-fix but it works for now! I put a couple of coats of Polycrylic on top of the contact paper for easier clean-up.
Trimming out the countertop project was one of the more difficult parts. I found some white trim on Amazon that fit nicely but couldn’t quite figure out how to get it to stick. I ended up using liquid nails which holds really well, but is awfully messy… and it was difficult to get clamps to hold the trim in place around the sink. The back may not be trimmed yet but who’s looking anyway?
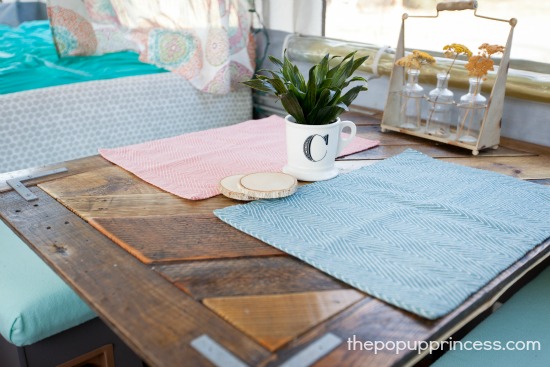
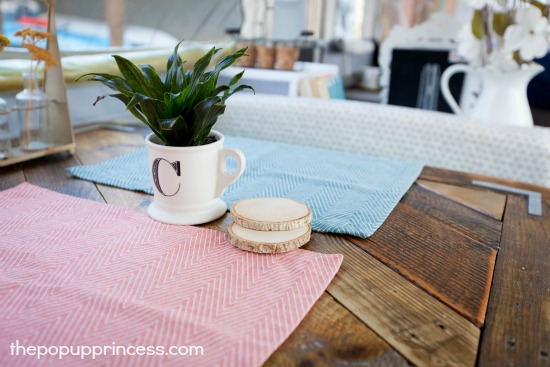
Now for that beautiful table! This project 100% belonged to my husband. He had been brainstorming ways to redo it and decided on a patterned wood top. He used scrap pieces of pallet wood we had laying around the garage and cut them to fit the top of the table. He simply screwed them on to the existing table top. Once the wood was screwed in place, he finished with a couple coats of dark stain and a few coats of polyurethane. After everything dried, he screwed in some hardware on the corners to give it a more rustic look. Let me tell you, it is a BEAUTY. I’m so proud of it!
We didn’t want to spend too much on the pop up renovation, so we made sure to do everything as cheaply as possible. At first, I bought a whole slew of things at Tuesday Morning, got home and hated it all… so I returned it the next day. I decided to check out my ‘ole faithful–the local Goodwill! I really scored that day. I got all of my coordinating bedding, pillows, placements and a few knickknacks while I was there. Most of these items were new with tags from Target!
I’m proud to say we completed the whole thing for less than $300–and all in a 2-week time frame! Goodwill is your friend people. 😀
Amazing, right?!! I just love, love, LOVE Becca’s makeover. It’s so light and whimsical. What a beautiful, relaxing little retreat. Thanks for sharing it with us, Becca! Let’s take another look at those afters, shall we?
Keep those makeover pictures coming! I love seeing all your amazingly creative ideas! 🙂
Happy Camping!


Wow! This looks awesome!! I never would have dreamed that the popup in the before picture could look like this! Great job!
Gorgeous, great job!!!! Been anxiously waiting to see your makeover! Hope you enjoy it for years to come.
Omg!! All of these remodels make me jelly! We recently bought a ’98 pop up that looks very well….1998 lol. I really want to spruce it up but have zero eye for style like all the remods! Any idea where to start. I also have to do it on a very low budget Any tips would be great.
Congrats on the new camper, Teresa. When I was remodeling my PUP, I found a fabric I liked for the valance. That was my jumping off point. I planned everything else around that. If you are only doing a few things, I highly recommend painting the cabinets and redoing the floors. Those easy ways to give the camper a more modern feel, and you can do them both on a small budget. Good luck! 😀
How do you paint the canvas walls around the beds?
You don’t. 🙂 Actually, the canvas in pop up campers in much like tent canvas. You want it to be breathable so you don’t have an issue with condensation inside the camper–which is no fun. When you paint the canvas, you’ll have issues with that, and it may also affect the way the camper folds up. I wouldn’t recommend doing anything other than cleaning it well. Is there any specific reason why you’d want to paint it, Marissa?
Some of them look so much different, it would seem as though they are painted.
That is the magic of a good photographer, Patty! 😉
Gorgeous work! My husband and I are starting the journey of finding a pop up camper. I would love to buy one used so I could give it a makeover, but I’m also scared of getting in over my head buying used. I would love if there was a feature in what to look for and best places to go when looking for a used pop up! Thank you!
How exciting! I haven’t written a post on purchasing a PUP, Amy, because there are so many great resources on the Internet already. One of my absolute favorite pop up related sites, The Pop Up Portal, has a great article on shopping for a camper. I can always find the help I’m looking for there. You can find their article here. For more information on how to thoroughly inspect a camper when you go to take a look at it, I love this online article. It is concise and accurate, even if the appearance is somewhat dated. 🙂 You can find another great article from the (now defunct) Pop Up Times magazine here.
I highly advocate buying from a private party of a dealership. Unless you are buying a new camper, most dealerships won’t warranty a used camper anyway, so you are no better off buying from them. You’ll also find a higher mark-up at the dealership. We bought our camper off of Craigslist and got an amazing deal on it. Great deals are out there, but you have to be patient. My advice would be to read as much as you can and go see a few campers you know you may not end up buying, just so you get an idea of what you like and don’t. Who knows? You may find you actually love a camper you thought you wouldn’t. Good luck!
Hi! We are being gifted a pop up verybsimilar to this one and I LOVE what was done with the wooden table! Do you happen to know if it effects the way the table lays down to make a bed at all? I wasn’t sure with the wood being higher off the table how it laid down? I just stumbled upon your website and I have been dreaming of pop ups ever since.
I’m not sure how it affects Becca’s camper when the dinette is folded down. Maybe Becca will chime in. 😉
If you are concerned about height, though, you could always build a new table top. Simply remove the folding legs from your original table and attach them to the new top. That’s what we did with ours.
Good luck with your remodel. I can’t wait to see it!
Just yesterday, we purchased our first camper! It’s a 1982 modal, so it’s older than me but is in good nick for the most part. This is now my inspiration. I can’t wait to start my bargain hunting and diying. What an incredible transformation!
I have a quick question about the table. With the additional wood attached to the top of the table, does that increase the overall thickness of the table? The reason I ask is because our table becomes the third bed. That being said, it seems that if the table is thicker, then the bed would be off with the middle part of the bed being “taller” or thicker.
Hope that makes sense.
I’m not sure Becca checks the comments here, Bill. I would think, though, that constructing the table top this way would add some height to the bed. If you keep your dinette in the bed position frequently, you might want to construct a new tabletop that mirrors the original top’s thickness instead of building over top of the existing one. 🙂
That was my thought. We don’t keep it in bed position often, but we want to take a friend camping with us later this year. My wife loves the look of this table though. We may experiment with putting some vinyl on the table too to make it look like wood. I will submit to be featured later as we finish up.
If you build additional thickness on the table, you can lower the supports used to create the bed by the same thickness. This will compensate for the additional material of table.
Since discovering your blog I can’t wait for each new makeover and I don’t even own a pop up! As a new (and novice) camper I recently purchased a 95 Prowler travel trailer. Although not a pup the inspiration I’ve gotten from looking at the makeovers featured gave me the courage to redo mine. I’ve incorporated many of the pop up ideas into my trailer and it’s still a work a progress but so much better looking then when I started. Keep the makeovers coming!
That’s so wonderful to hear, Maria! I actually just featured my very first travel trailer today. It’s a hybrid camper–so it has canvas beds–and it is gorgeous. You might want to check it out.
CASSIE’S HYBRID TRAVEL TRAILER MAKEOVER
Thanks for hanging out with us pop up people. I would love to see pictures of your camper! 😉
Wow, this is a beautiful remodel! I just purchased my first pop up, a 2011 Flagstaff and the first thing I want to do is replace the curtains. I am terrible at sewing but this way with the curtain rods and Command Strips seems easier. Did Becca install any curtains around the trailer or just the bunk ends? Would you recommend the Command Strips or a different no sew method?
Just subscribed and can’t wait to read all your blogs!!
Thanks 🙂
I always recommend trying your hand at sewing first, Olivia. Curtains are SUCH an easy project. What type of curtain hardware is already installed in the camper? I’m not familiar with the newer Flagstaff setups.
I had the same idea for my curtains to use the exact same tablecloths shown on here. When I brought it up to my husband, he looked at me as if I had two heads. I said to trust me and…well… he won. Now I see what it would have looked like! Beautiful! I love that rustic look too. WOWZA!
Beautiful! Did you spray paint the kitchen sink pull bar (or what it’s called lol)? Debating on that right now… Thanks!
I would like to know what the flooring is, as it does not look like the vinyl planking that everyone talks about. It look heavier more like the hardwood flooring that I had been looking at and was afraid it would be to heavy. Any ideas? Thanks
Although many people have used laminate in their remodels, I would not recommend it. In addition to the weight issue, you have flexibility issues. Your camper floor will flex as you drive down the road. I’ve heard many horror stories of laminate buckling after a few trips and/or weather extremes. Plank vinyl is much more flexible, and while not guaranteed by the manufacturers for RV installations, it is a much better choice for flooring in a pop up camper. The only complaint I have heard about plank vinyl flooring is that the adhesive-backed planks will sometimes come up in extreme temperatures. If you are using an adhesive-backed tile, I’d recommend a primer or extra adhesive for the floor. 🙂
Thank you Laraissa, the info is very helpful.
My fiance and I just took over a pop up rental business and we are now owners of 4 pop ups! Except one of them is in awfull condition and the other 3 are in OKAY condition. I’m so thrilled and now obsessed with this page because I feel like I have hope in renovating the 4 under a budget and to make them beautiful again.
The valances and curtain hanging is one of the parts most needed updates on. Can you go into more detail with the curtain rod instead of using the old clips?
I love this site and thank you for giving me hope! I’m so excited!
Loving all of these makeovers! We recently bought a pop up and are in the process of redoing it.. I’m very curious about how you painted the lift handle (the large bar that moves the kitchen down). I tried spray painting it but that turned out horrible 🤦🏻♀️ Can anyone give me an ideas?