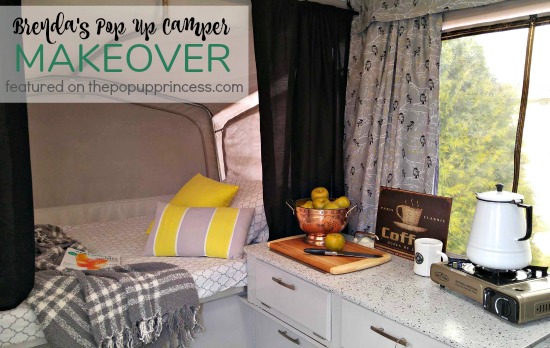
 This week’s Reader Feature makes me smile every time I see it. Brenda caught the pop up camper remodel bug from her sister Shannon, whose remodel was featured here on the blog last year. Brenda and Shannon and their families had been camping together in their PUPs all year when Shannon decided to give hers a little facelift. It wasn’t long before Brenda was itching to do the same. Here she is to tell us all about it…
Brenda’s Pop Up Camper Makeover
My husband and I started camping in 1985. Our first camper was a 1969 Forrester, which we purchased for $2,000.00. I glammed it up with wallpaper and new upholstery. It was a great camper, and I still miss it to this day! As the family grew and we acquired more “stuff,” we moved up to a larger and more cumbersome camper. We eventually decided it was too much to haul around, and it became a stationary camper at a lake near our hometown. By the time our son turned 16, he didn’t seem to want to “hang” with Mom and Dad, so we sold the camper and stopped camping for the next 18 years.
Last year my sister, Shannon, and her family moved back to Minnesota after 20+ years in California. They love to camp and wanted to take advantage of all of our state parks and spend time with family. They bought their first camper–a pop up–so they could camp in relative comfort.
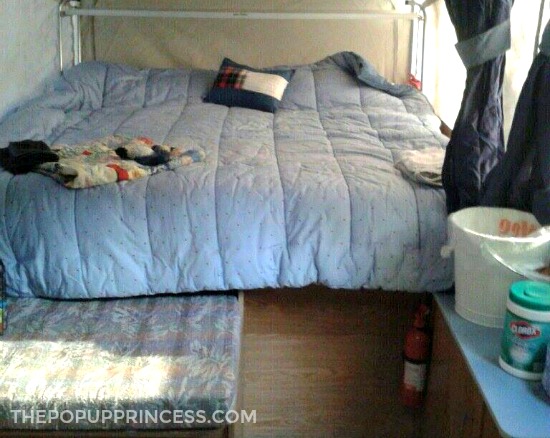 We started the search for something modest, so we could camp with them. I was hesitant about going camping again and wasn’t convinced I would still enjoy it. We located a 1994 StarCraft Star Flyer on Craigslist. It was close to our hometown, so we drove over to check it out. I was a bit apprehensive as the camper had been used for several years as a base station for a hunter and his friends. The seller had it popped up for us inside his shed when we arrived. The cold temps did nothing to camouflage the residual smells of cooking grease and cigar smoke, which was a definite turn off for me. 🙂 But it was in good shape structurally for its age, and the canvas was in great shape, too. It was in desperate need of a deep cleaning and updating. Shannon assured me that this was a gem in the rough. “It has good bones,” she said and persuaded me that it had great potential. We purchased the PUP and towed it home—in the Minnesota snow and wind—in February of last year.
We used our PUP for the first year without making any interior improvements. My husband, a practical man, replaced both tires and installed a new battery. He scrubbed down the roof, but as he saw it, “If it ain’t broke, don’t fix it!” So we left it alone. Then Shannon and her husband decided to remodel their pop up camper. In fact, Shannon’s camper was actually featured here on this blog last year.
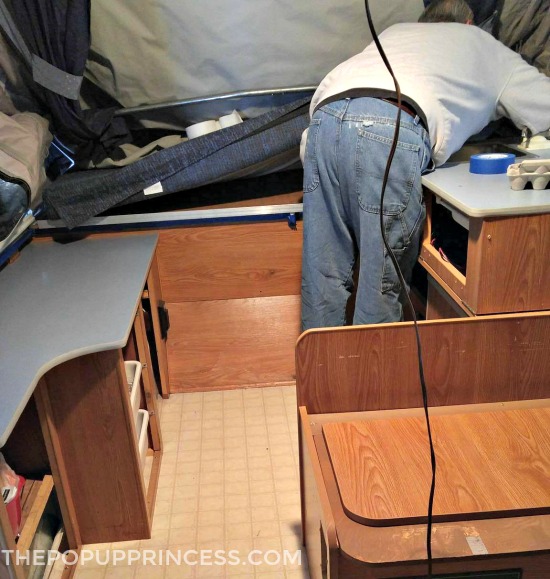 Shannon and her husband worked through the winter months and transformed their PUP into a warm and welcoming retreat. After seeing their camper’s transformation, I was bit by the bug. The three of us persuaded my husband to let us run with a few ideas. Before he knew it, we were into it big time. There was no reason to turn back, so we began a full-scale remodel on our PUP.
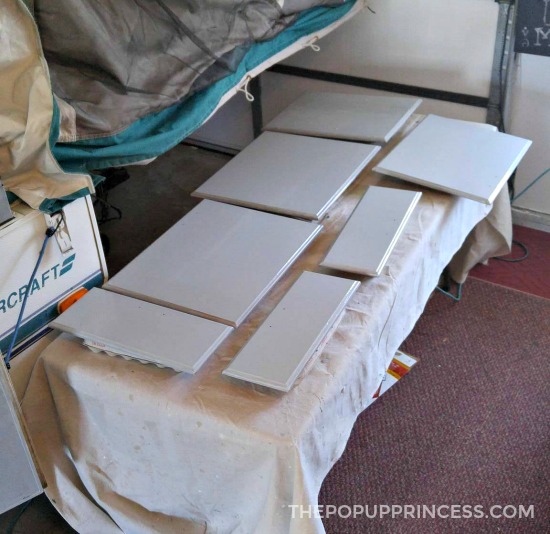
My brother-in-law, a painter by trade, removed all the cupboard doors, drawers, and hardware with my hubby. He primed with one coat of Zinsser’s Bull’s Eye 1-2-3 interior exterior primer. He then painted the cabinets with two coats of Dutch Boy cabinet trim and door paint in high gloss Gray Marble.
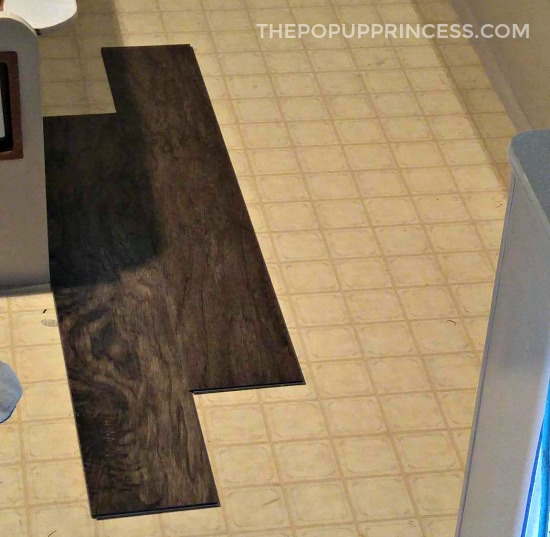
Then my husband installed the new flooring. I cannot express how much of a difference this makes. I absolutely can’t say enough about it! I love it! We selected a click-lock plank vinyl in Dovetail Gray from Menards. My husband laid it right over the old generic rust-stained vinyl, and it looks fabulous.
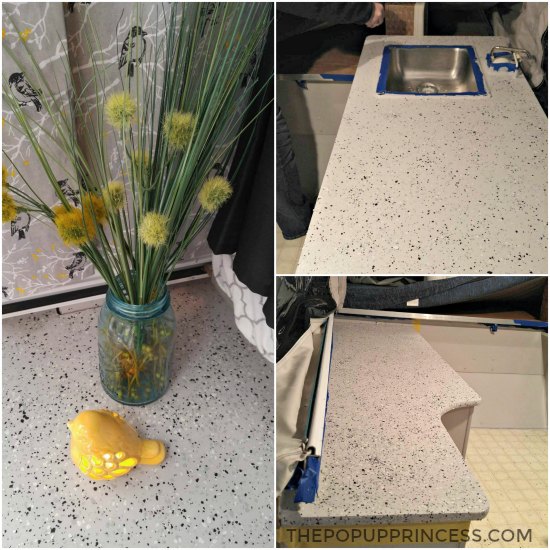
Next we moved on to the countertops. We used the same process Shannon did in her makeover. We painted the countertops with the Gray Marble paint from the cabinets, and while it was still wet, we dropped Rustoleum garage floor sprinkles into the wet coat of paint. This was the fun part! 😀 To finish it off, we sealed the counter tops with two coats of Minwax 3X gloss latex polyurethane.
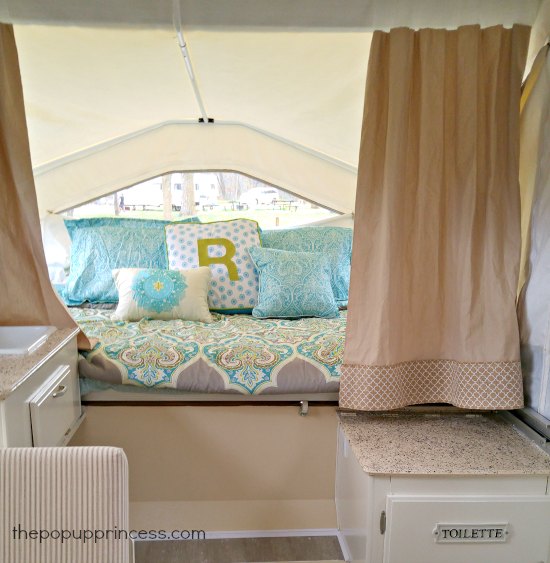
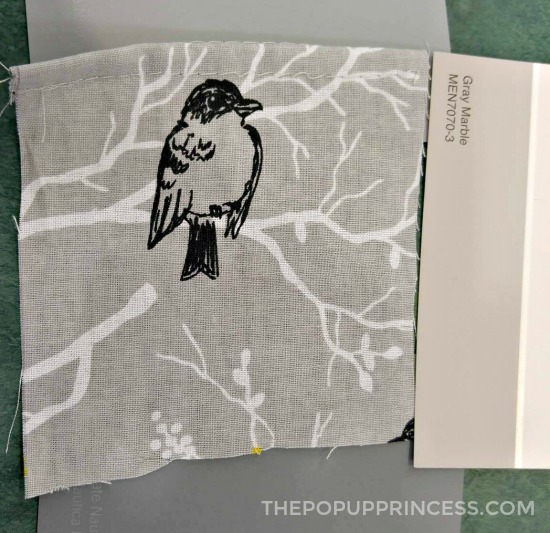
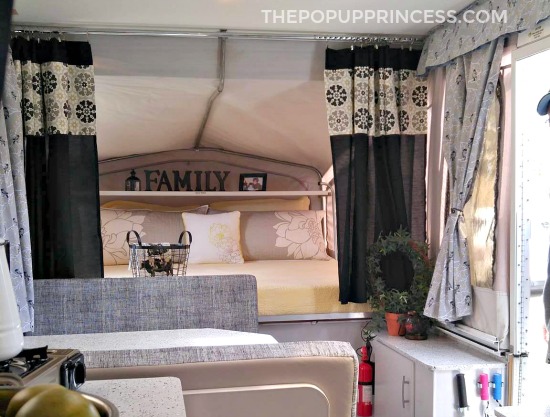
Shannon and I sewed all of the curtains. I ordered the fabric online from JoAnn Fabrics and used discounts and coupons. I purchased 16 yards for just under $100.00. I bought ten yards of a fabric named “Keepsake Calico Cotton – Gray Birds on Branches” for the main curtains. I wanted something nostalgic that is reminiscent of the 1940’s and 50’s but found that era fabric to be extremely expensive. I actually like this fabric much better. I calculated my yardage carefully–almost too carefully, as I had no room for error and could have easily run out. The end bunks are black flat sheets from Wal-Mart that I trimmed out with two yards of “Merry Go Round-Home Essentials,” also from JoAnn Fabrics.
Our dinette cushions were taken to the local upholstery shop. I decided on the Alexander Heath bone black fabric, mostly because we have a little Chihuahua whose fur happens to be the same colors. 😉 The upholstery shop charged me $80.00, but it was well worth it, as I didn’t have to mess with the zippers. The vinyl on the cushions was still in great shape, so I had the upholstery shop leave it on the covers. I only needed four yards for the tops of the cushions, and the vinyl side comes in handy when our grandchild camps with us.
We are so very excited to camp this season in our newly designed PUP. The color scheme is very calming to me, and I love the pops of yellow. We also added a few conveniences such as a high-rise cassette toilet, which slides in and out of a side cabinet.
We are thankful we found The Pop Up Princess blog, as it has been such a huge influence on our decision making. And we couldn’t have done it without my sister, Shannon, and her husband. They were such a big help and support during our makeover. Now we are all ready for some family camping!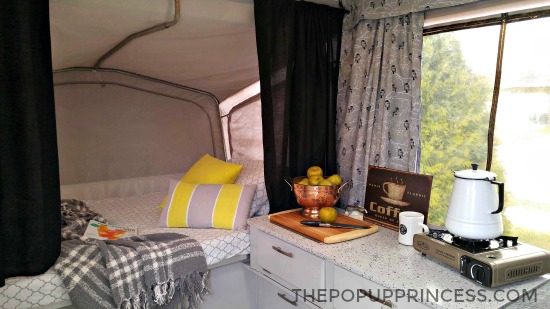
Isn’t Brenda’s makeover gorgeous? I absolutely love that the remodel was a family affair, too. Great job, Brenda… and Shannon! (And of course, the hubbies, too. 😉 ) Thank you so much for sharing the transformation with us.
Disclaimer: This post contains Amazon affiliate links. The Pop Up Princess is a participant in the Amazon Services LLC Associates Program, an affiliate advertising program designed to provide a means for sites to earn advertising fees by advertising and linking to Amazon.com. This means that if you choose to purchase an item from a link in this post, The Pop Up Princess earns a small advertising fee to help pay for future projects and posts… so thank you! 🙂
Happy Camping!




Such a gorgeous reno! I just purchased a 2010 Santa Fe pop up and am trying to figure out how to paint under the hinge that moves the cooktop and sink up and down. Is it hard to remove and then reattach? It’s the only thing holding up my reno. Thanks for any advice!
Following this, I am in the midst of painting our cabinets, and will be getting to this in a few days. Have been asking around, but no answers yet.
Hi Leah- We actually just painted right over the hinge. We didn’t give it much thought. Occasionally tiny pieces of paint find their way off and on the floor. I figured I can always take it off and redo it if it bothered me. But it would be an undertaking to take it off. Good luck.
I’d love to see/read more about your slide out toilet. We want to do the same concept in our Utah, but the cabinet must be remodeled first. We want it to slide to prevent little fingers from being punched in a folding cabinet top.
Beautiful job!!
*pinched, not punched 😊
Ours just luckily fit into a cabinet that was level with the floor. My husband just removed a half shelf from the interior. We had thought about making a little shallow wagon to pull out but it works for us as we do not have small children using it. My sister’s makeover utilizes a cabinet that possibly you could copy and install safety hinges for a child’s similar to a toy box to avoid the pinched fingers.
Love it! I went back and looked at Shannon’s camper too – each of you has done such an amazing job remodeling your pop ups. When you are together, there’s no doubt you have the most beautiful campers in the campground. Enjoy it! It’s just lovely. (I particularly adore the fabric.)
Thank you for the sweet compliments. It is so much more welcoming then what we had. I love the fabric too!
It was great fun doing it with my family.
Love it!
Thank you for this one. We have a 1995 Flyer and I hadn’t seen anyone restore one exactly like ours. I also appreciate that you took the cushions and had them done. That is the part I don’t want to tackle myself.
When you put the cabinets back in after replacing floor…how do they screw in?
We put ours back in the way they were, which meant that we had to screw them into the side walls and floor. Technically this means your floor is no longer floating, but we haven’t had any problems with expansion and contraction yet. The floor still looks great. 🙂
Beautiful reno! What a cozy trailer.
My husband and I traded in our tent for a 2001 pop up last year. It’s very outdated but seeing all of these amazing renos gives me hope! I honestly hadn’t even thought of painting etc.
Our trailer came with little bits of mold and mildew so yesterday I tried removing them with a mold eraser. It’s bleach-free and guaranteed not to discolour… but it did!! The canvas covering the windows has turned a nasty yellow and I am devestated. I’m assuming it’s because it was exposed to light (although I treated the trailer on a cloudy, rainy day with no sun).
Do you guys have any tips on how to remove the yellowing? I really don’t want to have to purchase new canvas as it would be around $1500.00. Could I paint it? Please help!
I never recommend painting canvas, Katie. First of all, you need to make sure that your canvas can breathe. Adding a layer of paint will hinder its ability to breathe and will likely give you issues with condensation inside the camper. Not fun. Second, you have to fold and unfold that canvas every time you set up and tear down the camper. I don’t know many types of paint that can withstand constant folding and unfolding without cracking or flaking. You also need to consider that at one point, your canvas was (or still is) waterproof. Most paints and dye are water-based, so they may not adhere evenly to the canvas.
Was your mildew cleaner listed as safe for fabric? Is there a chance you can call the manufacturer and see what they recommend?
Could the canvas be dyed? I have seen curtains made out of painters tarps, which is a heavy canvas, that are beautiful. I would think it would be worth investigating if you HATE the yellow stains. I know it won’t color evenly but it could also look amazing, giving you a uniquely stunning look! Sometimes “mistakes” turn out fantastic!
I’m not saying you couldn’t try dyeing it, Tiffney, but canvas is pretty expensive to replace if you ruin it. Mistakes sometimes turn out fantastic, but they also very often turn out terribly. If you are planning on replacing your canvas anyway, it might be worth a shot, but if the only thing wrong with your canvas is color, I wouldn’t risk it. 😉 You might end up with something you hate even more than the original color.
Really love your popup…you did a wonderful job!!! I love the colors!! The counters turned out great and I love the curtains!
I am wondering: how did you treat the table top and how did you add the shelf above the bed area?
Thanks for sharing your hard work and wonderful popup!
We have the exact same camper. The shelf is part of the bunk end supports.
I’m curious about how the paint holds up… I’ve tried to convince my husband to let me makeover our camper and he says the humidity will kill a paint job. Does yours without the elements? It’s beautiful!
I’ve purchased a 1999 StarCraft Constellation. The inside is in good shape, but needs a modern touch. I will also be painting the cabinets and putting in a new floor. The main curtains are still in great shape and are a light gray, so I came out ahead on that. I’m having a hard time with deciding on the upholstery for the one sofa bed, as we do not have a dinning area. Any suggestions? Does a solid color or print work best? I have found the material for the valance and have purchased the bedding, linen, throw blankets and lots of pillows. I originally thought I went overboard…but not after seeing your makeover! Thanks for confirming that this is our home away from home and it should feel comfortable and represent our style. I can’t wait to have it all done.
I have the exact same camper and redid the fabrics while embracing the blue counters. After seeing this I want to paint them. How has the painted counter held up?
Hello, just bought our first PUP and researching ideas for a remodel. I love the changes you made in making your space both beautiful and functional. I love the countertops, did you use the original tops and did they have the T strip? If not what material did you use? I would be thankful for any help you could give on this! Thanks