 The last year or so has been pretty crazy, right? Things have been changing on an almost daily basis, and vacations are nearly impossible to plan. RV camping in particular has really exploded, as more people are discovering the beauty of nature and joy of camping with their families. And because finances are also in a weird place, I’m seeing more and more people snatch up used campers and take on a pandemic remodel project instead of buying brand new.
 Britney and David are one such family. David is a middle school science teacher. Britney recently left her part-time job to stay home with their two little boys and make the most of their time together before their oldest heads off to school. With Covid closing down most of the family’s summer activities, they finally made the decision they’d been toying with for years–to get a pop up camper and start exploring the country. Though both had been tent camping some as kids, they were RV newbies and are amazed at how much they have learned in just a few short months! 😉
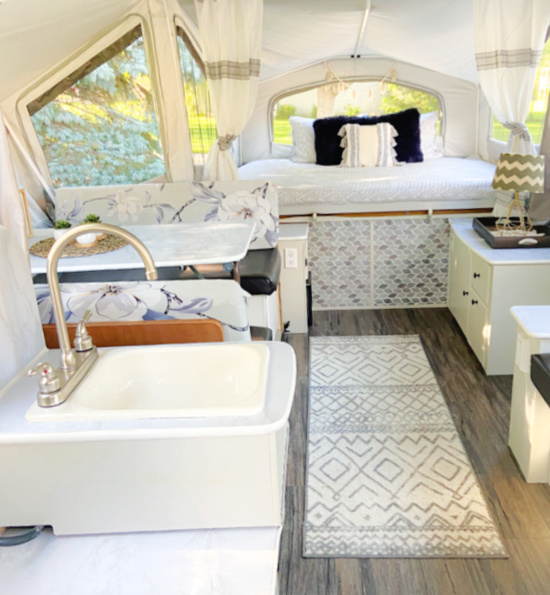
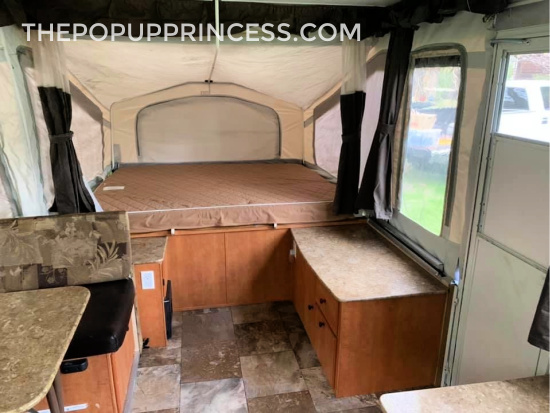
 Britney and David purchased a 2013 Palomino Real-Lite 1206 and were immediately ready to make it their own. They had some extra paint from projects around the house, and wanting to save money, they used that as their jumping off point. Britney gave the cabinets a good cleaning and sanding. Then she coated everything with that light gray leftover paint. She finished the cabinetry off with a few coats of matte polycrylic.
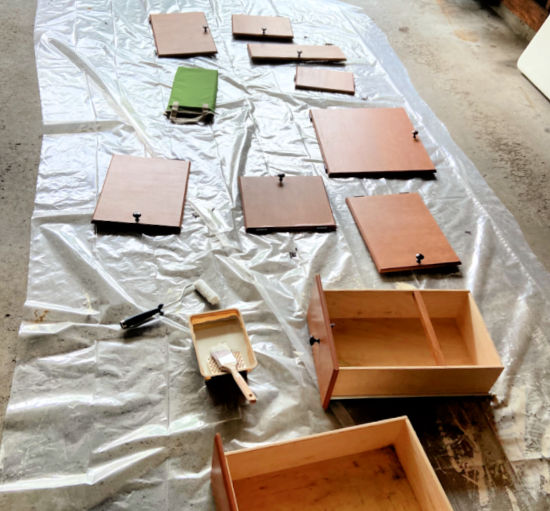 Britney said she learned a few lessons firsthand. Take the time to prime so the paint can adhere to the surface better, even if you have a paint and primer in one. She also says she learned she should have waited longer between coats especially in hot/humid weather. After a few touch ups and some extra curing time, it’s held up pretty well. They love how paint really brightened everything up! Need more tips on painting your cabinets? Check out our tutorial here.
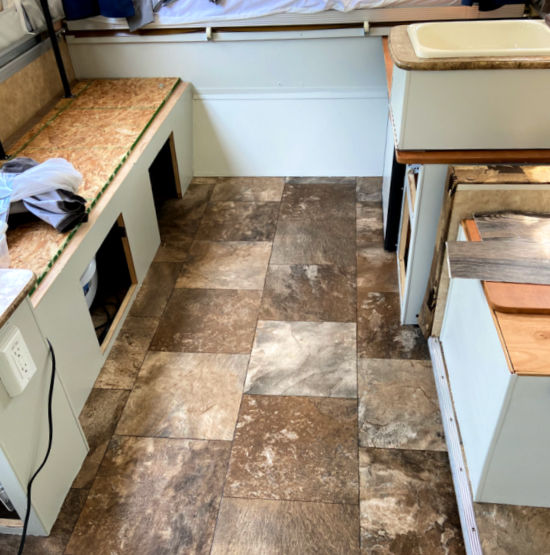 She then tackled the countertops. Britney loved all the remodels she saw that used marble contact paper. She used the thicker PVC-type paper, hoping for a little more durability. Then she coated the countertops in the same matte polycrylic she used on the cabinets. Another lesson she learned through experience–the texture of the matte topcoat holds onto dirt and grime, so she’ll eventually have to add another coat of glossy polycrylic to make the countertops easier to wipe clean. The flooring is a peel and stick vinyl plank from TrafficMaster in Walnut Ember Gray. They purchased it at Home Depot.
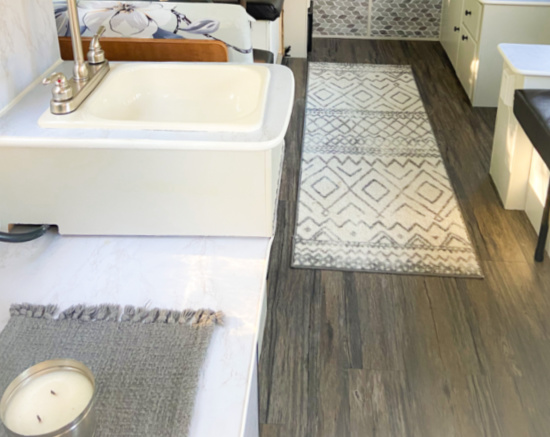 Britney says the countertop edges had a learning curve. She started by wrapping the contact paper around the edges, but those curves just weren’t looking as sharp as she was hoping. She ended up trimming the edges flush with the countertop, then she painted the t-molding trim. (As a side note, we recommend replacing the t-molding altogether. In our experience, paint may not hold up to the changes in climate and abuse from kids. 😉 You can read more about that in our painting post here.)
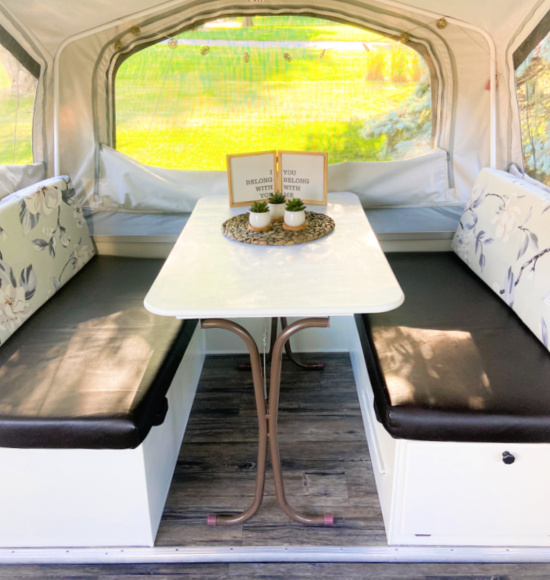 Britney decided she wanted to keep her bottom cushions, as the faux leather material was easy to wipe down. They have two little boys that bring in all the dirt, and needed something simple to clean. To break up the brown, she found upper cushion covers to tie in the rest of the décor. Dining chair covers are an amazing way to cheaply (and quickly) change the look of the camper. They are also removable–again, to make clean up easy.
 The curtains were more of a challenge for Britney, as she hadn’t used a sewing machine since junior high. She wasn’t a fan of sewing back then either. She loved the idea of salvaging the sliders and mesh of the old curtains for the boys’ bunk, and used stitch witchery to connect them to new blue curtains. It was hard to get the seam straight, and in the end, it turned out pretty frayed. She recruited her mom to give her a refresher course on the sewing machine. Britney used her long lost sewing skills to complete the rest of the curtains. She wants everyone to know it’s not as hard or intimidating as it seems. They turned out beautifully, didn’t they?
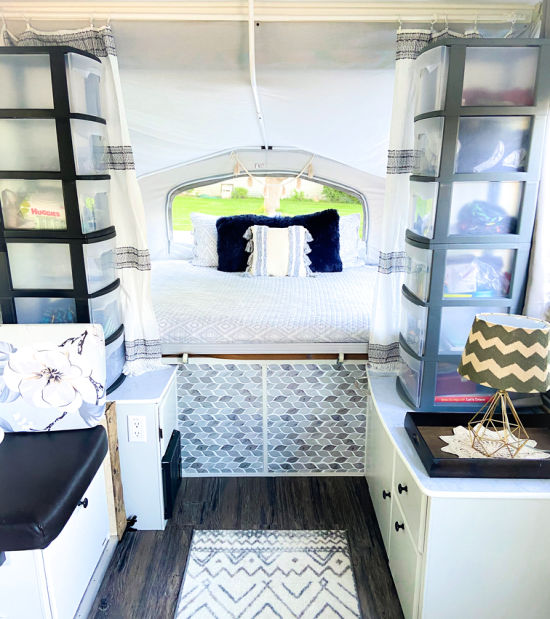
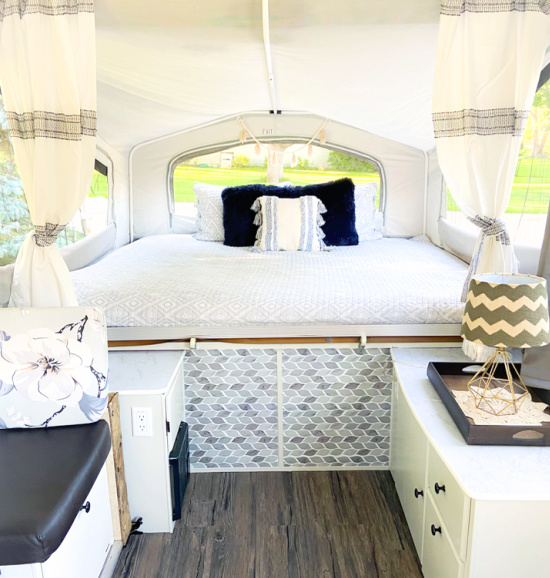 The accent wall under the bunk is Britney and David’s favorite part of the camper. It was an adhesive tile that was pretty easy to apply. It really ties it all the colors in the camper together. The leaf pattern is a nod to the beautiful outdoors around them. What a fun accent wall in this cute little PUP!
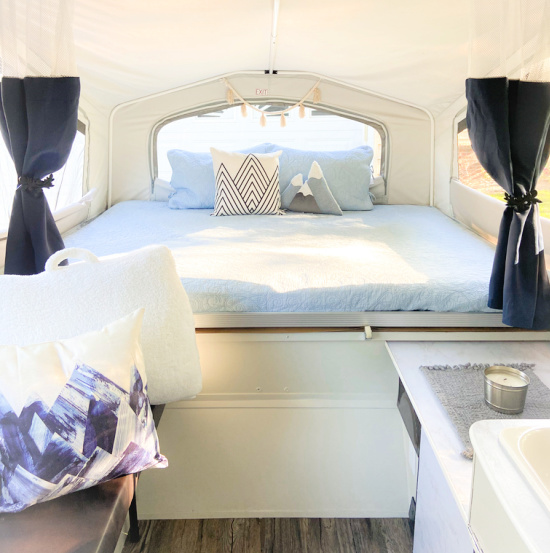 Britney hit a local thrift shop and scored a lot of the décor that you see in the camper, including the bedding, lamp, and blackout curtains. She fell in love with one of the blue mountain throw pillows, and was on the hunt for items that coordinated. She had a blast shopping for the pop up, and searched for items with different textures to add dimension and make the space feel cozy.
 Britney and David were intentional about having a lot of meals and rest times in the camper while it was set up in their driveway to help their boys get comfortable with camping in it. Their first night sleeping in their PUP was in Camp Driveway. It’s been a hit for the boys ever since. Mom and Dad don’t mind it too much either. 😉 It definitely is their home away from home.
Happy Camping!


Leave a Reply