


I feature quite a few “girly” pop up camper makeovers. It’s not that guys don’t enjoy a good camper project as much as the gals. I just find that women tend to take more pictures of the process and write all the details down. Most of my reader remodels come from women, so I get super excited to see a camper makeover that isn’t overly girly. It’s a bonus if it features black cabinets, as everyone seems to love those. When I saw Chelsa Jo’s camper, it checked all those boxes. I knew I had to feature it.
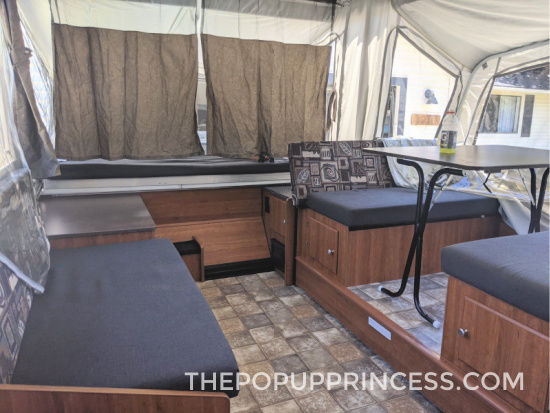 Chelsa Jo purchased her 2011 Coleman E3 in June after over a year of shopping. It is a pretty new camper, by pop up camper standards, and some people would be intimidated by that. It is easy to take a well-loved camper and give it a facelift. Tearing into a camper that still looks brand new takes some guts.
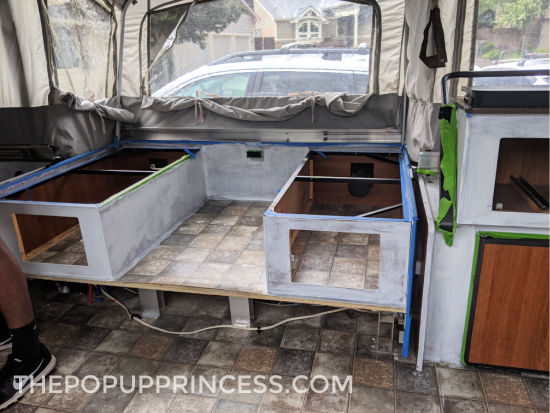 Chelsa Jo started by painting the cabinets. She read up about how best to do this. If you want to see our best tips and tricks, make sure to check out this post. Chelsa Jo prepped and prepped. Then she prepped some more. 😆 This is key to a great paint job. She started by sanding the cabinets. Then she used an oil-based Zinsser primer.
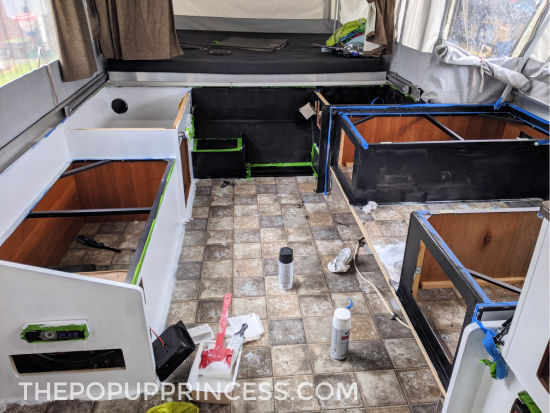 Then it was on to paint. Chelsa Jo really wanted to paint all of her cabinets black. She was worried that the end result would be an overly dark camper, so she broke it up a bit. Some of the cabinets got three coats of sleek, black semi-gloss latex paint. The rest of the cabinets got a semi-gloss white to lighten things up a bit.
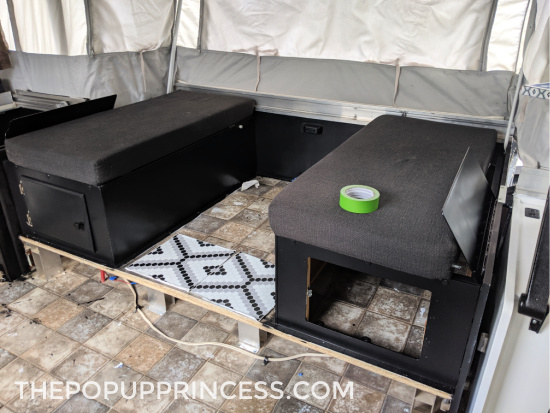 To tie in both the black and white cabinets, Chelsa Jo layed a penny tile print linoleum tile in the dinette. She found these cute FloorPops tiles at Joann Fabric locally. She said installation was a breeze, and she was able to lay the dinette flooring in just under two hours with only a utility knife. Then it was on to the rest of the floor.
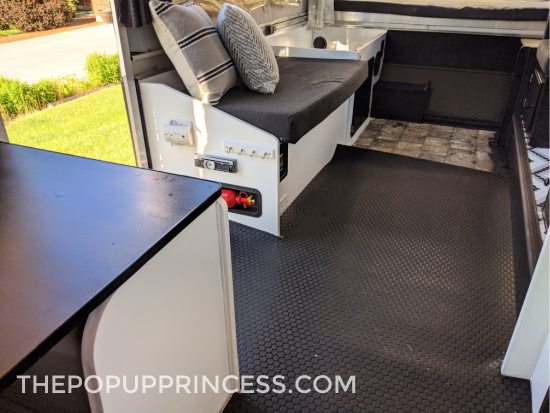 Chelsa Jo has kids, so she wanted something durable for the main flooring. She installed a rubber coin material from RecPro right over the top of the existing linoleum. It comes in 5ft lengths, so she ordered one roll, thinking it was just enough. She was short less than six inches! 🙁 She had to order another 5ft which added $150 to her renovation costs. There is also a line where the two pieces meet. Lesson learned! Chelsa Jo says to always measure twice before ordering this flooring. To install it, she initially used a vinyl glue. That did not work well, so she ended up adding Liquid Nails to really get it to stick.
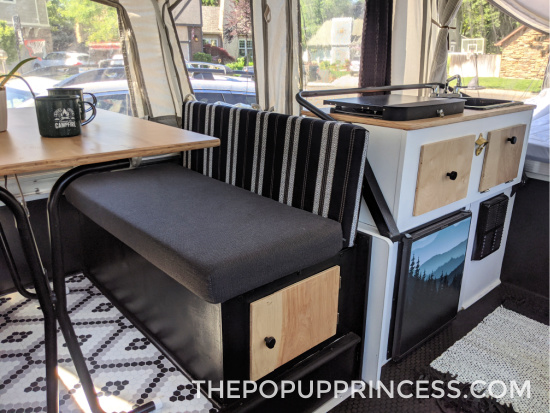 She replaced all the cabinet and drawer fronts with 1/2 birch plywood. I love the contrast and warmth it adds. The plywood was about $40/sheet. She used her miter saw to cut the pieces to size and ended up using about a sheet and a half for all the fronts. She sanded each door with 150 grit sandpaper, then 300 grit sandpaper. The sanded doors got sealed with three coats of clear matte polyurethane. Chelsa Jo used the original hinges, but she upgraded the hardware to matte black knobs from Amazon (available here).
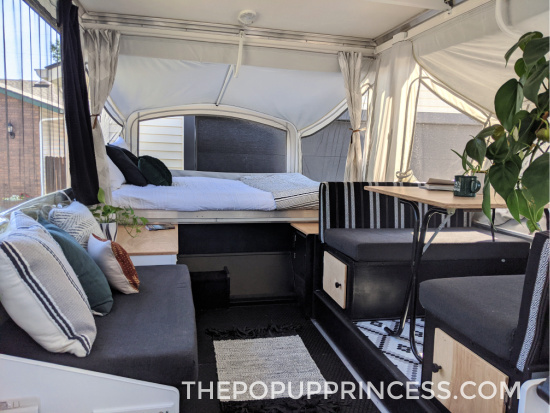
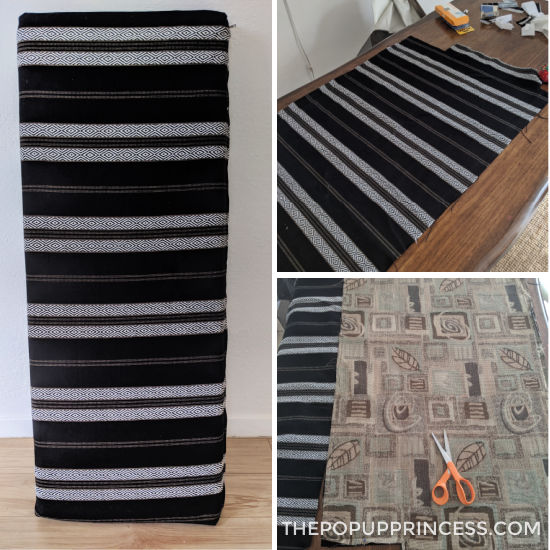 The bottom seat cushions were a nice grey so she kept those. For some visual interest, she ordered new fabric for backrest cushions from Fabric.com in Berber Basketweave White & Black. Chelsa Jo insists that she is an amateur sewer at best, and was a little intimidated by the cushion covers. She dug in anyway using the previous cushion covers as a guide. Look at how awesome those covers turned out! She says this is the project of which she is most proud–and with good reason! 😉
Chelsa Jo had a whole box of curtains from an old house and was able to repurpose them in the camper. She used them to replace the ugly brown original curtains. The original mattresses were in great shape, so she kept those. She did add anti-fatigue mats (see our post on sleeping comfortably here), and those have been a game-changer for keeping warm and comfortable!
 She used 3/4 inch birch plywood on the countertops and table to tie in with the cabinet fronts. Chelsa Jo used the same sanding and sealing method she did on her doors. Since the table would get a bit more use, she actually applied ten coats of polyurethane to the top of it, sanding lightly between coats. The she attached the original folding legs to her new table top. The original black sink was in great shape, so it stayed, but she did upgrade the faucet to a chrome utility faucet she found at Home Depot.
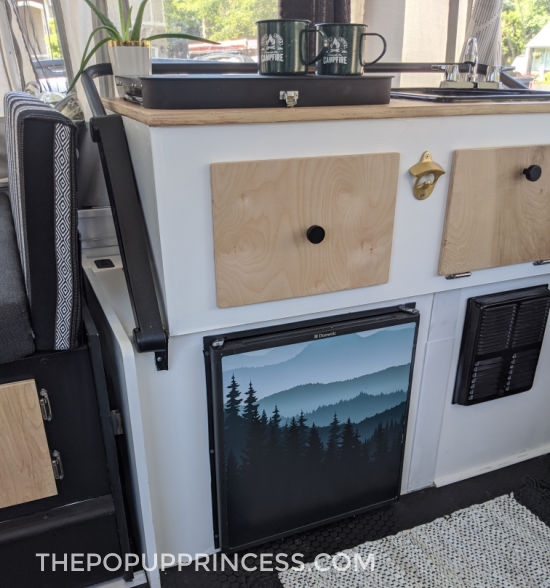 The fridge cover is actually a removable wallpaper sticker from Etsy. Chelsa Jo emailed the designer and gave her the fridge dimensions. She was able to create the wallpaper sticker in the right size. Chelsa Jo says this is her favorite part of the remodel. It love the little pop of color it adds.
 Chelsa Jo was kind enough to include a cost breakdown of her pop up camper remodel for all you budget-minded campers, too.
Paint – $150
Floors – $320
Cabinet/countertop plywood – $150
Fabric – $70 (not including the pieces I already had)
Pads for the mattress area – $100
Faucet – $23
Hardware/knobs – $45
Dining floor – $40
Fridge sticker – $25
TOTAL: $923
Not bad, right? She was able to completely revamp her camper for under $1,000. It took her eight days, and was definitely a labor of love, but Chelsa Jo and her family are so pleased with how it turned out. I’m sure they’ll be having all kinds of fun adventures this summer. Thanks so much for sharing all your hard work, Chelsa Jo! Happy Camping!
Disclaimer: This post contains Amazon affiliate links. The Pop Up Princess is a participant in the Amazon Services LLC Associates Program, an affiliate advertising program designed to provide a means for sites to earn advertising fees by advertising and linking to Amazon.com. This means that if you choose to purchase an item from a link in this post, The Pop Up Princess earns a small advertising fee to help pay for future projects and posts… so thank you!
Happy Camping!

Wow, so gorgeous! I love the natural wood cabinet fronts.
I’d love to get that fridge sticker! Which shop on Etsy did Chelsa Jo get it from?
She actually didn’t include that source in her makeover story, Melissa. But she is on Instagram @chelsa.jo and I bet you could drop her a message to find out! 😀
This looks stately. Not too masculine but relaxing and neat.
I love the look that she achieved with the black cabinets, but am afraid it might be too dark for us. Yet, I hesitate to go with light cabinets. When we have to pop down in a hurry( usually weather related) or when everything is wet, I feel like the light cabinetry would be a huge mess. We also use our floor space to pack “stuff”….things that sometimes shift around in transit ….making light cabinets a hot mess. 😂. We are getting our original 1994 Jayco 1207 back from our kids in a couple of weeks, and can’t wait to “pop up” and start our “ refurb”! LOVE all the ideas that I’m seeing, which is also making it so hard to make a decision!!! Everyone is so creative with their “ do-overs”!
Very sophisticated! You would be comfortable in Manhattan NY with this style! Great job 🙂