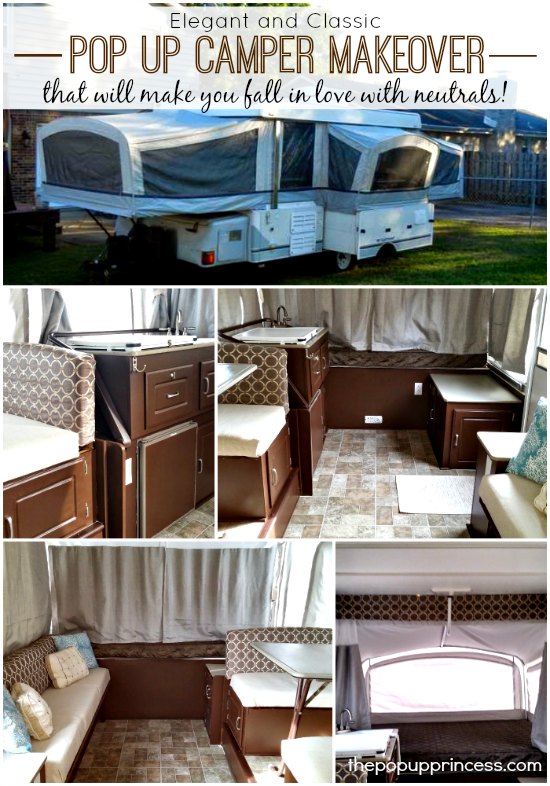
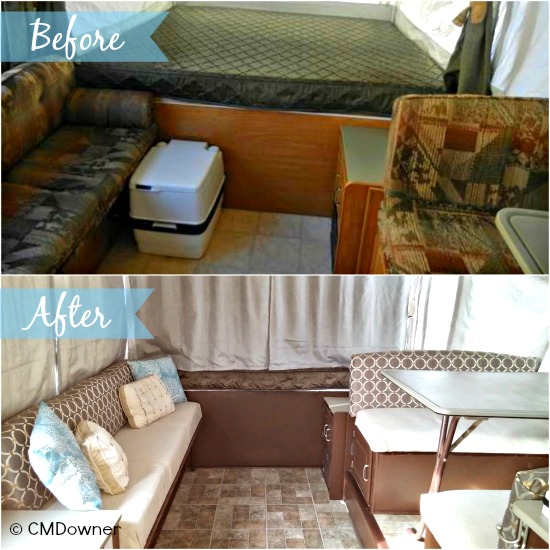
This week, I’m so excited to share with you a fantastic remodel by Cyndie. She chose a neutral color palette, and I know what you’re thinking… BORING! But this camper makeover is anything but. Cyndie really made her neutral palette work for her. When I first saw her camper makeover, I fell in love with the rich, brown cabinets. So many of us have painted our cabinets in shades of white that we forget you can pull off a really fantastic–and classy–cabinet makeover with a little color. Let’s take a look at what Cyndie started with, shall we?
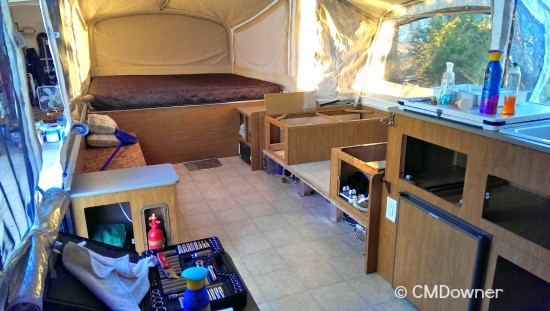
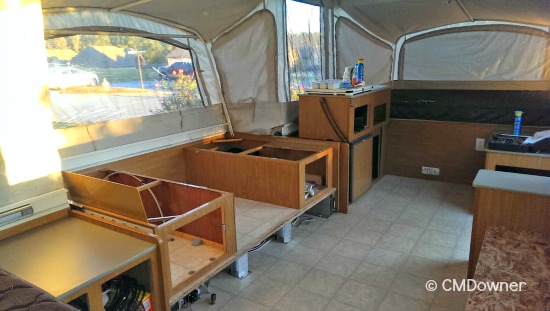
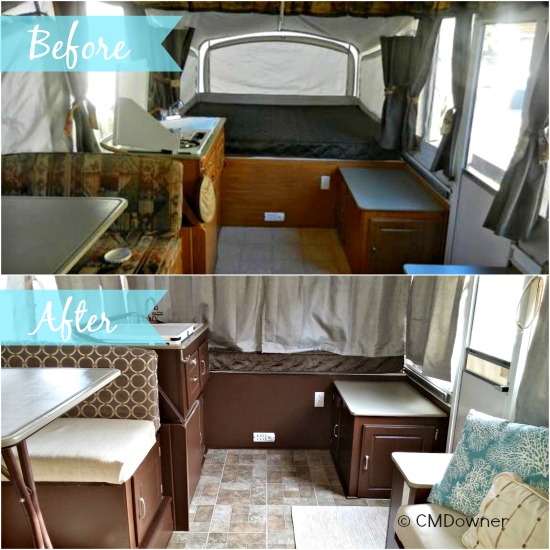
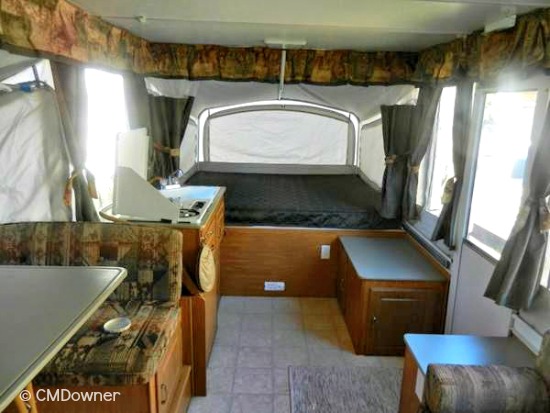 Yep, typical Coleman camper. The camper itself was in fabulous condition, but that tired decor needed to go. I don’t know who thinks up camper color schemes, but they need to be fired!
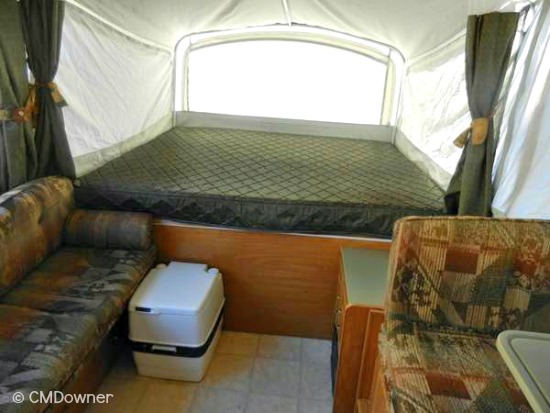 Cyndie and her husband had a plan–and the first things to go were those yucky oak laminate cabinets.
First, they removed all the cushions and cabinet doors and cleaned all the surfaces really well. Once everything was all cleaned up, they brushed a Zinsser oil-based primer on all the cabinets.
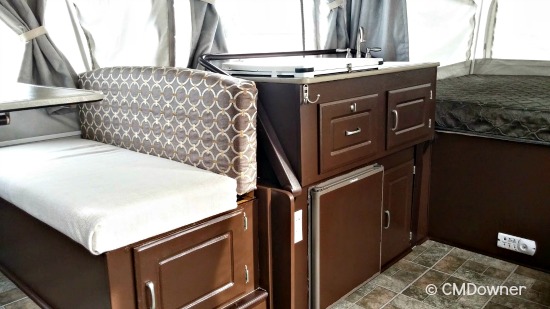
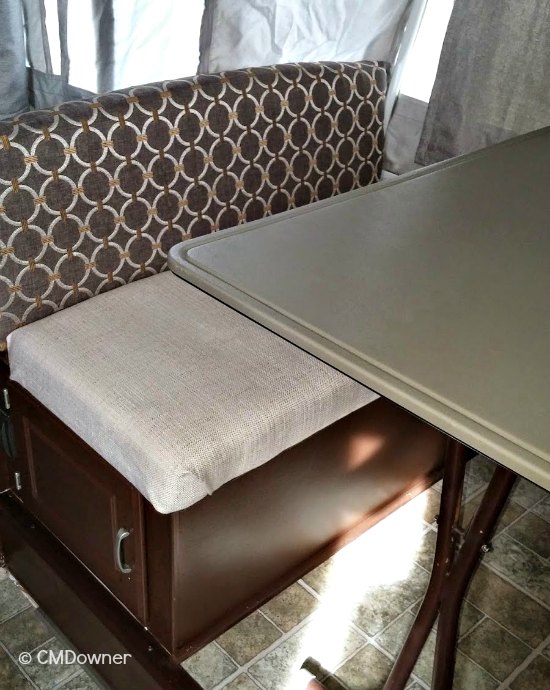
Next, Cyndie and her husband painted all the cabinets and doors a deep, rich brown. They used Behr latex paint with primer and left all the cabinets in place, taping off the countertops and anything they didn’t want painted. They used a brush to give everything two good coats of paint for durability. Isn’t the result gorgeous?
They even painted the swing galley bar! I’m jealous! 😉 Cyndie’s husband used dark brown spray paint to spray all the metal components of the camper, like the swing galley bar, dining table legs, and slide-out threshold. It makes a huge difference in the look of the camper, don’t you think?
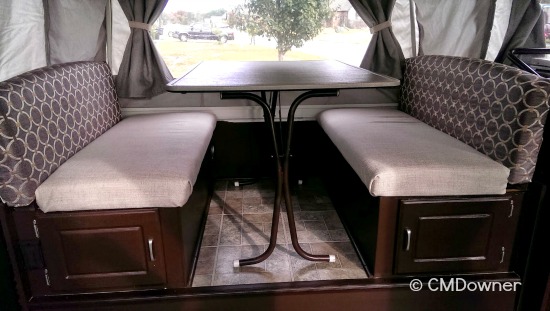 Because their cabinet hardware was not a standard size, they decided to spray paint all their drawer pulls and hinges to match their new decor. They used a Valspar brushed nickel spray paint and finished it off with a clear coat to seal everything. The added benefit was that they saved themselves about $50 in new hardware. Score!
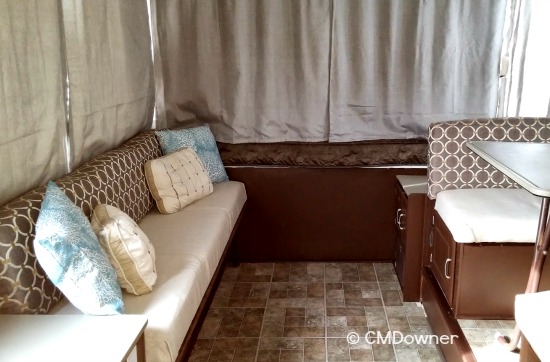
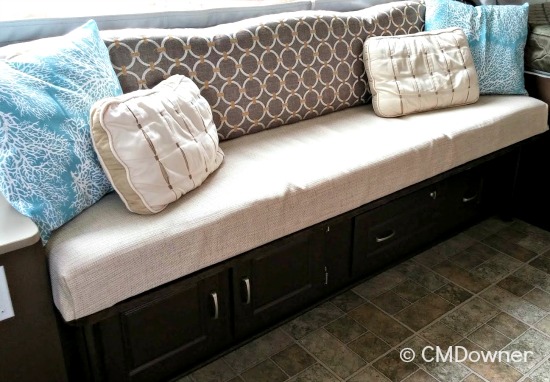
For the cushions, Cyndie used two different fabrics, a brown geometric print and a soft oatmeal colored tweed. She decided to splurge on a high quality fabric and told me she was very pleased with the results. Rather than have the cushions reupholstered, she used the wrap and staple method to give her seating a new look. She wrapped the cushions in her fabric and stapled it to the particle board at the back of each one. I love the tailored look it lends to the whole makeover.
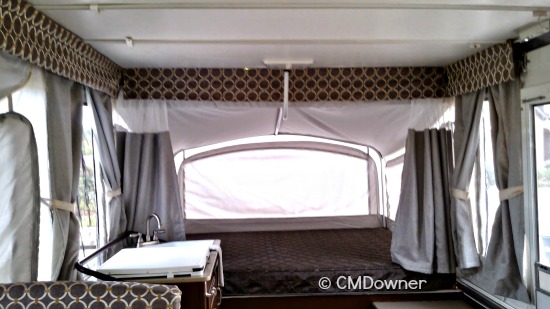
Cyndie reused her existing drapes, because she liked that they had the blackout liner built in. To make them coordinate with her new color scheme, she chose a neutral gray fabric, cut it to the size of each curtain, and sewed it right on top of the existing drape. What an easy fix–and a great idea for those people who don’t want to fuss with removing and reattaching those pesky little slider tabs.
For her valances, Cyndie used the same geometric fabric she used on the cushion backs. She cut each valance so that the finished product would be 8″ instead of the standard 10″ valance. The shorter length helped to open up the camper and make it feel a bit larger. To attach the valances to the track, she cut the glider clips off the elastic in the old valance, leaving about 2″ of elastic on either side. Then she spaced out the clips and sewed them, elastic and all, to the new valance. She added a button hole to the end of each valance to secure it to the screws at the end of the glider track.
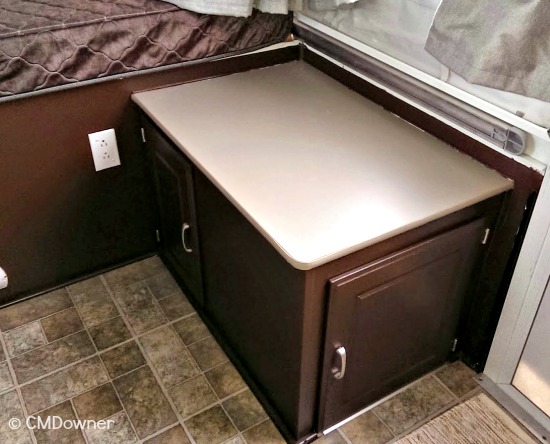 Her countertops already matched their new color scheme, and they were in perfect condition, so Cyndie and her husband left them. They did take on that old, yellow laminate floor, though. After scuffing up the original laminate flooring and cleaning it well, they installed new peel and stick tiles right on top of the old floor. To add a more finished look to the camper, they also added quarter round, painted brown to match, to the bottom of the cabinets.
Because Cyndie’s color palette is all neutrals, she can incorporate pops of color without worrying if they clash with her decor choices. That’s exactly what she does here with these fantastic blue coral pillows. I love that if she decides to change out the pillows, she can easily pick a different color and swap out the blue–and she won’t have to repaint or reupholster anything. That’s what a good neutral palette will do for you. It may seem boring to go with browns, but you have so many more choices in the long run. And how can you argue with these stunning results?
It doesn’t even look like the same camper anymore. Cyndie and her husband did an amazing job, didn’t they? It looks so warm and inviting.
A huge thanks to Cyndie for letting me feature her here this week. Do yourself a favor and check out her blog–you won’t be disappointed. You’ll find lots more pictures of her camper and hear from Cyndie herself on just how they accomplished this awesome makeover.
Have you started on your makeover yet? I’d love to see pictures! Drop me an e-mail or give me a holler on our Facebook page. I love seeing what you’ve done with your homes away from home!
Happy Camping!


Wow, that’s a beautiful job…Enjoy
Didn’t she do a great job, Alice? I love it!
Awesome job by Cyndie and her family, it looks great after the remodel. Have you considered doing the countertops ? Any LEDs yet ?
Lot of great ideas on this blog, keep it up !
Thanks for sharing.
Wow! that looks great!
Doesn’t it, Kate? I just love how warm and inviting it is.
Wow, it looks great! We painted our kitchen cabinets with a lighter shade of brown and I am thinking maybe we could just use that to paint our pup cabinets…..would save money too, hmmm.
Good idea, Amy. I reused a lot of paint and fabric from my house. It certainly saves you money.
We just purchased a 2001 Coleman Utah! We are new to the PUP world! I am looking to do all the things done here. This camper looks absolutely amazing! My main concern is not getting enough fabric to cover my cushions, any idea as to how I should measure my cushions or how many yards Cyndie used?
Julia, I love the Utah. If we could have found one in our price range, we would have bought a Utah or a Westlake. They are so awesome.
I’m not sure how many yards Cyndie bought, but you could ask her. If you haven’t stopped by her blog yet, you can find it here. I made actual slipcovers for my cushions (which you can see here), so my estimate was different, but may be similar. I estimated about 2 1/2 yards of fabric for the front panels, 2 1/2 for the back panels, and about 2 yards for the boxing strips (side panels), so about 7 yards total. I did have some left over, but one thing I would suggest is overestimating a little. You don’t want to be short on fabric–especially if you aren’t certain you can get more of that fabric–and it’s always nice to have a little extra fabric for curtain tie backs, pennant banners, valances or pillows. Hope that helps. 😀
That is very helpful and I will definitely check out Cyndie’s blog! I’m not sure that I am talented enough to make slipcovers for everything. I will be recruit ING my mom for help 🙂
I actually purchased flannel sheets in a floral design from Target. They were on sale for $17.99 so I bought two sets in a queen size and had enough fabric to do my curtains and the back cushions! I bought a solid color sheet set that matched and did the seat cushions. I saved a lot of money by using sheets because every time I would find a fabric I liked it was way to expensive for the amount that I needed. Just wanted to pass that info on 🙂
It is gorgeous! We just bought a 2005 Viking Epic 1706, It is so cute! I am dying to make it over and make it our own, LOVE your site and all the tips!!!
Thank you so much, Kristi! Isn’t Cyndie’s PUP great? I can’t wait to see what you do with yours. You’ll have to send me pictures! 😉
We just purchased a mid 80s Starcraft, a little beat up, but after seeing all the beautiful customwork here, and at reasonable prices we’re excited to take on this project! Thank you for having an awesome site for those of us who are creatively challenged! hopefully ours will make it up there when we’re done!
Awesome, Joseph! I love the look of those 80’s model campers. They remind me of the one my uncle had when we were young. I’m excited to see what you guys do with yours. 🙂
where do you find the replacement counter tops?
Angela, I don’t believe Cyndi changed out her countertops. We made new countertops for ours, though. You can find that post here.
After seeing many amazing re models, this is the color scheme that I am going for. While the light stuff looks beautiful, the dark will hide more dirt and grime! We are surf campers and need to be able to get stuff somewhat dirty. I hate the colors it came with, but the browns are a great alternative! Ill be posting mine by the end of the summer gals!
Can’t wait to see it! 😉
Stephanie, good luck and post some pictures of your remodel!
I love this look! She mentioned using Behr paint- what color was used?
Hi Rach, The color was Behr Bison Brown.
Cyndie
I love these remodels so much! I sewed over my existing curtains too, but I think they might be a bit too heavy for the plastic clips that come standard on the Coleman popups. Cyndie, did you find them to be too heavy after sewing on the additional curtains? Larissa, have you heard from anyone else that has done this too?
I have heard of several people sewing new curtains over the existing ones, Felicia. I would choose a lighter weight fabric just in case, though. 🙂
I am wondering if there were any challenges with replacing the floor under the slide-out.
What year and model is this Coleman?