


 Dani is my kind of girl. She believes in raising her children with plenty of exposure to nature and daily outdoor play. She knew that she wanted to incorporate camping into those outdoor experiences, but her husband was less enthused about the idea. He prefers the conveniences of electricity and air conditioning. So they met in the middle, both agreeing that they could compromise with a pop up camper.
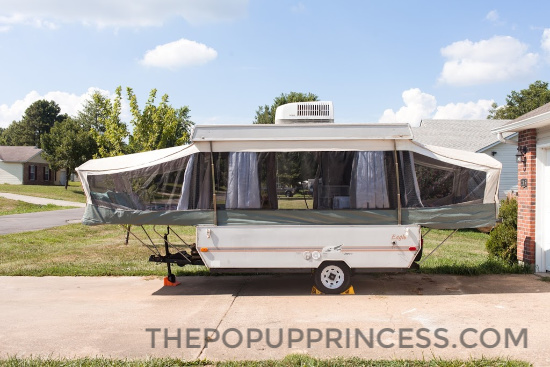
And so began their quest for their very first camper. In their excitement, they quickly purchased a 1999 Jayco Qwest pop up camper for $1500 without much research. In retrospect, Dani says she probably should have shopped around a little longer, because this camper turned out to be a big project. 🙁 (For tips on what to look for when purchasing a pop up camper, make sure to check out our post on buying a camper here.)

When they purchased the pop up camper, Dani knew about a couple of issues right off the bat. They were going to need to replace a countertop, interior paneling, and a stabilizer jack. What they didn’t know is that the camper also had major water damage and quite a bit of black mold and mildew. They knew, of course, that killing mold and replacing the water damaged panels had to be the first project. That meant they had to repair an entire wall at one of the bunk ends.
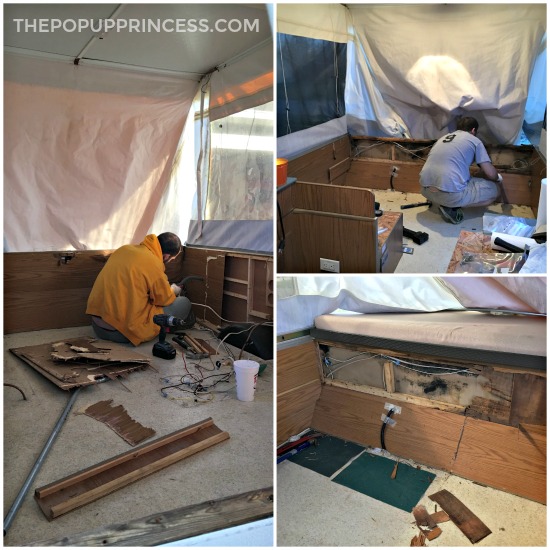
Dani and her husband bought all new paneling at Menards. The total cost was just under $100 for four sheets of paneling. In order to replace the paneling, they had to rip out all the cabinetry and ultimately, the electrical wiring, as well. This wasn’t part of the plan, but thankfully, Dani’s husband enjoys a good demolition. He cut out the rotten structure in the bunkend, and replaced it with new wood supports. Once the paneling was installed, it looked as good as new.
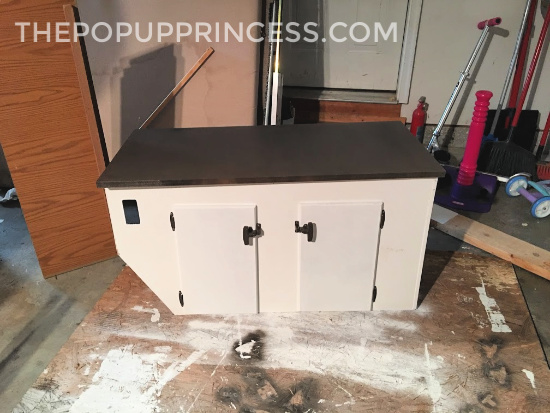
The next project was to repaint all the cabinets, which was much easier now that it was all outside of the camper. Dani bought a gallon of Dutchboy outdoor white latex paint and went to work. She and her husband also sprayed the cabinet tops and hardware with Rust-Oleum All Surface spray paint in Hammered Dark Bronze. They used this to spray the table top as well.
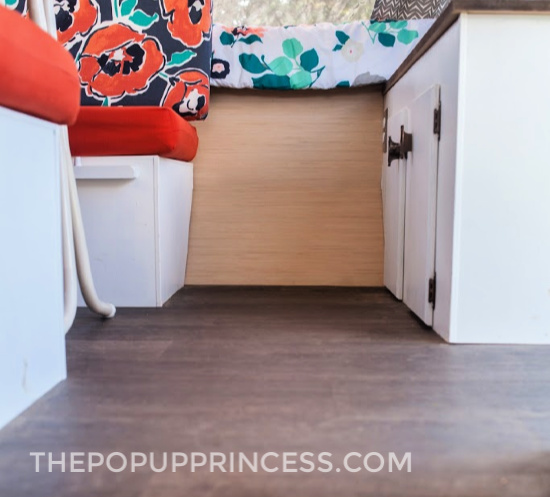
Before they reinstalled the cabinets, Dani and her husband laid down a new laminate floor on top of the original vinyl floor. They bought this for $100 at Menards as well. I’m getting the feeling Dani loves Menards. 😆
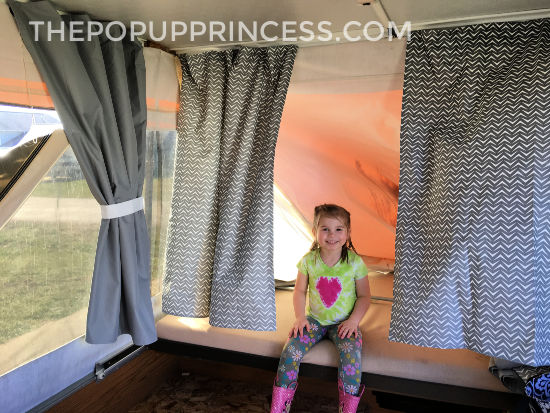
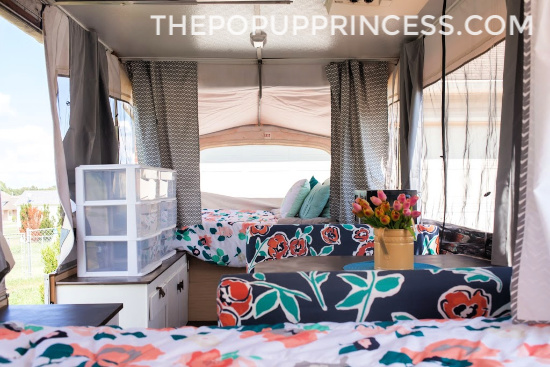
While her husband worked on the floor and cabinet installation, Dani got to work on cleaning and repairing the canvas. She had read this post on canvas care, and followed our recommendations on using Bass Pro Shop mold and mildew remover for the canvas. It worked better than she expected, and the canvas now looks amazing. There were a few rips she repaired as well, in hopes of getting a good season of camping in before the canvas would have to be replaced.
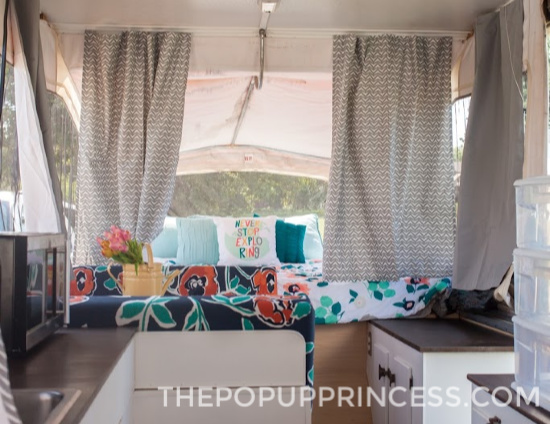
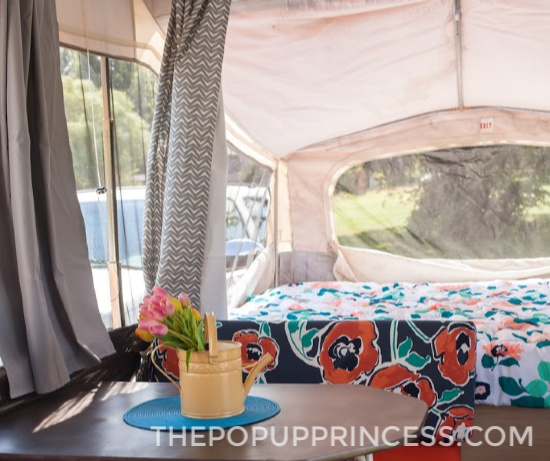
Dani ripped out the old curtains and replaced them with ones she purchased from Target. She cut and hemmed the new panels to the right length, and rather than purchase all new curtain clips, she took the original ones out, gave them a good wash, and sewed them into the new curtains.

Once the curtains were finished, Dani’s mom helped her sew together cushion covers for the dinette seats. They purchased two shower curtains in a floral pattern and two solid orange window curtains, all from Target. The solid orange covers were for the bottoms and the fun floral print for the back cushions. It took Dani and her mom an entire night, but it’s her absolute favorite part of the entire camper. The idea was to sew cushion covers that can be easily removed for washing. Dani wanted something that didn’t need zippers, so they used an envelope closure. Aren’t they gorgeous?
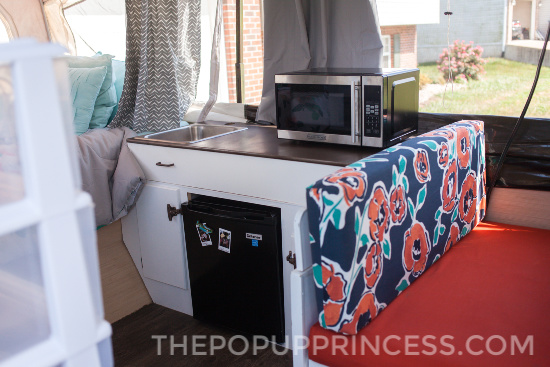
The very last project on Dani’s list was replacing the ice box with an actual refrigerator. They found it at… yep! you guessed it! Menards. It was just under $100, and perfect for that little space.
Dani says they still have some work to do on their little camper. This year they’d really like to replace the canvas, along with a few other projects they have in the works. They’ve already created memories with it that will last forever, and they can’t wait to make more. In fact, Dani is currently in the middle of making all her summer camping reservations. I’d say she is doing a fantastic job of getting those kids out in the great outdoors.
A huge thank you goes out to Dani and her husband for sharing their amazing makeover project with us. You did a phenomenal job, and I’m sure your kids will look back on those childhood camping memories with fondness.
Happy Camping!

So bright and fun! Menards is worthy of so much love! We miss Menards after moving to Colorado!
We just bought an old pop up and are starting our reno. When you use the rustoleum spray on the counters do you take the t trim off or just paint right over it? I know Larissa has some issues painting it but how do you make the edges look so nice?
I would LOVE to know how these cushion covers were created with an envelope closure in the back! Any details would be appreciated 🙂
I was wondering the same thing!
So pretty! I love the bright colors. I want to learn how to do the envelope closures on the cushions, too.