I’m so pleased to be able to bring you Debbie’s camper makeover today. Debbie had fond memories of camping in her youth and wanted to share that experience with her three boys. She started looking for a camper, and before she knew it, she was a new pop up camper owner. Once she got it home and hit Pinterest, she was bombarded with great inspiration and knew she wanted to give it a makeover. Here’s Debbie to share her makeover story with us…
DEBBIE’S POP UP CAMPER REMODEL
As do so many, I have fond memories of pop up camping when I was little. My folks think that’s quite funny, as we only had the camper for a couple of years, and I was very young at the time. But, hey, it must have made a big impression on me! 😀 I have three fun boys, ages 15, 11, and 9, and I’m married to an Eagle Scout. I thought a pop up would be an adventurous way for us to grab some quality time here and there as a family without having to book a hotel, so I started to hunt.
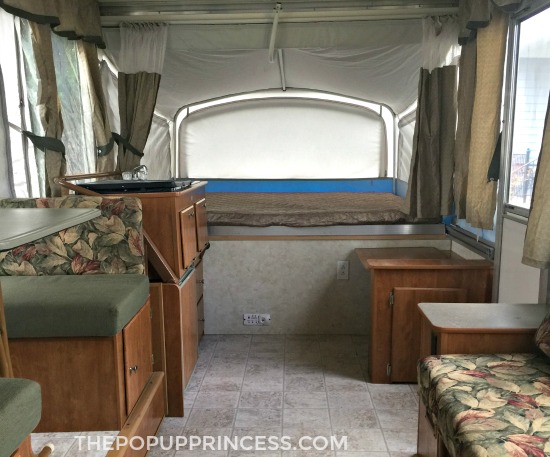
After a few dead ends, I found THE ONE– a Coleman Utah. It had a slide out dinette, stove, sink, heat and A/C. My mom and dad helped out with some early Christmas money and BOOM! We were pop up camper owners!
Of course, I started combing the web for ideas and modifications. I found that almost all of them were right here on The Pop Up Princess! When I was purchasing my camper, I’d never considered a makeover, but once I saw all the great things the readers here had done, I knew I just had to complete a makeover of my own.
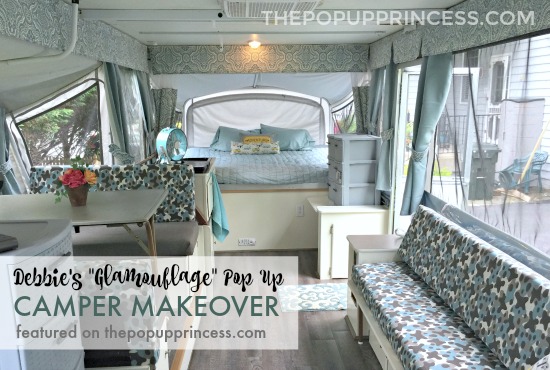
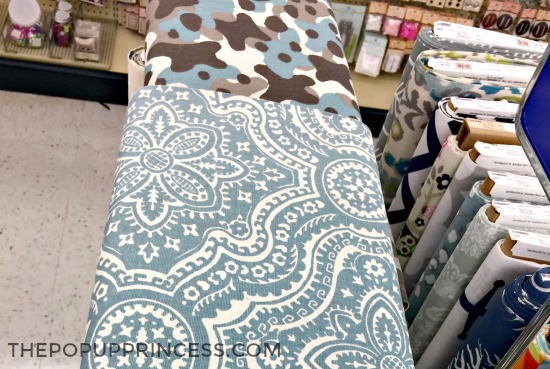
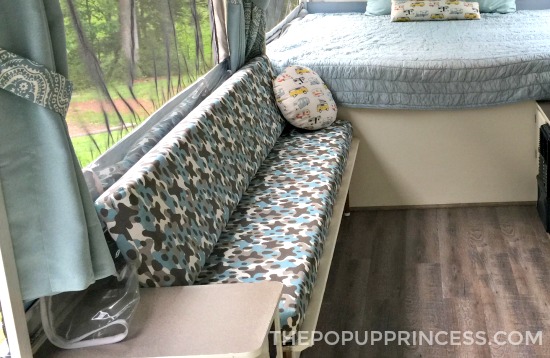
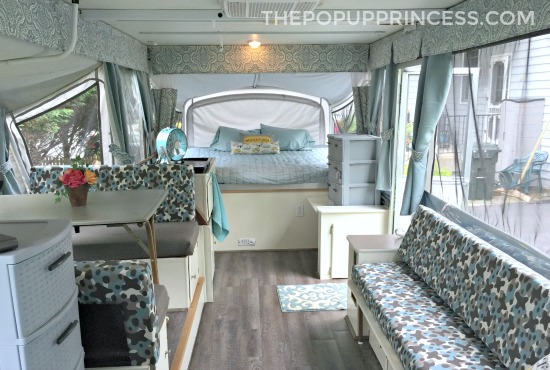
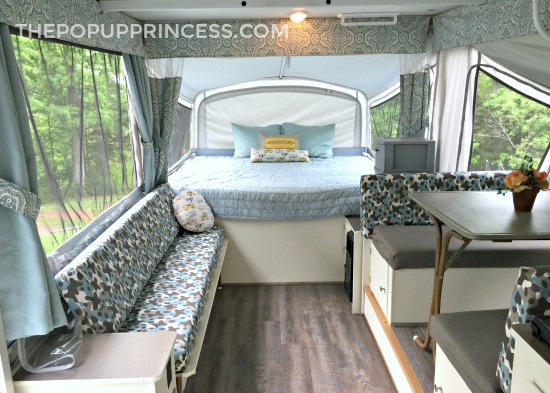
We camped in our PUP for a year before I decided to make the remodel my Spring project. I camp with all boys, so I couldn’t make the project too girly. I started looking for inexpensive fabric and textile inspiration and found my “muse” at Hobby Lobby — a sort of camouflage printed duck cloth. It was sturdy, yet pretty, and there were several complimentary fabrics right there on the rack. A friend dubbed the main cushion fabric “glamouflage,” and I loved it. It became the theme for my camper.
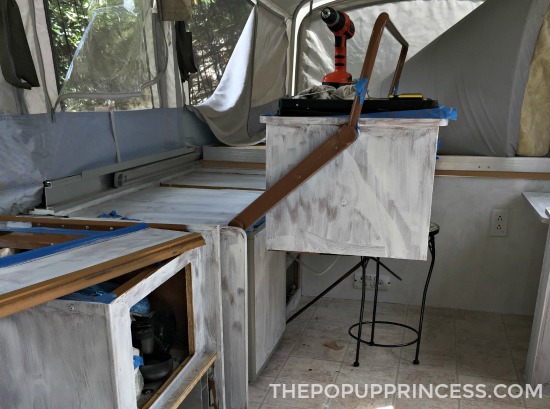
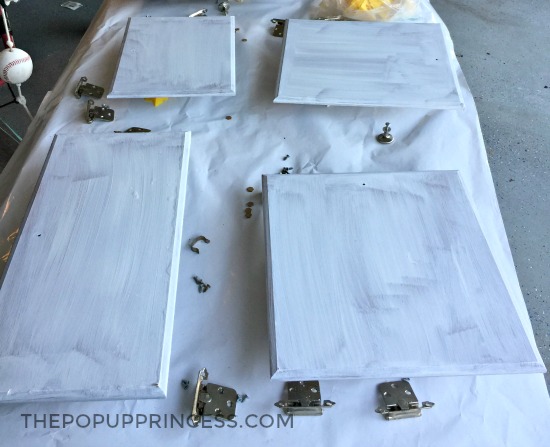
With the fabric choices out of the way, we moved on to painting the cabinets. I had recently finished painting cabinets in the kitchen of a rental property we were prepping to sell, so I kind of had my creative juices flowing from that project. My neighbor is a professional faux finisher and does cabinet refinishing as well, and she gave me her tips. She uses Krud Kutter and a green Scotch-Brite scouring pad to clean the junk off. Then at her suggestion, we used a high-end primer called STIX to prime the cabinets once they were clean and dry.
For the paint, we chose a milk paint from General Finishes in Antique White. To seal it, we applied three coats of a satin top coat also by General Finishes. Yep — that’s three coats on everything. It was a pretty big job, but these higher end products made it easier, and the result is really nice. Because the cabinets are that standard particle board and very thin wood, there was a bit of swelling and water damage on a few doors. I chose not to sand or try to refinish them. I mean this is a camper after all, and now that it’s done you don’t even see the damage! I painted the walls and the plastic trim with the same paint and topcoat as well. The hardware was in pretty decent shape, so we just reused it.
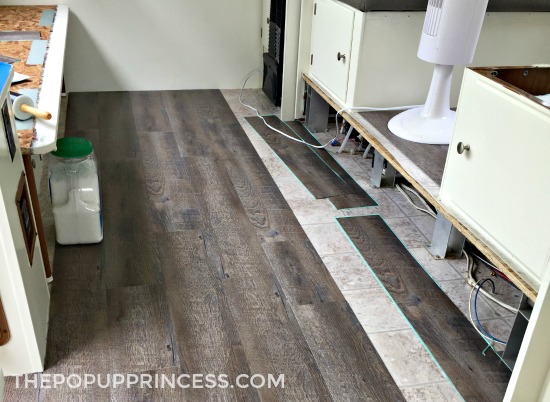
Next up was the floor. After cleaning the existing linoleum thoroughly, I began laying the new adhesive plank vinyl in the dinette. We only needed one box of the Style Selections brand in Driftwood Gray from Lowe’s. There are a few “piecemeal” smaller pieces in the cassette potty area, but that’s okay by me. When I started in the dinette area, some of the planks were bowing up. I went back and read the instructions and consulted on some online forums about the product and decided to use a vinyl floor primer. After applying the primer, I was much happier with the result.
It was a fairly easy job. The planks were easy to work with, and it was truly a major transformation for this project and totally worth the $60. We splurged for the matching Driftwood quarter round to finish it off. I filled in the gaps and edges with matching colored caulk as well.
With all the major renovations out of the way, I was ready to get started with the textiles. I found a super easy tutorial for covering the cushions on Confessions of a Serial DIYer, which made a box pleat finish on the corners so easy. I hand-basted the seams shut, and if I need to launder them, it will be easy to snip and pull the cover off, then re-sew. For me, it was way easier than dealing with Velcro or zippers.
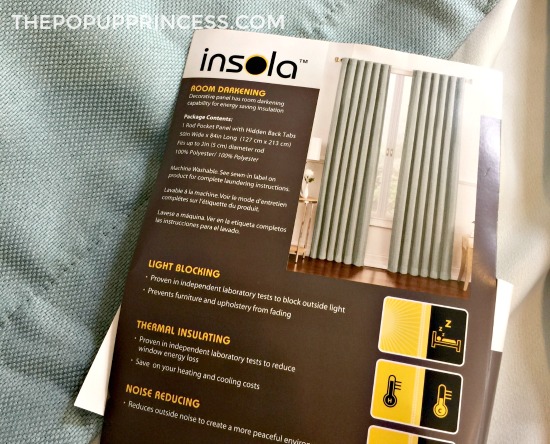
I purchased beautiful room darkening curtains that I liked (Insola panels in Spa Blue) at Bed Bath and Beyond–with a coupon–and decided I was going to use them for the curtain fabric. In order to maximize the fabric, I made sure to get panels that were pocket top. For the big main window, I took one 84” curtain and simply turned it sideways, cut up the middle, and hemmed the bottom to the correct length.
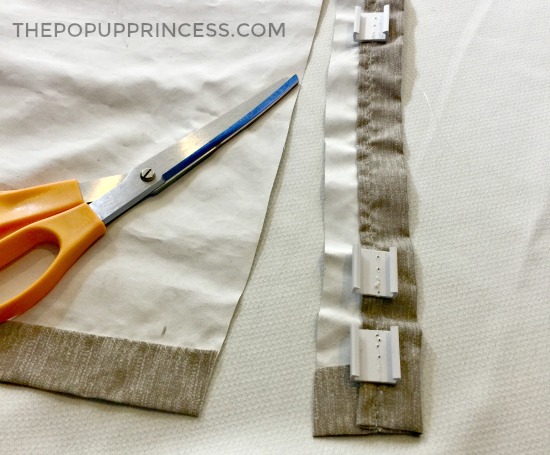
I cut the tab strip of the original curtain off in one piece, and then sewed it onto the new fabric. I needed three panels to do all of the exterior-facing windows. They were $29 apiece, and with my coupon I got the 20% off each one. Considering the black out/thermal lining was already there, I thought it was well worth it to go this route. For the privacy curtains on the bunkends, I used the more feminine fabric. Once again, I salvaged the netting and clips by cutting them and sewing them onto the new fabric.
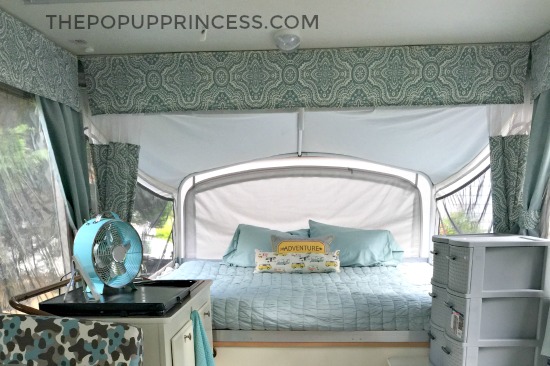
The valances were a little more difficult. There wasn’t a great way to salvage those clips easily like with the curtains, and I didn’t think I wanted a gathered valance. I decided to sew a straight valance, matching up the repeat of the fabric. Then I attached it to the channel of the previous tab curtains using Velcro that I found at JoAnn’s specifically for attaching fabric to solid objects. In order to get the cut-outs right around the ceiling, I just kind of pinned the valance as I went and sewed along the pins, little by little. It helped a lot that the camper was right in the driveway during this whole project. I think if I’d just taken the curtains down and marked them somehow, I would not have had the same success.
I gave the stove cover a coat of high-heat spray paint to spiff it up, but I left the dinette table alone. It was already in great shape and the color coordinated with the new decor. To finish off the makeover, I sewed a couple of fun accent pillows for the beds and sofa from a fun camper print fabric and found “Adventure” pillows at Home Goods. They just HAD to come home with me! 😉 I’m in love with how it turned out, and we certainly have enjoyed our little home away from home.
Wow! How gorgeous is this makeover? I love that it is glamorous without being over-the-top girly. It makes a perfect retreat for the whole family, doesn’t it? Thanks so much for sharing, Debbie. I hope you and your boys have some amazing adventures.
Disclaimer: This post contains Amazon affiliate links. The Pop Up Princess is a participant in the Amazon Services LLC Associates Program, an affiliate advertising program designed to provide a means for sites to earn advertising fees by advertising and linking to Amazon.com. This means that if you choose to purchase an item from a link in this post, The Pop Up Princess earns a small advertising fee to help pay for future projects and posts… so thank you! 🙂
Happy Camping!




Super cute! Thanks for the explanation on how you did your curtains!
You’re welcome! 🙂
I love it! I particularly like how you did the valances. I hope to have my own pop-up one day. I love the ideas I keep getting from the Pop-Up Princess.
Inspired me to new valances and cushions, maybe paint.
❤️! did you put the planks over the existing vinyl? How did you work around the slide out clearance?
Second the question from Michelle about navigating slide out. The swinger kitchen seems like it’s not going to get along with the planks. I haven’t done the floor yet, but envision removing enough off bottom to not create issues with floor.
Have you been able to try the slide out to see how the clearance is with the new flooring? My slide out is so close to the floor, I’m afraid I’ll have to totally remove the existing laminate. 🙁
this is a really nice reno.
Genius on the curtains….just sewing the old strip onto new material vs. salvaging the clips.