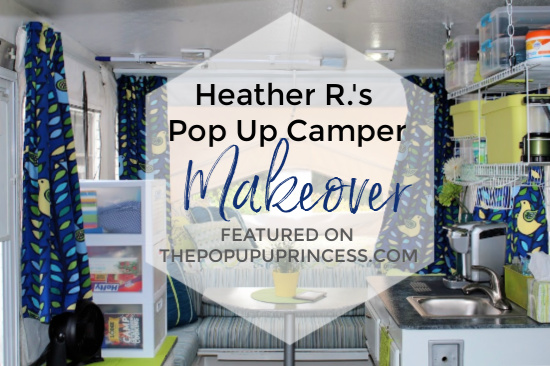
 We’ve been working our tails off on the Rockwood camper, so I thought I’d revisit one of my favorite reader features. This makeover is absolutely awesome. I featured it back in 2016, but it is such a cute little glamper, that I had to share it again. Heather and her husband, Joe, were not handy people and had never tackled a project as big as a camper remodel before, so they were a bit out of their element. That didn’t stop them, though. They used Internet tutorials and enlisted the help of Joe’s sister, Melissa, to help them create the glamper of their dreams.
Growing up, Heather had camped a few times with family and friends. She spent her college summers in the 90’s working at the camp office at Hickory Run State Park in Pennsylvania, and she always longed to have a camper of her own someday. As adults, she and her husband Joe started out camping with a tent. They took it out a few times, but it wasn’t very comfortable, and they didn’t enjoy sleeping on air mattresses or cots. A pop up camper seemed like the next logical step for them, so they started looking for one of their own.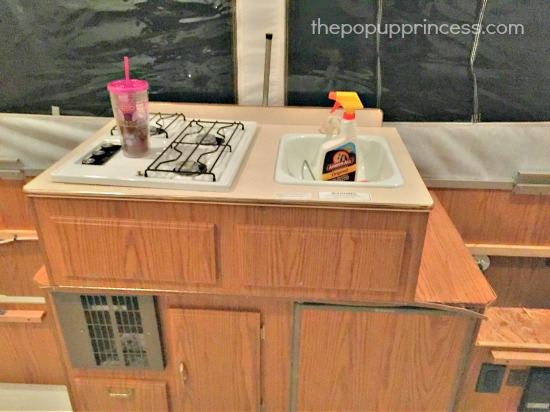 They got a great deal on a used 2003 Rockwood Freedom model 1980 from one of Joe’s friends at the end of the summer. Overall, it was in average shape, but it needed a good scrubbing and a few cosmetic repairs to the cabinets and table. It sat in their driveway through the winter, and once spring rolled around, they began to discuss the repairs they needed to do. They started out thinking they’d clean it, change out some of the molding that was coming off, and be good to go. The first time they popped it up on their own, they learned a valuable lesson. They forgot to put down the stabilizer jacks, and it tipped like a seesaw! Luckily, no harm was done to them or the camper, and they laughed hysterically while they cleaned up the mop water. 😆 (For more info on leveling and stabilizing your camper, be sure to check out our post here.)
After giving the PUP a good cleaning, Heather started looking for replacement t-molding online, but was quickly distracted by Pinterest, where she found all the awesome reader features on this website. That did it for Heather! She saw so many gorgeous remodels–from painted cabinets, to reupholstered cushions and curtains, and organization tips–that she lost a few hours of her life absorbing it all. She showed her husband what their drab pop up camper could become, and their simple plan was quickly replaced. From that point forward, it was referred to as the “glamper.” Knowing they weren’t the handiest people, they enlisted the help of Joe’s sister, Melissa, who is a jack-of-all-trades. She was happy to help them, but Heather doesn’t think she actually realized what she was getting herself into. 😉 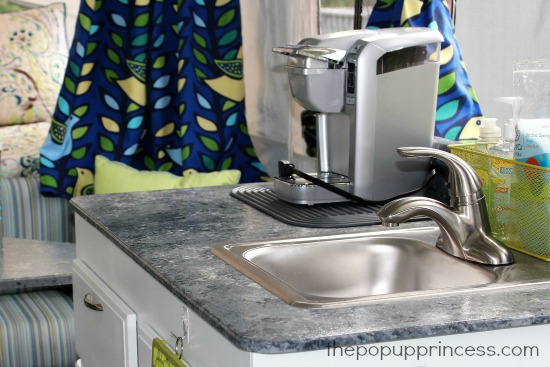 They decided that the sink area needed to be rebuilt, because some of it was damaged and the molding was missing. The table was also in bad shape, so those became their first two projects. When they were rebuilding the top half of the fold over galley, Heather realized that they would not cook inside the pop up, so they stove was wasted space. They removed the insert for the stovetop, which gave them added counter space. They ended up replacing the sink as well, because the one that came with the camper had a leak in it. Heather found a small stainless steel bar sink at Home Depot. It worked perfectly. For the tabletop, they used the top from an old desk that they were throwing out. They simply cut the top to the necessary shape and attached the leg from the original camper table. Kudos, Heather! What a great way to repurpose what you’ve already got!
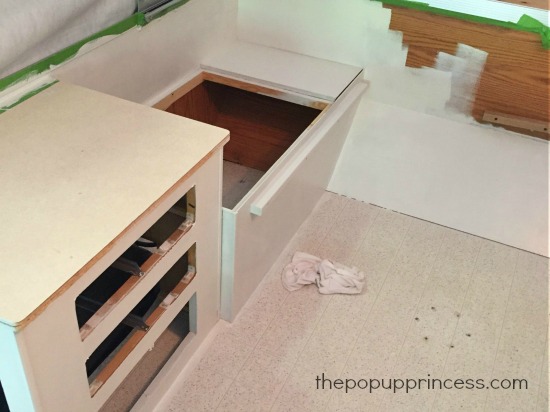 Next Heather painted the interior frame, countertop, cabinet frames, cabinet doors and drawers. She used Behr Marquee Interior Semi-Gloss Enamel in the color Looking Glass, and finished it with two coats of Minwax-23333-Polycrylic-Protective-Finish. On the countertops and tabletop, she used Giani Countertop Paint – Slate. She says the kit was very easy to use, and she was pleased with the results. To complete the cabinet facelift, they replaced the old rusty cabinet hardware and hinges with new stainless hardware.
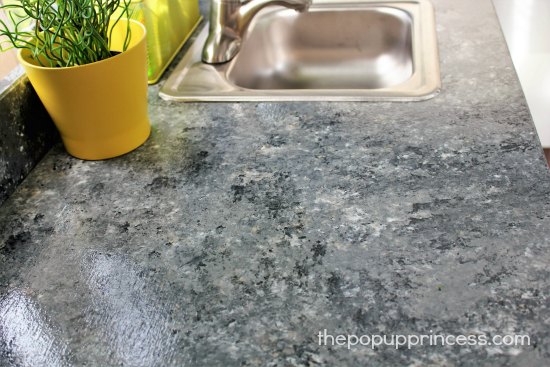 They painted the door of the fridge, outlet covers, and heater vent with a hammered stainless spray paint. Their daughter, Kyla, added her artwork to the front of the refrigerator. 🙂 The floor was the last piece of handiwork before they could move on to the camper decor. Heather and Joe chose a peel and stick plank vinyl from Ollie’s Bargain Outlet. They only needed one box, which cost them $15. Joe and Melissa tackled that project together.
 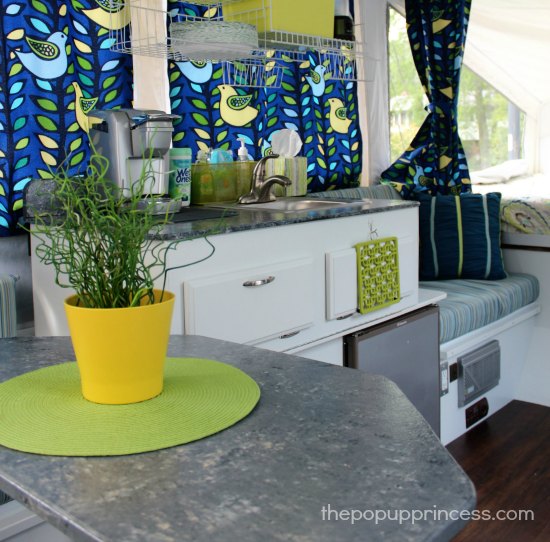 While the paint and carpentry work was in progess, Heather began planning the color palette. She found a retro partridge pattern from JoAnn Fabrics that she absolutely fell in love with on the spot. It was an outdoor upholstery fabric, and she admits it was not the cheapest, but she had to have it. JoAnn didn’t have nearly enough in stock for the cushions, which was Heather’s original plan, so she settled on that pattern for the curtains. (As a side note, this fabric is no longer available in blue, but you can find it in gray here.)
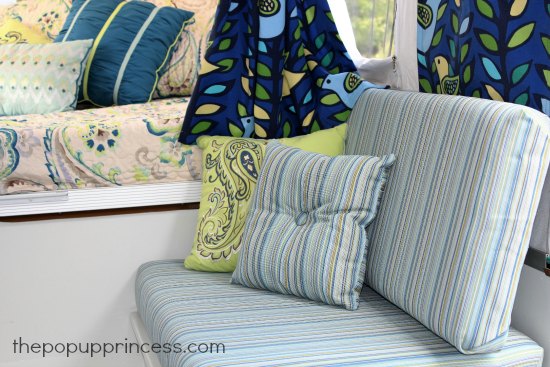 She found a coordinating striped pattern, also in the outdoor fabric section, that worked perfectly with the busy partridge fabric. Heather used the wrap and staple approach found here to recover her cushions. The existing cushions were in good shape. They just needed to be recovered. She added a thin sheet of luan plywood to the backs of the cushions, wrapped them up, and stapled away. The corner cushions from the dinette proved too much of a challenge for Heather, so she sent them to the local seamstress to tackle. The seamstress even made Heather a little pillow with the leftover fabric!
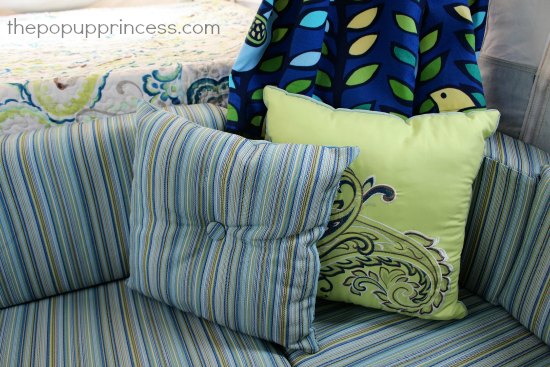 Since they have two kids and two dogs camping with them, Heather and Joe decided to treat the cushions with Scotchguard Upholstery Protector Spray. They used about eight cans to give each of the cushions two coats. To make sure she had adequate ventilation, Heather sprayed them outdoors. A little bonus was that they dried quickly in the sun.
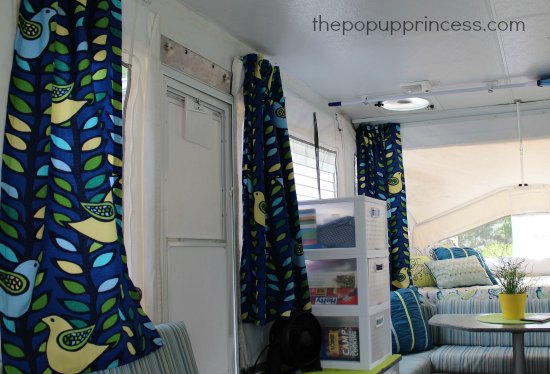
The curtains were Heather’s next project. She decided to skip the valances and just hang panels. The original curtains in the pop up camper were dark evergreen. They looked like they had bleach spots on them, so when Melissa threw out the valances, the curtain panels went, too. While she technically owned a sewing machine, she had tried and failed with it a decade ago. She was reluctant to try again, so Melissa came to the rescue once more. Melissa helped Heather get the sewing machine working, and she’s happy to say that she successfully made all the curtains from start to finish completely on her own.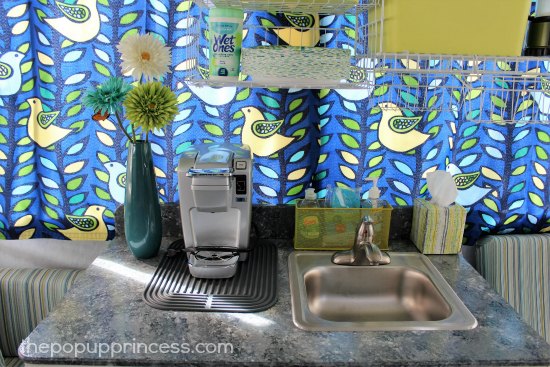 Heather used this tutorial to help her with the curtains. She purchased several white twin flat sheets from Walmart for $4.88 per sheet to use as blackout lining, because that cute fabric had already put a sizable dent in her budget. She used the original clips from the old curtains, cutting them off and sewing them onto the new panels. That way she could easily reattach them to the track.
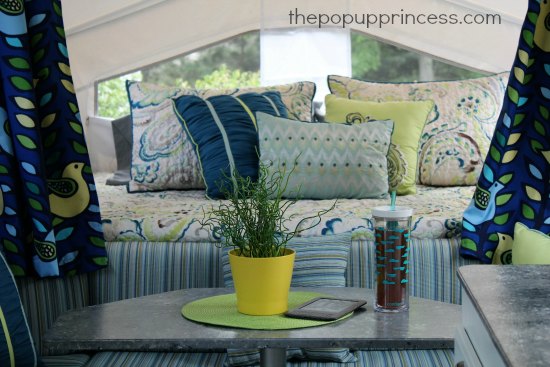 The existing heated mattresses were thin and smelled like mildew, so Heather decided to replace them with something thicker. She was looking to add a bit more comfort to the beds and didn’t mind doing without the heat. Overstock.com carries 6” thick memory foam short queen and short full size RV mattresses that were the perfect size for her bunkends. Under each mattress, Heather and Joe laid down interlocking gym mats that she purchased on Amazon. She found the coordinating bedding on Amazon as well. Heather loved that the throw pillows that came with the set matched her decor perfectly. (For tips on making your pop up camper beds more comfortable, be sure to check out our post here.)
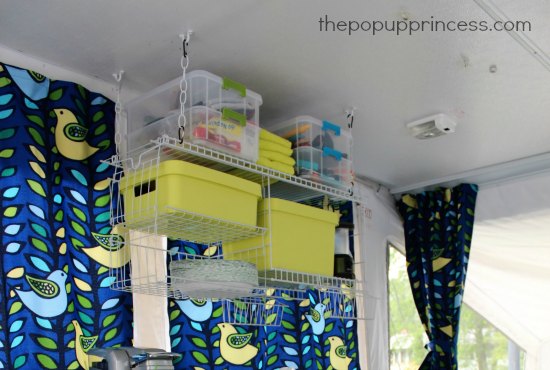 Heather discovered so many ideas for storage and organization on Pinterest. Their camper had the pantry hooks installed over the sink, but they were missing the actual pantry. Heather decided to make her own version to replace it. She had some leftover closet shelving, and she bought a few more hanging baskets to put together the hanging shelving over the sink. The green boxes came from Target. She also has a three drawer plastic dresser for additional storage. Clips on the ceiling hold their broom, which is invaluable for keeping the camper tidy.
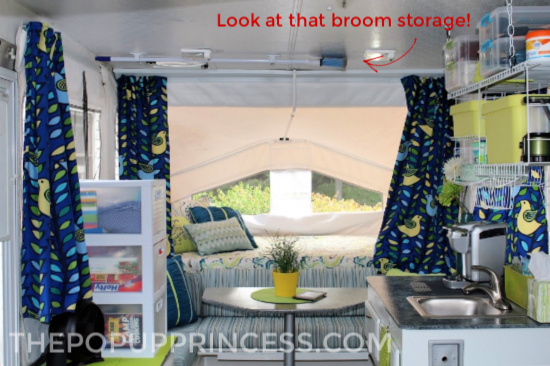 Heather and Joe spent many days and nights (and many cases of grapefruit shandy beer) bringing their pop up camper to life and couldn’t be happier with how it turned out. They took it out three times in the first summer, but first took two weekend visits to a local family campgrounds. They were sure they’d have to call Aunt Melissa to the rescue at least one more time. Turns out she’s also a whiz at leveling campers and starting fires. 😀
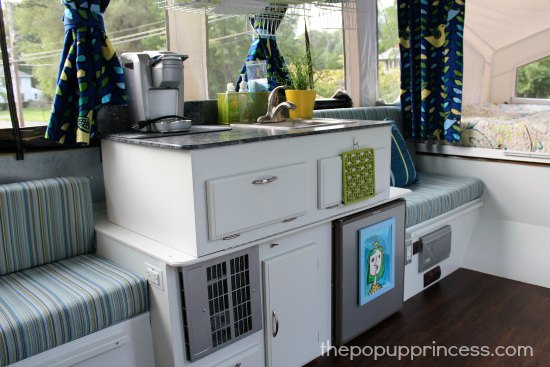
Once they got their feet wet, Heather and Joe felt comfortable enough to take a 10-hour jaunt to western Ohio (minus Aunt Melissa) for a long weekend with relatives. Each trip, they were faced with at least one day of rain and were grateful to be inside of the glamper instead of a tent. Now that they have the kinks worked out, they are so looking forward to more camping adventures. How gorgeous is that makeover? Nice work, Heather and Joe. I’m loving all your storage solutions… and I’m pretty sure we all need an Aunt Melissa, too. 😉 Here’s to many more fun family camping trips. Thanks so much for sharing your journey with us.
Disclaimer: This post contains Amazon affiliate links. The Pop Up Princess is a participant in the Amazon Services LLC Associates Program, an affiliate advertising program designed to provide a means for sites to earn advertising fees by advertising and linking to Amazon.com. This means that if you choose to purchase an item from a link in this post, The Pop Up Princess earns a small advertising fee to help pay for future projects and posts… so thank you! 🙂
Happy Camping!


Can I please have Melissa’s contact information, my man can’t tell the difference between a hammer or pliers!😂😂😂Girl Power!!!!
Wow. This is an incredible makeover. It is hard to believe that this is a pop-up camper!! Thanks for sharing.
this is awesome! have you slept on the box and how comfortable are they? is the foam that you purchased much heavier than the original? Great job!
yes the memory foam mattresses are heavier and incredibly comfortable!
How fun!! I really like the partrage fabric! It’s just the right amount of color. Great job!
Heather, I LOVE it! What a fantastic job you did! I just started tearing everything apart Saturday and cannot wait for this weekend to continue. I love the added broom hanging from the roof! What type of hooks did you use, Command? Thank you as well for the links to supplies used; I have a running list on Amazon where I just link and add the item to my shopping cart. This way, I know what I want without having to figure out which remodel I saw the item in and try to re-find it!
Thank you Larissa for this amazing site and thank you Heather! Awesome!!
Yes, I bought the command hook at target, but also on Amazon
https://www.amazon.com/Command-Broom-Gripper-2-Grippers-17007-HW2ES/dp/B01G1Y42H0/ref=sr_1_1?ie=UTF8&qid=1478114136&sr=8-1&keywords=command+broom+%26+mop+gripper
Thanks for the feature, Larissa! We couldn’t have done it without your blog for inspiration.
Love! Love! Love! I’m so glad there was a 17 minute rain delay during the World Series so I could read all about your amazing makeover! You choice of colors and fabric is sharp and very fun! I also appreciate your links. It will make shopping so much easier! Have fun camping in your wonderful pop-up!
This is amazing. I can’t believe a pop up could look that good. And we all wish we had husbands we could do projects with.
Awesome redo. Can you tell me what the partrage fabric is called? I LOVE IT!😀
Outdoor Fabric-Kas Osanna Lapis
sold at Joann fabrics
I love it! I wish mine was already JUST LIKE THIS! unfortunately, i’m just starting. I just wondered how your countertop and cabinet paint are holding up?
It held up great for the 2 summers we’ve used it since the remodel
We also have a Rockwood Freedom 1980 and it’s such a great little camper. Although I’ve recovered all the cushions and made all new curtains, I haven’t painted the cabinets yet. Seeing yours really makes me want to do that this spring!
My question is about your swing galley kitchen; our hinges broke last season and I’m looking at other options. Did you install a piano hinge on the front of yours? How is that working out for you? We are considering building a new box with feet that stays put by resting in four holes that we drill in the base cabinet.
Thanks for sharing your remodel!
Yes we bought a new piano hinge at Lowe’s. The entire galley was rebuilt with oak I believe so that the new hinge would attach since the holes from the old one were quite worn.
I love your popup. I have a question on the curtains. Did you use the same bird fabric on both the bunk end curtains and the privacy curtains?
Yes I used it for all of the panels
Hi Heather,
I love how you stored your broom! The whole makeover is awesome – that fabric!!!!!!!!
Question – I saw a couple “before” spots with exposed particle board edges – the middle level of the galley, and the little cabinet with drawers opposite the galley. How did you seal those edges before painting them?
Thanks!
Caroline
We used this putty called bonding
http://www.walmart.com/ip/3M-Bondo-Body-Filler-Stage-3/17130346
Hello!
I am about to start my remodel. I have the same camper as you! I was wondering how you put the flooring in. Did you lay the flooring and then re-screw the base of your table in a spot that you felt was close enough? Or did you cut the flooring around the base? Did you just loosen it and tuck the flooring? I am having help with that part but wanted to know your opinion. Thank you!!
The base was bolted to the floor to the underside of the pop up. We removed the bolts and the base before we did the floor. Once floor was done, He crawled under the pup and used an awl to poke holes up through the existing holes so we knew where to rebolt the table.
This was well worth reposting! I appreciate the way Heather has kindly continued to answer questions posed since this originally “aired.” 😉
love it you did a awesome job on your pup