


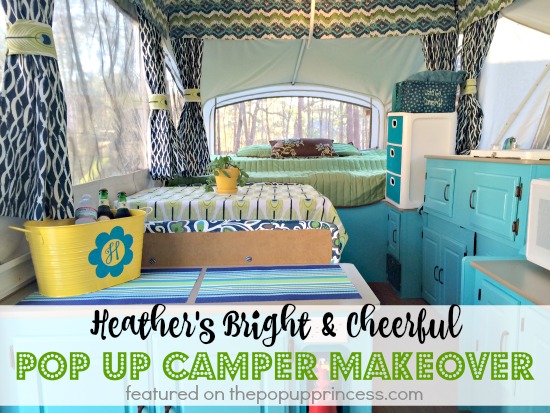
You can definitely tell it is springtime! So many readers are pulling out their campers and getting them ready for the camping season. I’ve been bombarded with questions and cute makeover pictures, and the sense of excitement is almost palpable. I’m right there with ya! We’re all ready to get out there and camp! The colors I’m seeing in camper makeovers lately are so fun and bright, too… like this awesome remodel from reader, Heather. As soon as I saw those beautiful, spring colors, I knew I had to share this one with you guys–and Heather’s story is especially inspiring because she did most of the remodel all on her own. She’s proof that you don’t need a Mr. TypeTwoFun around to get the job done! Here’s Heather to tell you all about her pop up camper journey. 🙂
Heather’s Pop Up Camper Makeover
Let me introduce you to our 2004 Fleetwood pop up camper, “Grace.” Grace was in great shape when we bought her from a co-worker a couple of years ago. We enjoyed many fun family trips, however, once I discovered Larissa’s posts on Pinterest and then her blog, I began scheming and dreaming of a makeover! I followed so much of her advice and the information shared by other folks on the Pop Up Princess blog–all that information was a great blueprint for me, because I have never before done anything like this. I was determined to do as much of it on my own as I could, as my husband is a knife maker and was busy with his own projects.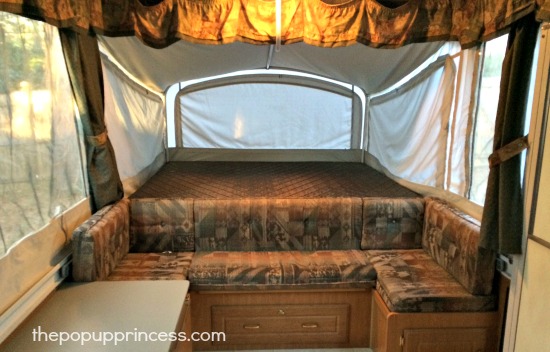
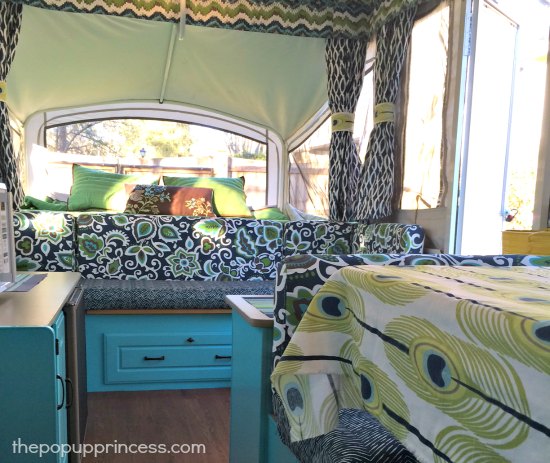
I took Larissa’s advice and found the fabric for the cushions and drapery first. We knew we wanted turquoise cabinets, so I looked for fabrics that would coordinate. I loved the idea of mixing fabrics and patterns, so I went for it! My original color palette included more oranges and pinks, but my husband and son reminded me it was a family camper so I changed my direction. I found these coordinating fabrics at Fabric.com. They were around $8 a yard, so this was the most expensive part of the project, but makes the biggest statement.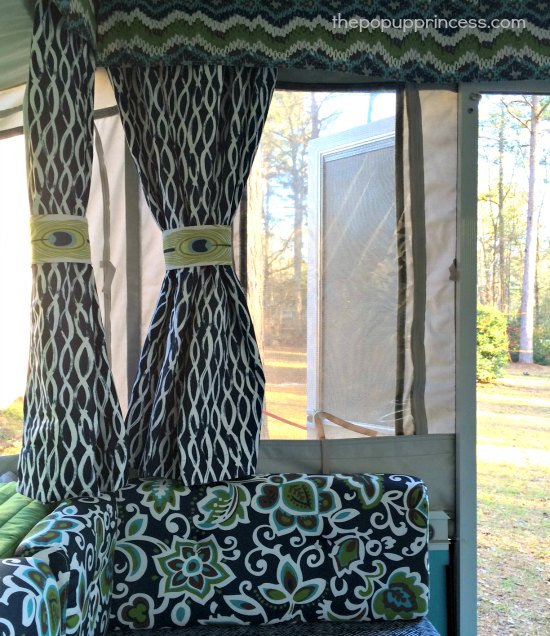
The cushions and valance fabric are indoor/outdoor fabric and seem sturdy and durable. The panel tie backs and table cover are cotton, but they really add excitement, so I had to have them. Fortunately for me, my mom can sew, so she sewed the valance and the tie backs for me. I used this idea for the glide tape–what a life saver, because I could not figure out how to get the new valance to stay on the track! I had a small town professional upholstery man attach the glide tape after my mom completed the valances. This worked like a charm and went on soooo easily! This same professional did all my seat back cushions, as some of them did not have the plywood backing. He was extremely reasonable and did a super job! I upholstered the bottom cushions myself, using the “present method” (or wrap and staple method) I had read about online. I enlisted my husbands help and strong hands for the stapling and holding the fabric tight. It was definitely a two person job!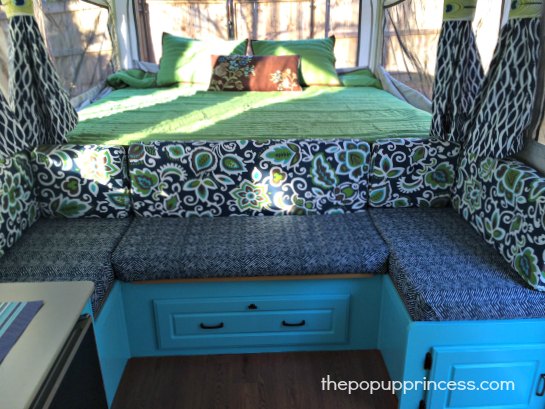
I lucked out on the blackout panels, which I got at Target for $9 a piece. The navy and white combination was perfect with my new fabric. I was able to cut one panel in half to make two panels, so I only needed five total. They were the perfect length to cover my windows and provide privacy for the beds without dragging or getting in the way. After cutting the panels, I hot glued Velcro squares to the top rough cut edge, knowing that the valance would cover it so it would not be seen. After seeing how much new c-clips cost, I knew they were not in the budget, so I reused the clips that were on the panel track from the original panels. I used hot glue to attach Velcro squares to the c-clips, which matched up with the ones I had put on the panels. I use a lot of Velcro at my job as a speech therapist, so I followed my rule “soft on the surface, rough-remove” so that I would be consistent in which Velcro went where! So far the hot glue is holding up pretty well to the stress of opening and closing the camper. I have had to re-do a couple after lowering the camper, but it’s not a big deal, and I keep a glue gun in the camper just in case. 😉
When I painted the cabinets, I removed the hardware and cabinet doors, labeling each one and bagging the pieces as had been suggested. This was very helpful to get everything back in the right spot. I cleaned the cabinets with the TSP cleaner Larissa had recommended, but decided not to sand, as the paper veneer was so thin. I could not remove the cabinets, so I painted them in place after removing the doors. I used a tinted Kilz premium primer and good quality Behr paint in the color Rushing Stream. My 8-year-old daughter was a big help on this part, removing hardware, and helping paint. She was very careful and neat! Often my painting was at night, after work, so I would be painting by lantern, which meant several touch up jobs the next day. Lesson learned. 😀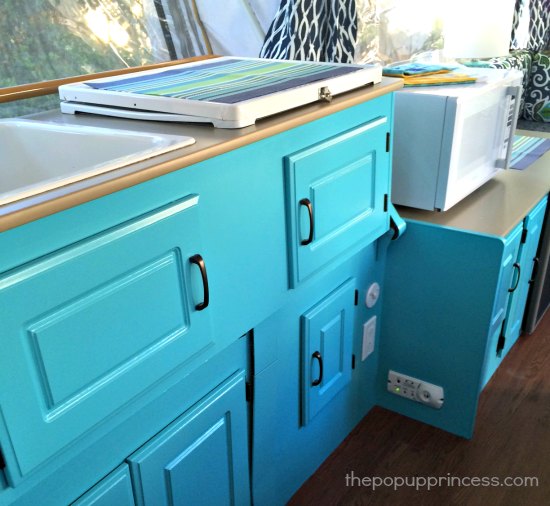
Originally, I was going to replace the dated gold hardware on the cabinets, but I found that the new hardware I purchased was a fraction of an inch off. I really wanted to do this project on my own, without my husband’s help to drill new holes, so I spray painted the old hardware with Rustoleum Rubbed Bronze, and it looked brand new! I also used Larissa’s idea for chalkboard paint on the fridge door and it turned out very cute. To touch up the gold screws, I sprayed some paint in a paper bowl, and dabbed it on the screw heads after they were back in place.
Next came the flooring. This was the part I was most nervous about doing myself, however, I am thrilled with how it turned out. It’s not perfect, but pretty awesome if I do say so myself! 😀 I used peel-and-stick vinyl planks that I bought at Lowe’s. I only needed one box and have a few planks leftover. The cost was about $45. I arranged the planks before peeling them, to make sure that the lines looked natural and more like a real wood floor. My kitchen shears worked much better for cutting than a utility knife, so I stuck with that. True to camper fashion, nothing in the camper is square, so that meant a LOT of cutting and piecing. To fill in the gaps where some pieces didn’t exactly match up, I painstakingly put dark colored wood filler in the joints with my pinkie finger and let it dry. It blends so well with the wood, that you don’t even see or notice it. The flooring took me the better half of one day to install, and several hours the next day to fill in with the wood filler, but I love the results!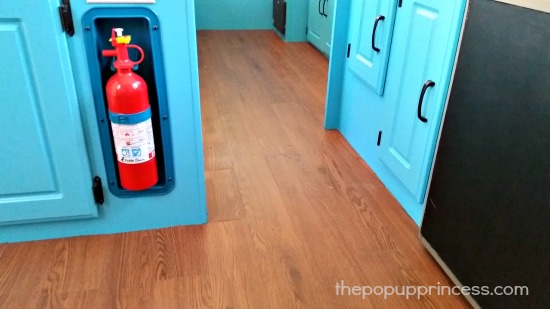
Last was the accessorizing, and I love to accessorize! I found the bedding sets on clearance at Target for $11 each, and they were the exact green that was in the seat back cushion fabric and tie backs. I also found a turquoise mini Keurig, the lamp, and the “Happy Place” picture at Target as well–all on clearance!!!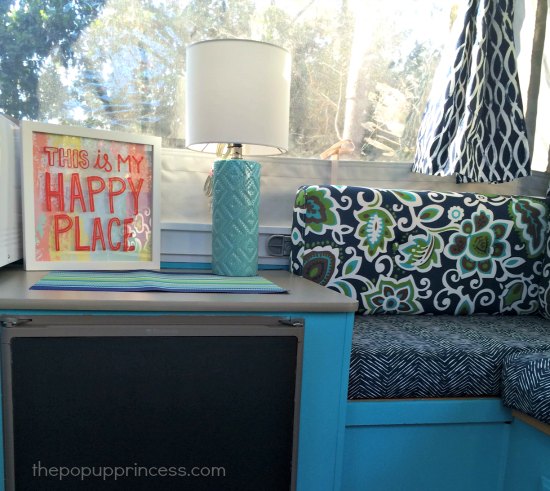
What a fun and exciting project this was! For spring break, we are taking a 5-night family campout. I am so excited to be staying in our newly remodeled Grace.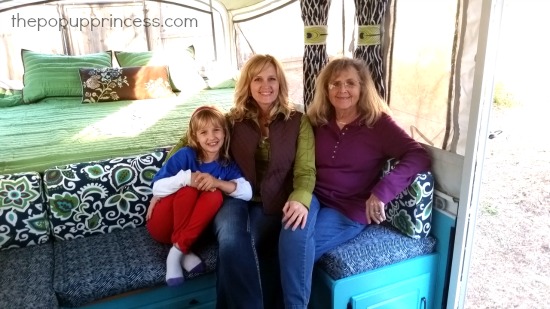
Thank you again for the inspiration, the information, and the confidence that I could do it all myself! –Heather
Thank you so much for sharing your story with us, Heather. You inspire me! Let’s take another look at those before and after shots, because they are really unbelievable!
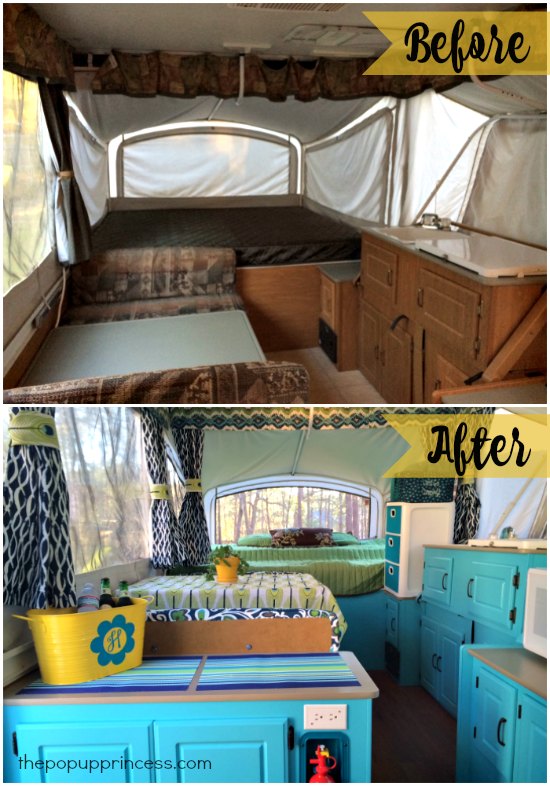
Wow, right? Just in time for spring, too. Nice job, Heather!
Have you been working on refreshing your pop up camper? Would you like to be featured here on The Pop Up Princess? Check out our guidelines for submitting your remodel. Hint: Make sure to take lots of good, high quality pictures! 😉
Disclaimer: This post contains Amazon affiliate links. The Pop Up Princess is a participant in the Amazon Services LLC Associates Program, an affiliate advertising program designed to provide a means for sites to earn advertising fees by advertising and linking to Amazon.com. This means that if you choose to purchase an item from a link in this post, The Pop Up Princess earns a small advertising fee to help pay for future projects and posts… so thank you! 🙂
Happy Camping!

Looks killer! Someday we’ll do the same and spruce up our ole skool Palomino pup from it’s dark wood, beige vinyl, and gorgeous brown tweed 🙂 is what it is for now tho!
Which Behr paint did you use…? We are waffling between spray paint and primer/brush on.
I thought I answered before…sorry! I used a roller and brush combo. A brush for getting in recessed doors and cutting in, and roller for the rest so brush strokes wouldn’t show.
Simply gorgeous!
Thanks!!
Great job! I love it!! Please tell me where you got the table cloth!! I NEED it for my pop up!!!
The table cloth is leftover fabric from the tie backs. I cover it with a clear vinyl tablecloth from Walmart so we can enjoy it but keep it clean! I got it from Fabric.com
As the “husband” mentioned above, I can personally attest to what an amazing job Heather did. It was all the more of an accomplishment as she did it all without my invaluable interference! So proud of my Heather!
You should be proud, Dan! Heather is amazing. 😀
Thanks!!!!
Just seeing this!! Thanks!
I love this, you did such a wonderful makeover Heather!
Thank you! So much fun!
Bravo, you accomplished a lot!!!!!
Thank you!!!
Love this! Your camper looks awesome! I am getting ready to recover my cushions, how much fabric did you use on the seating?
I don’t know where my measurements are now, but if I remember correctly, it was 1 yard and 1/2 for each seat cushion bottom. I didn’t go all the way around, but used the present method and left the original fabric showing on the underside.
The blue cabinets are amazing! Such a bold statement & it totally works!
My husband and I really wanted to revamp our pop up. We want to paint the cabinets but are worried it might peel, since the cabinets are made if that cheap/fake wood. Do you have any issues with that?
Preparation is definitely key here, Amy. You can read all about painting your camper cabinets here.
PAINTING YOUR POP UP CAMPER CABINETS
LOVE!! Did you remove the original flooring first?
I LOVE how your camper turned up! I do have 1 quick question, how did you get the T molding to match your cabinet color? I’ve read that those don’t hold paint well, were you able to find new molding to match, or did you paint it and just hope for the best?