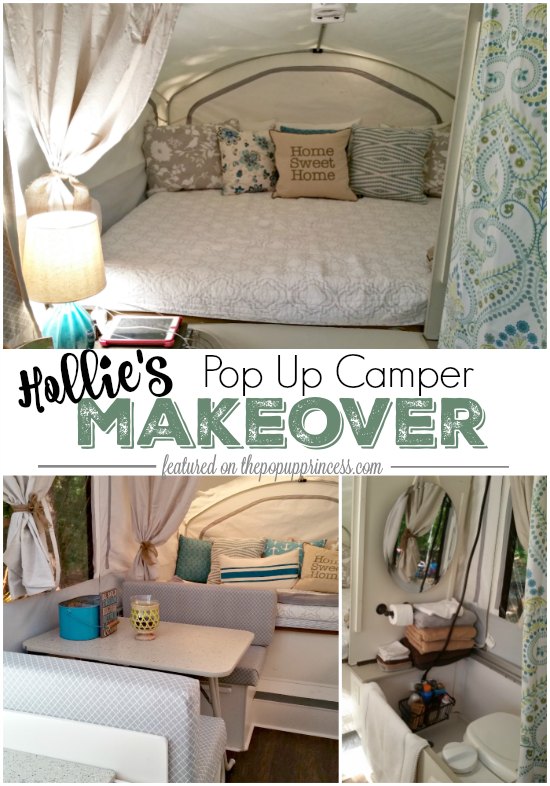
 I really love this next pop up camper remodel. Maybe it is because the colors are so similar to mine, but Hollie’s makeover really speaks to me. And what I think it is saying is that I need another camper… 😉
If you are loving Hollie’s remodel as much as I am, I know you are going to want all the details. See? I get ya! We’re on the same page here. I knew you’d want to hear more, so here’s Hollie to tell you all about her “new” little pop up camper…
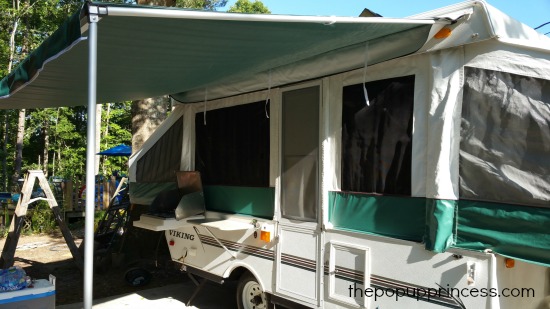
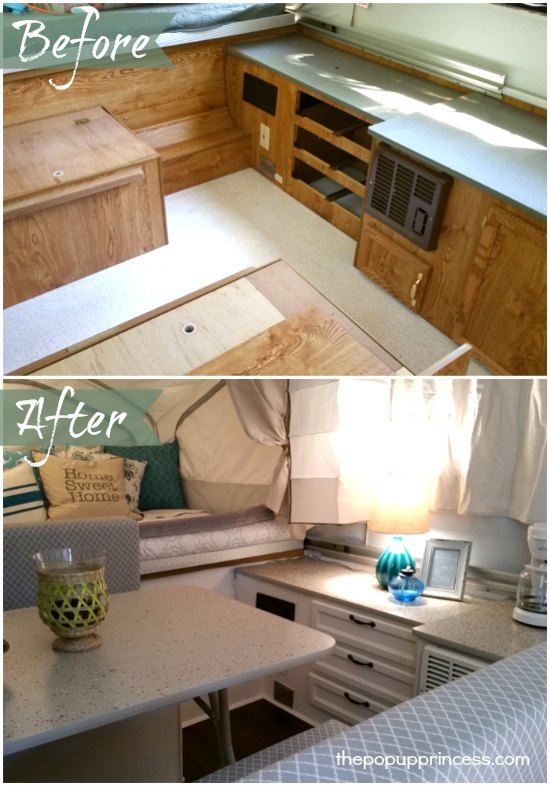
Last April, I bought a 2001 Viking Pop-Up Camper with the intentions of “glamping” it up. I wasn’t sure what I wanted the end product to look like, but as you can see, I started with the original oak cabinets, a plain laminate floor, and bluish-gray countertops. Blech! 😛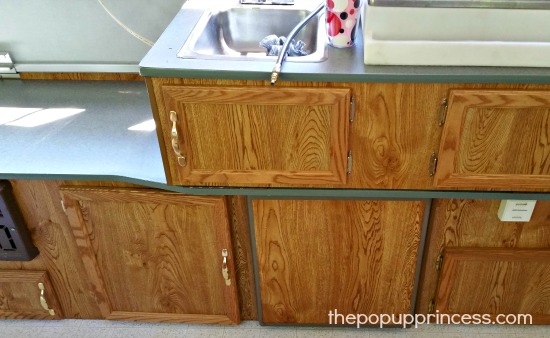
It didn’t take long for the ideas to start coming together, and Pinterest gave me quite a bit of inspiration! With a little help from family, I started my makeover by repainting the cabinets. We gave the cabinets, doors, and drawers a good coat of primer, and then painted 2 coats of Behr Primer & Paint. I can’t remember the name of the color, but in person it is an off-white/creamy color.
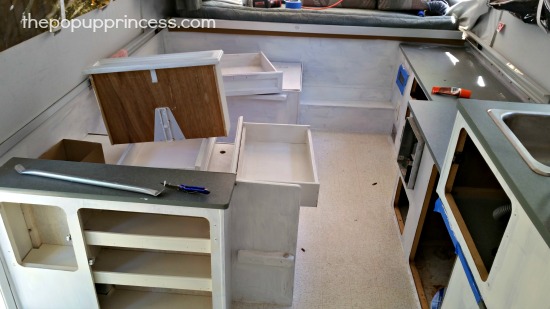 It seemed like it took days to finish all the painting, but in reality, by spending a few hours here and there working on the camper while it was parked in the driveway, I think we finished the cabinets in 3 or 4 nights. Then it was time to work on the countertops. I had never used this process before, so I was a little nervous, but I LOVE the way it turned out! We lightly sanded the countertops, and then painted them with a coat of primer. As you can see from the picture, we used Rustoleum Countertop paint, with Behr Decorative Paint Flakes–the kind that you would use to put on a garage floor–and a Minwax Polycrylic Sealer to finish it.
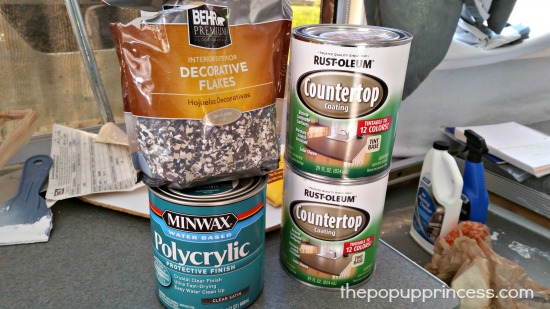 The countertop paint is an enamel, and it dries really fast. Because of this, we worked in small sections, with LOTS of ventilation (it has a very strong odor as well). It only took one good coat of paint, and then we pretty much had a confetti party with the paint flakes. To add more dimension, I crumbled some of them up in a Ziploc bag to make smaller flakes and mixed them back in the original bag with the larger flakes. While the countertop was still wet, we would grab a handful of chips and toss them up in the air or just sprinkle them on the countertop. Voila! We let the countertops dry completely and then topped them with a coat of the sealer. It is not as smooth as real granite, but this is a camper so it doesn’t have to be perfect, and it has held up with 2 kids. Did I mention that I LOVE the way they look?? 😀
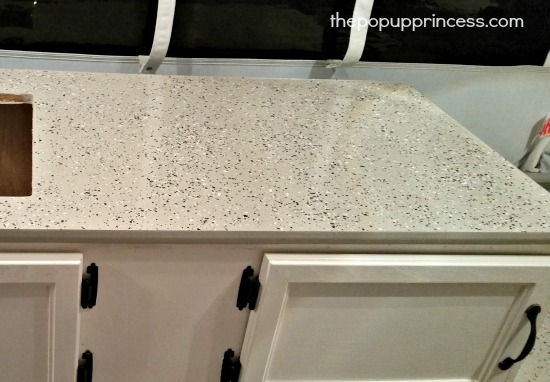 We also bought all new hardware for the cabinets and drawers. Some of the original hinges were no longer working properly, so we bought hinges that would help the doors close easily. We also bought the pretty rubbed oil bronze handles from Home Depot. Once we got all of the doors, drawers, cabinets, and countertops finished, it was really coming together! The next major overhaul was the floors.
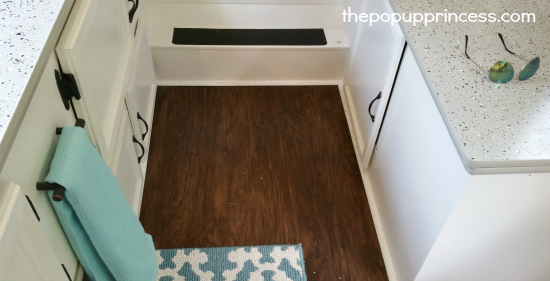
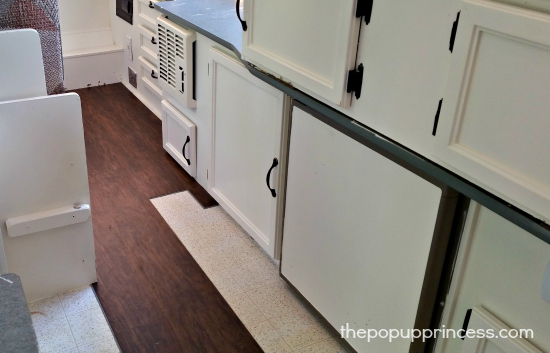 We bought some really nice floating floors from Home Depot. They were plank vinyl, so we knew we could cut the pieces easily with a utility knife. The install was pretty simple as well–just time consuming. We finished it by adding shoe molding all the way around the cabinets. We painted the steps leading up to the bunkends, and they kept getting scuffed up, so I knew we had to do something that would better protect them from normal wear and tear. I bought gray stair tread from Amazon and adhered it to each step. It made a huge difference.
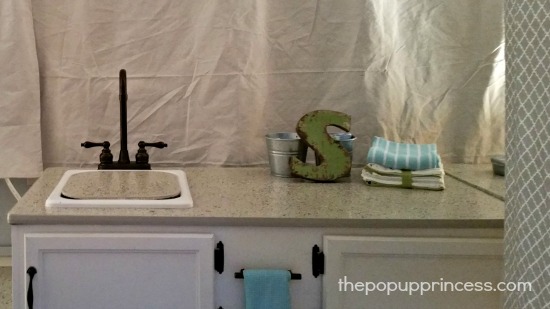
 I started working my way up the list of projects. To clean the windows, I bought a cleaning solution that I found on Pinterest and gave the vinyl a thorough cleaning. (You can find that process here.) I also found a new sink and faucet on Amazon, and installed those as well.
 Then there is one of my favorite parts…the bathroom!!! I haven’t seen too many pop-ups that have a “bathroom.” Ours has a toilet and shower, and as you can see, I hung a mirror, changed out the shower head, and installed a toilet paper holder. The mirror is easily removable for when we pack the camper up. I also added a cute wire basket to hold all of our shampoo, body wash, etc. while we camp.
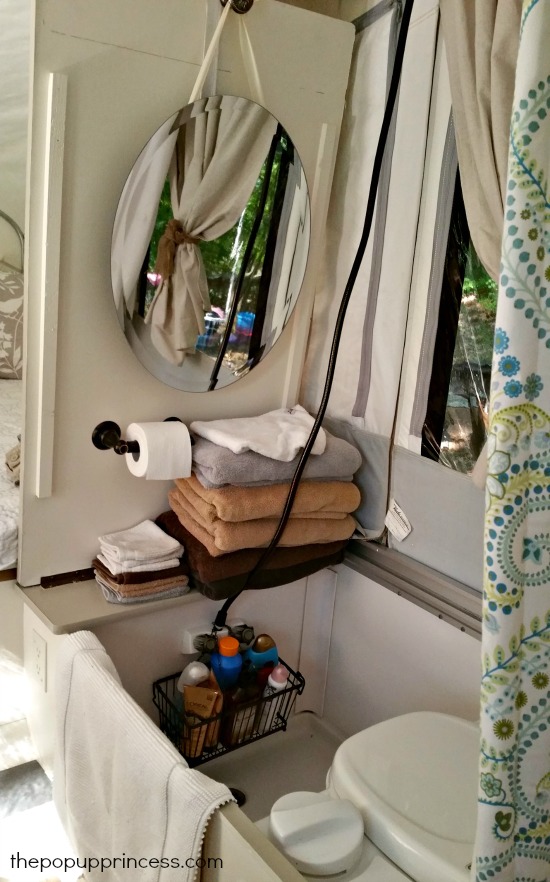 Lastly, I broke out the sewing machine I hadn’t used in almost 10 years. I bought 3 or 4 canvas drop cloths from Home Depot and some pretty gray fabric from a fabric store. I sewed new curtains for everything and used the original hooks and some Velcro to install them. Then I tied them with burlap.
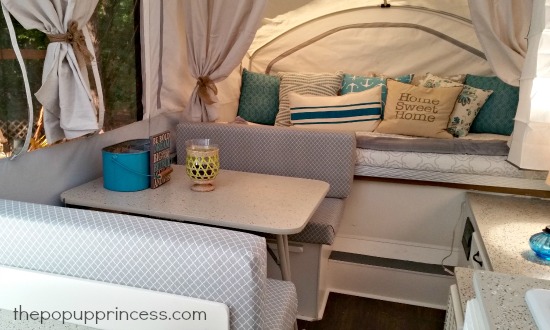 Then I used the pretty gray fabric to redo the cushions that go with the dining table. I bought two matching shower curtains from TJ Maxx and used one as a shower curtain and the other as fabric for a new valance.
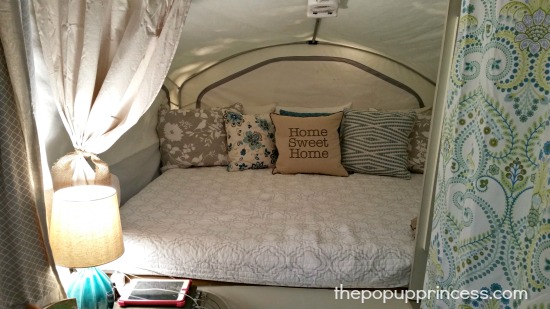 Then it was time to decorate!!! I went to TJ Maxx for most of the items you see… lamps, rugs, bedding, pillows, decorative accents. I bought a small white coffee maker and toaster oven from Walmart that stay in the camper. Believe it or not, everything fits in the camper when it is packed up! I use two big totes to hold all the bedding and linens, and then everything else gets packed into the storage under the bench seats and on the shower floor.
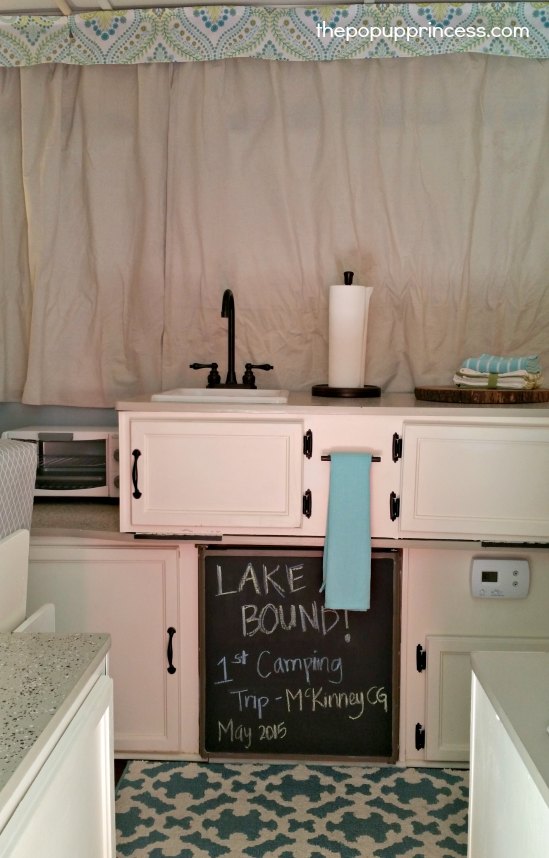 We bought a new awning to go on the outside, and one day I want to buy a new canvas top for the PUP, too. The top of the bunkend canvas had some small tears and holes in it when we bought it, but we put temporary patches on them until we can make the investment on a new canvas top. When people walk into the camper, the last thing they look at it is the roof–if they pay attention to it at all–so as long as it holds up in the rain, I’m okay with the patches for now. It was a lot of work, it took a lot of time, but I love my “new” pop up camper!!!! 😀
Gorgeous, right? Let’s take another look at that before & after comparison. I cannot even believe what a difference some paint and fabric can make. Beautiful job, Hollie. Thanks for allowing me to show off your remodel. 🙂
Keep those camper makeovers coming. I love seeing your ingenuity and hard work. You guys are really amazing!
Happy Camping!


That is one of my favorites I have seen on here! The colors are so soothing. Great job!!
Looks wonderful!! I’m in the process of remodeling my own popup and have been struggling with what to do with the countertops myself. I’m wondering if anyone knows with the paint chips if you have to sand them down after they dry before you apply the top clear top coat? I have debated using the Giani Faux Granite Paint but have read mixed reviews.
We used the faux granite kit and it looks AMAZING….I would recommend it if you are artistic and have time to add the hand psinted “viens” to it. We did all our counter tops in the camorr and the table, and I spent about 8 hours. I can’t emphasize how gorgeous it is though. Makes an incredible difference and everyone thinks its real granite. All you need is one kit. Good luck!
I can’t wait to see pictures, Jenn! 😉
Please post pictures. I would love to see!
I have used the Gianni Countertop paint in my home. We are on year 5. The key to lasting paint is prep, prep, prep and patience! We love our countertops!
There are so many ways to redo a counter top on youtube. I saw one woman who painted who bathroom vanity in a white marble look. Was beautiful and at the fraction of the cost. I am thiking, just got my camper, but thinking I will watch more vis and do the painting etc then invest in exoxy. Its so tough and cost is similar to the rustolium kits.
I love what you did with the counters! I am going to try it tomorrow!!!!
This is one of my favorites!! I agree that the color palette is very soothing. Hopefully our pop up camper will have a similar feel when we are finished.
Love this! Looks so comfy and cozy!
This is great! Do you use the shower? If yes, do you have to remove the mirror, etc.
Dreamy!!! Love!!!
Love it! I am in the process of remodeling our 1995 Jayco king 6, and are doing the same thing with our countertops, paint, Behr Flakes and Poly for a top coat. I’m a HUGE Star Wars fan, (not fanboy uber-geek, mind you), so we are doing ours in a star wars empire theme, with greys, whites and black. Anyway… I am planning on just using a good hi-gloss enamel for the counters instead of the countertop restoration (WAY less expensive) and am wondering if I should use a polyurethane topcoat or a polycrylic. Any suggestions? Does one hold up better than the other?
Here is a great article that may answer your questions, Michael. In my personal experience, polyurethane tends to yellow over time. This is especially noticeable over light colored paint or stain. If you are staining, you may not notice it as much, as the wood tones may camouflage it. Hearing that, you may think the polycrylic is the better choice, but I’d first think long and hard about the wear your countertops will receive. When we refinished our dining room table, we used polycrylic for the top coat. It didn’t hold up very well to heat and repeated wiping with a wet rag. We had to reseal with a polyurethane and have had no problems since. I’d say that if your paint color is dark enough that you won’t notice a bit of yellowing, use polyurethane. It’ll be much more durable. If you have to go with polycrylic, it is still a good choice, you’ll just have to be more careful about heat and water. 🙂
Your remodel looks really nice! I am wondering how that tall faucet for the sink works though. How does it fold down?
Not sure how Hollie packs hers away, but when we fold up our camper, the neck of the faucet gets unscrewed first. It’s simple to do and well worth the extra time. 🙂
Love the counter tops, can i ask what color you used? Also, did you replace the t-trim around the counter tops? If so, what color and brand? I’m struggling finding any answering about replacing t-trim……..
You can see how we replaced the t-trim on our cabinets here, Jena. We purchased our t-trim on Amazon, but you can also find it on t-molding.com.
Hi! Not sure if Hollie checks this, but I’d love a link to the specific faucet 🙂
We have the exact layout in our pop up. How do you keep the toilet/shower cover to stay up? I have been fighting with this for years.
How did you paint the T trim on the counter?
You can paint the t-trim by using a good primer and a spray paint that is meant for plastic, however, I wouldn’t recommend it. We painted our trim, and it didn’t hold up very well. It look beautiful in the beginning, but it was short lived. After about a year and a half, we ended up replacing it. You can read all about that here.
Let me know if you decide to sell it. I just love what you did.
Where or how did you get your toilet shower combo? I love this idea!!
Certain models have shower/cassette potti combo units built-in, Kate. Hollie happened to have one of those models. 🙂
Does T-trim come in any colors others than white and black? Love those countertops but cannot find anything close to that color, more nuetral. Thanks, the renovation is amazing!
You can find it in brown or tan on Amazon or Rockler, Breanna. 🙂
What color was your rust-oleum tint base?
Did you paint the Canvas walls around the bed ? Mine look dingy and I want to remodel
I would not recommend painting your canvas, Marissa. If you’d like to whiten it, try cleaning it well with Bass Pro Shops Mildew Cleaner or a mixture of Dawn, bleach, and water. Check out Campfire Traveler’s post here for before and after shots of the Bass Pro Shops cleaner in action.
Your camper looks just like mine!! (except ours has additional seating where your counter is across from the dinnette). My question is the bathroom. I would like to use ours more and it looks just like yours except the counter top must be removed to use. I see yours has a piano hinge which I can add, but how does it stay up? Did you mod that yourself or did it come that way? Either way, let me know as I would love to be able to have the bathroom more accessible by having modifying the top to stand up like a partial wall. Thanks!!
I love all the redos! I have a question. You show nice, tall, sink faucets. How does your pup come down with a tall faucet? Is the faucet removed before the pup is rolled down?
We remove the neck of our faucet (it unscrews) when we fold the galley down, Ellen. 😉
Is there a way to heat a pop-up so that it can be used year round in the southern states? I’m wanting to go tiny and I’m looking at RVs to do this but the motorized ones are sooo expensive. I could pull one of these with my car and still follow my dreams. I love the way you decorated it and there still would be enough room for my crafting and my 2 Chihuahuas!
Many of the smaller PUPs have furnaces, Kathryn. Do you know your vehicle’s tow rating?
Where did you get the oval mirror in the shower area?
Very nice! What did you do with the original flaps that roll down over the window areas? The ones that have straps to hold them up or down?
We just started a remodel of a Coleman Sequoia. This weekend we began the process. We took out everything, and have decided not to put some of it back in. We painted all the cabinets with Glidden Bit of Sugar, which is a little whiter than I thought. My hubby installed flooring that we upcycled from his mother’s kitchen, and leftovers from other projects. The planks aren’t all the same shade, but it all snapped together. I am happy with the mix-matched planks, though very little of them will actually be visible. He then cut new countertops and we used Hollie’s idea of the flakes. We used a grey primer & paint with the black, grey and reflective flakes. We did so much so
In two days. Hubby will polycrylic the tops during the week.
Thank you so much for all the ideas. I can’t wait until we get to the actual decorating!