 Okay. You guys kow I am a sucker for family camping stories, so I just love this makeover from Jenn. She and her husband had been campers since they met over a decade ago. They’ve always camped in tents, but when they found out that they were expecting their first child, they knew they needed to upgrade. They both wanted to share their love of camping with their baby, but Jenn is a really frugal mom. She did not want to break the bank on a brand new camper that she knew they would only be able to use a couple times a year. I feel ya, Jenn! 😉 When they found out that their best friends were upgrading to a bigger RV, she jumped on the chance to buy their old pop up camper.
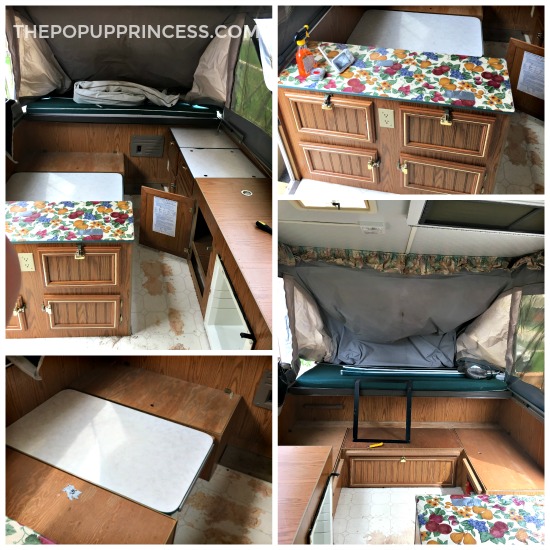 Jenn found the awesome reader features on this website and with those and some tips and tricks from Pinterest, she was able to transform their pop up into a little oasis. The biggest job for Jenn and her husband was definitely the paint. Jenn says using the right primer is the most important step for a good paint job, and I wholeheartedly agree. If you need more tips on painting your camper cabinets, be sure to check out this post. Jenn used Zinsser 1-2-3 Primer and put two good coats of it on every inch of that brown wood. After the primer was dry, she applied three coats of white paint, which she picked up at Home Depot. To update the cabinet hardware, Jenn just removed all the handles and gave them several coats of spray paint. I love the way they contrast against those white cabinets.
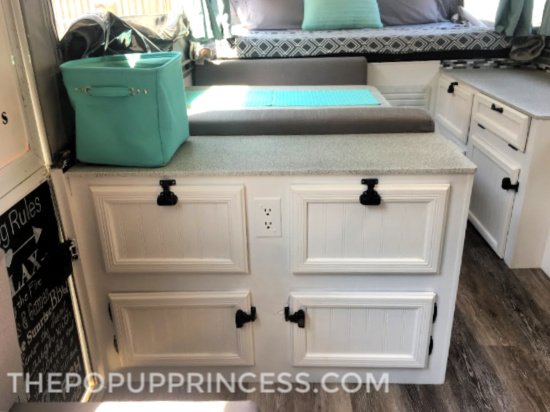 Jenn and her husband used adhesive plank vinyl to update the flooring. The whole camper only required two boxes, so they were able to give the floors a whole new look for under $100. For the counter tops, they used stone fleck spray paint. It took a lot of tape and plastic to protect the other surfaces in the camper, three full cans of stone fleck spray paint, and three coats of clear coat achieve that finish. Jenn says it was worth it, because they look great.
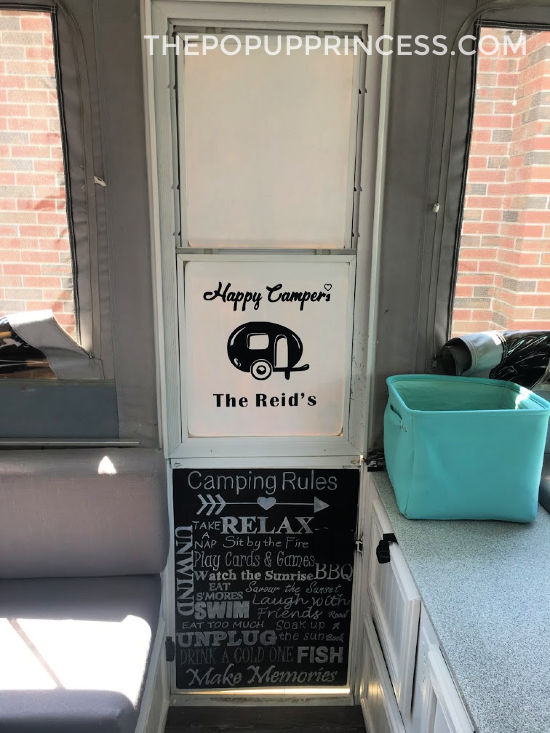
 Her husband had to remove the door and replace the wood panel, as it had rotted quite badly. While the door was off, Jenn painted the new panel with black paint. Then she hand-painted camping related words and phrases on the door panel with a white paint marker. She had the “Happy Campers” decal custom made for the top panel. Isn’t it adorable?
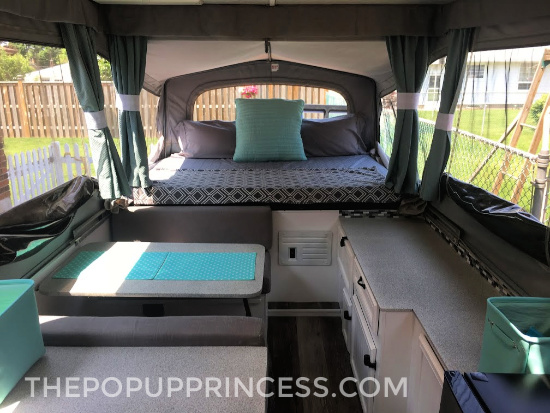
 Knowing that the curtains would be a lot of work and require a lot of fabric to replace, Jenn opted not to replace them. They were still in great shape, so she decided to base her color scheme around them. She freshened them up with new tie-backs and picked coordinating fabrics and accessories. For the cushions, she purchased a cheap two-pack of curtain panels from Giant Tiger. Then she put her grandma and her sewing machine to work. 😉 Jenn says curtain panels were great, because they are large pieces of fabric that can cover a whole cushion inexpensively. She also used curtain panels to make a new valance to hang around the perimeter of the ceiling.
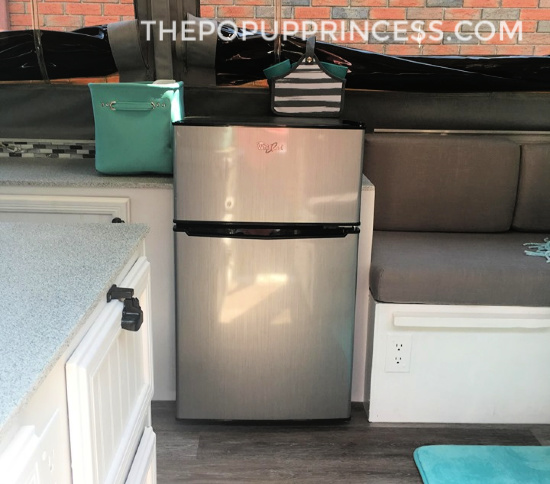
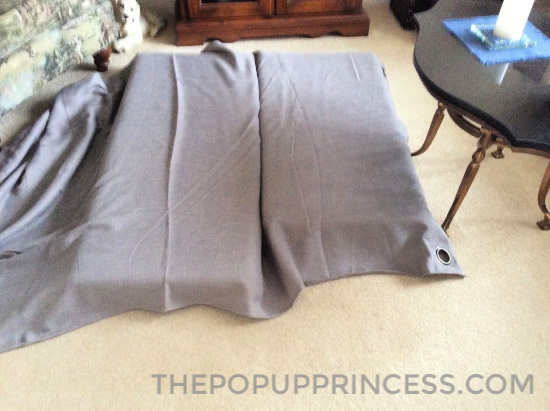 Jenn had some adhesive vinyl tile laying around from another project, so she put it to good use as a backsplash. She cut it to size and applied it directly to the wall above the countertops. (You can see how we used the same type of tile as a backsplash for our camper here.) They added some coordinating, inexpensive sheet sets from Costco, some turquoise accents from Home Sense, and a new fridge that they picked up for $75 at a Treasure Hunters store.
 But the pièce de résistance of Jenn’s makeover has to be what she calls the “Baby Trap.” 😆 Because they were planning their first camping trip with a new trailer and a one-year-old baby, they knew they had to come up with a safe solution for him to sleep in the bed. Using some metal piping, Jenn’s husband cut to size and put together a frame that would fill the entire opening of the bed. Jenn picked up another two-pack of curtain panels and some mesh fabric from the fabric store. She sewed together a safety panel to go over the frame her husband built.
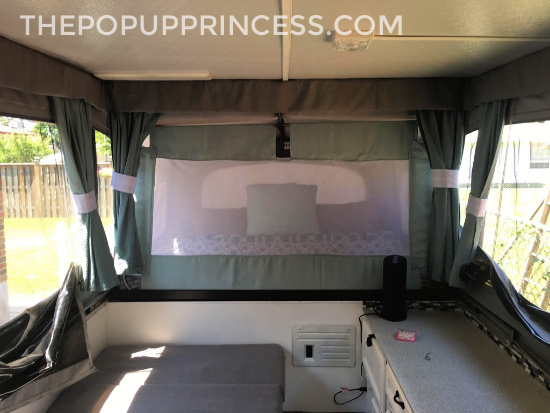 The top and side pieces of the turquoise fabric are held together with Velcro for easy in and out access to the bed. The frame stays in place, tucked between the mattress and the bed frame, and is hooked through the shepherd’s pole over the bed canvas. Jenn and her husband used this for the first time on a group camping trip with a bunch of friends. All of their friends with young children asked them to make one for their trailers, too. She says it was honestly the best project she and her husband have ever accomplished together. Now their son sleeps safely in the big bed, while they can enjoy the campfire and marshmallows.
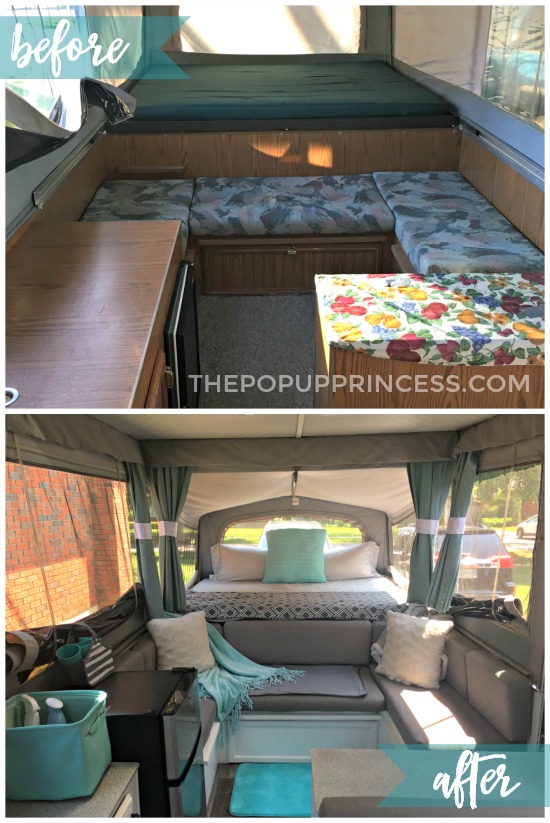 Jenn’s remodel took her about a month to complete. She worked on it for a couple of hours everyday while the baby was napping and only required her husband’s help on the weekend with the door and floors. She is so happy with how their little pop up camper came together and says it makes camping that much more enjoyable. And that is really something to be proud of. Look at that amazing transformation!
Thanks so much for sharing your remodel with us, Jenn! Here’s to many memorable weekends around the campfire! Eat some marshmallows for me.
Happy Camping!


Love it!!! I’m thinking of a remodel of our pop up v soon, just because I am so inspired by your blog!!
Amazing 🤩
Is it possible to get more details on the Baby Trap? This is awesome and would save having to pack a packnplay.
Beautiful makeover!
Do you have to remove the fridge before putting the popup down?
She does, Michelle. It is too tall to fit upright in the camper with the PUP folded down. 🙂
Oh my goodness! I’ve GOT to figure out how to duplicate this baby trap! It will definitely make life with my 15 month old easier. Any details available will be GREATLY appreciated!