I’m so sorry, you guys. It has been waaaay too long since I’ve posted. Things have been crazy over here, and I just haven’t had much time to blog. I’ve really missed it, though, and I am so excited for things to get back to normal. And I have a great camper makeover to share as I get back into the swing of things. Jenny and Mike sent me pictures of their Trailmanor makeover, and it is amazing. If you have never seen a Trailmanor before, read on! They are awesome pop up campers, and I have Jenny here to tell us all about theirs. Take it away, Jenny!
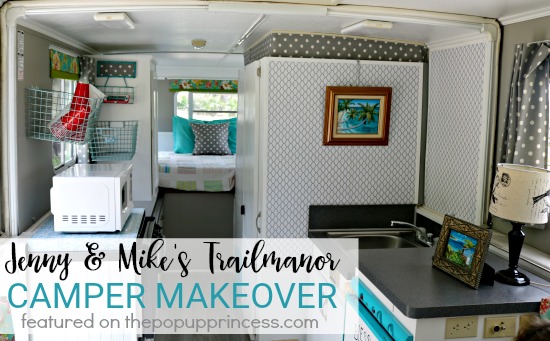
Jenny & Mike’s Trailmanor Makeover
Our search for a pop up started innocently enough. We were camping with my husband’s family one weekend, and as I was going to bed in our tent, I said to him, “I’m way too old to be sleeping on the ground. My body can’t recover from this like it used to. No matter how many times you tell me this air mattress doesn’t leak, I end up on the ground by morning. Let’s get a pop up camper.” We have four kids, three of which are still at home, so we knew we would get a lot of use out of it throughout the year.
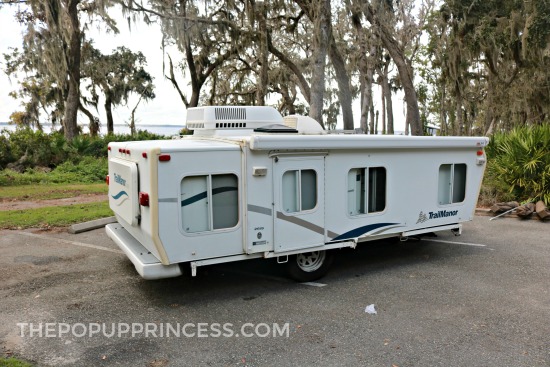
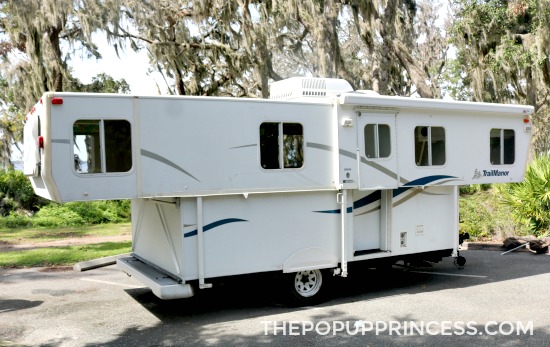
We searched for a good year around the Jacksonville, FL area where we live before we found one. It was in an RV resort in a small little town called Beverly Hills, FL. Many thanks to my mother-in-law who lived in that little town and gave us a call when she found it. It was a 2005 TrailManor 2619, and it was currently housing a full time resident and three indoor cats. I was a little worried, but couldn’t believe how clean the owner kept the camper.
I had never seen this type of pop up camper before. With minimal effort and in a matter of two minutes–I can easily lift the sides up–the camper went from a small box that could fit into our garage to a 26 foot hard sided camper. We ended up buying it on the spot, after negotiating the purchase price down to $4200. We took our new Trailmanor home and thoroughly cleaned every square inch of the camper, then debated on whether we would make any changes right away.
It wasn’t long before I discovered The Pop Up Princess blog and spent many a night pouring over the featured makeovers. I jotted down what I liked, taking note of tips, techniques and decorating ideas. I was obsessed. It took a good year before we started our project, but when we did, we gave ourselves a pretty quick timeline. We only had a couple of weeks from start to finish. I swore off social media for the month, so as to not waste time.
Hurricane Irma came through town at about the same time we started, so we took advantage of the week off of school and work (for hurricane recovery) to make some serious progress. We have yet to name our camper, but I keep thinking Irma might be her new name.
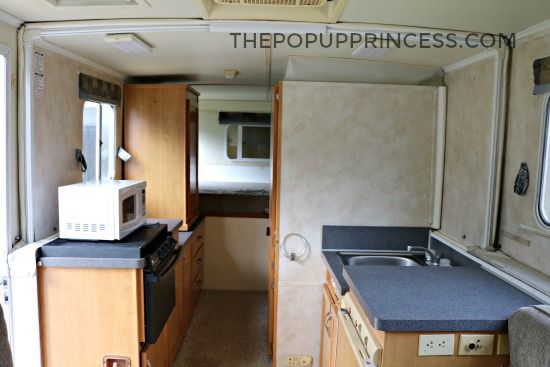
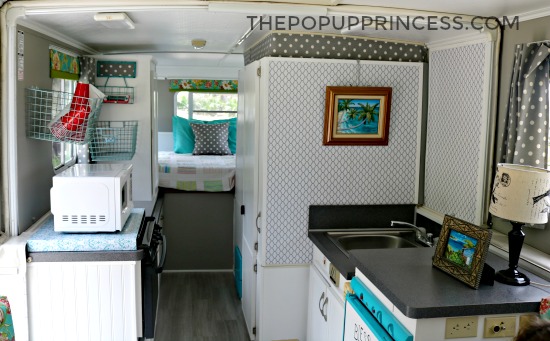
My house is filled with color, so I knew right away the brown and dark blue was out the door. I was definitely going to infuse some color into our new camper, but I knew I needed a neutral base to start with, so we painted all the cabinets with a white semi-gloss paint we already had around the house. Next, we installed an adhesive-backed vinyl flooring from Stainmaster in a light gray color called Chateau. We bought the flooring from Lowe’s, and it cost us $83.
The hardware on the cabinets was brushed nickel, and it worked perfectly–no changes necessary. Oddly enough, once these two steps were completed our laminate countertop, which looks blue in the before pictures, took on a more gray/black hue. For some strange reason, once the cabinet color was changed to white the black and gray flecks in the countertop were more prominent. Lucky for us, this worked out perfectly, and we didn’t need to make any changes to the countertops. 😀
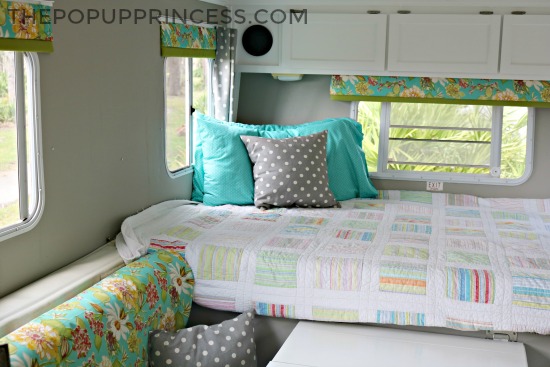
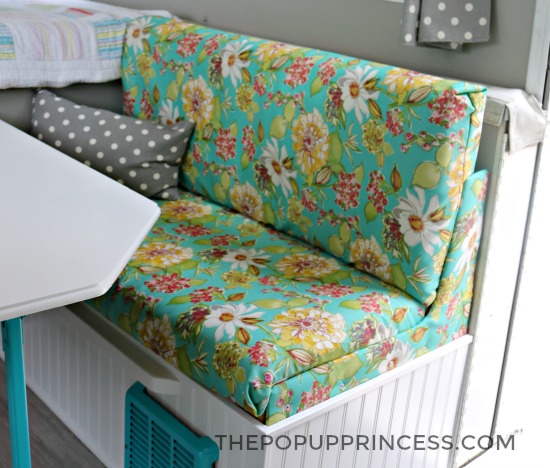
The next step was picking out fabrics. When faced with a whole wall of outdoor fabric choices, this step became a little overwhelming. In fact, it took me two trips and two hours of debating to finally pick the fabric I was most attracted to and go for it. It was a bright, flowery teal outdoor canvas called Fiji Pierette Franco. I also selected a coordinating green solid called Richloom Outdoor Solar in Kiwi, both were from JoAnn Fabrics.
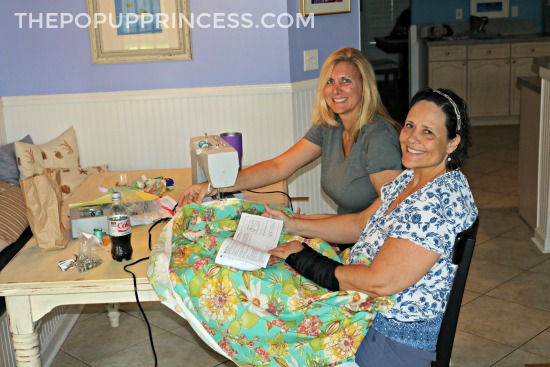
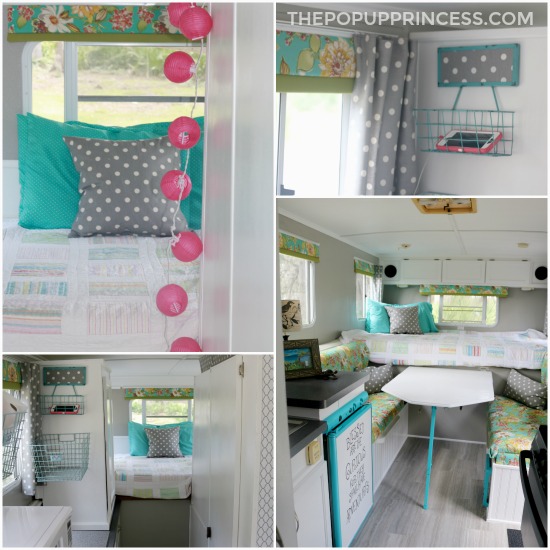
The curtains were done in a gray polka dot duck cloth from Hobby Lobby. All in total, I spent about $150 in fabric, and that was using a 40% off coupon for each purchase. It was definitely the most expensive part of the makeover. I went to work on creating slipcovers for the cushions, recovering the valances, and making the curtains. There was one problem though… I had no idea how to sew. My friend, Anne, came over one Saturday morning and taught me how to sew in about two hours. I borrowed her sewing machine and went to town.
With my limited sewing knowledge the easiest thing for me to do with the dinette cushions was to create a pillowcase slipcover with a Velcro closure on the long end. I can remove the covers and throw them into the wash when dirty. I simply tuck the corners into themselves to give the cushions a finished look. For the curtains, I made new panels and used the existing tabs to hang them. Then I made coordinating pillows to complete the look.
With the fabrics out of the way, it was time to pick a color for the walls. Because we had so much color in the space, I knew I needed go with a neutral, and that neutral turned out to be a shade of gray called Sherwin William’s Dorian Gray. To add interest, we used touches of bright teal (Rust-Oleum Ultra Cover Gloss in Seaside) on the vents, table legs, and refrigerator. We also added $20 worth of white bead panel on the dinette bench bases to help to add texture. For a couple of the walls in the trailer, I used contact paper from Walmart and Lowe’s ($5/roll) as a “wallpaper” to cover up the existing wall covering.
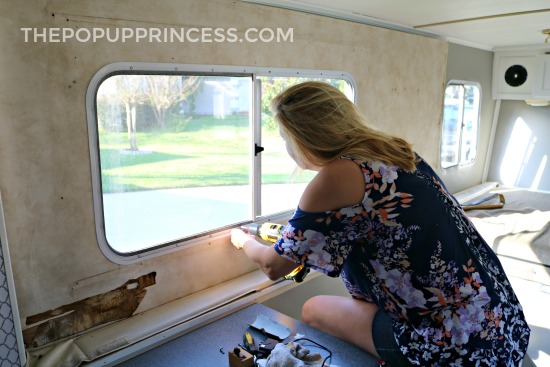
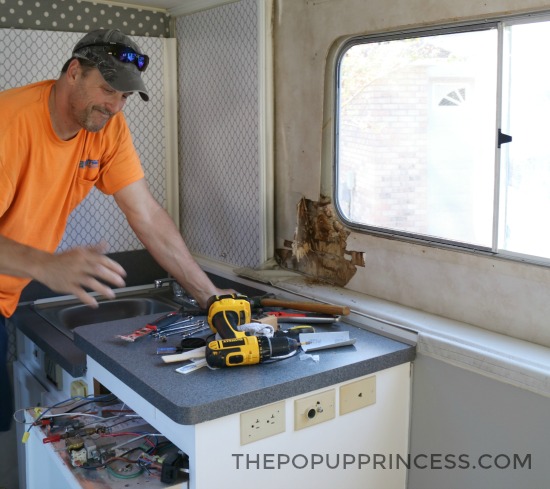
It’s my understanding that no renovation is complete without a little setback, and that was true of ours, too. As we were removing a portion of “fake wall” from one of the walls, we uncovered a window leak that had rotted some of the wood and rusted away the sheet metal wall. Not knowing where we would find the same type of sheet metal to patch the wall, my husband came up with the brilliant idea of taking a section of the same type of metal from under the bed mattress. We borrowed sheet metal from under the mattress and patched it with a different type of metal, because no one would ever see it. It worked perfectly and was fixed for under $20.
This was the first large project that my husband and I really worked on as a team, equally dividing the all the tasks. While it was exhausting at times because of the tight deadline we gave ourselves, it was actually really fun and exhilarating to see the progress. My hope with this little camper is that we create lasting family memories. I want my kids to grow into adults that love to camp, spend time in nature, and develop a sense of curiosity that leads to adventure. I think “Irma” will help us achieve that perfectly.
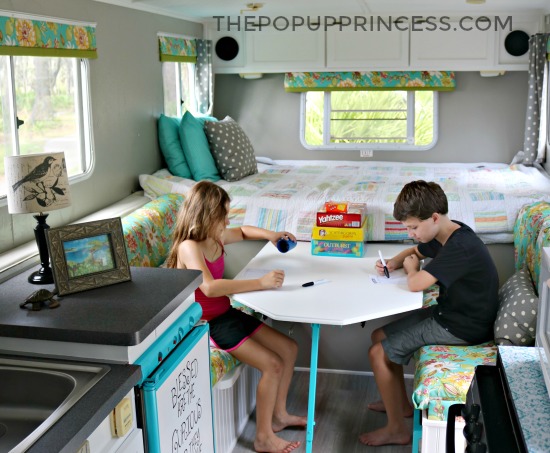
Wow! What an amazing makeover, right? And check out those little ones playing games at the table. I’m loving it! I’m sure Jenny and Mike will have many happy memories in their Trailmanor to look back on. Great job! Thanks so much for sharing. 🙂
Happy Camping!




We have a 2003 3026 TrailManor, absolutely love it. I seriously love your makeover. I hope you are members of the TrailManor Fans Facebook page. If not you should join. Happy Memory Making
I’m not a member but thank you for the suggestion!
Absolutely gorgeous!!! I’m looking to purchase a Trailmanor as well and love what you’ve done with the place!!!
Wow, I have never seen a camper like yours. How cool is that? I love what you did and as close as I keep getting to finishing mine, now I want to add the beaded panels as my bench bases are flat and rather boring. Here I go again! Haha. Thanks for sharing!
Larissa, I am glad you are back. Missed you. I hope all is well with you and the fam!
Thank you. I love the bead board too. Such a big impact for little money.
Hola!
Acabo de comprar un motor home y esta pagina es una inspiración!!! Felicidades quedo muy lindo tu camper 🙂 Saludos.
muchas gracias! 😊
Curious about how you hung the wire baskets. Just bought something very similar for our new-to-us Trail Manor, which is in storage. I was thinking a couple of command hooks would do the trick. My husband is doubtful.
We tried the command hooks first. It didn’t hold well enough once i started loading the baskets with food items. My husband ended up putting screws in for me to hang them on…much better.
How did you repair the wood around the window? Our looks the same way and looking for suggestions on how to repair/replace the wood. Thank you for sharing your makeover – it looks beautiful!
We cleaned out the rotten wood (sheet paneling) and then we actually used a square of the sheet metal under the bed to replace it. We just cut a square out. We couldn’t find the sheet metal locally, but now they have it.