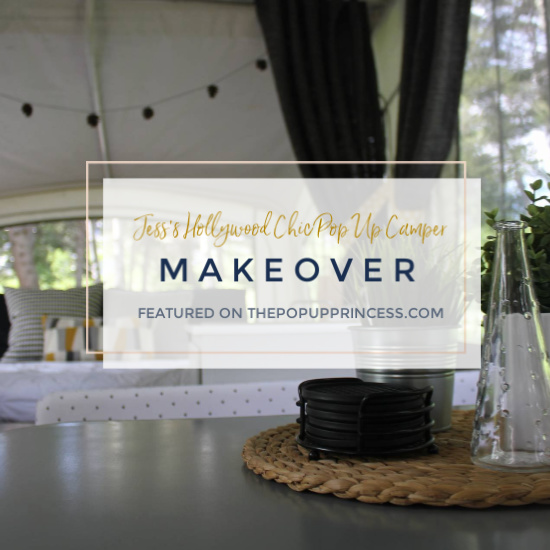
 Some reader makeovers are so awesome, I’ve just got to share them again. Jess’s 1996 Coleman Laredo remodel is one of those. It’s not too feminine–so it appeals to the guys out there–but it still has this vintage Hollywood chic “glamping” vibe going on. I love. love. love this one, and I know you will, too. If you missed it the first time around, here’s Jess to tell you all about how she tackled this project…
Jess’s Hollywood Chic Pop Up Camper Makeover
I grew up in the 80’s, camping every summer in my family’s pop up. These are my favorite memories from my childhood. I wanted my daughter to have the same camping experience I did, so my husband and I finally got a pop up.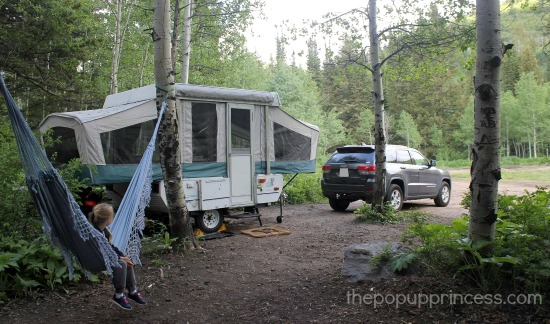
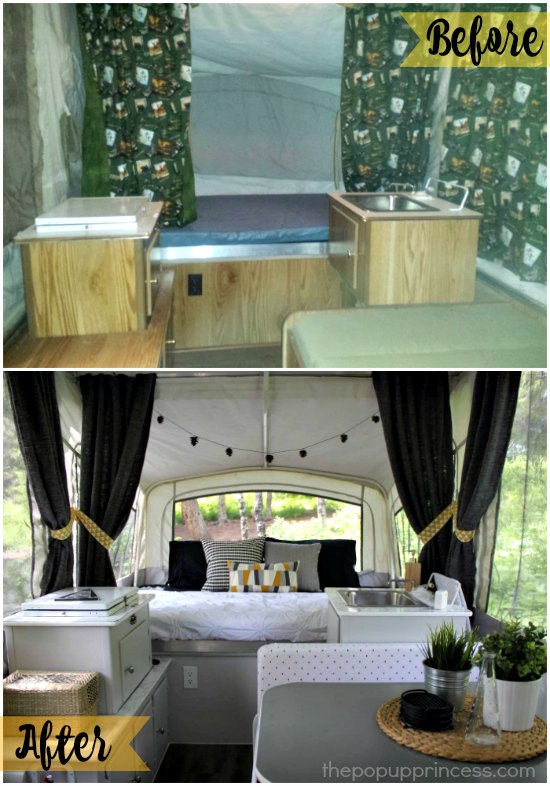
It’s a 1996 Coleman Fleetwood Laredo. It needed some major TLC, but for only $500, I was able to make our camper a home away from home. It took me about 10 hours, but I first cleaned it inside and out. The previous owner had nailed laminate flooring down to the floor of the camper, so next I ripped out all that laminate and scraped off all the old glue from the original linoleum flooring.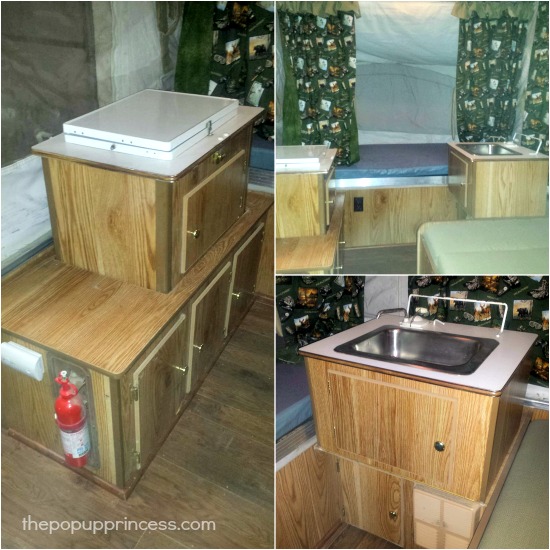 I decided I didn’t want to sand or remove the cabinets, so I gave them a good cleaning and two coats of Bullseye bonding primer. Then I rolled on two coats of light grey paint that we had leftover from our basement project. The color of paint is called Seattle, and it is made by Kwal Paint. I removed the old light brown t-trim molding that was on the edge of all the cabinets and replaced with pretty new white t-trim I got for cheap on eBay.
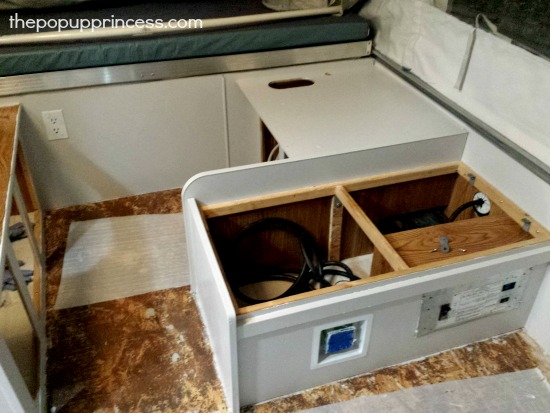
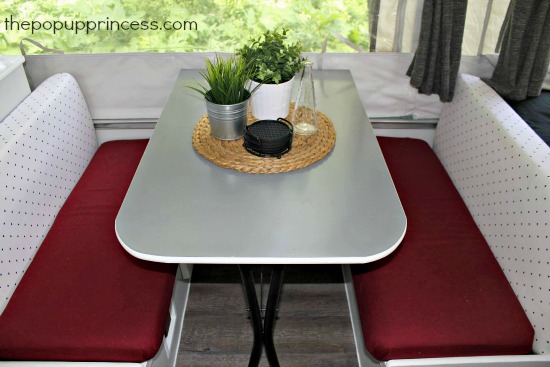
For the counters, I decided to use marble contact counter paper (available here) which I bought for $30 total on Amazon. It has a durable look and feel and a protective glossy top, too. I had to remove the sink and stove to cover those surfaces, and while I was at it, I replaced original gold cabinet knobs with new brushed nickel ones from Lowe’s for around $12. I also spray painted the furnace grill cover with a white high heat epoxy paint from Lowe’s.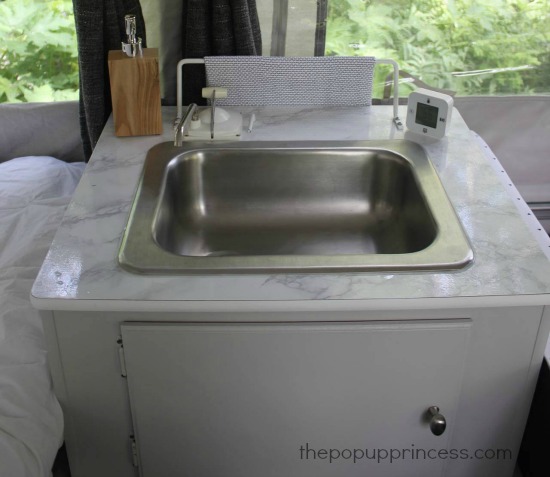 For the cushions, I removed all the original covers and then reupholstered with a maroon fabric for the bottom and white with black triangles for the top. For the back of the cushions, I cut out black felt and glued it on nicely to hide all the upholstery staples.
The bed pads were in great condition so I bought a foam pad for each one. I cut them to the necessary sizes, laid them over the top of the original mattresses, and covered them with black fitted sheets.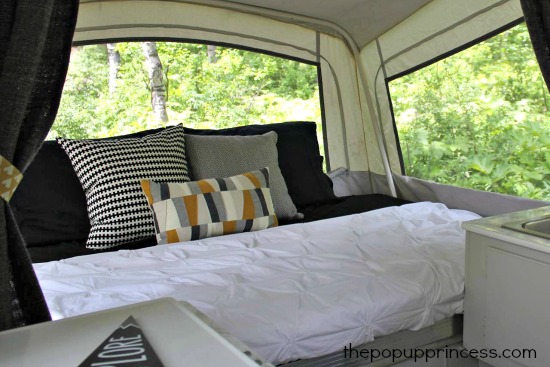
The curtains are blankets from Ikea that I cut in half! 😀 This was the cheapest option for thick fabric. I went with a dark grey so it wouldn’t show grease or dirt. The ties were made with the “goldenteepee” fabric (available here) from Spoonflower. They open and close with Velcro.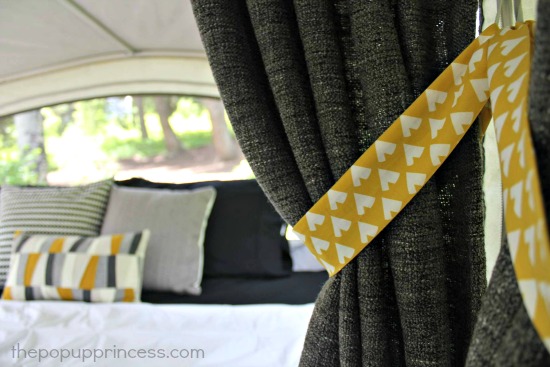
For the table, I primed then sprayed with a dark grey paint. Then I put 4 coats of Polycrylic protective finish on top. I sprayed the metal legs with Rustoleum Rust Reformer, then sprayed on two coats of black high performance enamel.
Last was the flooring. I went with a grey Style Selections Luxury Vinyl Planking from Lowe’s, which was $28 total. Instead of doing a trim around edge of flooring to hide gaps, I used white caulk.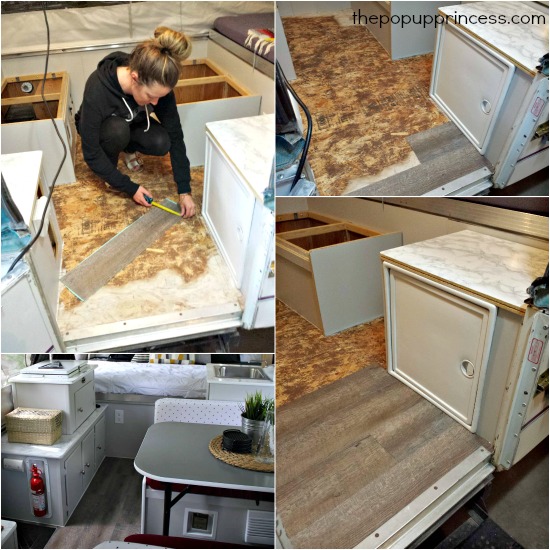
All of the decorations are from Ikea and Target. I made the garland with pinecones, black jute, and eye hook screws. This was such a fun project! I’m sad my remodel is over but so excited to start new camping memories with my family. I couldn’t have done it without all the amazing tutorials and featured makeovers on this blog! Thank you, Pop Up Princess! 🙂
No! Thank you, Jess! That transformation is nothing short of amazing. Let’s take one more look at those before and after shots, shall we?
Wow! I really adore this makeover. I especially love that Jess and her family have a comfy little retreat to experience the great outdoors together, and I’m sure her daughter will have wonderful memories of her childhood camp-outs, just like Jess does. Thanks for sharing, Jess! 🙂
Disclaimer: This post contains Amazon affiliate links. The Pop Up Princess is a participant in the Amazon Services LLC Associates Program, an affiliate advertising program designed to provide a means for sites to earn advertising fees by advertising and linking to Amazon.com. This means that if you choose to purchase an item from a link in this post, The Pop Up Princess earns a small advertising fee to help pay for future projects and posts… so thank you! 🙂
Happy Camping!


Looks amazing! I can totally relate to being sad when it’s all finished, I felt the same way! Now you can enjoy the fruits of your labor! ❤️
I am trying to find t trim on ebay with no luck. What do I search for?
We found ours on Amazon, Wanda. You can see how we replaced ours in this post about painting our cabinets. Hope that helps. 🙂
We got it from amazon too
Beautiful!
Amazing!!! I’m so impressed with the cost-effective strategies, but I’m MOST impressed with the result. WOW!!
Love this! Such inspiration. I cannot wait to start on mine.
I sooooo love this! Great job, Jess!
Question for Jess, please:
May I ask exactly what kind/brand of blanket is it from Ikea (the one you used for curtains), also, the contact paper for your counter- are those the contact paper rolls you can buy from Wlamart?
I look forward for your reply! Thanks so much!!
There is a link for the marble contact paper in the post above, Anna. It’s not thin Contact paper like in Walmart. It’s very thick and glossy. Jess actually got it at Amazon, and I’m not sure if it is available elsewhere. It’s not the thin stuff readily available in discount stores, though. 🙂
Thanks so much, Larissa!
I just did our counters with the marble!! Thanks so much for the idea it’s beautiful! And super easy!
Hey Anna. The blanket from ikea is called GURLI. They have a charcoal one (which I used) and a red one. Hope that helps ☺
Thanks so much, Jess!! Have a great summer 🙂
How did you attach the blankets to the ceiling?
They are attached to the original metal rail with the original plastic rail clips.
This is adorable. Now I want a pop up. I’ll start with a car to pull it or a hitch at least 😉 thanks for sharing these great ideas.
Hi Jess! I LOVE the marble look with the contact paper. Can you elaborate more on the process? Was it super hard to install? Did you seal it with anything once it was down?
Hey Katelyn. It was so much easier than I thought it would be. I read about the wet method of installing and decided to do that. So first I measured the area then added half inch on all sides. Cut it. Then pulled backing off slowly spraying windex as I layed it on the surface squeegeeing as I went. I took an exacto knife to the edges of the excess paper. And that’s it. It hasn’t come up and sticks really well. I’m so happy with it. The wet method is nice cause you can move and slide the paper around where you need it, otherwise it’s really sticky and hard to get it perfect. It takes a few hours to dry. If there are any air bubbles Just squeegee every 30 minutes. All my bubbles were gone the next day when it was dry.
Sorry for spelling your name wrong katelin 😊
How did you attach the curtains? Thanks! Great makeover!
LOVE this, love the color palette! We are purchasing our first pop up this weekend and it is in desperate need of updates! I too am interested in how you did the curtains.
I love the look of this. My hubby and I recently purchased our pop up for the same price. I wondered how much this reno ended up costing you. I want to do the same thing to ours and you have close to the same set up. Ours is a starcraft meteorite.
Another great redo. It is so inspiring.
The fabric for the tie backs are so cool since that is the symbol for camping on most park reservation sites. I like the entire job, but that the tepees were a great touch, good find!
I’m going to buy my pop up today! Super excited
We just bought a pop up to redo so this was a great help to us. However…I can’t see how you hung the curtains. The original have those plastic clips but I can’t sew them on the curtains so please give some easy idea of how to hang them.
You may want to check out our post on pop up camper curtains here, Wanda. We used Command hooks and drapery rings to solve that problem. 😉
Love the make over. Thank you for sharing. Have you had any problems with your floor sticking on the bare wood? Also, how did you trim out your windows with black?
Hello! First time owner of our 1995 Jayco trailer. It doesn’t seem to have rods for curtains. I would like to add some, any suggestions? Doesn’t seem to have any room for rods. I was thinking of adding those bathroom rods that stick themselves. Also I would like to paint the cupboards. What’s the best paint to use! I live in Western Canada not sure if we carry the same stuff. Thanks
Most campers don’t have curtain rods, Brandy. They have a track system that uses plastic tabs. You can check out this post here for more info. You can also check out this post here for info on painting the cabinets. Good luck with the remodel! 😉
Beautifully done!! I’m almost finished with my pop-up redo, and I love looking at these blogs! They are so inspirational!
I LOOOOVE this camper remodel and color palette, I know this was posted awhile ago, and I am starting my camper remodel this weekend! So excited. I’d love to know the type of flooring Jess used, and how much time it took to repaint the cabinets. ALSO, I want to put blinds up on the big side windows vs curtains. Anyone have a solution for securing blinds? I realize I will have to take them down when the top goes down. We have a 1999 Coleman Fleetwood. Thanks for any advice!
I have featured a few campers with blinds. Most people drill into the roof. I’d be cautious with that, but it can be done. Check out Glenda’s pop up camper for an idea of how it was done. 🙂
I have a few days left of my summer break, spending it going through all the reader feature posts. This one is so pretty. I love how classy it looks. Big thanks to Jess for being specific about colors and cost. I’m excited to start on our popup makeover!
Hi Jess we bought the exact same pop up yesterday 😁 you did a beautiful job, I love it! Will be starting a few changes today. What size sheets/comforter did you buy for the bunks?
I think they were full fitted sheets. So excited for you!