As their kids grew older, Jocelyn and Scott longed to take a family vacation to some of our most loved National Parks. They picked up a neglected pop up camper, gave it a little bit of love, and hit the road on an epic adventure.
Jocelyn and her husband, Scott, found their 2004 Fleetwood Destiny Cortez on Jocelyn’s best friend’s property. It had been neglected and was slowly sinking into the mud. Her friend bequeathed the camper to them on the condition that they save the poor thing and send photos of future camping vacations in it. They rushed out to rescue that pop up camper–which they dubbed Parker–from the early March rains. Their minivan got stuck twice trying to extricate Parker, but a kindly neighbor (who first had to check with Jocelyn’s friend to make sure that they weren’t thieves 😆 ) and his tractor hauled them out and saved the day.
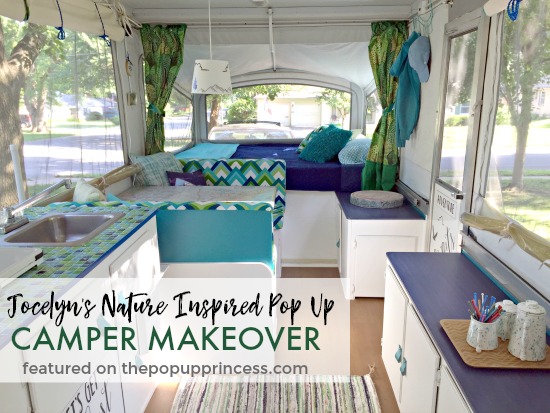
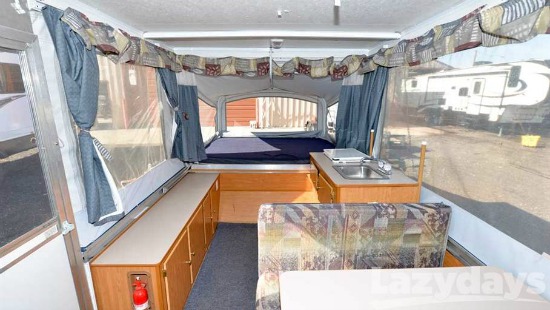
All the way home, Jocelyn, who is an interior designer by trade, was dreaming up a design plan for her makeover. She was inspired by the nature she knew they would be experiencing on future trips – mountains, forests, and lakes. Once Parker arrived in his new home, they immediately got to work. They removed all the original moldy curtains and gave that camper a thorough scrubbing. Jocelyn forgot to take before pictures, but she says this stock photo is exactly what Parker looked like before his facelift.
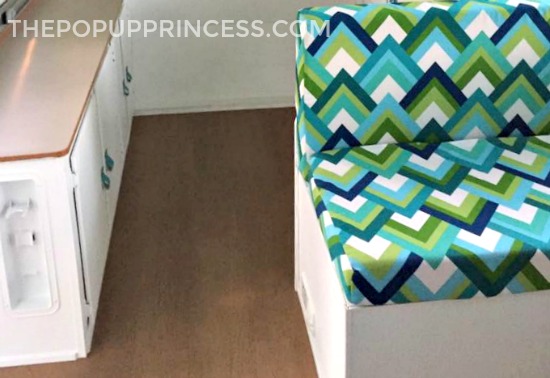
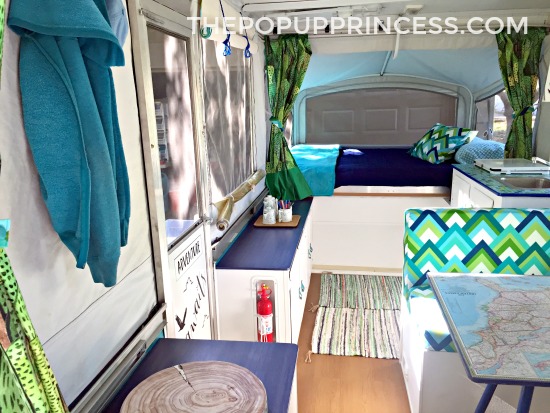
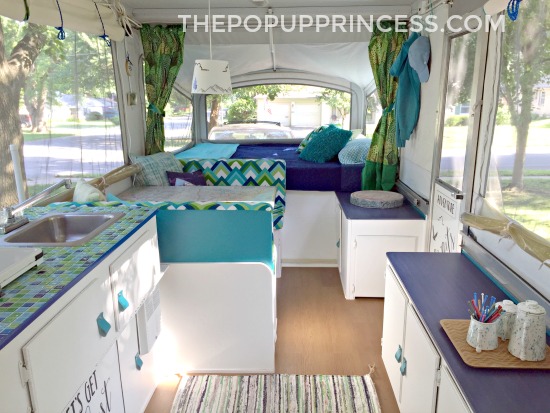
The cabinetry was all painted in two coats of Behr Premium satin finish paint in the color Polar Bear. After giving the original linoleum floor a good cleaning, Jocelyn applied peel and stick vinyl over the top of it. Any spaces between the new vinyl planks were sealed with colored Minwax wood filler that matched the oak finish of the floor. Then Jocelyn got to work on the upholstery. The original seat covers were removed used as a pattern for the new cushion covers. Jocelyn was also able to reuse the original foam. She sprinkled several layers of baking soda on that foam and set it out in the sun for a few days to eliminate the mildew odors. She actually had to repeat this baking soda process a few times, but eventually they were good as new.
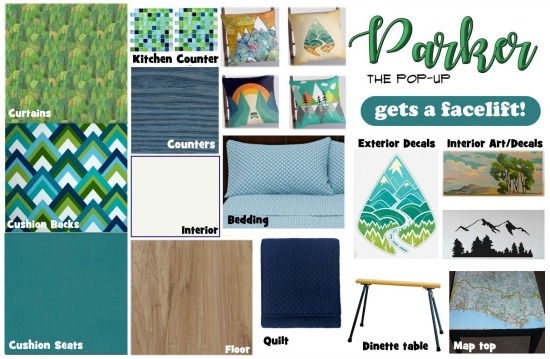
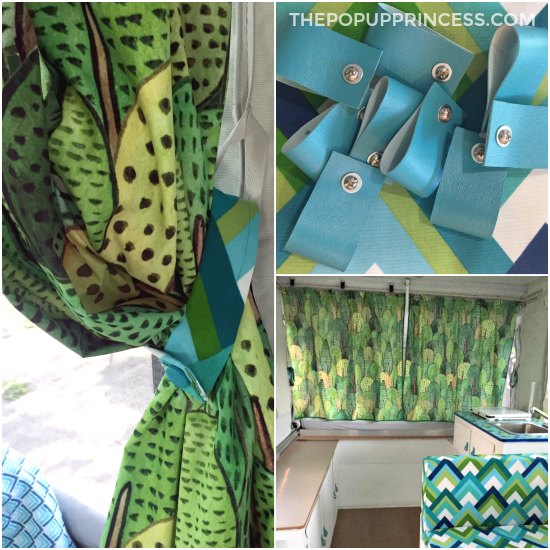
While the cushions were airing out, Jocelyn got out the sewing machine and stitched up some new covers. She used marine grade vinyl for the bottoms of the seat cushions and outdoor upholstery for the fronts. The upholstery pattern, Solarium Outdoor Resort Peacock, resembled mountains and fit in with Jocelyn’s nature inspired theme perfectly. She was having a little trouble finding the perfect pattern for the bunk curtains, though. After a few late evenings crashed out on the couch surfing the Internet, Jocelyn discovered artist tapestries on Redbubble. She found the Watercolor Forest one was perfect for her color scheme, and medium was the ideal size. She made curtain tiebacks using leftover cushion upholstery and buttons from the seat cushion vinyl.
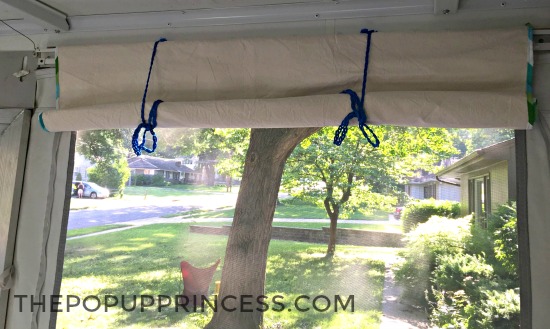
The cabinet pulls were also cut from the seat cushion vinyl. Jocelyn cut a rectangle of vinyl for each pull, folded it in half, and secured each with a nut, bolt, and washer. She was hoping to mimic a leather drawer pull, and I think they turned out amazing. For the side windows, Jocelyn made roll-up shades with unbleached muslin. She cut the fabric to size and trimmed in bias tape she made from the leftover cushion fabric. A piece of flat ½” wide wood trim was glued to the top and bottom for stability and braided nylon cord (glued under wood trim pieces) was used to tie up the shade. The entire shade is secured to the curtain track using heavy duty 3M Velcro.
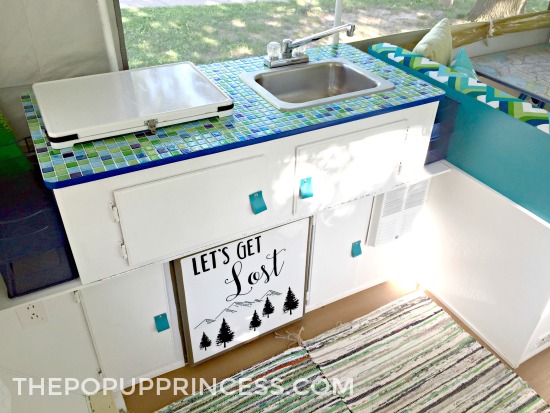
The kitchen area was next on the project list. That old, brown refrigerator was covered in white contact paper then later decorated in fun mountain and tree decals from Target. Jocelyn used peel and stick tiles for the kitchen countertop and covered the original plastic trim in blue electrical tape. She says it has held up surprisingly well so far. The stove, sink, and cabinet interiors got a good scrubbing, and Jocelyn and Scott outfitted the interior cabinets with metal stacking storage containers from Target. They purchased inexpensive camping utensils and kitchen gear in green and blue, which stay in the camper year round.
The countertops and table required a bit of muscle to remove, but once they got them out, Jocelyn and Scott opted to replace them with furniture grade ¾” plywood. They stained the new countertops with Minwax Express Indigo because it reminded Jocelyn of water. The countertops were an easy project. Jocelyn gave each section two coats of stain and two coats of Polycrylic. That’s it!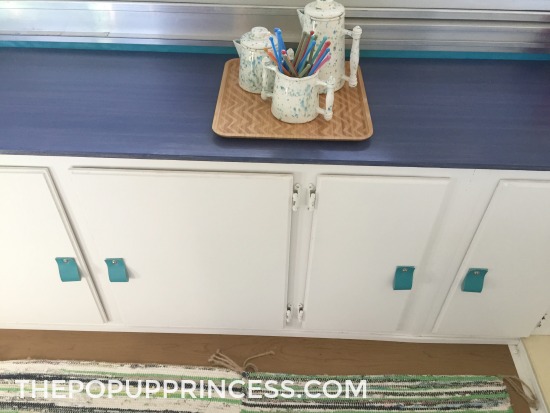
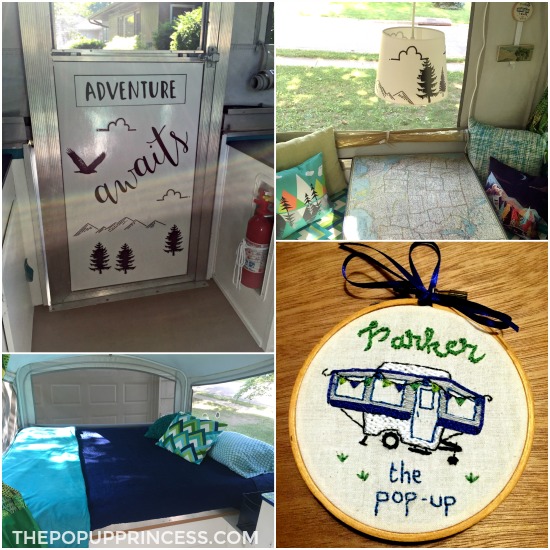
The custom table was made from furniture grade plywood that Jocelyn stained to match the countertops. Then she used Mod Podge to apply a map of the United States to the top. She used folding sawhorse legs (available from Amazon here) for the base. She was even able to find the legs in blue. Jocelyn found a cute hanging lamp at IKEA and applied the same decals she used on the fridge to the shade. Jocelyn secures the lamp in place with Velcro and unplugs and stashes it away when the camper is in folded up. She also added matching decals to the bottom of the camper door to keep with her nature theme.
At Walmart, Jocelyn found sheets that had a very similar pattern to her dinette cushion upholstery. Solid blue quilts with plush, teal throw blankets–all from Target’s Pillowfort line–finish off the bunks. Most of the throw pillows came from Redbubble and feature camping, nature, or road trip artwork. There is a dry erase board for messages inside one of the cabinet doors, and an over-the-door coat hook slipped behind the curtain track next to the door offers a great spot to hang coats and jackets. Jocelyn even cross stitched a custom wall hanging of Parker to add a little character to the space, and she hangs it on another over-the-door coak hook.
Once the interior was complete, Jocelyn and Scott decided to do a little work to the exterior of their pop up camper. They peeled off the original decals and replaced the caps and trim pieces for the electricity and water access. The rear lights and license plate holder were replaced, and Jocelyn even painted a custom spare tire cover. The canvas and body were all given a good cleaning, too. For tips on how to clean your camper exterior, be sure to check out our spring cleaning post here. There are lots of great tips on caring for your camper in there.
Jocelyn hit Redbubble again to find new decals for the exterior of Parker. She bought two large decals–one for each side–and they really help bring the interior theme to the outside of the camper.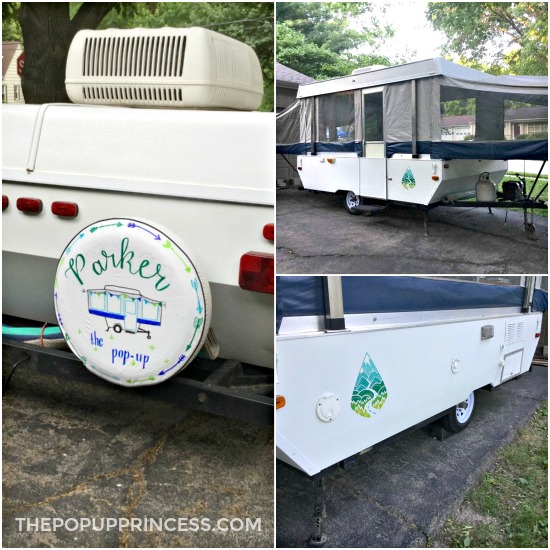
Jocelyn and Scott took Parker out for a quick inaugural weekend outing to break him in and work out the kinks. Then they took a family National Parks tour last summer. They spent 10 days visiting Badlands National Park, Mount Rushmore, Black Hills National Forest, Bighorn National Forest, Yellowstone National Park, Shoshone National Forest, and Grand Teton National Park. Whew! What a trip, right? Jocelyn said they learned the hard way to buy US made tires. Otherwise, though, it was a fabulous trip, all taken in the comfort of their rolling vacation home.
Parker has seen a handful of nearby campsites since then, and Jocelyn and Scott have more fun plans for this summer. As their kids have grown older, they have become more tolerant of long car trips–which means they’ll have a lot more road trips in their future. And I think that is the best kind of summer vacation there is… but I might be a little biased. 😉
Disclaimer: This post contains Amazon affiliate links. The Pop Up Princess is a participant in the Amazon Services LLC Associates Program, an affiliate advertising program designed to provide a means for sites to earn advertising fees by advertising and linking to Amazon.com. This means that if you choose to purchase an item from a link in this post, The Pop Up Princess earns a small advertising fee to help pay for future projects and posts… so thank you! 🙂
Happy Camping!


Very nice…very inspirational. I have always loved the pop-up campers. You have given me some great ideas. Thank you. Enjoy “Parker” … I’m sure you will.
Thank you, Michael!
This is gorgeous! There are so many good, quirky ideas to consider in this remodel. I especially love the tapestry bunk curtains and the cabinet pulls.
Quirky is my middle name!! Thank you!
So cute. I especially love the decals. Happy camping!
Thank you, Mary!
Wow. Love the counter top tile. Where did you get them?
The whole trailer is adorable.
I bought them on eBay, but they are fairly easy to find at big box home stores and Amazon.com.
Are they square tiles or on a sheet? Also having trouble finding the material for the cushions, any suggestions
So many great ideas and I love the color palette! Thanks for sharing!
Thank you, Kelley!
We just got a Rockwood Freedom 2005. Even though it’s still very nice and good condition I am excited to revamp it. This makeover is gorgeous. Very bright and inviting.
It feels so much lighter and brighter after a revamp!
How many tapestries did you order for this project? 2 or 4 of the medium. Who did you source the vinyl from on the seat cushions to match so nicely. Great job buy the way! I am going to try to do this to my new purchase!!!!
Thank you for the questions! One tapestry per bunk and my fabrics came from fabricguru.com! – Jocelyn
Hi! I love the idea of purchasing stickers from Redbubble. Curious to see how long yours held up? I contacted them about outside use and they gave me a general disclaimer that I shouldn’t expose the stickers to sun or wind or rain ;).
Parker is stored inside, so that helps. It’s been two years and exterior stickers are still bright and intact!
I would love more information about the stick tiles as the countertop. Can you elaborate on how you did that?
I know you didn’t ask me, Amber, but I got some similar ones from Amazon. They were super easy to install – just took 1 1/2 hours, and I got a 10 pack for a very similar area.
Amber, the stick tiles I bought were from eBay, but you can find them at most big box home stores and Amazon.com. They are super easy to install and are cut to size with scissors. I make sure we clean up any water on the counter quickly to help them stay put. They have held up well after two years.
Love this color scheme, and you’ve given me some great ideas! I added some peal and stick “glass” mosaic tiles on Saturday. It turned out great and only took 1 1/2 hours. For the last couple of days, I’ve painted my “wood” cabinets in white using a new type of paint called “Cabinet Enamel” from Vaspar. You (supposedly) don’t have to sand, prime and then paint. It does tend to cover very well. And I’m guessing it is going to wear like iron since I can’t even clean the dried paint off of my skin! Thanks for some wonderful ideas!!!