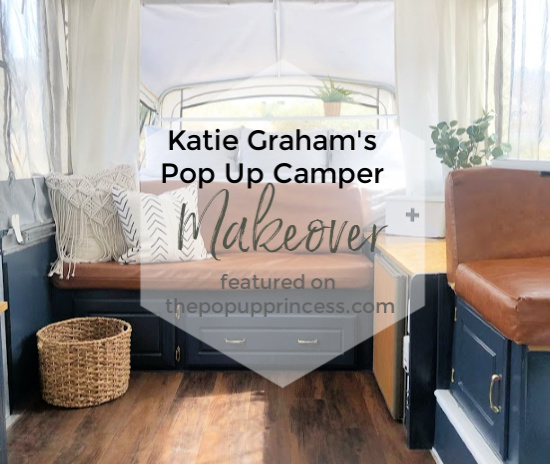
 All you readers out there that have been lamenting the number of white camper makeovers we’ve shared recently are really going to love this next feature. I am a big fan of white cabinets (I have them in my first camper and in my home), but I also love the bold look of a colorful cabinet. Katie definitely went bold on her cabinet color, and it really paid off. Not only is this camper gorgeous, it is kid friendly, too. Read on for all the details.
 It took Katie and her family a few months to find a camper that had everything they were looking for. When they finally found it, the camper was in pretty bad condition. Katie absolutely loved how big it felt on the inside with the dinette pull-out, though, and she could see past the imperfections. She had a vision for this little PUP. She and her family made an offer, and once the camper was theirs, they rolled up their sleeves and got to work.
 This little 2001 Coleman Bayside Elite had been sitting in front of the seller’s house for years and had been popped up for four months straight. That is killer on your canvas for sure, and Katie knew she’d have to patch some areas that had sustained damage. (As a side note, she used Tear-Aid to repair those spots in the canvas.) The camper had layers and layers of dust and dirt on the inside, and it was looking pretty rough. First order of business was a good cleaning. Then Katie started making plans for her remodel.
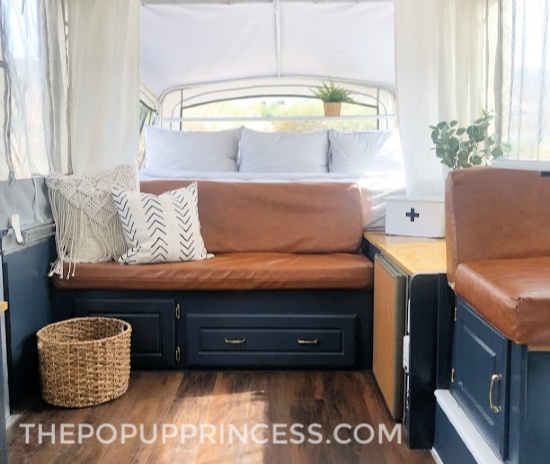
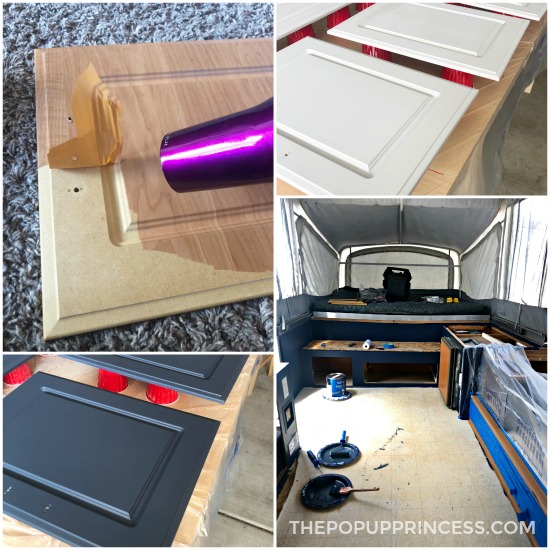 First order of business was painting the cabinets. Katie noticed some of the laminate on the cupboard doors was bubbling up. She removed all the laminate off of the doors by using a blow dryer to soften the adhesive. Then they peeled back the plastic coating and were left with the raw MDF. Katie sanded the doors, then she applied an oil-based primer to the cabinets and sanded again. She went back and forth on paint colors so many times that her husband got tired of her indecisiveness and went with navy. 😆
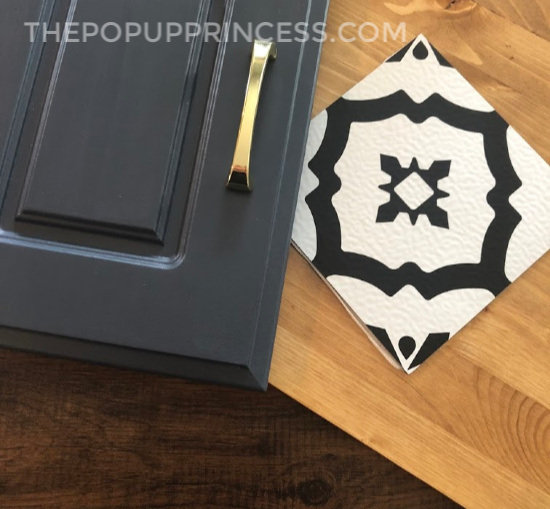
 They used a Valspar paint from Lowes and had it color matched to Benjamin Moore’s Hale Navy. Once they were happy with the paint, they applied a polyurethane topcoat. They had some chipping and peeling on the doors when they first painted them. To prevent that from happening again, they applied a clear topcoat. This not only helped protect the paint but also made for easy clean up. Katie says the navy has been great so far and really doesn’t show much dirt. And now that the cabinets were a beautiful navy, the original hardware really popped. No need to paint or replace it. It’s gorgeous, right?
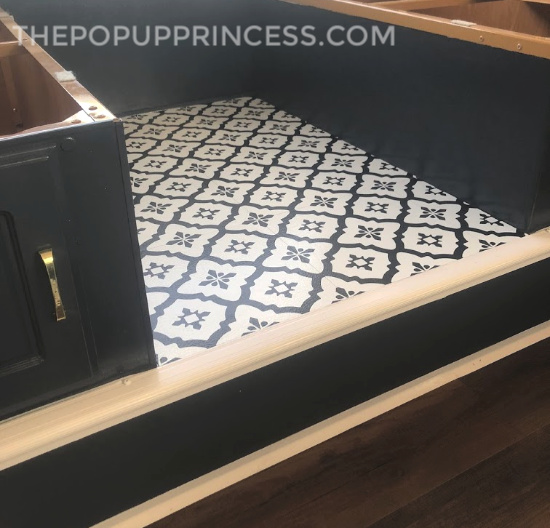 For the main flooring of the camper, Katie and her husband selected an adhesive plank vinyl from Lowes. Katie says making all those cuts was a little difficult, but the end result was worth the work. To add some visual interest, they selected a contrasting flooring for the dinette area. This particular flooring is the Comet design from FloorPops, and it is available on Amazon here. I love the look of black and white tile, but have always hesitated to use too much pattern in a small camper. Katie came up with the perfect compromise by using it in the dinette area only and keeping the rest of the fabrics and finishes neutral.
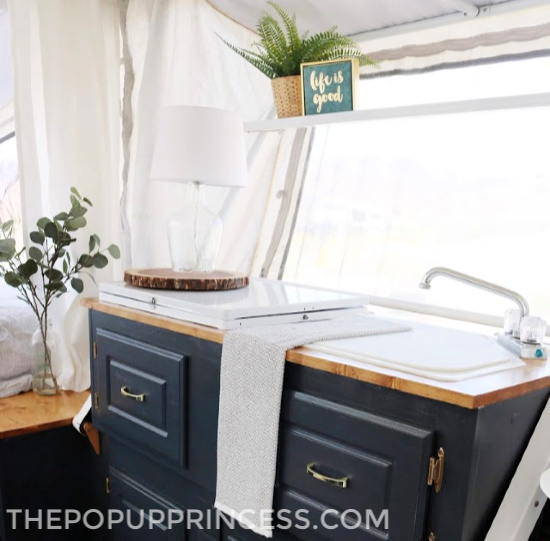 Katie and her husband purchased sheets of edge glued pine board from Lowes to replace the countertops. Using the original ones as a template, she traced, measured, and cut the boards to size. Then she applied a couple of coats of stain and finished it off with a polyurethane topcoat. Katie recommends that if you use this method on your counter tops, make sure to use the polyurethane on the top and underside of the wood. Katie only applied polyurethane to the tops at first, and on their first beach camping trip, the moisture caused some warping. They had to go back and replace a couple of countertops, but made sure to apply poly to both sides the second time around. Problem solved.
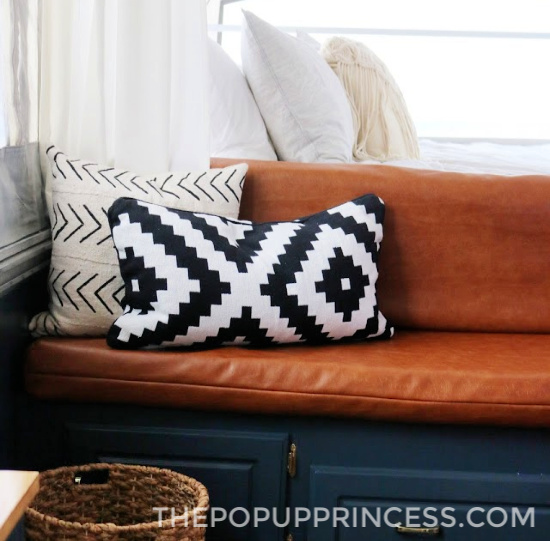 Katie knew she needed the cushions to be upholstered in a fabric that was easy to clean. They would be camping with kids, and that always means there will be some clean up. Am I right? 😉 She selected a faux leather, because she knew it would wipe down easily. Because she isn’t much of a seamstress, she enlisted the help of her cousin to sew cushion covers. They turned out so beautifully, and she says they wipe up like a dream. Perfect for a family-friendly camper!
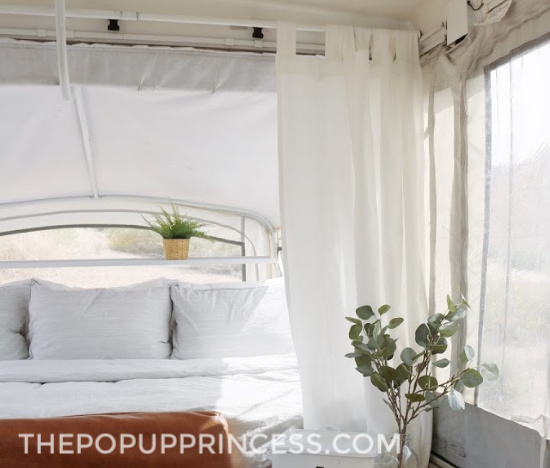 With the curtains, Katie wanted to keep things simple and easy. Since her sewing skills were limited, she bought some cheap curtain panels from IKEA. She cut the panels to size and hemmed them along the bottom. To hang her new curtains, she used a tension curtain rod on each bunkend. This makes it easy to take down the panels for cleaning.
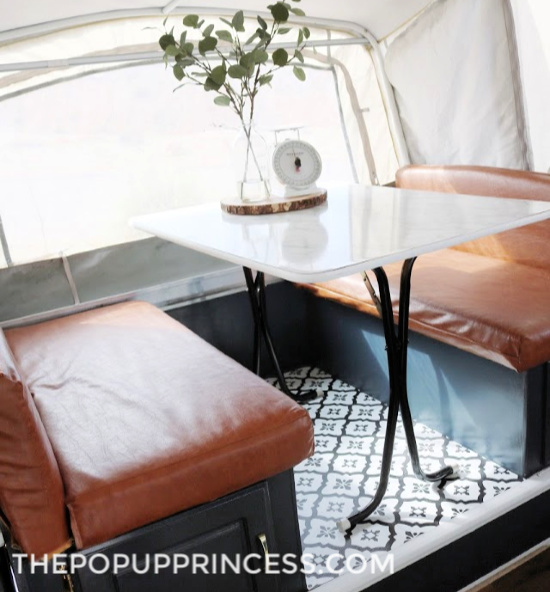 The last little project for the camper was the dinette table. It was still in great shape–it just needed a facelift. Katie covered the top in adhesive marble print paper she purchased off Amazon. To trim it out, she purchased new white t-molding to match the top. Now it looks brand new and goes with the look Katie was going for in her remodel. She added a few decor items and accessories from IKEA and HomeGoods, and the project was complete.
 Katie says renovating a camper in the middle of the summer in Vegas was rough and hot, but she would do it over and over again for the memories they are making as a family. And believe me, they have had some great adventures already! If you want to see what they’ve been up to–and get a peek at tons more pictures of their pop up camper remodel–make sure to follow them on Instagram at The.Great.Grahambino. A huge thanks goes out to Katie for sharing her remodel with us. If you want to see more remodels like Katie’s, be sure to check out our post here on colorful camper cabinet remodels. There are some great ones in there!
Disclaimer: This post contains Amazon affiliate links. The Pop Up Princess is a participant in the Amazon Services LLC Associates Program, an affiliate advertising program designed to provide a means for sites to earn advertising fees by advertising and linking to Amazon.com. This means that if you choose to purchase an item from a link in this post, The Pop Up Princess earns a small advertising fee to help pay for future projects and posts… so thank you!
Happy Camping!


Does the polyurethane yellow your counters? It did ours. I had a pretty grey stone look but next time I opened the camper the tops had a green hue to them. Wanting to eventually replace counters but am a bit afraid the same thing will happen.
It looks awesome! I love the blue!
How much does a renovation like this cost?
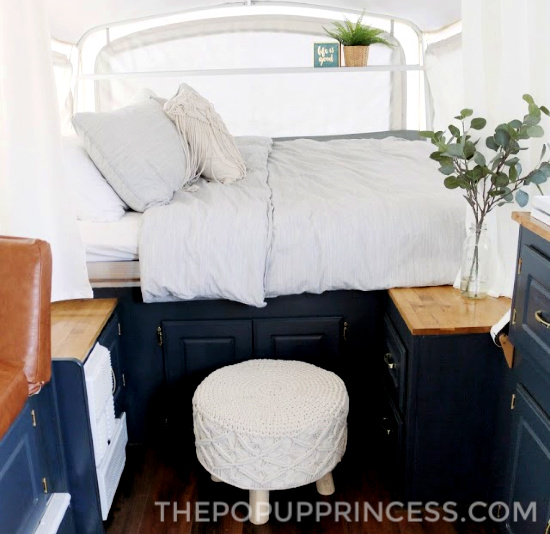
I haven’t seen a camper with shelving in the sleeping area. I’d love to know more about how that’s attached.
That little shelf is awesome, right? It’s a standard feature from the manufacturer. I’ve featured a couple of campers with those shelves. One of my favorites is Courtney’s here.
I didn’t see details of what Courtney used for her shelf. Any other suggestions or posts? TIA 🙂
It is standard from the manufacturer. She didn’t build the shelf, it came that way from the factory. 🙂
I’d love to know where you found the faux leather fabric for your cushions! I have been on the hunt for this exact thing.
Can I ask how many yards of fabric you needed? We have this exact camper and I would LOVE to redo the cushions!!
What thickness of edge glued panel did they use on the galley counter? I ran into problems with the panel breaking down the center once I cut out the areas for the stove and sink. Edge glued panel is pretty flimsy that way.
You know, I’m not really sure, Ryan. Katie didn’t include it in her makeover story. She is on Instagram at @the.great.grahambino, though, so maybe drop her a message! 🙂
Where did you get the faux leather from?
Not sure where exactly Katie purchased hers, but I’ve found faux leather at both JoAnn and Hobby Lobby craft stores. 🙂
Beautiful end result! I’m in the middle of redoing my 2004 popup and just starting the painting. I see you didn’t paint fridge door … is there a reason I should know not to do?
The first thought that came to my mind viewing your makeover was “Vintage Ralph Lauren” and I get it. Good design eye.