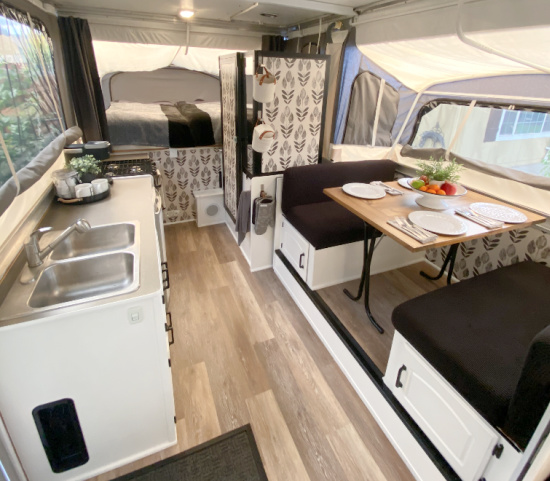
 If you’ve been around here for long, you know I’ve always drooled over highwall pop up campers. They have so much room, and they are perfect for larger families. And they have an actual bathroom! That’s why I am so excited to share this gorgeous highwall makeover from Kristin and her family.
Growing up, Kristin always loved camping. Her family owned an RV, so they would pack up and go several weekends every summer. Her husband, on the other hand, was a “grab a bag and walk into the woods” type of camper. When their children got older, they would pack up the minivan with their huge tent and head out for a weekend here and there. Kristin found it was SO. MUCH. WORK. The packing and unpacking was barely worth the 48 hour camping trip.
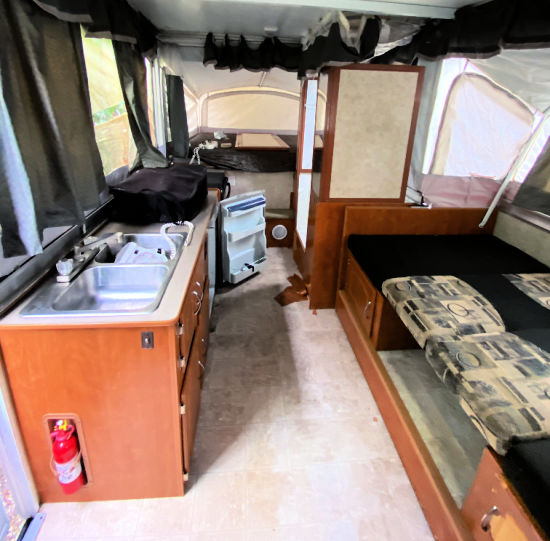 After a few summers of packing up the car and pitching a tent, they decided it was time to hunt for a trailer. After a family vacation was canceled due to COVID, a pop up camper landed in their laps and they knew it was meant to be. Kristin and her family jumped on it. They got an incredible deal on a 2006 Fleetwood Niagara, which they promptly closed up for the winter. During those winter months, Kristin researched, pinned, and dreamed of what she would do in the spring to make that camper a little home away from home.
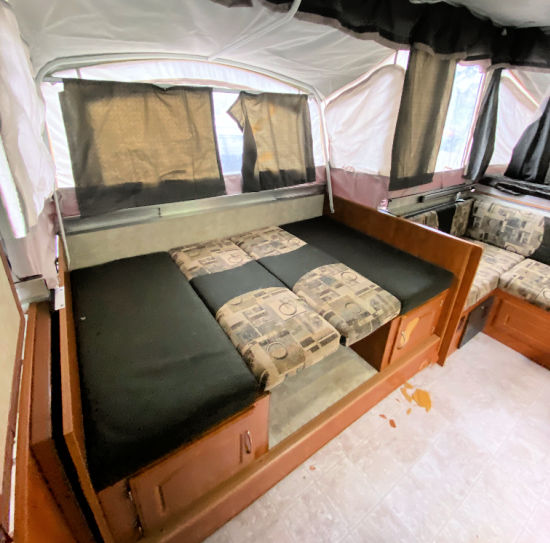 They finally popped it open when the weather hit about 40 degrees, and there was no chance of rain. That’s spring in the Pacific Northwest. 😆 The wheels in her head had been turning all winter, so Kristin cranked up the heater and removed cushions, draperies, and cabinet doors and drawers. She rolled up her sleeves and got to work.
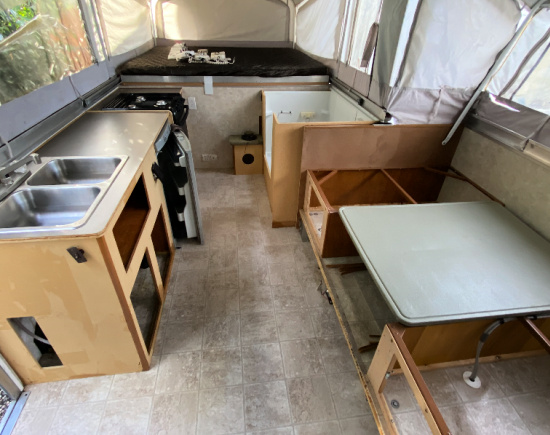 Because she has little kids and little kids like dirt, Kristin’s number one priority was durability. Sure, she wanted cozy, comfortable, and cute, but she knew her kids wouldn’t be as kind to the camper as she would have liked. She decided to remove the laminate covering on the cabinets before painting, and it took many, MANY hours to remove all of it. About half way though she debated if it was worth it, but she feels like it was.
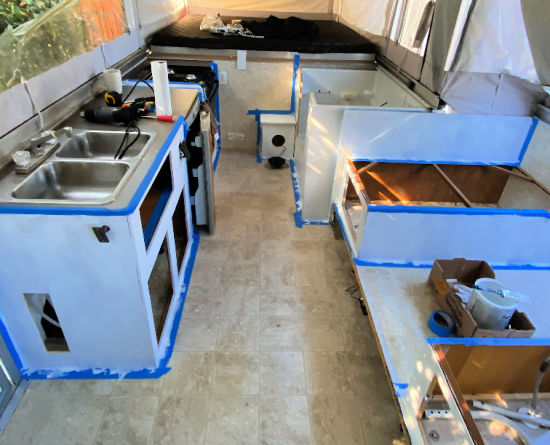 Once the laminate was removed, Kristin gave everything a quick sand, a couple coats of primer, and then settled on Benjamin Moore’s Satin Impervo Paint. Kristin says if you’ve never used this paint before, get ready for a gut punch when they tell you the cost per gallon, but she feels like it is worth the expense. She says there is NO WAY her kids are destroying these cabinets! Kristin installed new cabinet hardware and magnetic hinges, and the cabinets were complete.
If you’re looking for more tips on painting your cabinets, be sure to check out our post here.
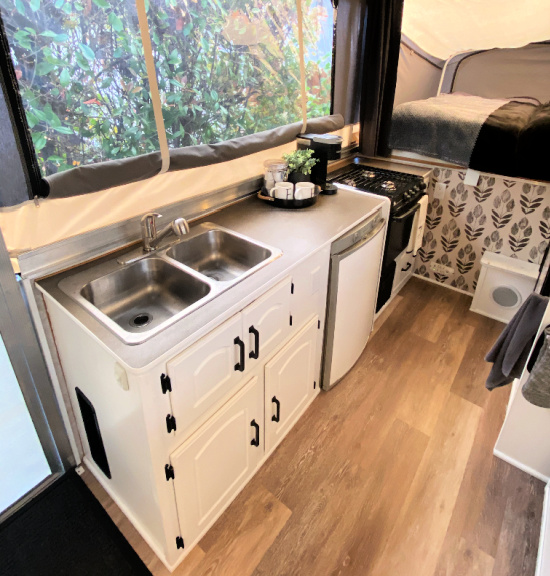 Then it was on to flooring. Kristin researched flooring options quite a bit. Her original linoleum floor was peeling in quite a few places, so she used a heat gun to soften the adhesive and pull it all up. She had all of the flooring out in less than 30 minutes. Then she installed Traffic Master’s floating plank flooring in Khaki Oak from Home Depot.
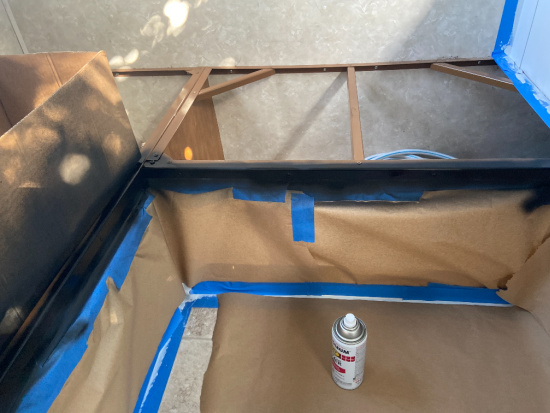 Since Kristin was going with a black and white theme, she wanted to get rid of all of the brown trim. She removed all of the bathroom trim pieces and any metal trim in the camper. Then she sanded, primed, and spray painted all of it black. This was no easy task, and for a while she says she regretted doing it. It was a lot of work, but it really ties the camper together.
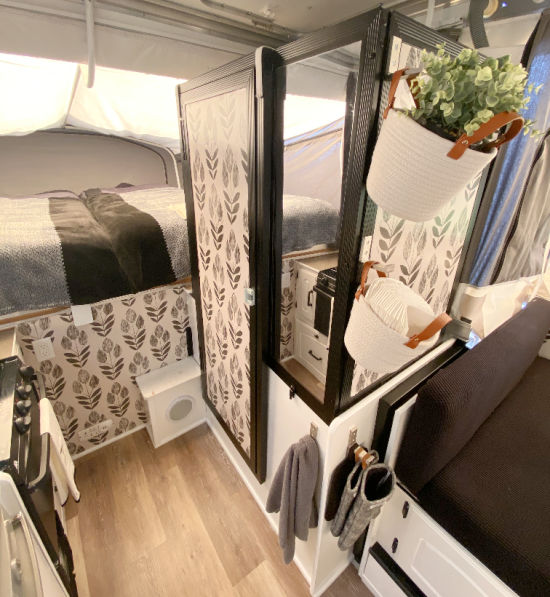 For the time being, they’ve decided to keep the original countertops, because they matched nicely and were still in good shape. They did replace all of the t-trim with a new white trim (you can find that here). What a difference that made, and it is so easy to replace.
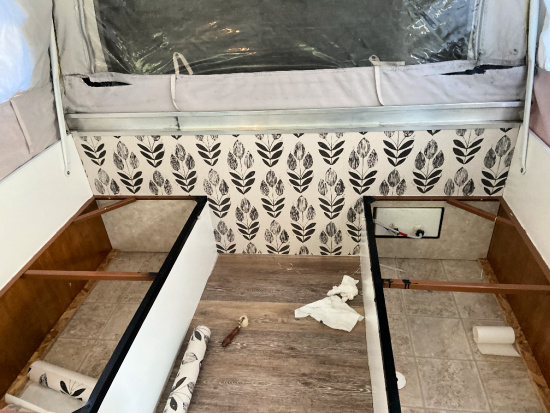 Kristin wanted a splash of something fun, but it need to be durable. She settled on this peel and stick wallpaper, but also used a wallpaper adhesive to make sure it would last through extreme temperatures. The adhesive took quite some time to set (but she says that could be because she was impatient and installed when it was 40 degrees outside 😆 ). Once it finally set, she also sealed it several times with polycrylic. She is happy to report that it seems to be holding up very well so far.
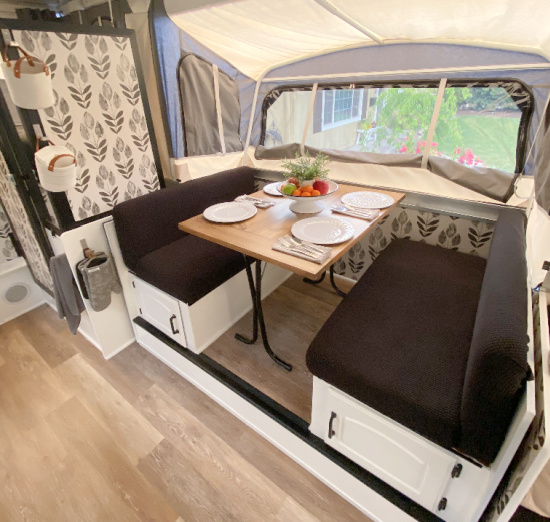 Kristin almost spent a good deal of time sewing cushions covers until another glamper opened her eyes to the world of chair covers on Amazon. (Kristin used the large sized sofa cushion covers.) They were inexpensive, so she figured they were worth a try. She is SO glad she went that route. The covers took up no time at all and stay put so well. Best part? She can throw them in the washing machine when her kids get them dirty.
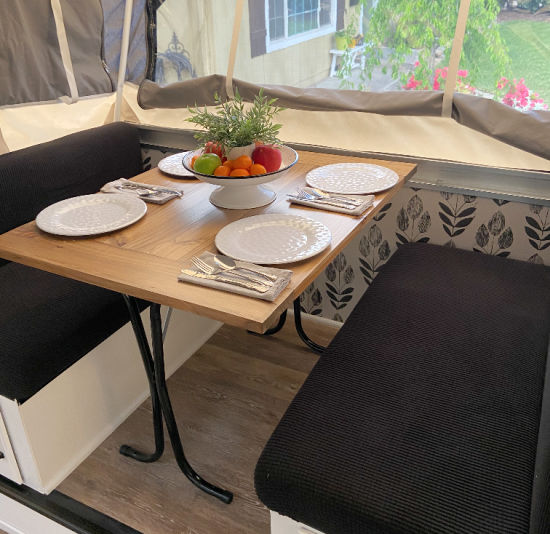 For the dinette, Kristin tasked her husband with building a new table. You can find a tutorial on this table here. I’d say Kristin’s hubby did a pretty awesome job with it, right? They added the anti-fatigue foam mats to the bunk ends and memory foam toppers on their beds. They opted for sleeping bags instead of bedding, which makes it much easier to separate the king bunk into two beds for the kids. Want more tips on sleeping comfortably in your pop up camper? Make sure to check out our post here.
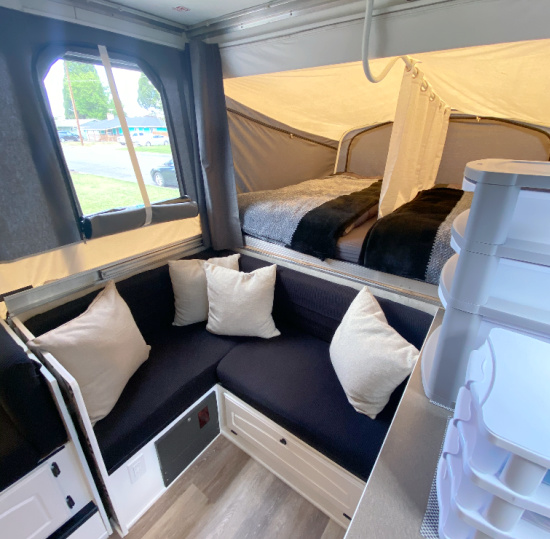 Last, but not least, was the canvas replacement. Kristin’s canvas still had some life left it in, but with some holes in the screen and a few rips starting to rear their heads, they decided to bite the bullet and replace the whole thing. They used Bear Creek Canvas for the replacement and could not be more pleased. Bear Creek delivered the canvas more quickly than Kristin anticipated, and when a few of the panels didn’t fit just right, Bear Creek had the pieces picked up, fixed, and shipped back to them within the week.
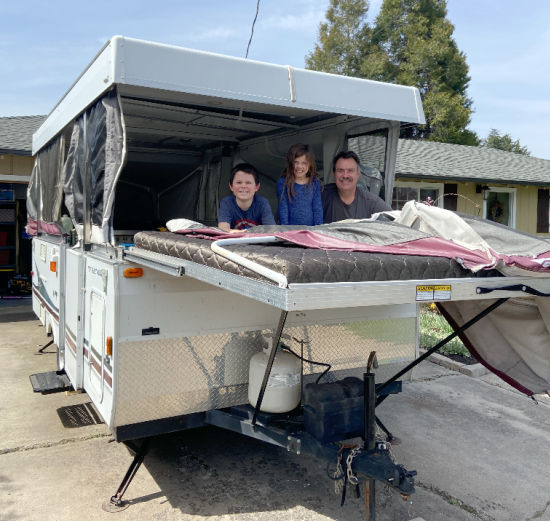 It was about $1,200 for the entire canvas, and Kristin says that was well worth the investment. They only paid $3,900 for the trailer itself, so even with the brand new canvas, it was still a steal. They called Papa to come and help them remove the old canvas and got the new one installed in about a half of a day.
 After a deep clean, Kristin and her family headed out for a weekend test trip. What a difference it made to have everything packed and ready to go! Not having to unpack anything but food and clothes when they got back made camping so much more enjoyable. They loved every moment of that weekend and have several more trips booked for the summer. Lovely job, Kristin! Thanks so much for sharing with us.
Disclaimer: This post contains Amazon affiliate links. The Pop Up Princess is a participant in the Amazon Services LLC Associates Program, an affiliate advertising program designed to provide a means for sites to earn advertising fees by advertising and linking to Amazon.com. This means that if you choose to purchase an item from a link in this post, The Pop Up Princess earns a small advertising fee to help pay for future projects and posts… so thank you!
Happy Camping!


Are those cushion covers dining chair covers or loveseat slip covers?
The link has been fixed, Heidi. 😉 Kristin used the large sized sofa cushion covers.