Lindy’s makeover is proof that even an inexperienced owner can remodel her pop up camper on a small budget with a little hard work and determination. Lindy did all the work on her family’s pop up camper on her own, with minimal help from others. She stuck to a $300 budget, and the results are simply amazing.
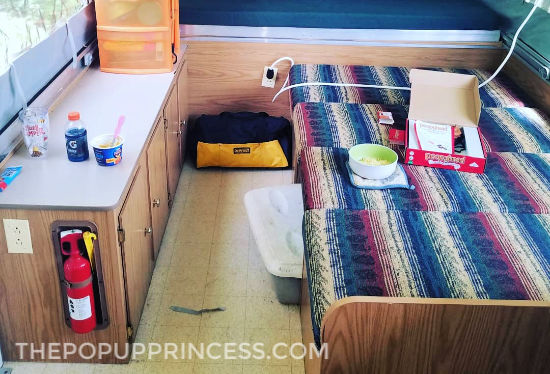
I just love the story behind this next reader feature! Lindy knew she wanted a pop up camper, and she knew she wanted to remodel it on her own. That is exactly what she did. When she discovered her neighbors had an unused Coleman Sedona pop up camper sitting on the side of their house, Lindy introduced herself and started asking questions. Her persistence paid off, and the neighbors offered to sell her the camper for $1400. Lindy snatched it up, named her after Penny after a beloved aunt, and set out on her new adventure.
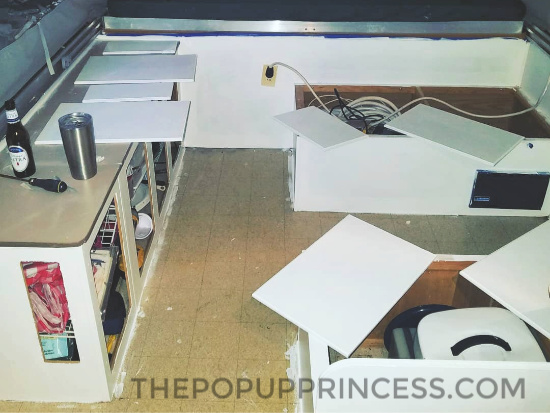
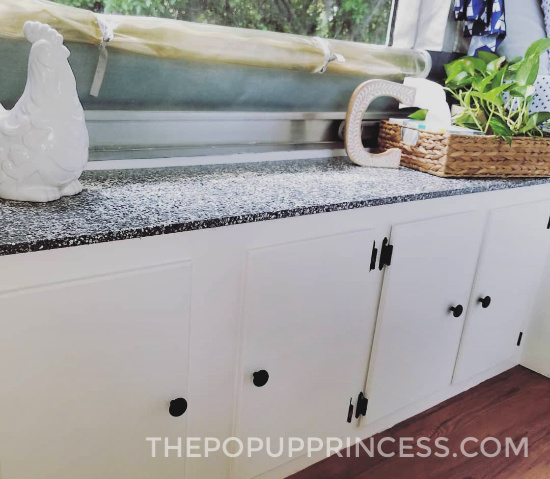
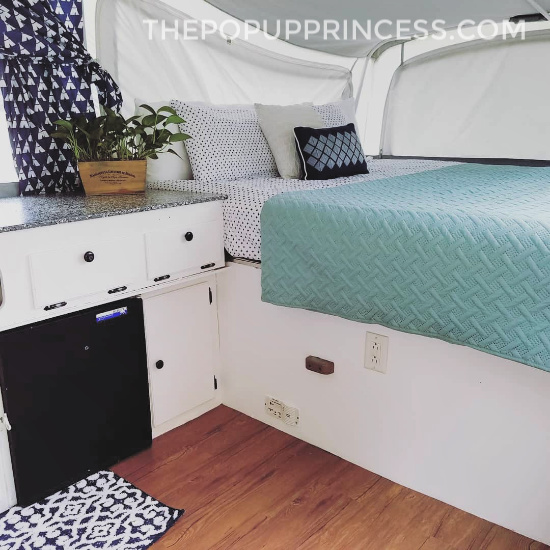
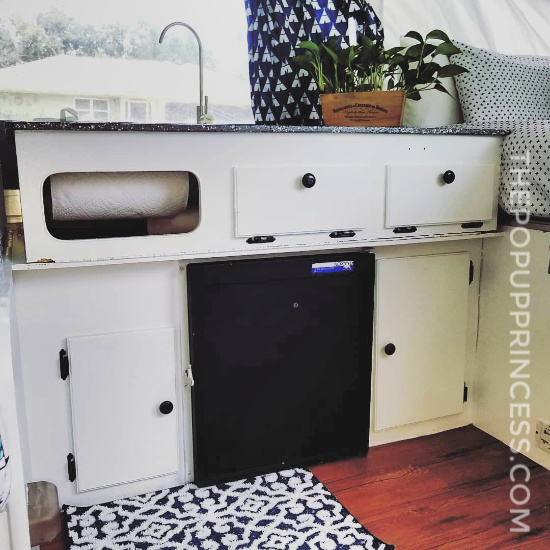
The first thing she wanted to tackle was painting the cabinets, because it was the task she dreaded the most. She felt it was best to just get it out of the way as soon as possible. She removed all of the doors and cleaned them with soapy water, then rinsed them with clean water. Lindy’s husband used to paint cars, so he always makes her do the prep work when she paints. Smart man! 😆 Lindy painted every cabinet surface with Zinsser Primer followed up with Valspar Ultra Interior Satin in the Sherwin Williams color Ultra White.
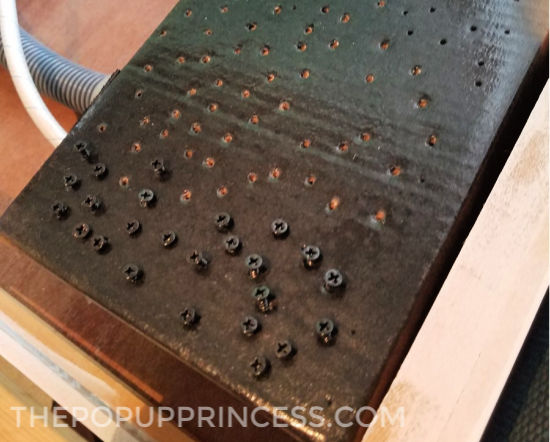
The cabinets took three coats of paint before Lindy was happy with the coverage. She says she probably could have avoided the extra coats if she had used a higher quality paint, but she was challenging herself to keep her remodel budget under $300. To save on money, she reused her original cabinet hardware. She cleaned the knobs, pulls, screws and hinges well. After the hardware dried, Lindy spray painted them with a can of primer and followed up with a metallic black spray paint. Lindy’s husband showed her that if you screw all of the screws into a piece of cardboard, they are much easier to paint. Great tip!
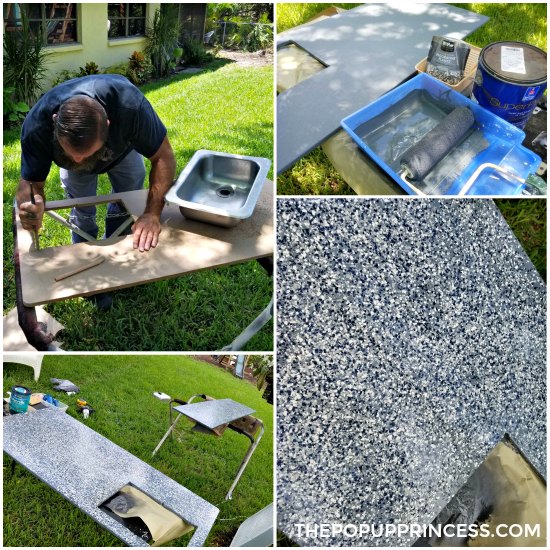
Lindy also prepped, primed, and spray painted the outlet covers with white spray paint. The fire extinguisher holder got a coat of black metallic paint to match the hardware. For an extra special touch, she painted the fridge door in a coat of chalkboard paint. Then she moved on to the countertops. Lindy really liked the challenge of repurposing and reusing the original parts of the camper when she could, but the countertops were one area where she just couldn’t do that. She took her countertop measurements down to Home Depot and had a solid piece of ½ inch MDF board cut down to size. The total cost was $25.
Then Lindy took it home, traced her old countertops, and used her jigsaw to cut out the sink and corners. She opted to ditch the propane stove to give herself additional counterspace. Lindy and her husband do all of their cooking outside, so they really didn’t need the stove. After cutting everything out, Lindy used a dark grey paint they had leftover from a previous project and painted the new countertops with two coats of it. To give the surface some depth, they followed up with garage floor flecks and three coats of polyurethane.
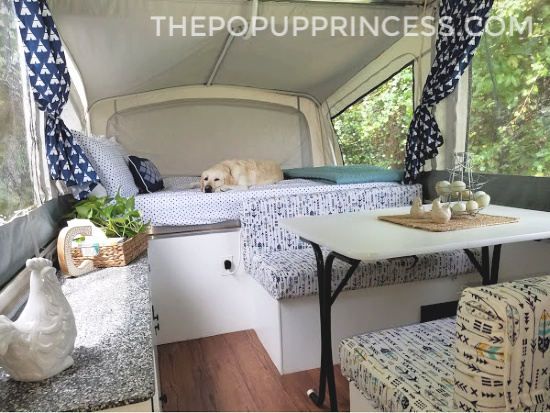
Lindy was also dreading the curtains and seat cover projects. She wanted them to look pretty but also appeal to her husband–so nothing too girly. The cushion covers also had to withstand dirty kids and dogs with minimal effort on Lindy’s part. It took her three weeks, six shopping trips, and a year off of her life before she finally came up with a color scheme. 😆 Lindy’s mother-in-law is awesome at sewing, so Lindy dragged her along to all of the stores. They started with the curtains and kept everything pretty basic. Lindy’s mother-in-law was nice enough to hand stitch the original curtain tabs to the new curtains and has the calluses to prove it.
When it was time to tackle the seat cushions, Lindy and her mother-in-law had no idea what they were doing or how they were going to do it. They set aside a whole day, and it was a good thing they did. Making that first cut was terrifying! Lindy says they basically made large envelope-type covers by wrapping the material around the cushion like a burrito. After cutting all the pieces, they placed the material wrong-side out around the cushion and started pinning. Since the material wasn’t long enough to cover the sides, they cut pieces to cover those and sewed the whole thing together. She left a flap over the back of the cushion where she attached Velcro. Now the covers can be easily removed for cleaning.
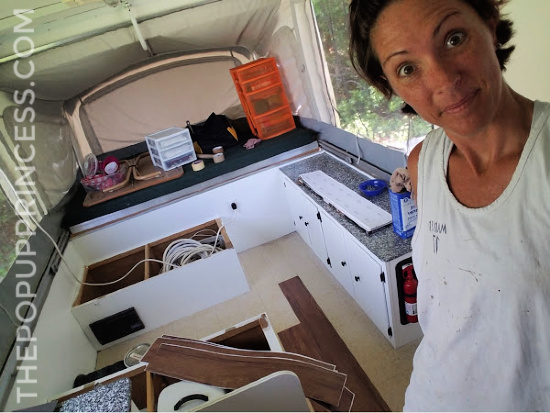
Lindy was most excited about the flooring, so she saved that part for last. It was her motivation to keep working on all of the above mentioned least favorite projects. Haha. She opted for adhesive wood-look plank linoleum, which she picked up on clearance from Walmart. When she went to install her new flooring, she was met by her well-intentioned husband and his bucket of tools. She just knew the perfectionist in him would have turned this quick project into a days long ordeal, so she banished him from the camper and took on the project herself.
Lindy cleaned the floor with soap and water, rinsed with fresh water, wiped the old linoleum down with mineral spirits, and then gave it another fresh water rinse. With that prep work out of the way, she layed her adhesive tile right over the existing floor. Easy peasy! Lindy added bedding and accessories and the new look was complete. She even managed to stick to her $300 budget.
Since Lindy finished this project, she has had so many families come up to her wanting to redo a pop up camper of their own. In fact, her kids’ PTO is even searching for one so they can remodel it and auction it off as a school fundraiser. Lindy loves the fact that her makeover has inspired friends to get creative and get outside with their kids. 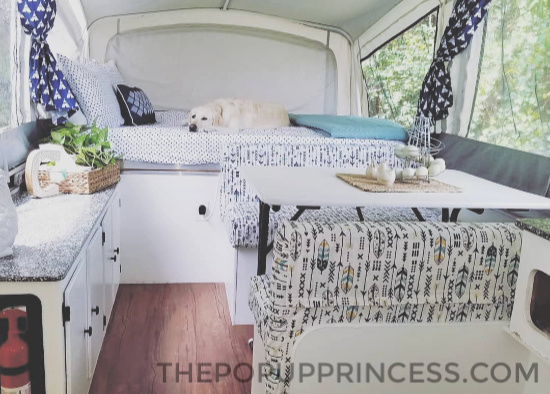
They have been on six camping trips since the renovation, and everything is holding up great. But the biggest thing Lindy wants everyone to know is that anyone can do this! Lindy is not a professional. She had minimal help from her husband and only basic guidance from her mother-in-law on the sewing. She did 95% of the work all by herself and had no clue what she was doing when she went into it. I am so proud of what Lindy accomplished on her own. She is pretty amazing!
Thanks so much for sharing your makeover with us all, Lindy. It’s gorgeous, and you should be very proud of all your hard work.
Happy Camping!



Ooooh I love this one so much! This is exactly what I am hoping to do this summer.
Good job! It looks great and I am impressed that you did everything yourself.
Very pretty and calming. I pick up MY puppy today. Can’t wait to rehabilitate it. The previous owners tried, bless them. 😄
It is just fantastic, a job well done! Being Lindys Mom and camping with her has inspired me to start looking for one of my own! Penny the Pop-up has evolved into great adventures with family and the happiest memories ever! I can’t wait to join them on another adventure👍
Lindy you did an amazing job ..you have inspired me to buy a pop-up and hopefully do as good a job as you did….you ROCK!!!!!
Love the fabric choices! It’s so cute. I’ve had my pop up for a year now and that is my biggest challenge – trying to figure out the color scheme! Love the counter tops too.
Great job!! Love those counter tops.
I’m so impressed that she did 95% of the work herself! I’m not a DIYer by nature, so the idea of doing this is very overwhelming for me.
It’s beautiful. I am getting ready to do my own in similar colors. My question is how do you remove and reattach countertops?
Open the cabinet and there are screws going into the bottom of the countertops
Great inspiration! We’ve spent this summer (2020) camping in our new (to us) pop-up and figuring out how what we want to change since we’ll be taking stuff apart to clean, paint and update. This really gives me hope that I can have a great outcome!