


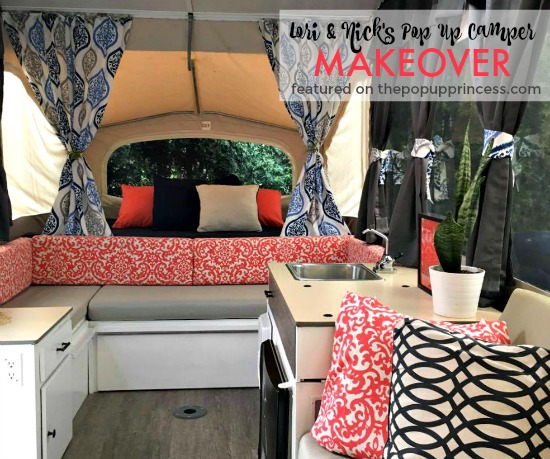
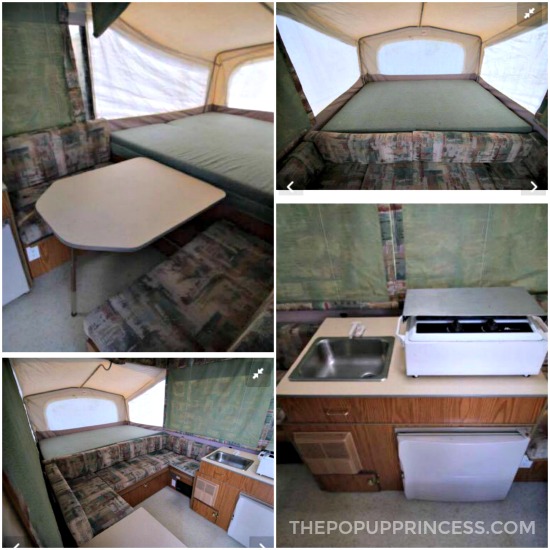
I’m thrilled to share another reader makeover with you all this weekend. It has been waaayyy too long since I’ve been able to share a reader makeover, and this one from Lori and Nick is so awesome, it totally makes up for it. Lori and Nick have a 1999 Jayco Eagle that was in great shape, it just needed a little update.
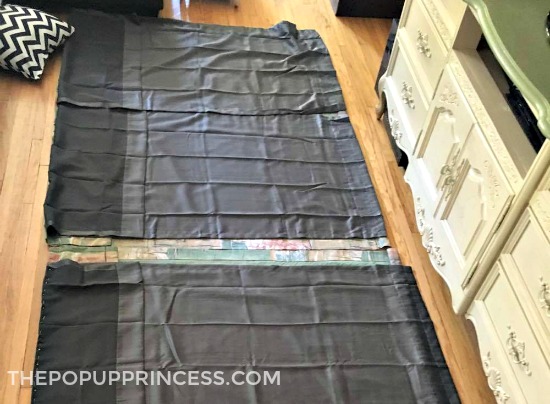
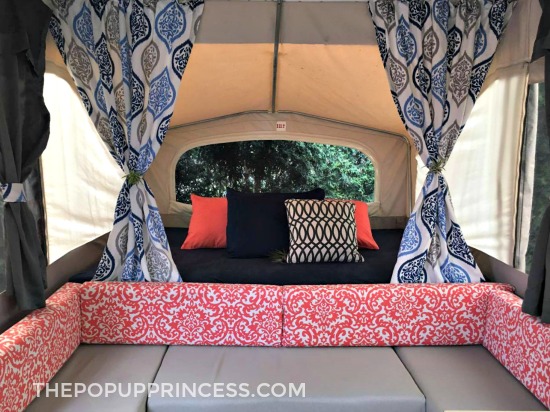
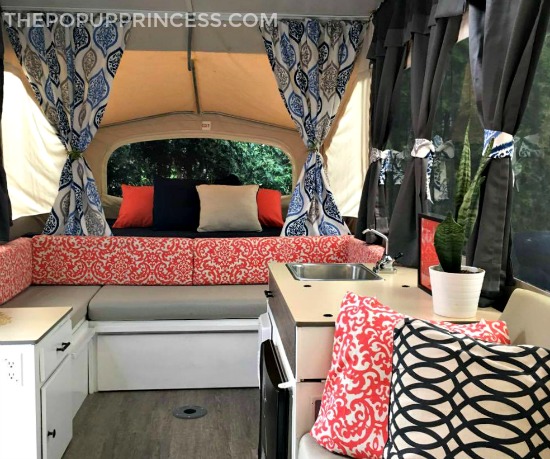
 Lori found inspiration from this blog and her friend, Jessica, who had just remodeled her own pop up, so she decided to complete a makeover on her own PUP. She started with dark gray pre-made blackout curtains and based her makeover plan around them. Lori cut the tabs off the old curtains and sewed them onto the new curtains. She used all the leftover fabric to make tiebacks.
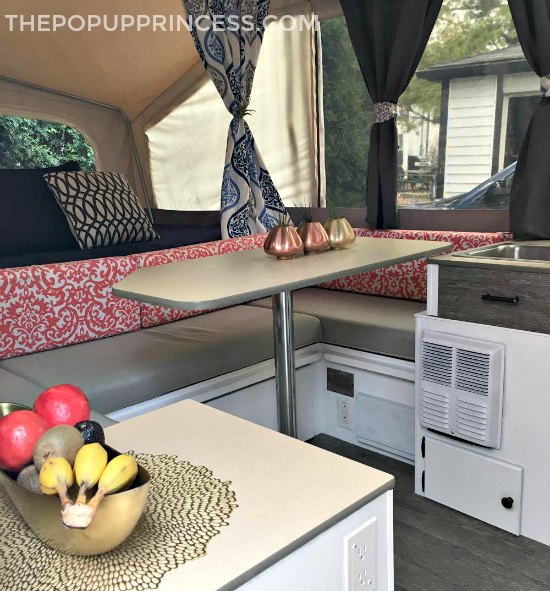
Next up were the cushion covers. Lori found some great fabric that was durable, easy to clean, and looked great. She used the existing cushion covers as a pattern to make new covers from her pretty new fabric. Because the fabric on the bottoms of the cushions was still in great shape, Lori was able to reuse it.
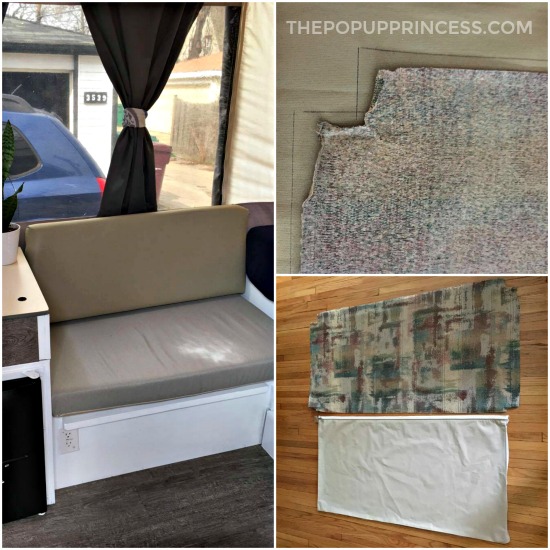 Because there were a lot of gray and blue tones going on in the camper, Lori really wanted to mix things up. She wanted to add a pop of color, so she used a fun coral print to cover the back cushions. Doesn’t it look great? And all that cushion fabric was purchased at Walmart.
Lori and Nick didn’t need the extra sleeping area on the other side of the camper, but they were really short on storage space. To give themselves some extra room to store all their camping essentials, they removed the seating area and made a custom storage area.
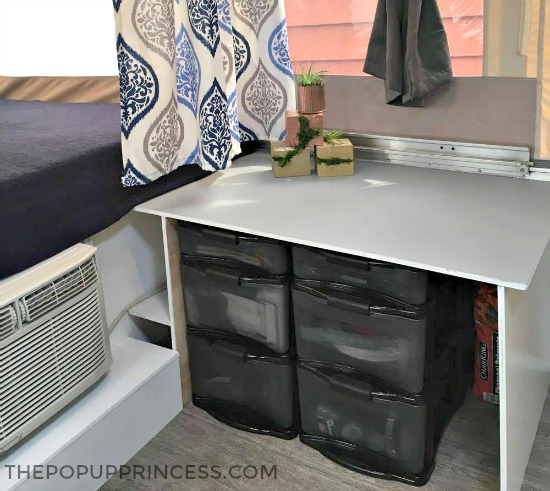
It works perfectly for Lori’s plastic drawer units. Nick even built a cover for the exposed cables. All in all, it cost them about $50 to make this modifications, and it was well worth the expense.
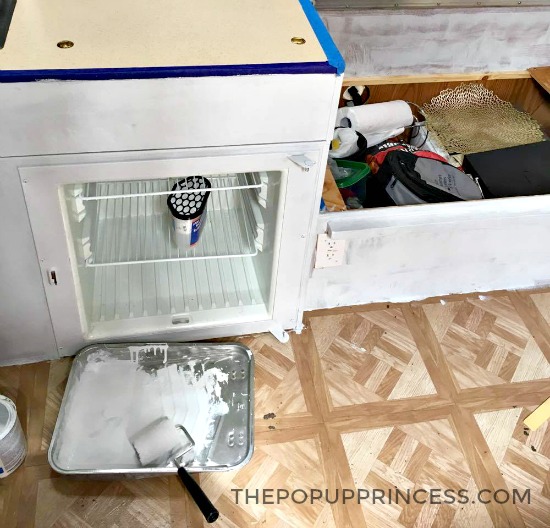
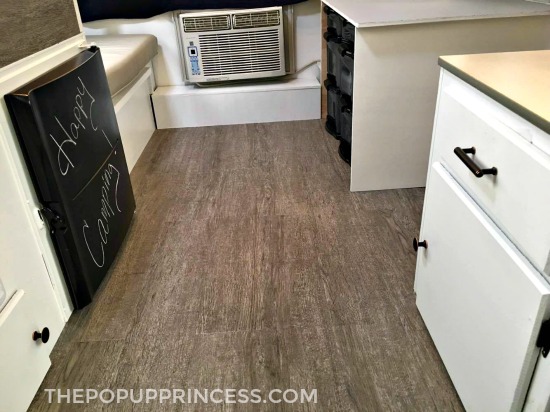
Next they moved on to the cabinets. Lori painted two coats of primer on the cabinets followed by two coats of semi-gloss white paint. She added new hardware and a new sink faucet, which gave the cabinets a whole new look. For a fun look, they painted the refrigerator with chalkboard spray paint.
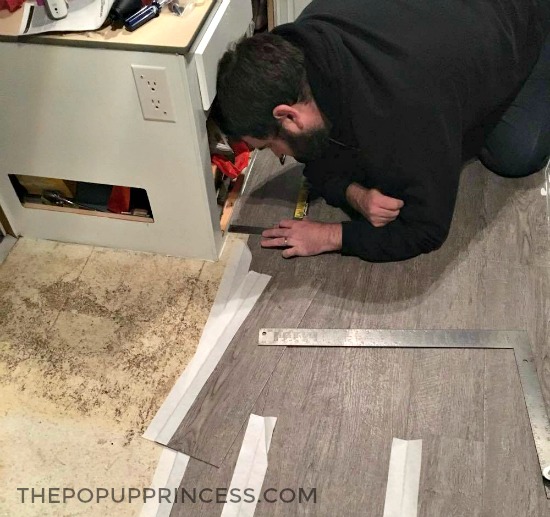
Last up was the flooring. Lori and Nick installed a new vinyl planks over the existing linoleum. It cost them about $80 to do the whole camper, and it really completes the new look. I just love the way it looks with those crisp white cabinets. (And just in case you are wondering, the A/C unit was installed by the previous owners. Nick and Lori don’t have any instructions on that one. 😉 )
All in all, the makeover cost Nick and Lori about $350, and they are both so thrilled with how it turned out. They still have a few projects they want to complete–like the countertops–but they were excited to get it out to some campsites this season.
I am really loving how the whole makeover turned out. I can’t believe how much of a difference $350 and a little hard work makes. Great job, Nick and Lori! Thank you so much for sharing with us.
If you’ve been inspired to complete a pop up camper remodel of your own, I’d love to see it. Check out this page for more information on how to get your camper makeover featured in our reader features.
Happy Camping!

Can you tell me how you did the sink/faucet? I am wanting to do this in ours and am clueless. We took out our water tank and plan to just hook up to a hose at campsites…are we able to put a new faucet in and use just the cold side? Any help would be appreciated!
Your camper looks awesome!
Thanks!
what bring of paint did you use for the cabinets?
did you roll on or spray on the paint for the cabinets?
Check out this post on painting camper cabinets, Lisa. It has all that info. 🙂
How did you change the latches over to knobs? I’m wondering if I take the latches off and put knobs the cabinets wont stay closed