Buying a used pop up camper can be tricky. On the one hand, you can save a lot of money buying used from a private seller. We got a screaming deal on our Coleman Santa Fe, and the best part is that we don’t have a monthly payment. That’s huge for us! On the other hand, though, owners can sometimes be less than honest about the camper they are selling. This means that you can often get saddled with a bigger project than you expected. That is why it is super important to make sure you thoroughly inspect your camper before you pull the trigger on that purchase. If you need more tips on buying a used camper, be sure to check out our guide here.
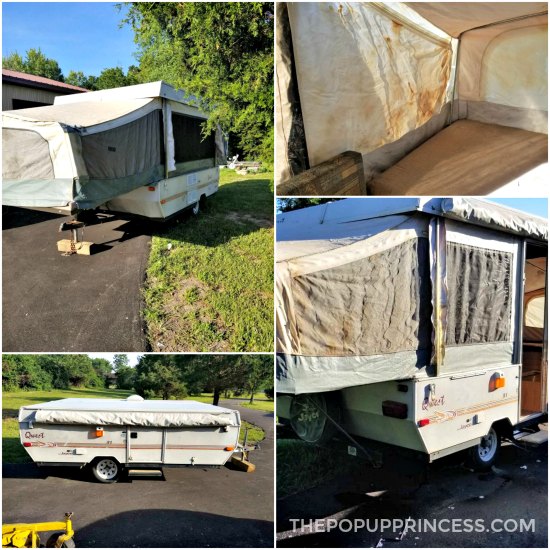
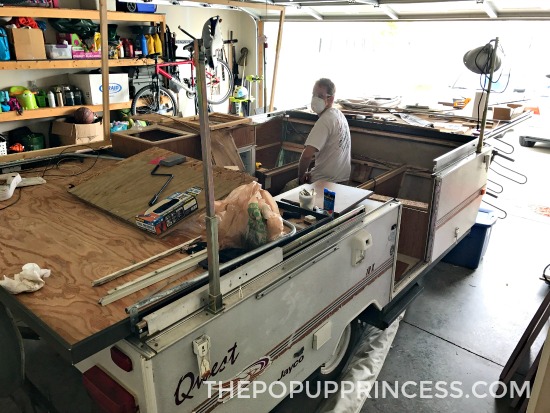 Even when you do everything right, though, you can still find unexpected issues with your pop up camper. That is exactly what happened to Matt & Katie when they purchased their 2001 Jayco Quest 10x on Craigslist. They had been searching for a pop up for weeks, and everything in their area was getting snatched up too quickly. They kept seeing an ad for a Jayco camper that “needed work,” so they eventually decided to go take a look at it.
At $500, they thought it was a good deal. After chatting with the owner and finding out what work was necessary, they felt confident taking it on. They knew they’d need to buy new canvas, which they’d priced out at Jayco for about $500 before they purchased they camper. Even with the new canvas cost considered, it was still way under their budget. They’d done their homework before going to see it and carefully inspected the camper for any red flags. It seemed structurally sound and ready for a minor cosmetic makeover.
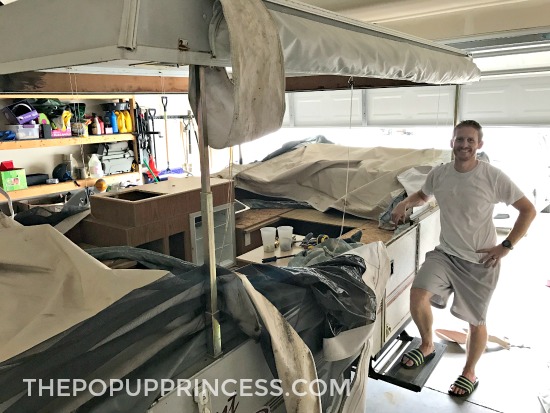 When they got their new camper home and started taking the old canvas down, Matt & Katie made an unwelcome discovery. There was rotten wood that extended throughout the entire roof. They hadn’t thought to look between the roof and the canvas, but once they removed the tenting, the rot was obvious. Now they had a huge project on their hands, but undeterred by the scope of a roof rebuild, they dug in their heels and got to work.
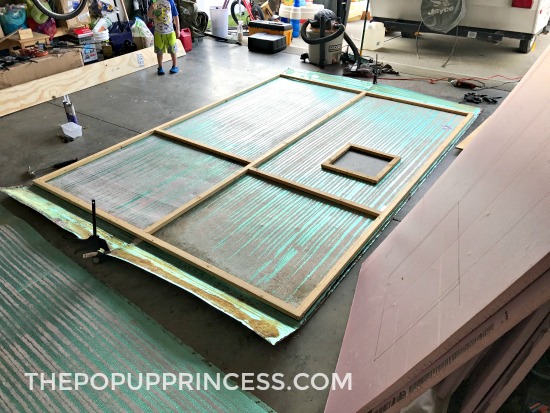
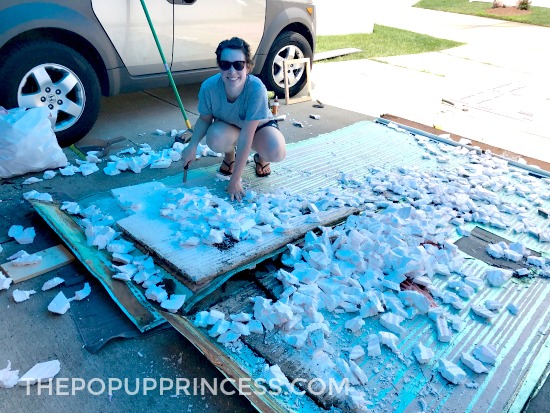 Matt removed the roof and Katie scraped off the old foam from the inside for hours. It was actually still wet from old water damage. Katie was surprised at how simple the construction of their PUP roof was. She says it was basically a thin wood frame, and 1-inch insulation foam, and a sheet aluminum skin adhered to the top. Once they had the foam insulation removed, Matt built a new roof frame, bought replacement foam insulation, and began the process of reattaching the aluminum skin.
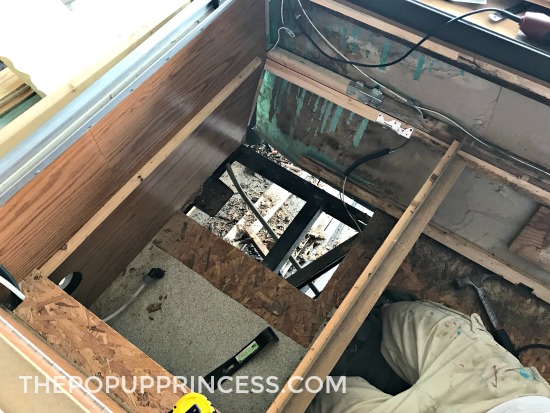
With the new roof complete, Matt and Katie knew they had to thoroughly examine the body of the camper to see if it was solid. Sadly, it was not. They found water damage to the body panels and subfloor of the camper upon closer inspection. Matt had to rebuild part of the front end and replace a section of the subfloor before they could go any further with the remodel.
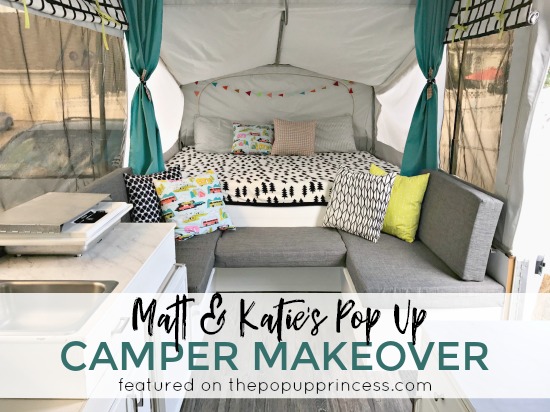
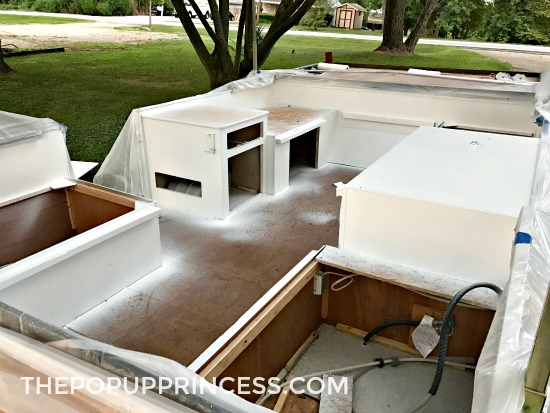
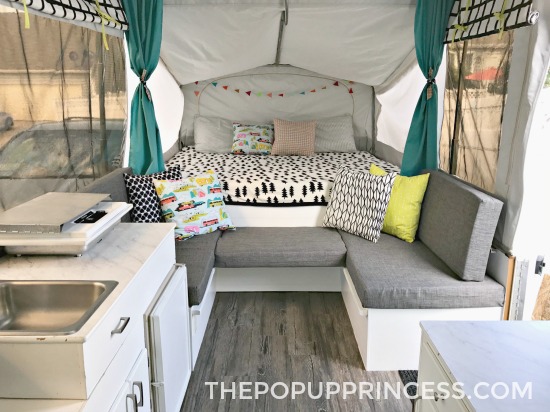
It was a lot of work, but with their pop up finally structurally sound, Katie and Matt were able to start painting the interior. It was actually convenient that the roof and canvas were removed, because it made painting the cabinets with a spray gun really easy. Silver linings! 😆 After working on structural issues for so long, it was exciting for Matt and Katie to see some of their projects making such a difference in the appearance of the camper. They painted all the cabinetry white and replaced the hardware. It completely transformed their little Jayco.
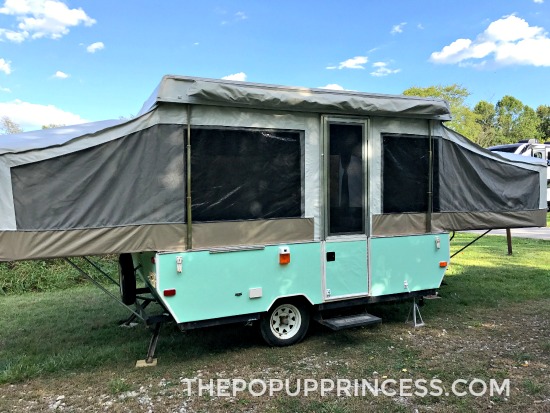
They had to paint the roof due to the rebuild, and they replaced the exterior hatches and vents as well. Matt decided to paint the body of the camper while they were at it. Inspired by retro VW camper vans, they selected a Behr Premium exterior paint in the color “Free Spirit.” Fitting, right? Matt used rollers and brushes to paint the body of the camper, and Katie reports that nearly a year later, it is still holding up beautifully.
While Matt was working on the structure of the camper, Katie took on the cleaning and planning. She scrubbed and cleaned everything while it was dismantled–the door, the vent, the cushions, and the mattresses. The foam was actually in pretty great shape, so Katie just gave it a good cleaning and started looking at upholstery options. She also began choosing a fun color scheme for their little camper, which they named Poppy.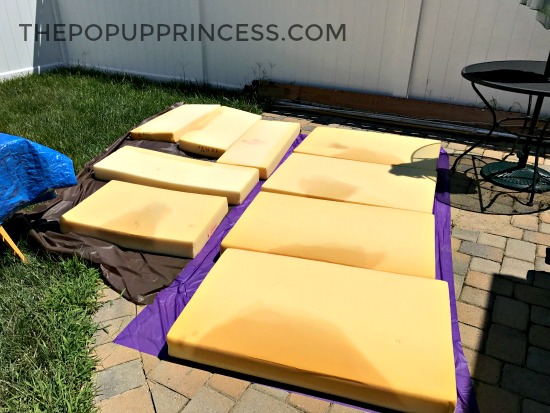
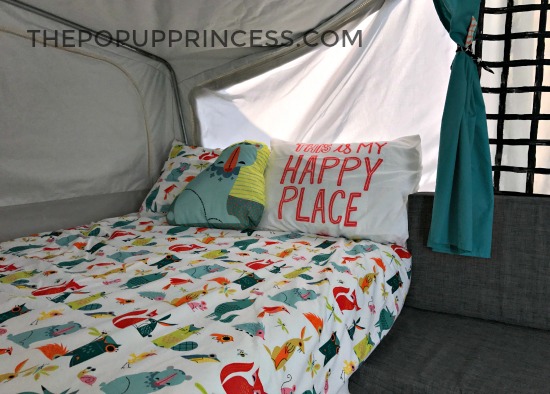
The kids’ bedding from IKEA actually inspired the entire color scheme of the camper. Katie really wanted the cushion covers to have removable covers, but didn’t want to deal with sewing in zippers. To achieve the perfect cushion slipcover, Katie made envelope-style covers and squared off the ends using this tutorial from Confessions of a Serial DIYer.
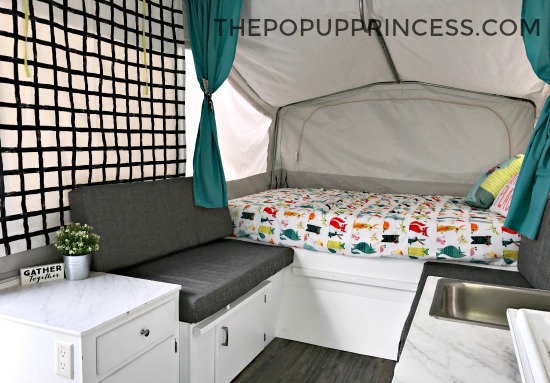
Katie was able to salvage most of the original curtain tabs and sewed them onto hemmed flat sheets for the bunk end drapes. For the side curtain panels, she used inexpensive IKEA fabric to sew a shade. The fabric was perfect, because it was extra wide and fit the windows easily. She sewed the original curtain tabs to the patterned fabric and added ties at the top. This enables her to roll up her shades when she wants to open up the windows or needs to fold up the camper. The best part of these roll-away shades? No wrinkled curtains when she opens up the camper. Great idea!
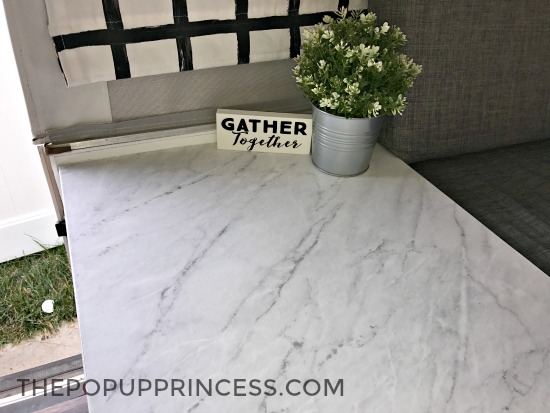
Katie applied a gorgeous marbled adhesive paper to the countertops. It’s durable and looks amazing. You can find that product on Amazon here. She initially painted the t-molding around the countertops, but it didn’t hold up very well. It began to chip and crack. Katie ended up replacing the painted trim with new, white t-molding, which you can also find on Amazon here.
When Matt was repairing the subfloor, they knew the old, outdated floor would need to be replaced. They selected a gray adhesive-backed plank vinyl from Home Depot to replace it. Because they didn’t have much square footage to cover, they only needed one box. It ended up being a really economical fix that totally changed the look of the space.
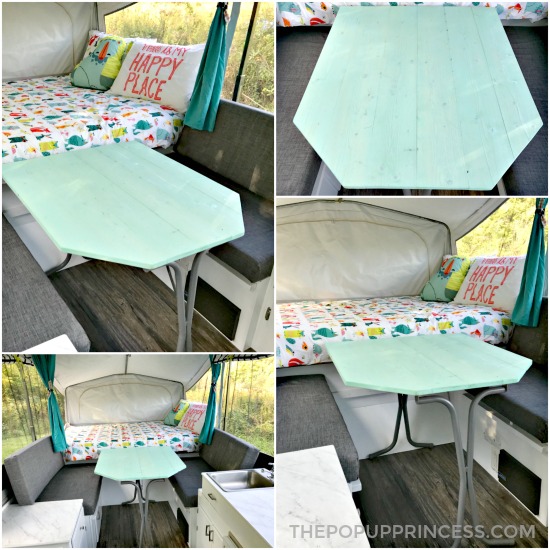
To complete the remodel, Matt build a new table for the dinette. Katie loved the look of wood planks, so Matt constructed a plank table which he reinforced from the bottom with metal brackets. Now there is no problem using this table top as a bed support, and it makes a great statement piece when it is set up. They watered down the exterior paint they used on the outside of the camper and gave the table a color wash so they could still see the woodgrain. The original legs got a coat of spray paint, and the makeover was complete.
Matt and Katie had spent the summer working on their camper, so as soon as it was finished, they took a few Fall camping trips. Katie says it was wonderful, and they had an amazing time as a family. They ironed out all the kinks and have started gathering gear for this year. In fact, they already have their 2018 camping season planned, with a trip to the beach coming up soon.
They are rock stars, right? I am so impressed with their dedication and determination to take that lemon and turn it into some amazing lemonade. That was a pretty intense project. Way to go, Katie & Matt! Thanks so much for sharing your remodel journey with us, and I hope you enjoy many happy trips in Poppy as a family. You’ve definitely earned it. 😀
Disclaimer: This post contains Amazon affiliate links. The Pop Up Princess is a participant in the Amazon Services LLC Associates Program, an affiliate advertising program designed to provide a means for sites to earn advertising fees by advertising and linking to Amazon.com. This means that if you choose to purchase an item from a link in this post, The Pop Up Princess earns a small advertising fee to help pay for future projects and posts… so thank you! 🙂
Happy Camping!


This is the pefect camper remodel idea for us, one question, did she added weight to the bottom of curtains?
All looks amazing!
Thank you
Do you remember the flooring color name! I love how it turned out. Y’all did a beautiful job!!!
I love the idea of the Roll up curtains but could you tell me a little more so I can use your wonderful idea and design?
Yes, please, share more on roll-up curtains. I’m at the curtains phase of our remodel and love this idea.
I don’t think Katie regularly checks the comments here, Connie. Sadly, I don’t have a tutorial for the roll up curtains on the blog, but there are some great tutorials on Pinterest.
Can you tell me where she purchased the new vinyl for the pop-up?
What vinyl are you referring to? 🙂
I believe she’s referring to the new flooring, it’s beautiful! Do you happen to know the color? Btw, I just stumbled upon your website, we just bought a 2001 Coleman Sedona last night, same floor plan as yours! We also have 3 kiddos (3 teens), so I can relate to many of your organization posts! Here’s to remodeling and making it our own!!!
Sadly, I don’t know the exact color of the flooring. I agree. It is gorgeous. The vinyl on the countertops is available on Amazon here.
I would love to know how the roll up curtains were attached, they look great. Also, is this the regular floor plan? We just moved our floor plan around and it has made such the difference having the U shape. We love it.
I am pretty sure Katie just attached the old curtain clips to the new roll up shades. They do look great, right?
I also want to know more about the roll-up curtains and also where she got the black and white blanket with the tree pattern.
I don’t have a tutorial on the blog (yet) for those roll-up shades, Kesley. There are some great ones on Pinterest, though. 🙂
I love the gray fabric used on the dinette seats! About the exact color and texture I am looking for!
Did you need to replace any parts and if so where did you order them. I have a 1977 star craft pop up and having hard time finding parts.
Older campers are notoriously difficult to source parts for, Tiffiny. I know Rockwood doesn’t carry anything for campers older than 1994. 🙁 When we were remodeling our 1995, we had to get creative, which often meant finding work-arounds for things like plastic door parts and sliders. Just part of the territory when you are remodeling a vintage trailer, I guess. 😉
I am wondering if you had the new canvas professionally sewn, or did you sew and attach I yourself?
Thanks,
Diane Carlson
They purchased their canvas directly from the manufacturer (Jayco) for about $500. Canvas is pretty easy to install and only takes two people, Diane. 🙂
I wasn’t aware Jayco sold directly to consumers. Whenever I call them for parts , they refer me to only an authorized jayco dealer . Only replacement canvas I’ve seen has been well over $1,000 and it’s from 3rd parties.
Do you know if the owners of the project re attached new ceiling? If so, what did they use to remove the old adhesive from the skin?
I don’t know what Matt & Katie used for their roof rebuild, but you can check out what we did on our Rockwood here, Adam.
And I’m not entirely sure on Jayco. I’ve never called them personally. I have had many people tell me they purchased their canvas through Jayco, though. I called Forest River directly for parts on my Rockwood and had no problem ordering from them. I didn’t have to go through a dealer, but maybe Jayco is different.
My husband and I did a camper last summer. Not nearly as bad as this one, thank goodness. For some reason the aluminum top along the edges had serious corrosion leaving large holes. We thought we could use bondo but decided to go with the wide tape. we backed the holes with aluminum strips (not easy) used bondo and then taped. The tape is about 9 inches wide and the reviews were good. I cleaned the inside, sewed new mattress covers by cutting down and resewing to fit. The curtain tabs were expensive and hard to find. I used cup hooks along the top edge with curtain rods and for the bed privacy curtains, I used extension shower rods. I purchased regular pocket curtains from Walmart, cut the bottoms to fit the windows and privacy curtains and used the remainder bottoms to cover the cushions. Finding new foam mattresses at a reasonable price and I had to settle for a less dense foam for the beds. I was able to purchase the bed in a bad sets to match the curtains which is a grey and yellow chevron pattern. It looks really great. We purchased a really heavy duty drill motor to raise the camper since it has a roof top ac.
What type paint did you use? Wanting to paint ours but want something durable. Thank you!
I can’t answer for Matt & Katie, but I do know they used a type of Behr exterior paint. We’ve painted the exteriors of both our campers. For the first, we used a single stage automotive paint, which we sprayed through our HPLV paint gun. It looks amazing, and I love it. It was a lot of work, though. For the second camper, we used Dunn Edwards alkyd paint over XIM UMA aluminum primer. It worked great, and it was a lot easier to accomplish. I’m hoping to get pictures of it up on the blog really soon. (Fingers crossed)
How did they make the rolling shades for the side windows? That is a great idea! Remodeling my pop up is my summer project. Thanks!
Unfortunately, I don’t have a tutorial from Matt and Katie for that. There are some good ones on Pinterest, though. 🙂