The best part about writing this blog is seeing all the reader makeovers! A couple of weeks ago, a reader named Todd left some comments on a few of my posts. We corresponded back and forth a bit, and I had such fun watching the progress on his camper remodel. Once his remodel was complete, I was so amazed, that I knew I had to share it with you all. So without further delay, here’s Todd’s awesome camper makeover!
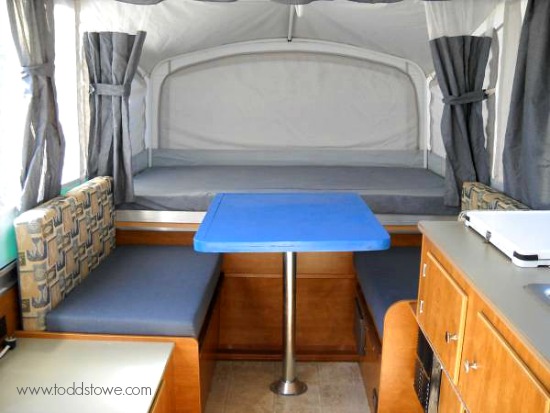
Here’s what he started with. Todd and his wife purchased a 2006 Fleetwood Sea Pine that was in great condition. There were a few minor cosmetic issues, but overall the camper was sound.
The problem was the interior. Todd and his wife weren’t crazy about their camper’s color scheme… we all know how ugly those stock interiors can be. The previous owner had also replaced the table with one of his own creation, and it was BLUE. It was the first thing that caught your eye in that camper. So Todd and his wife decided to give their PUP a total makeover–and they jumped in with both feet!
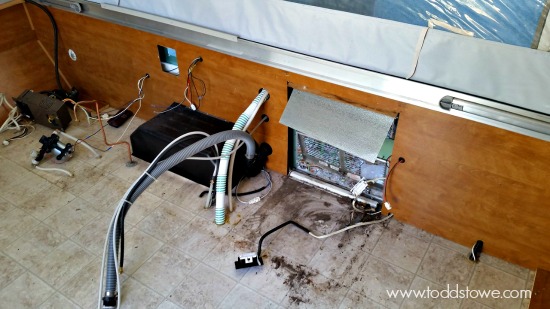
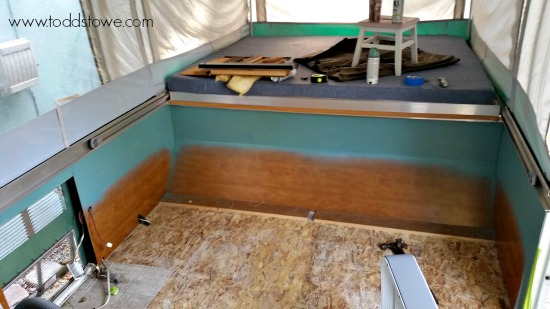
Todd approached his remodel much the way we did. He removed all the cabinets and gave it a good cleaning. He also removed the old linoleum floor to prep it for new flooring.
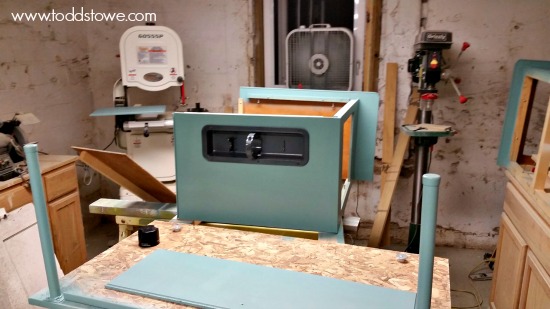
While the cabinets were out, Todd painted all his paneling inside the trailer with a spray primer from Rustoleum and gave them a coat of Valspar spray paint in a beautiful blue-green color. He took the cabinets to his shop, where they received the same treatment.
After giving them a few coats of paint, Todd gave the walls and cabinetry a coat of Minwax Polyurethane in a satin finish to seal them. Then it was on to the flooring.
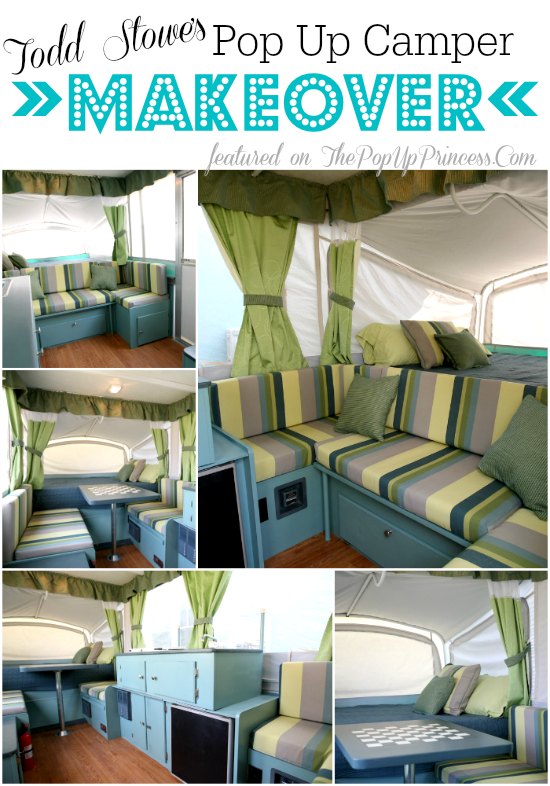
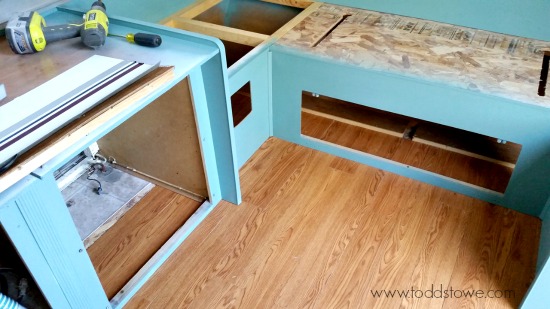
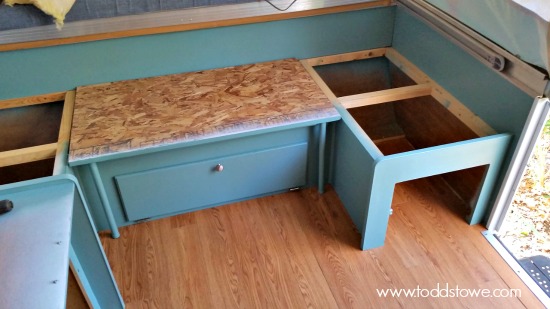
Todd and his wife chose a pretty honey oak colored plank vinyl flooring. They opted for the peel and stick flooring, which they purchased at Lowe’s. Once the flooring was down, they started putting the cabinets back in. Doesn’t it look great already? Love how that cabinet color pops against the floors.
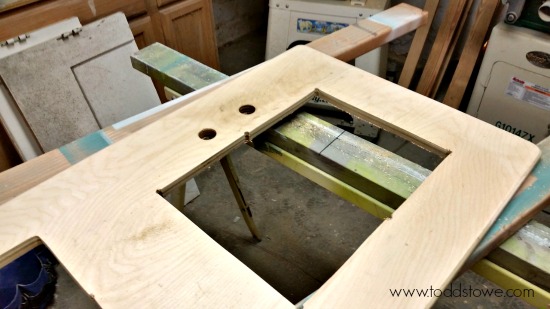
Since the original countertops were pretty damaged, Todd decided to replace them. He purchased cabinet grade 3/4″ birch plywood and cut new countertops out, using the old counters as a template. Once the countertops were cut, he routed and puttied the edges, then sanded everything well.
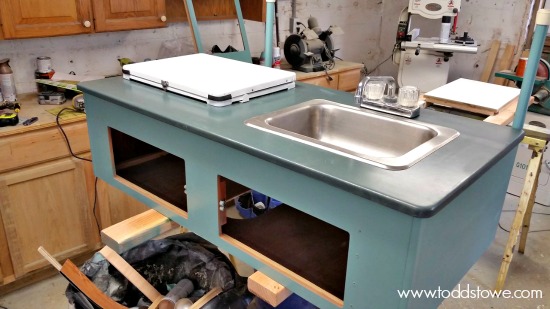
To finish the countertops, Todd primed and brush painted the tops in a coordinating blue paint, again from Valspar. Then the countertops got a couple coats of polyurethane to make sure they were sealed well.
Not bad, eh? I love the way the blues compliment each other. Todd put everything back together like a big puzzle, and he had no “mystery” parts left over. I love it when that happens! 😉
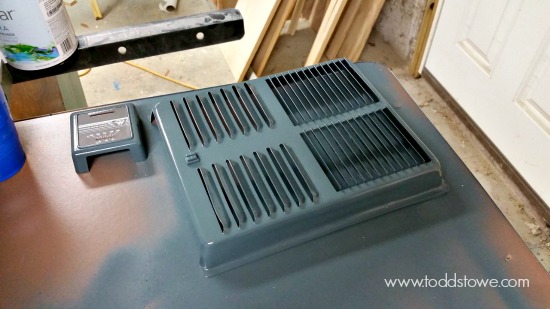
One of the things that really catches my eye with Todd’s camper is that he went above and beyond in all the little details. The heater vent and the thermostat case both got a coat of matching paint. The little things make a huge difference in the end result, too.
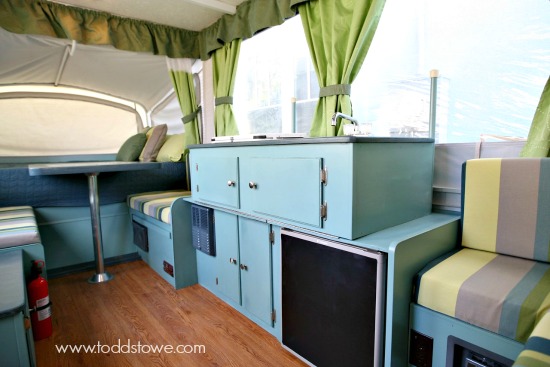
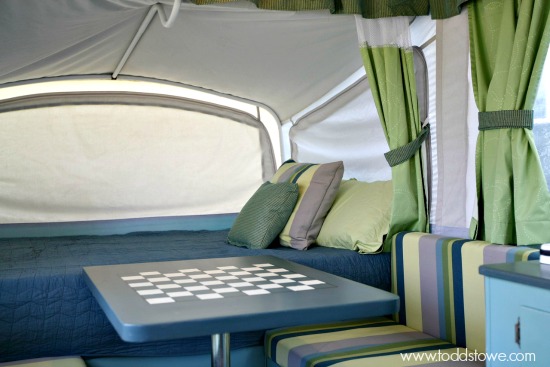
Wow, right? Todd’s wife made all the cushion covers from fabric they bought at their local fabric store, and they gave the cushions a coat of Scotchguard for durability. For the curtains, she used pre-made curtains she purchased at Target. She cut the slider tabs from the old valances and curtains and reused them on the new ones. She also reused the mesh on the privacy curtains. The bedding also came from Target, and she used her leftover fabric to sew throw pillows and pillowcases for the camper beds. To finish it off, the fridge was given a coat of chalkboard paint. Remember that very blue table?
It’s gone! Todd sanded it down and gave it several coats of paint to match the countertops. Then he used tape and paint to create a checkerboard on the table. How clever! That table is still the first thing that catches your eye in that camper, but for completely different reasons now. I’ve never seen anything like it, and it is definitely a conversation piece. Todd bought wooden checkers off of Amazon, so now his family can enjoy a game of checkers while they are camping. It’s so much better than that bright blue table, wouldn’t you agree? 😉
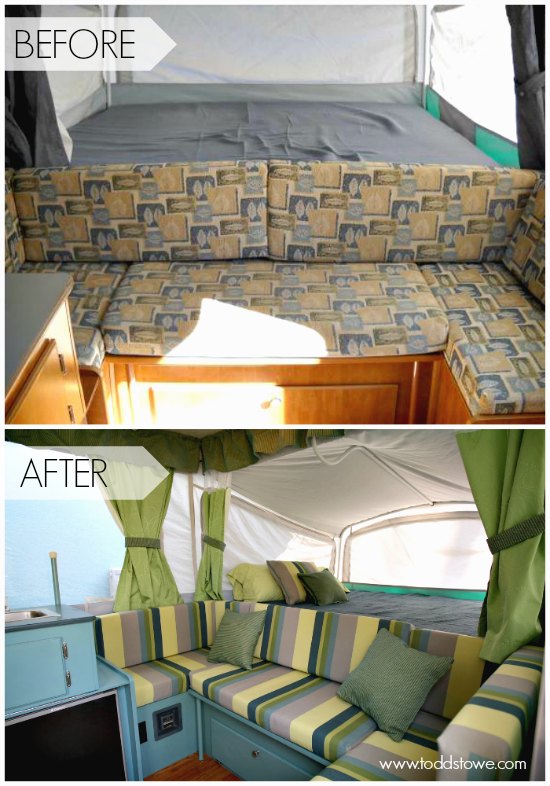 What an amazing transformation! When Mr. TypeTwoFun saw it, he was immediately impressed–and that doesn’t happen often. He loved the colors and the clean, simple look of it. It’s beautiful, without being overly “girly.”
So there you have it! Another great pop up camper remodel. I want to say a huge thank you to Todd for letting me feature his camper makeover here. If you want to see more pictures from Todd’s camper transformation, you can find all the details here. Be sure to check it out! And keep those camper makeover pictures coming! I love to see what you guys are doing with your pop ups! 🙂
Happy Camping!




Great Job Todd…..Enjoy 🙂
It is awesome, isn’t it Alice? Speaking of awesome… we need to get some good pictures of your camper makeover. Your remodel is amazing! 😉
Thanks Larissa….I have another month before my daughters wedding, I promise Betsey is next on the list. ..Actually she’s out this weekend with Amanda, so someone is enjoying her. ..I will definitely get you better pictures…..Have a great weekend ☺
Fun! Tell Amanda congrats for me! Her ring is so pretty! 🙂
One of my favorites I’ve seen!! Great job!!
For sure, Dana. Mr. TypeTwoFun really likes this one as well. He says it is a little more “manly” than ours. 😛
My hubby and I just bought a VERY clean 1999 Coleman Elite Niagara that I can’t wait to get my hands dirty in! I love your site and look at all the makeovers and I’m excited to see what I come up with. I hope my popup looks as good as these!
I’m excited for you, Bri! Send me pictures of your progress! Can’t wait to see what you do. 🙂
What an awesome makeover! These makeovers are making me more anxious to get ours done. I can’t wait to get going more on ours now that all the snow is gone!
Isn’t it great, Amy? I can’t wait to see what yours looks like when it is all done! Don’t forget to send pictures! 😉
Amazing job!! We just purchased an older pop up camper & needs some updating & repairs. This makes me excited to get started!!
Oh, this is the fun part, Susan! I could pick out fabrics and paint all day long! 🙂
hello – love the pop up camper remodel! Could any of you ladies comment on the durability after painting the cabinets? My husband is convinced it will still scrape/flake off no matter what we do. Also – how many target shower curtains did it take to replace the curtains in the camper? We just bought a pop up last night and I’m so excited to make it over. Thank you!
Ashley, it will NOT scrape off if you prep and prime your cabinets right. I wouldn’t use a latex paint. Go with oil based. We painted ours over a year ago, and they still look like they did on day one. I think it was one of the best changes we made to the camper. Here’s how we did it!
Everyone will have different measurements for their curtains. Best to take down your old ones and measure them out. You might be able to find a regular curtain in a shorter length that would work for your camper. Good luck with the remodel! 🙂
I used oil based paint too. It’s more durable than latex. The trick is to hit it with a sander first. This will scuff up the finish and give the paint something to adhere. I used an orbital sander with 120 grit paper. You can hand sand it. It will just take longer.
I made a mistake on the curtains though. My wife told me they were not shower curtains… they were just curtains from Target. She says I never listen…or something like that. :O)
We used 9 curtain panels.
Thanks, Patsy. Did you cut them to size, or were they already the right length?
I cut and sewed them to size. I used the old ones as a guide.
Just found your page a couple days ago after a google search for how to clean vinyl. About to take your advice, after tracking down a bottle of ProtectAll. I cant wait to see the results. We just bought a pop-up over the weekend and will be doing our own makeover!! Thanks for all the tips, cant wait to see future posts.
Can’t wait to see it! 😀
my hubby and I bought what I call a Frankenstein 1995 StarCraft Starter pop up. a previous owner removed the front slide out so it has just a big opening. the interior is ragged but nothing we can’t fix. just wondering what ideas your followers would have for the front part that is missing the slide out..we do not plan on replacing it. I love the makeovers on your page!!!
Do you have to replace the canvas, Terri? Maybe Bear Creek Canvas could make a canvas panel for that end…
When looking for fabric, have you leaned toward indoor/outdoor for mildew resistance and durability or what was most cost effective?
Jayme, we don’t have much moisture in Arizona, so I wasn’t too terribly worried about mildew. I did use an indoor/outdoor fabric on the cushion fronts, but everything else was 100% cotton home decor prints. I’m not crazy about the feel and texture of indoor/outdoor fabric, and it frays so terribly. The cotton fabrics are much easier to work with, and you can spray them with Scotch Guard if you are worried about stain resistance. 🙂
Wow! This remodel, plus yours too, look amazing! I’m getting such great ideas for our remodel. I have a question: How do you remove the cabinets in the trailer? I’ve looked everywhere online. People say they did it, but not how. Any tips for a newbie to remodeling? Thanks in advance! I love your website 😀
Basically, you just want to remove all the screws, Liz. Each manufacturer will be different, but for our Coleman, we just had to remove the screws in the back and the bottom. Make sure you label things well, and take pictures if possible. We kept all of our screws, bolts, etc. in Ziploc bags and labeled everything well. Best of luck with your remodel. I can’t wait to see pictures! 😉
Is there a tutorial for the checker board? I would love to do something like that in ours for our boys!
Not really.
Basically, I just put down a big square of masking tape, and drew out the pattern with a Sharpie and a ruler. Then I cut the along the lines with a utility knife and pulled up every other box. All that’s left is to paint where you pulled up the squares, let it dry, and pull up the rest of the tape. When you pull up the tape, a little of the paint might come with it but I wanted a shabby look anyway.
You might want to outline everything with a Sharpie when you are done.
But that’s pretty much it.
Thanks, Todd! 🙂
Love this! Especially the fabric on seats. I have been searching all over with no luck. Could you share where it is from?
Thank you!
It was a local fabric store. If money isn’t a problem, there are lots of choices. If it is (like it was with us), just keep looking. You’ll find some on sale eventually.
Beautiful, I feel a little bit intimidated in taking out the cabinets for fear that they won’t go back in the same way. My husband and I are not carpenter’s, is there easier way around it to painting the cabinets? Thank you,
You don’t have to take out the cabinets, Valerie. There are plenty of examples here on this site of awesome remodels by readers who didn’t take out the cabinets. Check out Cassie’s remodel, Rose’s remodel, and Cyndie’s remodel. They all left the cabinets in and painted them inside the camper. 😀
We have the same camper and I would love to remodel. Curious how much fabric you purchased for the beds, couches and throw pillows. Looking for easy way to do measurements and decide on how much fabric I will need. How many curtains did you buy from Target? Thanks.
I was also wondering how much fabric in total you used on all the cushions.
Our new pop up will be awesome but is in need of help! We took her for a test run this weekend and the thing we desperately need is a sink area. Many photos show a second tier/shelf of sorts on a rather large arm to swing down. Is this accurate? how would I procure o?
You are looking for a swing galley, Cara. I’m not sure how difficult they are to find, but here is a link to a company that manufactures them. Another option would be to build a galley that folds down. You could use a large piano hinge, and would likely be able to do the build yourself. Take a look at this thread on the Pop Up Portal for more ideas. Best of luck! 🙂
Wow! That is amazing. I agree the color schemes in these pop-ups aren’t desirable. Love the colors that Todd and wife chose. POPs with color! Makes me want a pop- up. Would be easy to pull with a Van. I saw on Pinterest how to install air- conditioner to a pop-up…how interesting…