


I’m so excited to share another pop up camper makeover with you today. This one is from Rhonda, who took her dated pop up camper from boring to beautiful on a small budget. She’s done such an amazing job that I’ll let her tell you all about it. Take it away, Rhonda… 😀
I wanted to have a little oasis that we could use while “roughing it,” and a pop up camper was the perfect option. Our camper was in pretty good shape when I purchased it, but it had been sitting for a while. After a good cleaning, I decided to give it a little makeover.
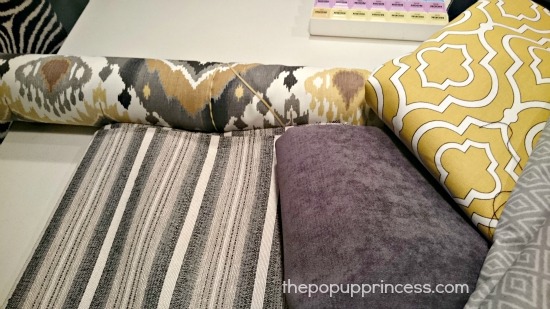
First, I chose the color palette. There are obviously a million options, but when you have your own seamstress (in the form of my retired mother), I had a little more wiggle room for customization! 🙂 I picked all Joann Fabrics and took advantage of a 50% off coupon I had snagged. My curtain fabric choices came from Nate Berkus & Waverly. I chose clearance fabrics to cover the seating at $2.50/yard! The lightweight cotton serves as the lining for window curtains. (Want to learn more about making your own pop up camper curtains, go here.)
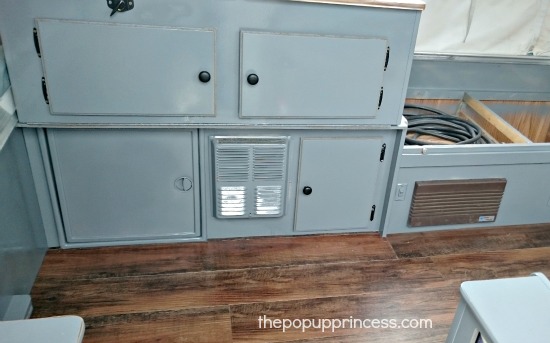
Second, I removed all of the doors and hinges to prep for spraying. I have a mean index finger with the spray can, so after I lightly sanded everything, I got to work with the primer coat. It really pays to let that dry well before moving on to your paint color. I chose a light grey for the cabinets–I wanted to keep it bright and neutral–and black for the hinges. I used Rustoleum in a high gloss for all paint colors, so I could easily wipe down any spills (we have 3 kids). With the high gloss, you HAVE to let the paint dry at least 4 hours, maybe longer depending on the weather, especially on that pressboard material they use for the cabinets. Once dry, it’s as good as gold! It took 3 cans of paint and 2 cans of primer total. (For more detail on painting pop up camper cabinets, click here.)
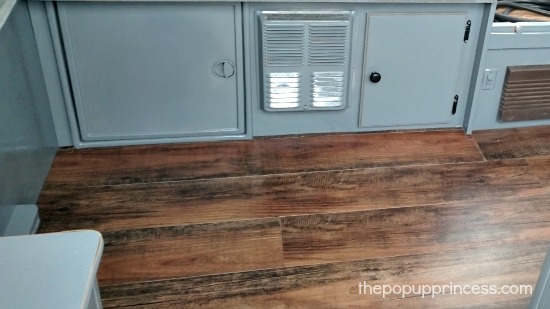
Next, I tackled the floor. CAUTION: This is not an easy job. Camper floors aren’t perfectly squared off. I am handy–to a point–so I didn’t remove the cabinetry to do the flooring. 😉 And I left the original flooring in dinette under seat storage. An Exacto knife, measuring tape and lots of patience is all you need. This was by far the most tedious job, for me at least. I used 20 pieces of the peel and stick laminate in a wide plank from Lowe’s. I love the results! What I thought would take me 1 hour, took 2.5 hours for the install, however, I am TOTALLY stoked!
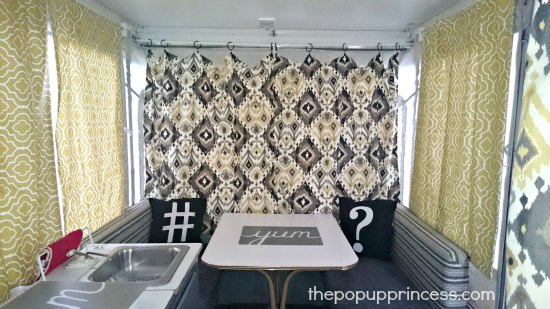
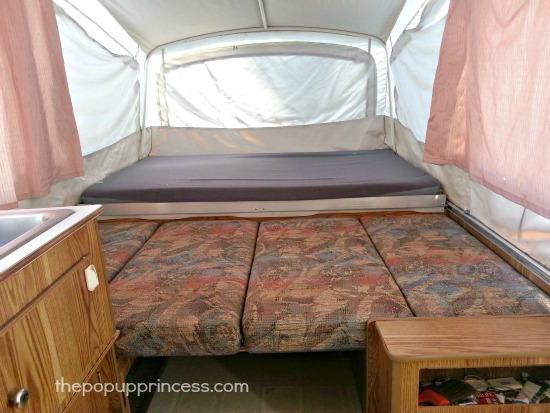
Tension rods hold the bedroom curtains. I used Velcro for the window curtains and attached them to the old c-clip tracks. Cute placemats adds some flair to the stove cover. I think the red accent towel I left in the photos accidentally actually works. 😀
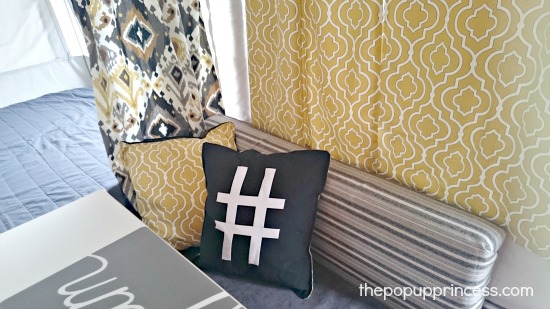
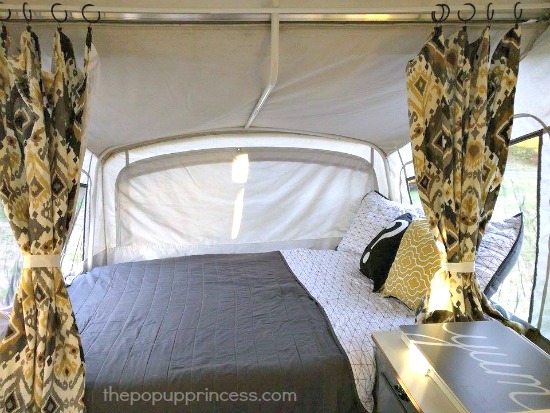 The bedding was from Target in the clearance section. I used a twin sized comforter for both “full-ish” sized beds. I designed the pillows with the leftover Waverly fabric I used on the window curtains and ready-made pillow squares from Joann Fabrics. I purchased 4″ memory foam in full size that I cut to fit the odd mattress. The full size foam was a little wide, so I will had to cut about 2 inches off the side and bottom. We used with the old Coleman 2″ mattresses underneath, but it was all too thick when packing camper down, so we will have get rid of the old mattresses and go with just the memory foam and some air mattresses.
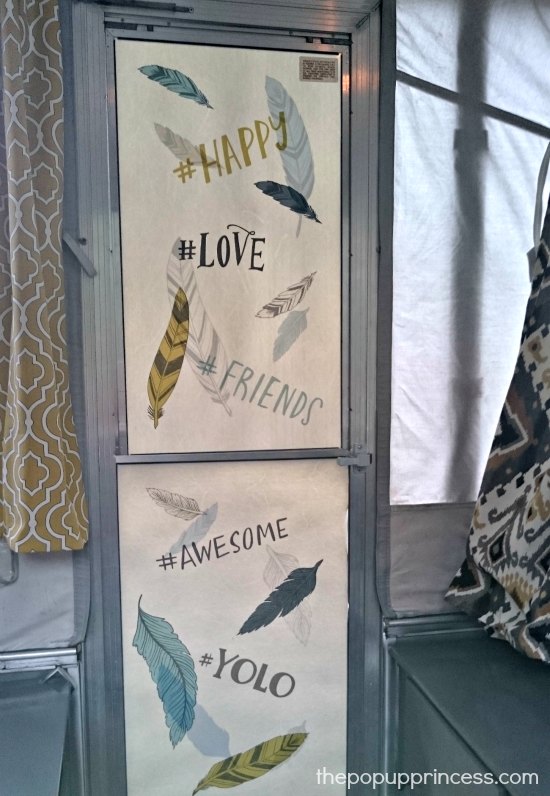
Lastly, I found some clearance appliques that I used to spruce up the boring door, and the camper was complete!
Here’s the cost of the project:
- Fabric: $179
- Spray Paint: $33
- Flooring: $29
- Bedding and Foam: $300
- Placemats and Appliques: $15

Look at that before and after shot. Doesn’t it look amazing? What an awesome job, Rhonda! I absolutely love it. 🙂
Do you have a trailer transformation of your own? Would you like to be spotlighted on The Pop Up Princess? Learn all about how to get featured here.
Happy Camping!

Great Job.
That looks amazing! The pop-up looks exactly like the one we own. Would love to do that someday but we don’t take our pop-up too far these days. It’s mostly used for overflow at our lake cabin.
Rhonda,
Looks great!!! What is the make/model of your camper?
I love your idea for the door. We are in the process of remodeling our camper and every time I look at the door, I see plain and boring. Thanks for the idea!
Renee
I love the door, too. Never thought of updating it. I love all the ideas I get here for the little details!
Isn’t it awesome, Toni? So creative! 😀
Ok….thanks.now Iam thinking
This website completely changed my mind about pop ups. So much so, I went and bought one. I am impressed with your budget as I have spent over $2k already. I used the same flooring and think this was by far my easiest project in my PUP. I also love the color palate. Nice work!
love this idea and its going to help me alot I still don’t understand how to get old “C” clips off, break them off or use a knife to genty pop off. My input is: If you want to change your counters ( my is ugly green) you can use self stick foor tiles ( about $26. for tiles) If you can’t cut around the corners and things like that, any handy man that has put in floors in can do it, Just asked if he has done floors before. The strips that broader the counters to do an cheap way, you can paint in a matching color with paint for vinly covering paint. You can also get the colorfull duct tape to match or any kind of sticky, stick on stuff. My son in law is a handyman/ home remodeler,so labor didn’t cost me. Total for supply was, $37.00 and now my counter look like a white marble with very very light browns. I did my ask my son in law about cutting and scratching on it. He said it is made to walk on and to with stand shoes and scatching. Also as he said, we all use cutting boards as we do in our homes so that wont be a problem. The best is if for some reason something does happen, a burn mark, some guest didn’t use cutting board. The good part is you can pop out the damage one and put in a new one.. I just love my son in law and his idea
Love the cabinet color & door update. Thanks for sharing!
Did you have to remove original linoleum on floor before applying stick on vynil planks? Did you have to treat the floor with anything first?
You don’t have to remove your original flooring to install new flooring, Robin. You’ll just have to be mindful of any additional thickness your new flooring will add. Are you removing the cabinets?
That looks amazing! I love the color palette and the door! I really like the gray cabinets and floor. Makes me want to remodel our remodel – LOL! Fantastic job!!
I would love to do something similar with my screen door…any suggestions where I might find the appliques?