


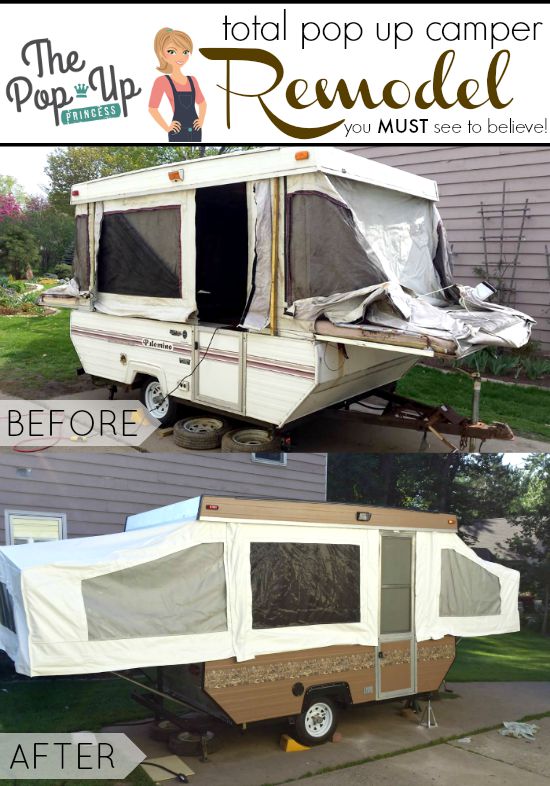
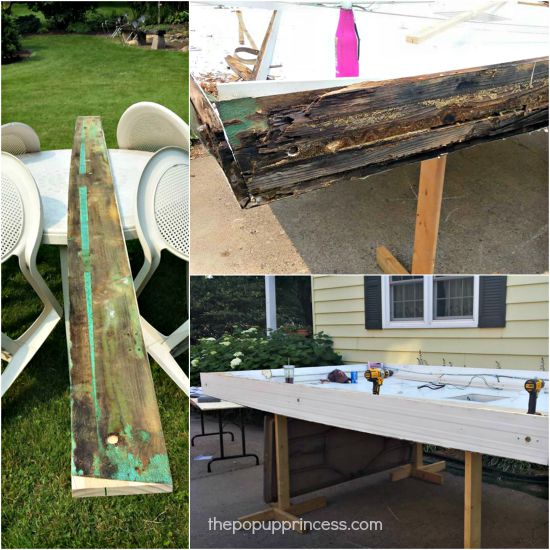
 Okay, you all are going to love this next reader feature! When Robert posted pictures of his camper remodel on our Facebook page, I was absolutely floored. Robert, his wife, Kelli, and their friend Jessica took on a remodel that was so labor intensive, most of us would have run away screaming. Robert’s uncle had given him a neglected pop up trailer that had been stored on his property for a long time. Upon towing it home, Robert and Kelli quickly realized that there was some major structural damage to the camper.
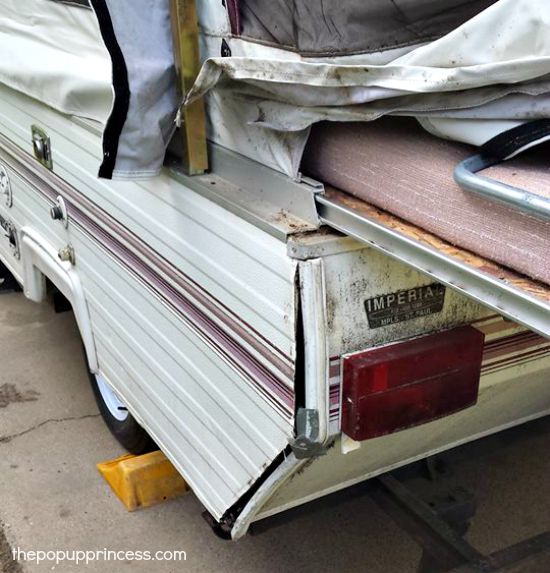
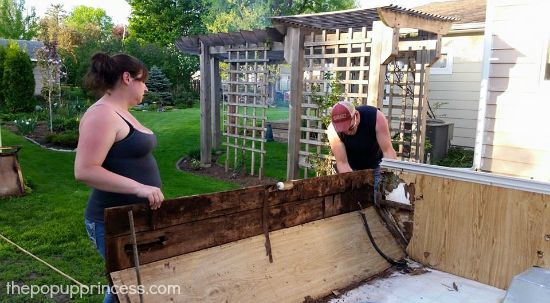
They found that subfloor was rotted away and would need replacing. The camper also had water damage on both ends, and the paneling and flooring had rotted beyond repair. Robert and Kelli were undeterred. They had always been up for a good project, and knowing full well what was in store, they enlisted the help of their friend, Jessica, to begin the demolition process.
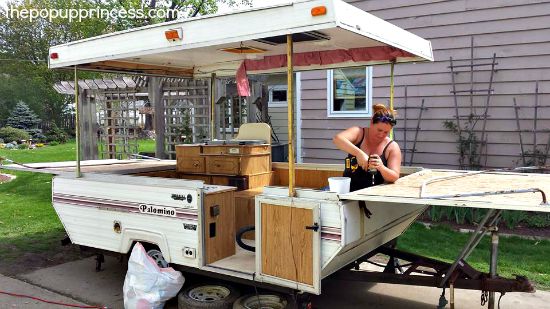 They pulled the old canvas off, and ordered a replacement. Then they completely gutted the trailer and pulled up the old flooring. The bunkends had also rotted, so those would need to be replaced as well.
 Once they had taken the camper completely down to the frame, they cleaned, primered, and painted it.
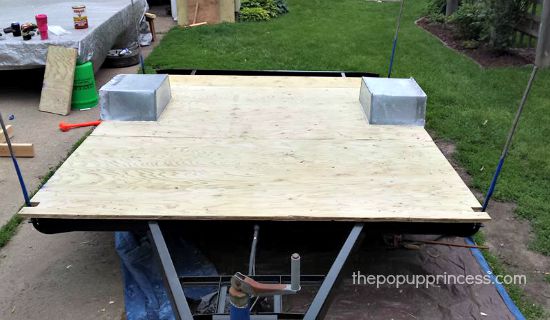
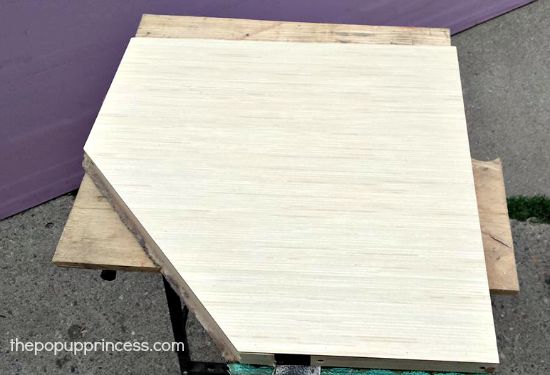
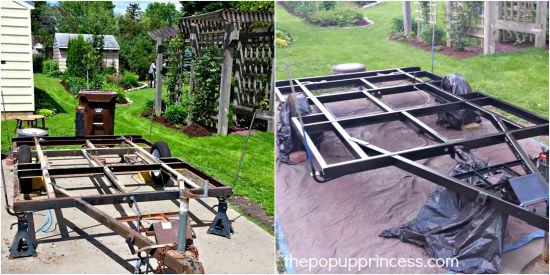 They replaced the subfloor with treated 3/4″ tongue and groove plywood, using self-tapping epoxy coated screws to secure it to the frame.
 With the subfloor installed, they moved on to rebuilding the side walls. They tackled the curbside wall first, pulling the old wood paneling off to get a better look at what was underneath. Some of the panels were in pretty good shape, but most of them needed to be replaced.
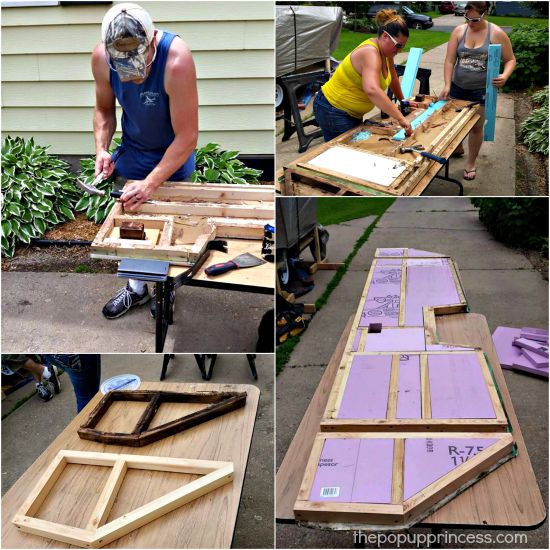
So Robert ripped down some 2×4’s and used the rotted braces as templates to build new ones. Then they glued the old skins to the new frames and filled the voids with foam insulation.
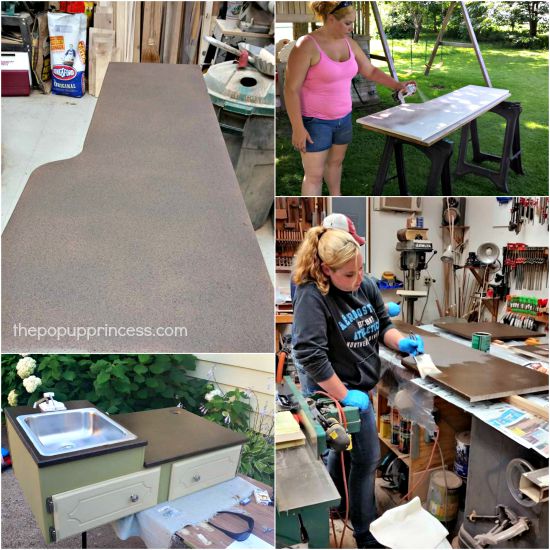
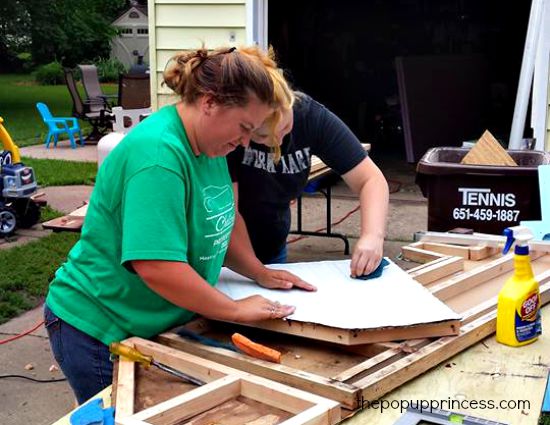 While the girls cleaned the exterior skins, Robert rebuilt the supports on all of the other panels. The girls used WD-40 and an adhesive remover to remove the old decals and prep the panels for paint.
 With the new supports all built and glued into place and the insulation installed, they faced the panels new interior paneling. Then it was time to put all the pieces of this big puzzle back together. 🙂
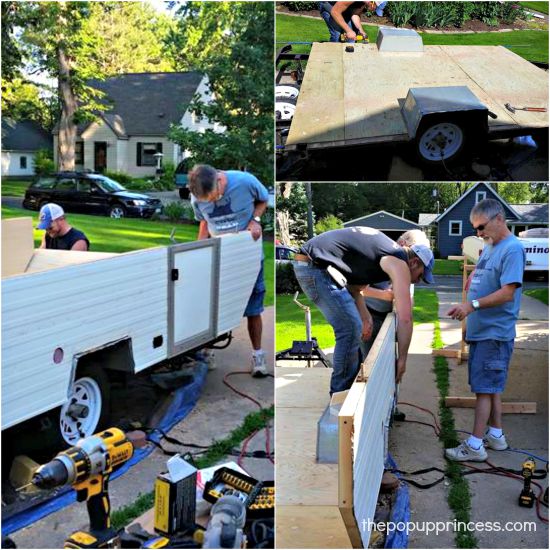 Robert used an oscillating tool to cut a recess in the floor, then he started mounting the walls back on the frame. He used plywood to rebuild the ends, knowing they would be covered by diamond plate. Next Robert started prepping the walls for paint. The girls had pulled all the old decals off, but were having a hard time removing the adhesive. They tried a few different chemicals, but they were slow going at best. So Robert got out the drill and a 3M Adhesive remover wheel, and it worked like a charm.
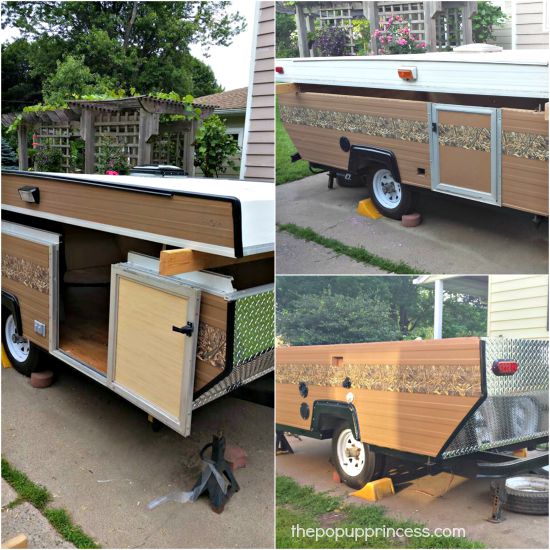
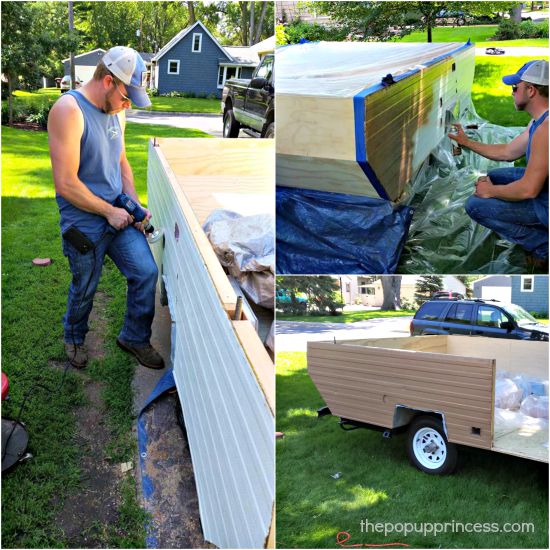 With the residue removed, they wiped the walls down with paint thinner, and taped everything off. Then Robert sprayed the exterior walls with Rustoleum Ultra Cover 2X paint. The girls picked a satin Nutmeg color to hide imperfections, and also accent the camo and black trim work they had picked out.
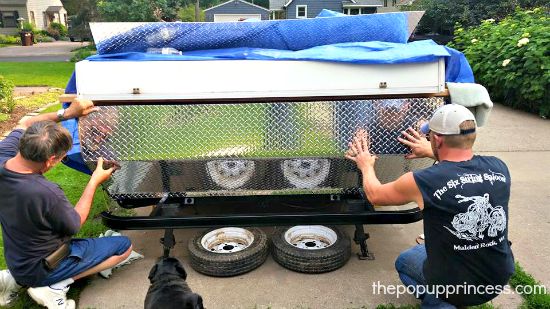 Next came the diamond plate… Robert made the bends in the plating himself (with the help of friends and family) and used PL400 and clamps to glue it to the plywood. How pretty is that?
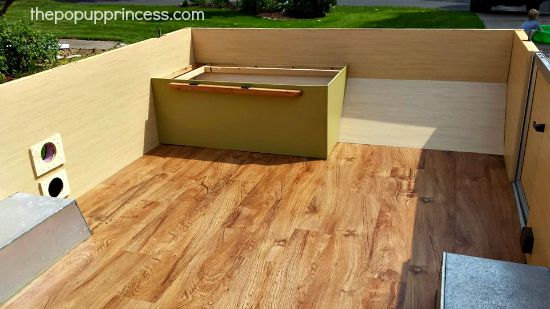
 When inspecting the roof, they found a pretty significant amount of rot on one side. Robert removed that whole panel and rebuilt it with a 1x8x10′ solid piece of lumber. While Robert was working on the roof, Kelli and Jessica laid the flooring. They went with a beautiful click-lock plank vinyl.
 Robert painted the sides of the roof to match the rest of the camper. Then he reinstalled the trim work on the corners, put in the new cable hatches, water inlets, drain, and tail lights. He also fixed the door frame, installed that, and finished the wheel wells. They had a custom camouflage graphic made for the side of the camper to complete the exterior.
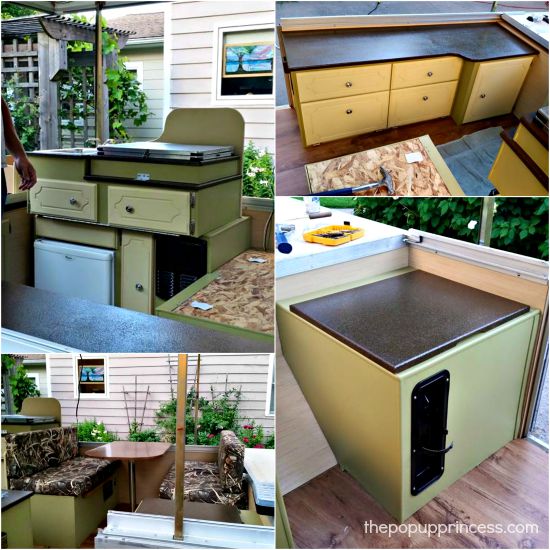
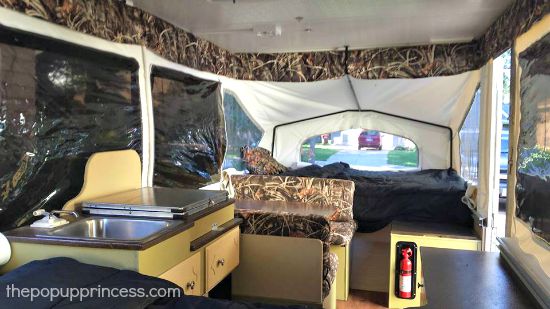
While Robert reinstalled the roof, the girls got to work priming and painting the cabinets. Robert cut new countertops out of MDF, and a neighbor was kind enough to build them a gorgeous new dinette table out of walnut.
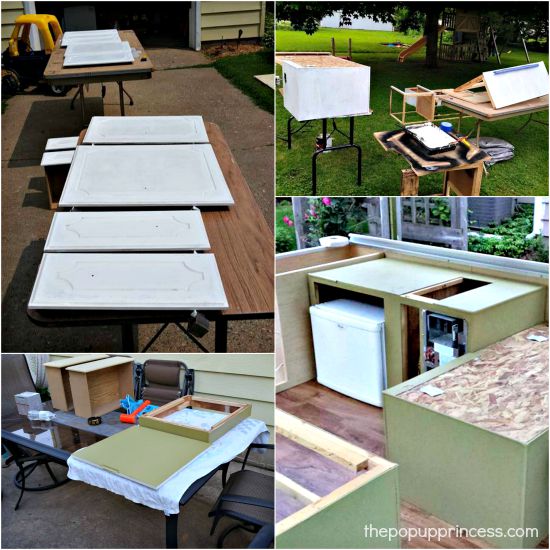
Once the cabinets were dry, they installed them in the camper. Robert also rewired the whole trailer and installed new outlets for the mini fridge. Then they got to work on the countertops. To finish the those, they used a textured Rustoleum stone spray paint. They sanded between coats and finished them off with several coats of polyurethane. I love it!
To cover the cushions, Robert and the girls used camouflage fabric and the “wrap and staple” method found here. It’s a simple way to update your cushions, but it yields such fantastic results.
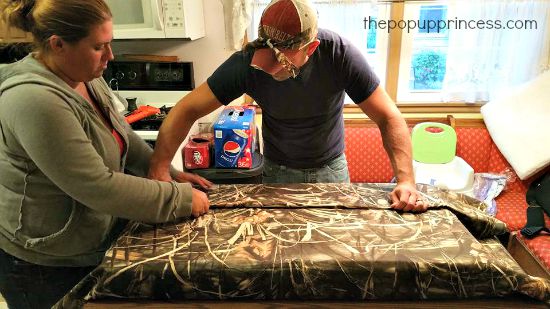 With all the interior components complete, it was time to put the inside of camper back together. The installed all the countertops and got to work installing the new canvas.
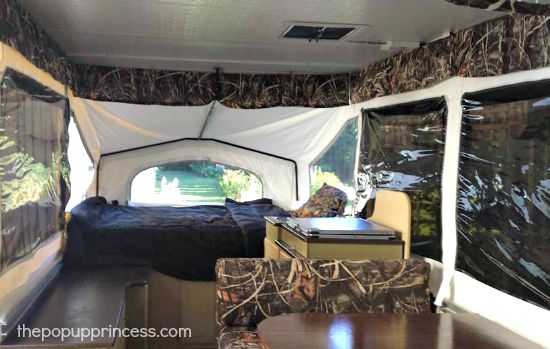
 Robert and Kelli purchased the canvas through Canvas Replacements and are very happy with it. The fit was good, and the quality was outstanding. I love that color, too! 🙂 It took the crew about 2 1/2 hours to install the new canvas, and it looks absolutely amazing.

They added a camouflage valance around the ceiling, and the camper was complete!
And just in time, too! At the start of the remodel, Robert, Kelli, and Jessica set a deadline for the camper project. They wanted to have it finished in time to take it to a local music festival. Through hard work and determination, they made their goal!
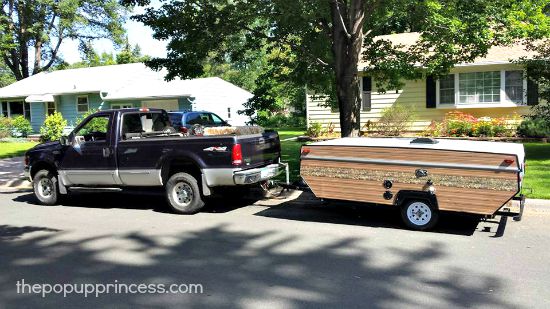
It took about 2 1/2 months from start to finished, but the results are definitely worth it. Robert, Kelli, and Jessica have a unique pop up camper they can be proud of–and they know the workmanship is sound. Let’s take a look at those after shots!
Pretty amazing, right? Most of us wouldn’t have given such a dilapidated camper a second thought. I know I would have been super intimidated by such a big project, but their hard work definitely paid off. And who knows? They just might inspire someone here to do the same! 🙂
 Robert and the girls documented their remodel meticulously. There was absolutely no way I could include all the pictures and information that Robert passed along. If you’d like to see more details, check out his post on The Pop Up Portal. You’ll be amazed.
And keep those pop up camper remodels coming! You guys rock!
Happy Camping!

WOW! Who would have thought that sad little pup could possibly be turned into that. Great work Robert, Kelli and Jessica! You guys definitely rock!
Thanks Mary!!! The three of us had a blast doing it!
I want to remodel my dads pop up for his 25 th wedding anniversary. Where did you buy the canvas replacement?
Robert bought his canvas at Canvas Replacements (see the post above), but you can also buy replacement canvas at Bear Creek Canvas. I hear that both companies do a fabulous job! 😀
Hi, Robert. I wonder how the Rustoleum Stone Counters have held up? It looks like something more doable than replacing our countertops. Thanks!
Great work!
Hi Robert. This looks exactly like the camper I’m remodeling now. Do you know what year it is? We’re hving a hard time figuring that out.
Where did you get new canvas for the outside sleep area
You can find replacement canvas at Canvas Replacements or Bear Creek Canvas, David. 🙂
This has to be the most amazing remodel I have ever seen! What talented (and hard working!) people you all are! To have done all that in just 2 1/2 months is remarkable. I also learned a ton about how pop-ups are put together. Seeing it rebuilt up from the frame was amazing. Thank you for sharing all your photos. I am currently looking at used pop-ups on craigslist and this gave me a ton of information on where to check for issues. The completed camper is outstanding! So fresh, clean, and personalized! Just a fantastic job!
Robert and family, Thank you so, much for bring back some great times in my childhood. There were 7 children, mom, dad, two dogs and most of the time added guests. My parents bought a used Pop Up and a shell camper that fit on the truck bed. With that many people the Pop Up sleep 8 to 10 depending on how many you could fit in the beds. Then we had a screen room that fit on the Pop Up after you bought one of the rolled out roof (They advise them on tv all the time ( You can sit on your deck with this rolled out roof and not have to go in because it is to hot or it rains) We joined the Ford Motor Company Wagon Train it was people that got together ever weekend and we traveled different places as a group. I just wanted to say thank you for bring back some great memories.
Thanks again for some wonderful memories.
Frances E. Carter
Wish yall was closer so yall could help me finish mine. My parents left the pup when they past, and I decided to redo it, only thing is my husband has no interest in helping me and now I am at a stand still having done all I can do until he fixes the lift system. He has been doing that for six or better months now.
Love this idea want to try it out on my own! About how much money did you have to out toward this whole project?
I don’t know the exact amount of $$ we spent. The new canvas was definitely the most expensive piece. They will run around $1000+ alone depending on where you order from. Ours is from Canvas Replacements. Good quality, but we had no say in the colors or anything. I will say that if you watch your local home improvement store for sales, you can save a lot of money. We bought most of our lumber and paneling on sale thru out the project at Menards. If I had to guess at a total though, I would say around $2000. but we did not skimp out anywhere on the project…and also picked up a nice Olympian grill to mount outside 😀
I owned Harrys Real Wood Furniture long time – twenty years and did many repairs with wood plus have pop up campers long time. Have to congratulate these folks on a job I don’t think I could have done as well plus you know how it’s been repaired – truly a ” labor of Love” and thank this site for posting this – happy camping
I love how you did everything! Im about to gut my 1980 Edson popup trailer and seeing how you guys did everything is a perfect guidline too!! Is there any more tips that you could help with?
I found this post while excitedly pinning pop-up re-dos for a camper I knew I would be acquiring soon.
Well, I went to look at the camper today and sadly it’s about in this same condition. After crying and getting really ticked off (it was a sentimental thing — belonged to my aunt who passed away when I was 14), I told my husband the condition it was in. He said “As long as the outside (metal) is fine, I’m up for it!! Let’s do this!”
So, here I go… it will probably take us much longer than Robert, but I hope to have results in enough time to go camping as soon as winter thaws out in 2017!!!
Wish me luck. Also, send vodka?
So much work!!!!! Y’all did an amazing job. Happy camping!
I’m rebuilding my Coleman Colorado. I’ve rewired and undercoating the new floor now. Thanks for the push to keep going and all the good ideas. Mine will be much easier because there’s no water or electricity, but I’m adding some, and only 1 slide out. Great job! Happy camping.
LOOKS GREAT!!! My husband and myself are just starting our pop up journey!! Super excited!
Not sure where we need to start. I do know i need to find a new canvas, any suggestions?
Both Bear Creek Canvas and Canvas Replacements have great reviews. I’ve never heard from anyone who was disappointed in either. 🙂
Can anyone help me with instructions on how to replace a lift cable on a Coleman 2001 Westlake camper?
Check the PopUpPortal, John. I’m positive I saw information on that there. 😉
I love the diamond plate amd kicked around the idea for my travel trailer. Where did you get it?
Awesome job! How and what did you use to replace your interior ceiling? Our is rotting from water damage.
Im currently trying to figure out how to remove the bed slides. how were you able to get them off of the track?
Please help with ideas on how to rebuild door for popup? Unable to locate a replacement. I have a 2008 Pony Palomino that we are refurbishing.
How did the paint hold up? I am just looking into repainting the exterior of my camper and I am very interested in how long the paint will last.
Thanks
I’m obviously not Robert, but we painted the exterior of ours with single stage automotive paint, Kristin, and it still looks brand new three years later.
I think “re-model” doesn’t do this project justice. It should have been called “Robert’s Pop-Up RESURRECTION! ” Great job!
Very nice work. After reading about it and looking at the pictures – one thing I would think about doing on a project like this is adding more head-room that would include some small storage cabinets along the ceiling line.
The area could include perimeter lighting, stereo, and speakers, etc . . .
Wonderful job
I’m currently revamping an 82 Starcraft Starlite, unfortunately being in the UK, parts are like hen’s teeth so the canvas will have to be patched rather than replaced. Seeing your efforts have really inspired me. Thank you.
Hi – where did you order the replacement canvas? Please help.
Robert purchased his canvas at Canvas Replacements, but I hear fabulous things about Bear Creek Canvas as well. 🙂
Replacing the long sides of the roof on a ’86 starcraft popup… where would I be able to get the textured aluminum to replace on the outside??
I have taken the sides off and replaced the particle board underneath with plywood and now have been looking for the alluminum. I don’t want to put a lot of $$ into it since it is an ’86.
We found that our manufacturer still carries the pebbled aluminum for our 1994 Rockwood camper. I was sure that the camper was too old to be able to find parts for it, but Forest River still carries it. Check with Starcraft (who I believe is owned by Jayco now). Maybe you can get it through them. 🙂
How hard was it redoing the corners? Mine has the same problem and want to make sure I do it correctly so I don’t run into fitting problems down the road. Thanks!
I am in the process of doing exact same thing. Mine is slower going as I am a single female without a lot of knowledge. Your process here will help a lot. I am very concerned about my corners and exterior panels. The whole trailer was dry rotted and falling apart down the road! I hope to be able to do half as good as yours when done.
Totally just inspired my husband and I
We have a camper that’s been sitting for 20 years!! We live in a dry climate but still have our work cut out for us and that just made us want to jump on it!
Great work! In the process myself of rehabbing our 1986 Coleman Laramie – similar size, similar initial condition.
REALLY curious – where did you find a mini fridge that was low enough to fit beneath the ends when the trailer is folded up?
Thanks for any input, and great job!
Not Robert, but we just replaced our 3-way fridge with a mini dorm fridge. We found this one at Target, and it ended up working perfectly. 😉
Sunbeam 1.7 Cu Ft Mini Fridge