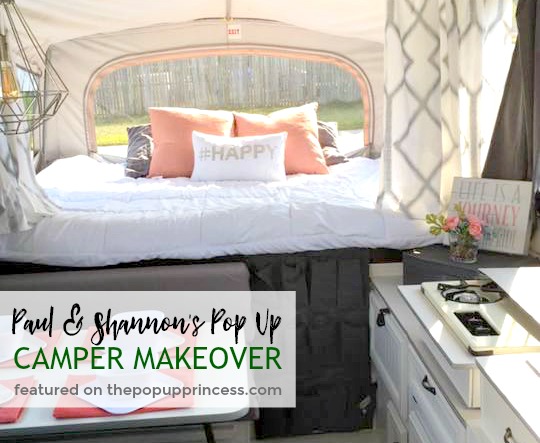
 I’m in love with this next makeover from readers Paul and Shannon. The whole color scheme is so calming and happy. Not only is the remodel cute as can be, there is a cute story behind it, too. Paul and Shannon are Civil War re-enactors that were used to camping in rustic A-frame canvas tents. They started looking for a family pop up camper because they craved the convenience of being able to pack up easily and go camping whenever they wanted. Shannon’s aunt and uncle had owned a pop up when she was a child, and she loved the versatility of being able to accommodate multiple campers. Paul and Shannon’s kids are 5 and 7 years old, and they wanted to be able to bring friends along when they hit the road. Shannon started looking online for ideas and stumbled upon this blog. The crafter in her was immediately sold on renovating a pop up.
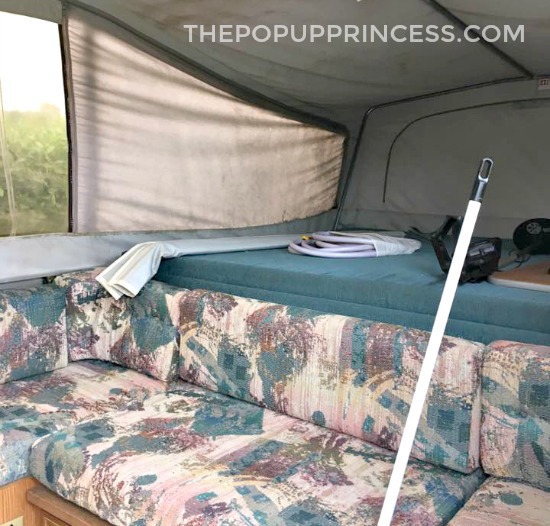
Paul and Shannon bought their 1995 Jayco from Paul’s friend/coworker for $900. The canvas had been repaired–there were a few tears from wildlife getting in during past winters–and the whole camper needed a good cleaning, but it was still in good shape. It had been stored and sat unused all season, so the first thing Shannon did upon bringing it home was scrub the inside of the camper from top to bottom. She used diluted LA Totally Fabulous cleaner (you can also find it at DollarTree) on the inside of the canvas, the cabinetry, and the floors. This worked really well on the built-up grime.
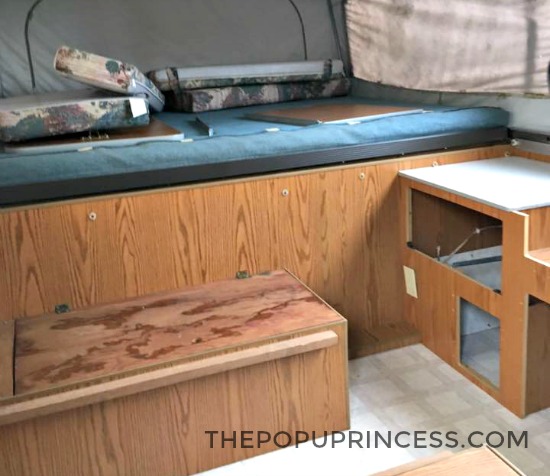 There were rust stains on the bunkend canvas from the supports, and the LA Cleaner did a great job of eliminating those as well. Shannon wanted to keep all the foam inserts, so she removed the cushions and bed covers. Then she sprayed the foam with Febreeze and let it air out for a few days. To clean the vinyl windows, Shannon used 303 Marine Vinyl UV Protectant inside and out. (For more tips on how to properly clean your camper, be sure to check out our spring cleaning series.)
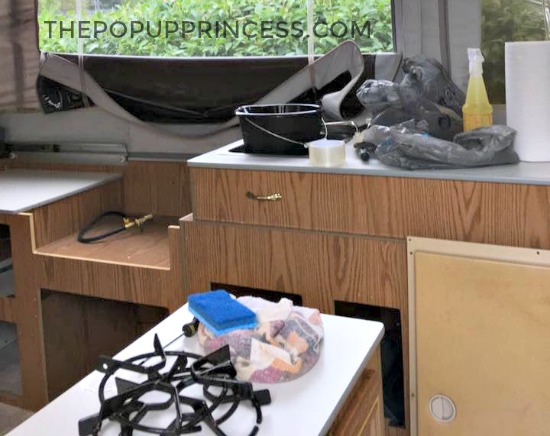
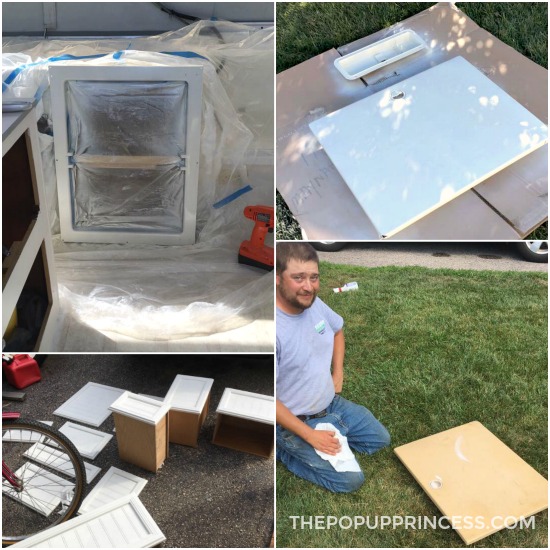
Shannon removed the cabinet drawers, doors, and hardware and scrubbed those separately. She took apart the sink and stove and scrubbed them with dish soap and water. She says Paul started to get very nervous as Shannon was taking everything apart and asked her several times if she was going to be able to put it all back together. 😆
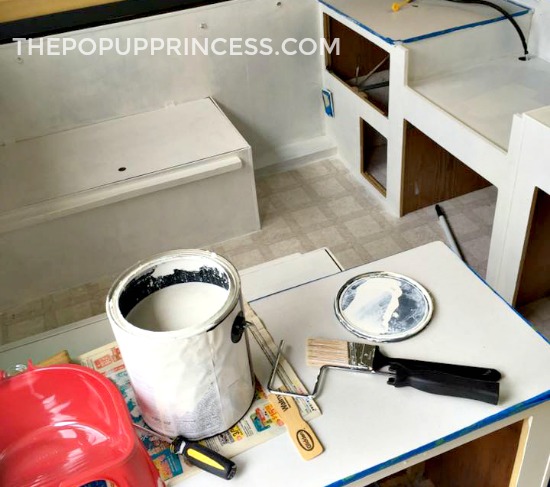
Once the cleaning was completed, Shannon primed all the cabinets, benches, and walls with two coats of Zinsser 123 primer. The benches under the dinette and couches were raw wood so it took two coats to cover properly, but the wood paneling on the walls of the camper actually took three coats. Then, with the “help” of her five-year-old daughter, Shannon painted the cabinetry with two coats of Valspar Professional in “Marshmallow,” which was a creamy off-white color.
Shannon wanted to replace the icebox in her camper, but after researching the cost of new iceboxes, she decided to repurpose the old one. 😉 She removed the icebox door and taped off the surrounding areas with plastic drop cloths. Shannon painted the outside of the unit with a cream colored Rustoleum Appliance Spray Paint. At this point, Paul took interest in the renovation and Shannon tasked him with painting the icebox door and extinguisher cover. They bought a new marine size extinguisher at Walmart for around $10 to replace the expired one, and it fit perfectly into the extinguisher mount. Lastly, the hardware got a coat of Rustoleum oil rubbed bronze spray paint.
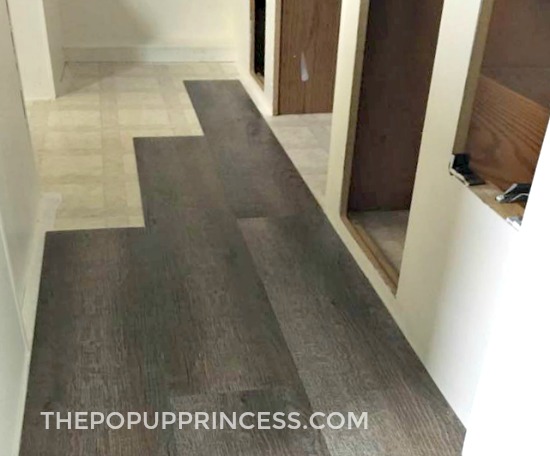
Shannon and Paul used adhesive plank vinyl flooring from Lowe’s in the color Driftwood. It is a nice greyish wood tone that Shannon had been admiring from some of our other Reader Features. In order to avoid removing the cabinets, Shannon and Paul decided to apply the flooring right over the existing linoleum. They first washed the floor thoroughly and let it dry for several days prior to installation. The application part was easy, but the next day Shannon found the planks had started to lift and bow, so she used Liquid Nails adhesive to re-adhere the planks to the floor. Shannon loved how the new flooring completely transformed her camper, and it only cost $50 total.
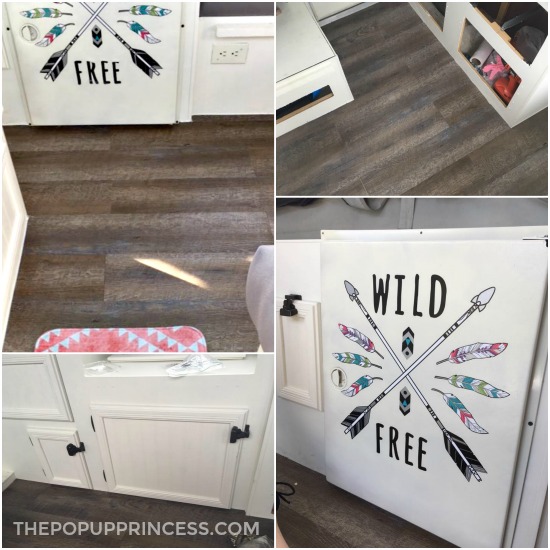
Once the flooring was all installed, Shannon put the cabinets and drawers all back together, being careful to line up the drawer pulls so everything closed properly. She had purchased a vinyl sticker at the Dollar Tree to jazz up the icebox door and loved how it looked, but it started to peel shortly after installation. Shannon bought a second decal, reapplied it, and used Mod Podge to make sure it stayed in place this time.
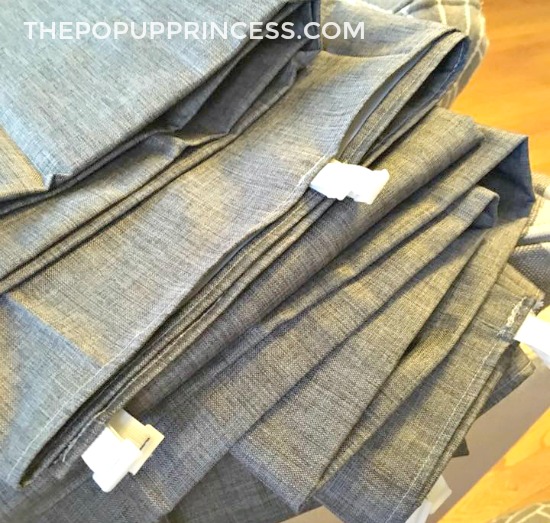
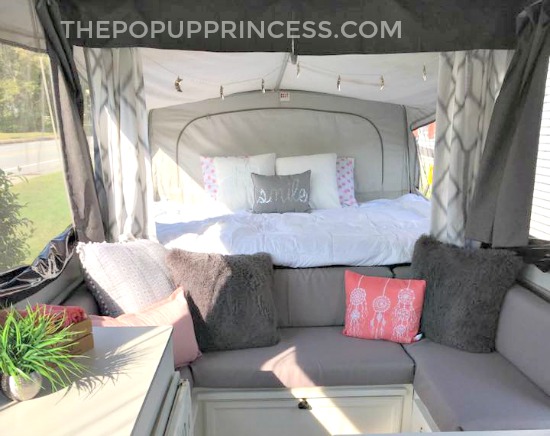
Even though Shannon is a skilled seamstress, she found it was more cost effective to use existing curtain panels than make them from scratch. She used 84” long charcoal gray blackout panels from Target–on sale for $9 each–to make the curtains. Shannon loved the design on some Target brand patterned curtains, but they were a bit of a splurge at $17.49 each. She decided to use the panels on the bunk end curtains only to add some visual interest while keeping the cost down.
Shannon cut each panel in half to make two curtains and sewed JR Products Elastic Sew In Curtain Carriers, which she purchased on Amazon, to the top of each one. With the new carrier clips attached, she was able to slide the curtain panels into the existing track. She used the remaining panel to hide the bunkend supports by making straight valances, which she hung across the bunkends with Velcro. All the curtain materials cost her around $100 total.
Shannon covered the existing cushion foam with a heavy duty grey upholstery fabric that she purchased at a local fabric warehouse for $2.99/yard. She wrapped the fabric and sewed it onto the cushions on the underside to make it easy to remove and launder or even change if she decided to do that down the line. It took about 13 yards or so to cover all the cushions. She used the old covers to draft a pattern for the odd shaped cushions on the corners of the couch and tailored them all individually for a custom fit.
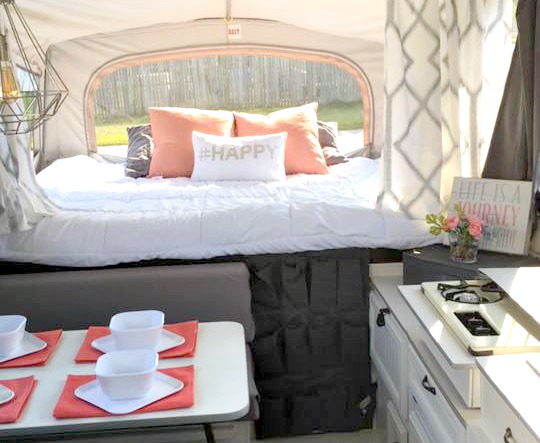
With all the major remodeling done, Shannon got to have fun with decorating the camper. Shannon and Paul’s kids are young, so Shannon opted to buy white down alternative comforters on Amazon for about $40 each. This would allow her to use bleach on them in the wash or easily cover them with a duvet if she ever changed her décor in the future. She used sheets she already owned for one bunkend and purchased an inexpensive set of sheets at HomeGoods for the other.
Shannon splurged on the awesome plug in light fixture that hangs above the dinette. She found it at Target for $30 and installed a hook above the dinette, to allow it to be hung when the camper is popped up. When it isn’t in use, she can store it under the dinette seats. A vintage style LED bulb gives off nice soft lighting when lit, and is much nicer than the standard ceiling lights in the camper.
Shannon and the family took their “glamper” out for its maiden voyage on Columbus Day weekend in October. They chose a family friendly campground about 40 minutes away from home at Burlingame State Park. Shannon says they got off to a rocky start since they didn’t know how to pop up the awning, but once they figured it out, it was smooth sailing. On the second day of the trip, they had a torrential downpour that would have spelled disaster for a tent camping trip. Instead, they spent the day warm and dry, playing cards and board games at the dinette. They love their new PUP and are already planning their spring trips. 🙂
Thanks so much for sharing your makeover journey with us, Paul and Shannon. It looks amazing, and I truly hope that you and your family have many wonderful adventures in your new pop up camper.
Disclaimer: This post contains Amazon affiliate links. The Pop Up Princess is a participant in the Amazon Services LLC Associates Program, an affiliate advertising program designed to provide a means for sites to earn advertising fees by advertising and linking to Amazon.com. This means that if you choose to purchase an item from a link in this post, The Pop Up Princess earns a small advertising fee to help pay for future projects and posts… so thank you! 🙂
Happy Camping!


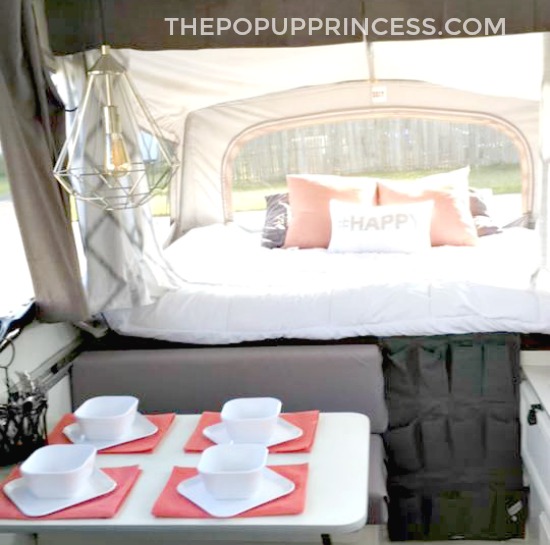
Can you share the link for the light above the table? I adore it
Carrie, The light was bought in store at Target this past summer, I am not sure if they are available on the website.
Your Pup looks amazing!
Is that a shoe organizer hanging at the foot of the bed next to the dinette? What a great idea and place for cell phone, flash light, reading glasses and such. Adding this to my list of must haves. Beautiful remodel !!
looks great!!!!
I see the cabinet hardware is latches vs. pulls and knobs. I assume they are brass and were painted? Is the paint holding up? People seem to have great results with painting knobs and pulls…i’m wondering if the latches with moving parts fare as well.
I just recently purchased a pop up camper and am excited to begin the restoration, love all the ideas and tips. It is end of season for me so I will be spending the winter researching products to begin my project in the spring.