


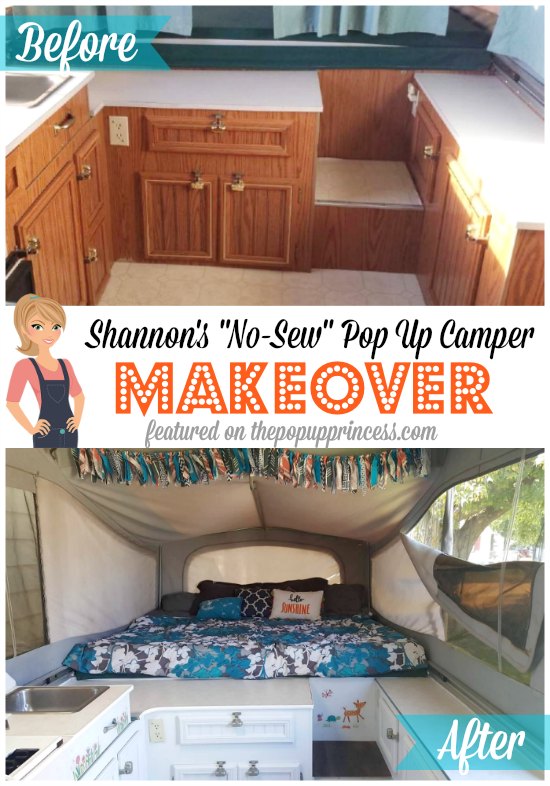
 Readers are always asking me if it is possible to give their campers makeovers without sewing. If you don’t sew because you never learned, never perfected the skill, or just don’t have access to a sewing machine, you can absolutely still give your pop up camper a fresh new look. Sewing skills definitely make things easier, but they aren’t necessary. This next feature is proof of that.
After their daughter was born in 2012, Shannon and her husband were anxious to make camping a tradition in their family. They started searching for a pop up camper on Craigslist, and by spring of 2014 they had purchased one from a private seller. After the first summer in their pop up, Shannon began researching how to make camping in a PUP a little easier. She came across this blog on Pinterest and was inspired by what other readers were doing with their campers. It didn’t take her long to decide she needed to undertake a makeover of her own.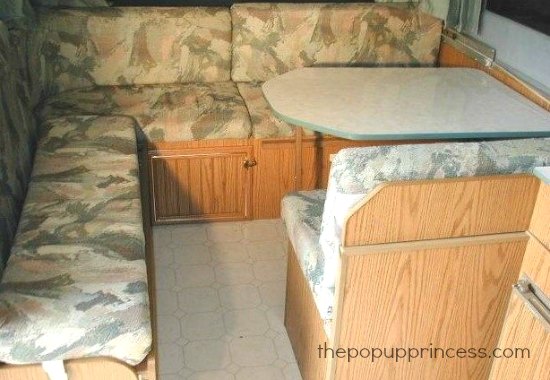
Shannon started her remodel in the summer of 2015, and although she didn’t really have a budget, she knew she didn’t want to spend a fortune. Shannon also doesn’t sew, so she knew that her whole remodel had to be “no-sew.” She started with her curtains. The curtains and valances that were originally in the camper were dirty and dingy looking, and she wanted everything to be fresh and clean. The valances were stapled to the roof, so Shannon pulled them out first. Then she purchased four grey and white chevron curtain panels at Shopko and cut each one in half to create eight camper curtains. Shannon used Stitch Witchery to hem the cut ends. Shannon cut all the tabs off the old curtains and hot glued them onto the new curtains. Once she hung her curtains, Shannon realized that she liked the look of the curtains without the valances, so she left them off. The curtains were the only thing Shannon accomplished that first summer, but it made such a huge difference that Shannon was hooked on this remodeling thing.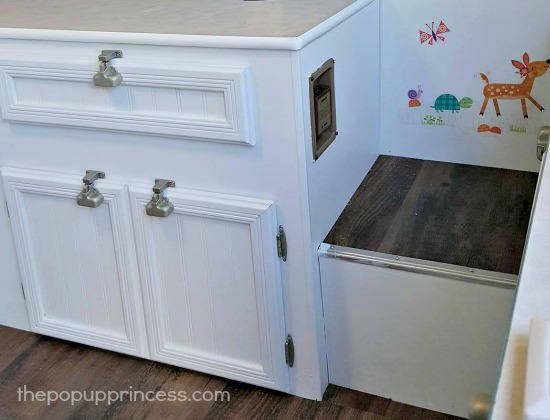
Shannon was determined to finish her remodel in 2016, so as soon as the weather warmed up, she pulled out the camper to paint the cabinets. She used the Nuvo cabinet paint in Titanium Infusion, since no primer, sanding, or prep work was supposed to be necessary. Shannon ended up applying three coats to achieve the look she wanted, which she says was a huge job. She says the whole project cost her about $100, and she had cabinet doors in her kitchen for a week. Because Shannon wanted to reuse her existing cabinet hardware, she removed it and spray painted it with a Rustoleum paint in Metallic Silver. In hindsight, Shannon tells me she wishes she had gone a little darker, but overall, she is still happy with how they turned out. The fridge got a coat of paint, and Shannon covered it with this cute decal she purchased on Amazon.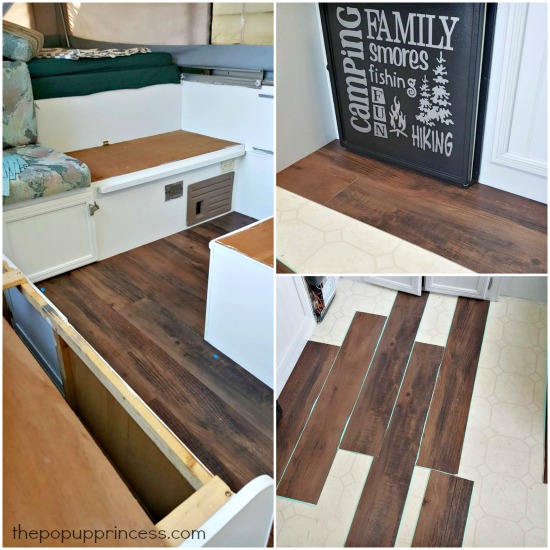
Once all the painting was complete, Shannon moved on to the flooring. She decided on a plank vinyl peel-and-stick flooring from Lowes. Before installing, she made sure the original floor was clean and free of debris. Shannon enlisted her husband’s help to install the new vinyl over the existing linoleum. At times the installation was tricky, but Shannon is so pleased with the end result.
With the painting and flooring complete, Shannon knew it was time to tackle the project she had been dreading most–covering the cushions. She went to Hobby Lobby five times in one week, trying to decided on patterns and colors. I can totally relate! 😉 Picking out fabric can be tough. Shannon really wanted a plain coral colored fabric, but came up short. While looking for an alternative, she was drawn to duck cloth in two different patterns, which surprised her. She ended up loving it, though. 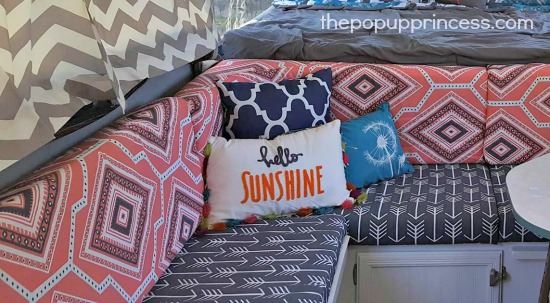 Shannon measured and cut the fabric. Then she used fabric glue to seam the fabric together along the backs of the cushions. She folded the ends of the covers like a gift and safety pinned them to the back. Shannon tells me that corner “L-shaped” cushion was the most difficult. In the end, her grandfather helped her cover it. She says it isn’t perfect, but it will work for now. The cushions were definitely the biggest challenge of her “no-sew” makeover, and she isn’t sure she will be able to remove them for laundering, so she is hoping they stay clean. 😉
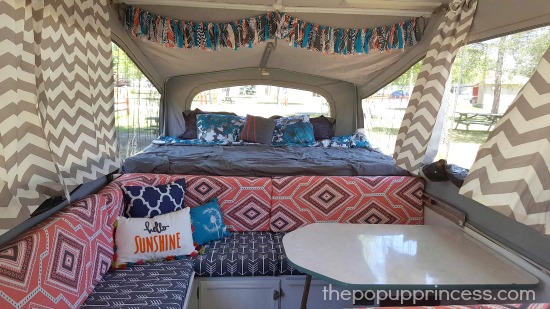
After finishing her cushions, Shannon had some leftover fabric. She decided to make scrap fabric garland “valances” for over the beds, since she didn’t hang curtains there. Shannon used pinking shears to cut strips of all the different fabrics she had left. She added a few pieces of navy blue fabric in different patterns for visual interest. Shannon cut a length of cotton rope and tied on all those fabric strips. Then she hung them above the bed using Command hooks.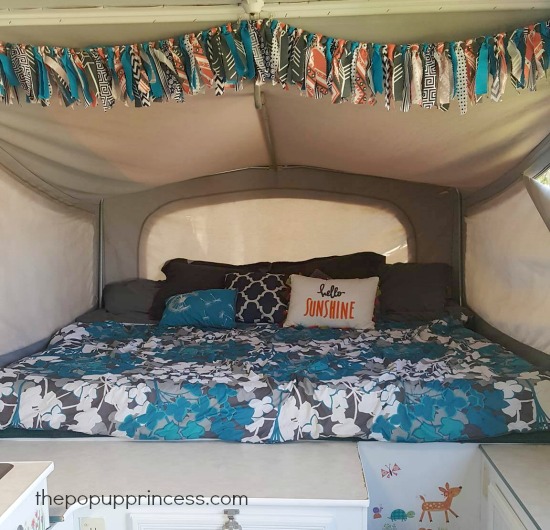
Shannon also ordered new 3/4 inch white t-molding and replaced most of the countertop trim, since in some places, the paint didn’t take well or the trim was falling apart. You can see how we replaced our t-molding here. To add a whimsical finishing touch to her camper, Shannon ordered some baby animal wall decals to adhere to the camper door and cabinetry. I love the fun, kid-friendly vibe it gives the space. 🙂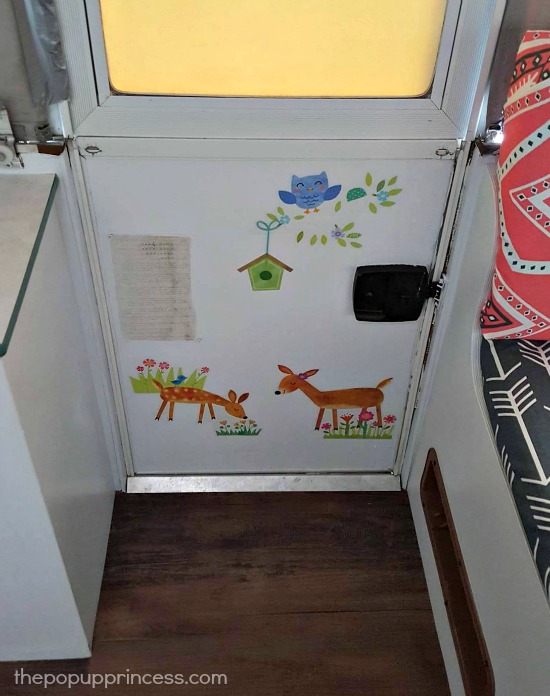 Adorable, right? I would have loved to have had a camper like this growing up, and I’m sure Shannon’s daughter will have wonderful memories of their little pop up. I’m so impressed that Shannon didn’t let her inability to sew limit her. The space turned out so stinkin’ cute! Well done, Shannon. 😀
If you’ve completed a “no-sew” makeover of your own, I’d love to see it! Check out this post for tips on how to have your camper makeover featured on our blog or Facebook page!
Disclaimer: This post contains Amazon affiliate links. The Pop Up Princess is a participant in the Amazon Services LLC Associates Program, an affiliate advertising program designed to provide a means for sites to earn advertising fees by advertising and linking to Amazon.com. This means that if you choose to purchase an item from a link in this post, The Pop Up Princess earns a small advertising fee to help pay for future projects and posts… so thank you! 🙂
Happy Camping!

This is so cute and gives me hope! I don’t sew and really want to redo so many things in our trailer! We have our cushions in the dinette and I want to make curtains. 🙂 Thanks for sharing.
Simply beautiful! Love the layout of the pup too!
This is EXACTLY what I needed to read! Recovering our early-nineties cushions is something I have really wanted to do, along with creating new curtains, but I don’t own a sewing machine. Thanks so much for sharing!
EXACTLY the example I need for our pop up redo… I am fighting mold right now. Love the concept of less as more-the valences and curtains are coming down for the winter while i search fabric stores until i find what i want. Great job!
I have the same L-shaped cushions! Can you give me any tips on recovering those??
Do you have any tips on covering the L-shaped cushions?