


 I often get asked how long it takes to remodel a pop up camper, and that is such a great question. It’s also one of the hardest questions for me to answer. Remodeling your PUP is really a very personal journey. Some prefer to knock it out in a few days and get to the camping. Others–and I am firmly in that group–prefer to take it in phases. Our remodels have taken us months to complete, and we will often take our campers out midway through the process to assess what works for us and what we’d like to change before all the modifications are locked in. Shauna is one of those phase remodelers, and I am so excited to share her journey with you.
Shauna decided it was time to look into a camper after a weekend family camping trip. It had stormed most of the time, and the whole family was all hunkered down in her brother’s massive trailer. This was just the push Shauna needed to ditch the tent. 😆 Once she opened up to the idea of a small camper, she started to look on Pinterest for some glamping ideas, and there she came across the fanstastic reader makeovers on this blog.
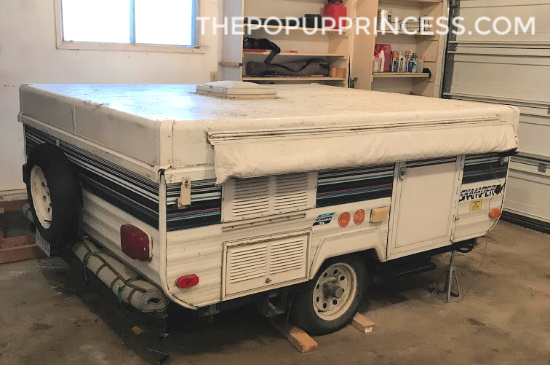 She decided that remodelling a little pop up camper would be the best compromise. She didn’t want a large trailer but liked the idea of camping with a little more luxury. Shauna definitely wanted a cozy bed, a heater, and a small fridge, but she didn’t want to break the bank to get those things. Lucky for her, Shauna’s sister and her family were looking to upgrade their pop up camper, and she was soon pulling the small 1992 Skamper into her garage. Because her sister was the original owner, not only did she luck out by knowing its entire history, Shauna was also able to get it for the family rate.
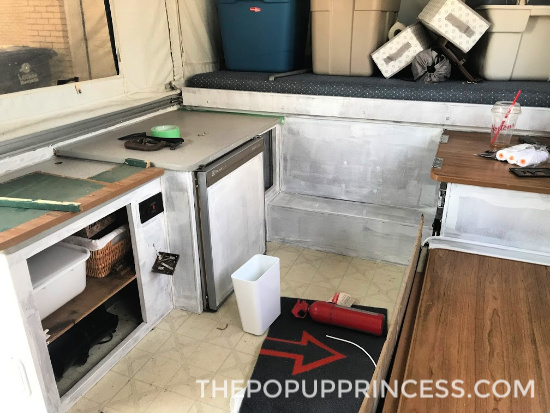
 Once the camper was home, Shauna assessed her condition, made some remodel plans, and named her Tina. The frame and canvas were in great shape, so Shauna’s first priority was new tires. The treads were okay, but the tires themselves were too old to be trusted for any long trips. With all the structural and safety issues addressed, Shauna moved on to the fun part–the interior remodel. She tackled this in a couple of phases. Phase one was all about making her new camper work for her. She started by taking out the dinette and converting it to a long bench. Since Shauna would be camping solo with her pup, she decided she would much rather have a comfy spot for morning coffee than a dinette.
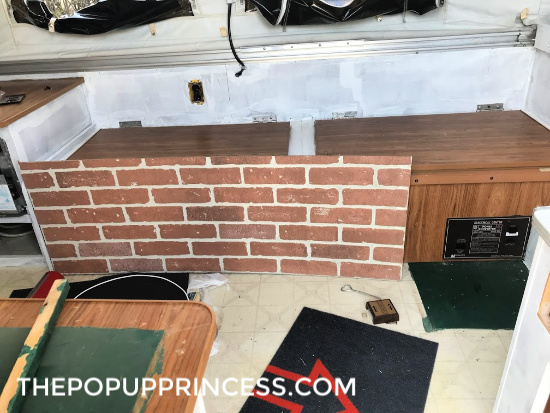
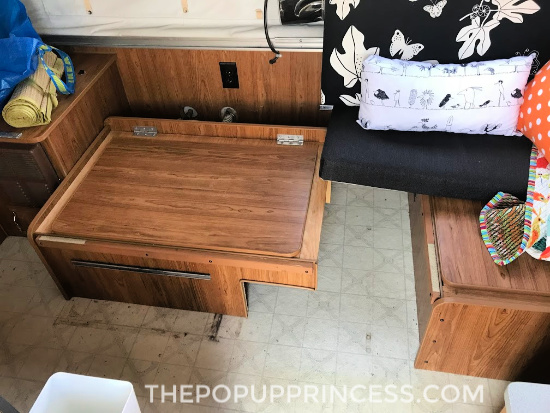 The only tricky part of removing the dinette was taking out the electrical converter box from the frame of one of the benches. After that was done, Shauna repurposed the frames of the original benches to make a couch. Both benches happened to fit perfectly against the back wall where the table used to be. Only a little additional support was required along the hole left where the wheel and electrical box used to be. Shauna had some left-over brick paneling from a house renovation, and she used that to face out her new bench.
Then Shauna began the painting process. She washed, prepped, and primed all the cabinets. Then she gave everything (including her newly constructed bench) several coats of white paint. For more information on painting your pop up camper cabinets, be sure to check out our tutorial here. Shauna was able to finish the painting just in time for her first camping trip. This gave her time to test out the new configuration. It turns out that in a pop up camper as small as Tina is, you never have to reach far to put something down on a countertop. Shauna ended up removing her table in favor of more space. Even in her rough state, Tina became the hang out zone for all the adults on the trip, despire being the smallest of the trailers in Shauna’s camping party.
Phase two should have been all about fabric, exterior paint and décor, but things took an unexpected turn for the worst. Shauna was replacing the cracked roof vent and discovered a leak. She got the inside vent panel off and the flood gates opened. She had water dripping down on her from the ceiling. Shauna knew this was an issue that needed to be addressed. She pulled off the interior vinyl, cut out any mold she found, salvaged what she could, and disinfected it well.
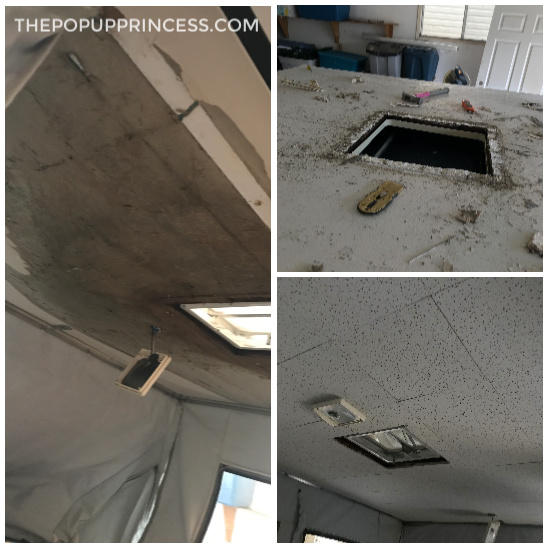 Most of the structure was still intact, and there was very little real damage. Shauna opted to let everything dry very well. Then she repaired the inside by gluing new panels–cut to 12″ x 12″–to the ceiling. Shauna replaced the exterior roof vent, caulked around it, and put in the new interior vent trim. She pulled all the exterior corner trim pieces off and resealed them to prevent the roof and body from being subjected to moisture in the future. Tina was now water tight again and ready for her makeover.
(As a side note: Water damage can be a major issue. It can often cause black mold and mildew–not to mention structural–issues, so if you have had a roof leak and are opting not to replace the roof, you’ll want to be sure you have killed any mold and allowed the interior to dry well before covering over the ceiling. If there is any wood rot, covering the issue won’t fix it. For structural soundness, you’ll have to replace it at some point. For more information on rebuilding your pop up camper roof, be sure and check out our roof rebuild series here.)
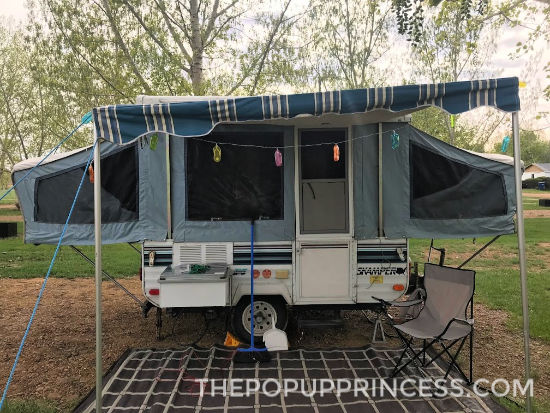
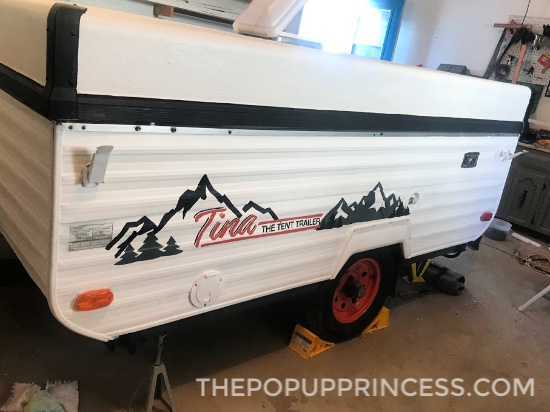 Since Shauna had been working on the roof, she decided to tackle the exterior makeover as part of this phase. The body of the camper was all prepped and painted with exterior metal paint. She painted a mural on Tina’s sides to let her personality shine. Shauna says Tina definitely turns a few heads out on the road. 😉
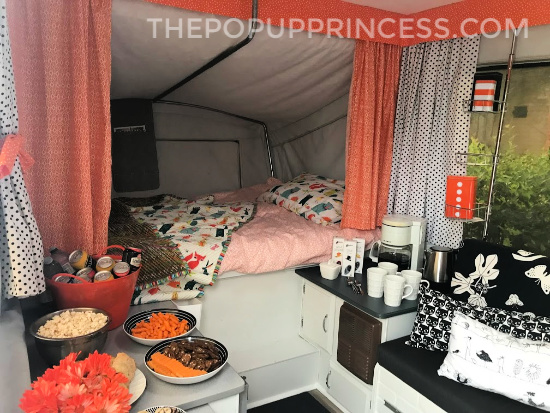
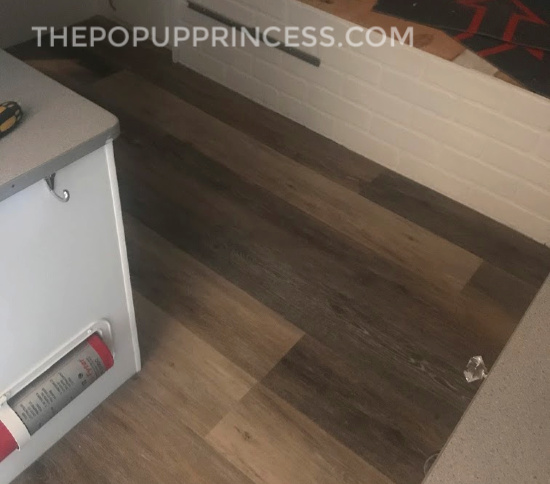 The last phase of her remodel was the interior fabrics and flooring. The flooring was replaced with click vinyl planks, which Shauna was able to lay on top of the original vinyl. She had plenty of clearance with the cabinet doors, so the added height wasn’t an issue. The adhesive vinyl planks do not work with the extreme winters in Shauna’s Canada home, so it was a bit of a trick to find the click lock vinyl in a style she liked. Flooring can get pricey fast, but she was able to find a nice grayish plank that worked well with her color scheme and her budget.
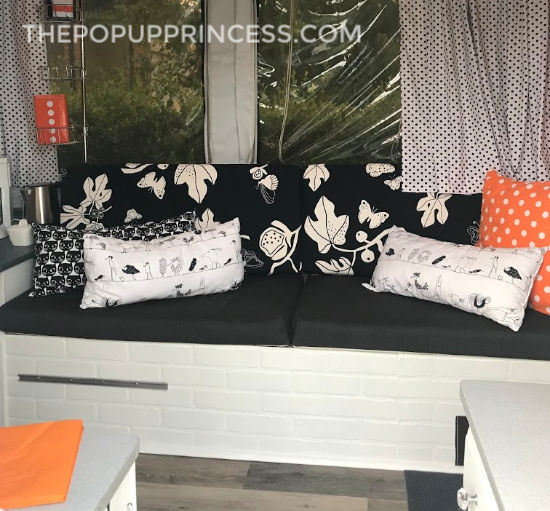
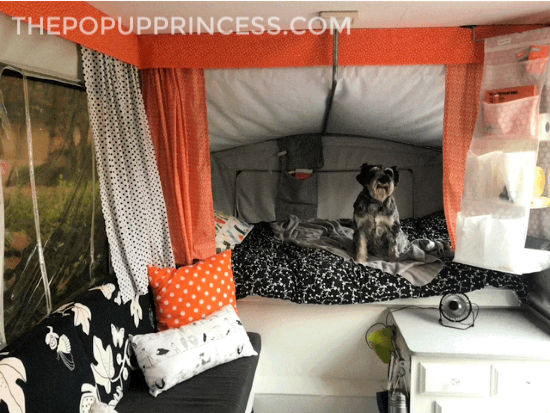
The inside received all new fabric–cushions, pillows, bedding, curtains–it was all replaced. Some of the fabric was repurposed from previous projects and some was purchased new. Shauna is a very lucky girl, because her mother is a great seamstress and was willing to do all the sewing for her. Without her mom, she says her camper would look a little less refined on the inside. Shauna is a big fan of Ikea, so much of the bedding and storage items were purchased there.
 Shauna added a few little extra storage features–most of them thanks to our readers’ suggestions. A floor shower caddy is used behind one bench as some added storage for coffee beans and knick knacks. Hanging sweater storage from Ikea was added right by the door to hold dog leashes, napkins, bug spray and other essentials. An Ikea metal rod hangs off one cabinet on the side where small things like keys, small broom and flashlights can be hung.
 Ikea also has some great felt remote holders meant to drape over couch arms. Shauna uses them at the end of each bed over the metal bed bows, creating instant storage for magazines, iPads, phones, glasses–all the little stuff that seems to get lost. As a bonus they don’t have to be removed when she pops Tina down for travel. Great idea!
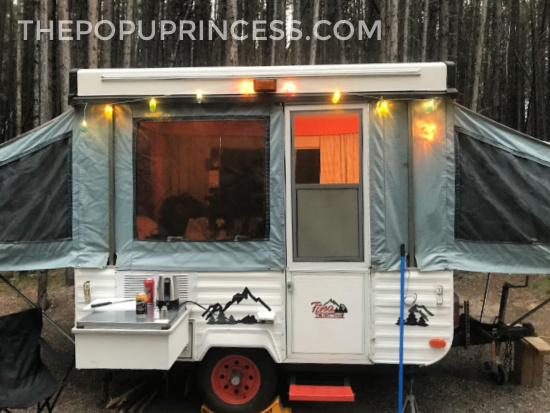 Tina’s renovation was done on a budget, but Shauna admits it was a pretty high budget for a small camper. All in all, her tires, repairs, paint, and interior fabrics came to $1500 CDN (around $1100 USD). But look how adorable she is! And now, with all the phases of the remodel complete, she is the perfect spot for Shauna and her dog to relax and enjoy the great outdoors. Beautiful job, Shauna! Thanks so much for sharing Tina with us. 🙂
Happy Camping!

How cute is Tina? Very nice job!!
Thanks for sharing my little Pop Up Tina. I had so much fun with her and getting all sorts of great ideas from your blog and what other readers have done.
Shauna,
Looks great! I’m helping my son restore a 1999 Viking pop up that he just bought. I am replacing the valance and curtains. I like the look of your smooth valance. Can you explain how you hung them? He currently has the ruffled ones (with elastic) with the sliding c clamps. Any help would be appreciated.
Hey Rhonda, Since I had to pull the roof apart a bit I could see the structure underneath. There was wood for about 1 1/2″ so I ended up using a airnailer and staples to put up the valance. Kept the lines a lot cleaner. I too was not a big fan of the ruffle.
It’s so pretty!
Shauna, that was a lot of work, but what an awesome finished product! I admire your skills and resourcefulness.
Shauna, this is amazing! I like it better than my house! What did you use to cover the top of the cabinet to the left of the long seat? The one with the heater. It went from wood-look to black. Did you paint it, or replace the top completely? Thanks.
Hi Caroline, thank you for your lovely comments.
The top above the heater was in pretty bad shape from wear and tear over the years. I ended up cutting a new sheet of plywood for it. good one side 1/4″, scribing around the one corner and then painting it with a grey tremclad paint. Saskatchewan winters are very harsh. Deep freezes and a lot of thaw melt days so everything I used inside was made to last outdoor elements. It’s been a few years and it’s been holding up really well.