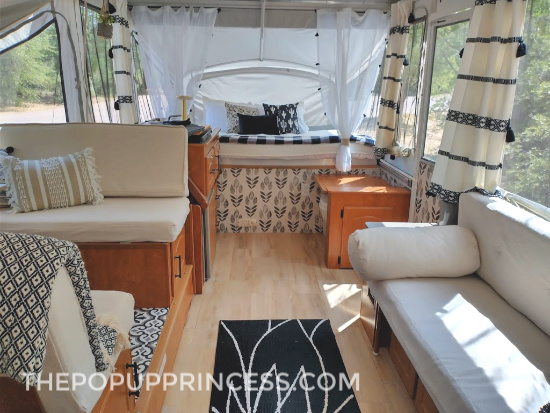
I honestly never thought that we’d still be stuck inside months after my last post, but here we are. 🙁 With all the craziness going on, we’ve had some major issues finding camp spots this summer. That means we are holding off on the camp trips. It’s been tough to be stuck inside for another summer instead of road tripping it around the country. On the bright side, quite a few of you guys have been taking on quarantine camper projects, and I’ve gotten to see all the amazing pictures. One of my favorites is this one from fellow Arizonan, Shelly.
I love this makeover, because I get asked all the time about skipping the cabinet paint. Believe it or not, you can make quite an impact in your pop up camper without even cracking open a can of paint. In fact, here’s a link to some of our favorite unpainted makeovers. We are definitely adding Shelly’s camper to that list!
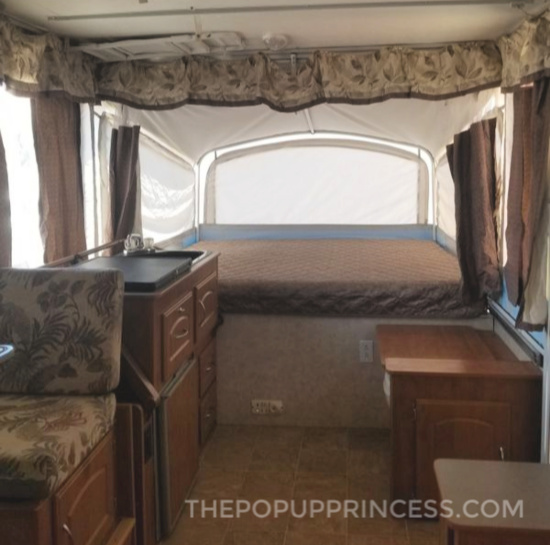 Shelly had toyed around with the idea of getting a camper for awhile, but nothing serious ever came of it. When the pandemic hit, after sequestering 24/7 with her husband and two college-aged sons, this mom needed a getaway project. 😆 Her family purchased a 2005 Fleetwood Utah, and Shelly turned her attention to remodeling it—with inspiration from all the amazing Reader Features here.
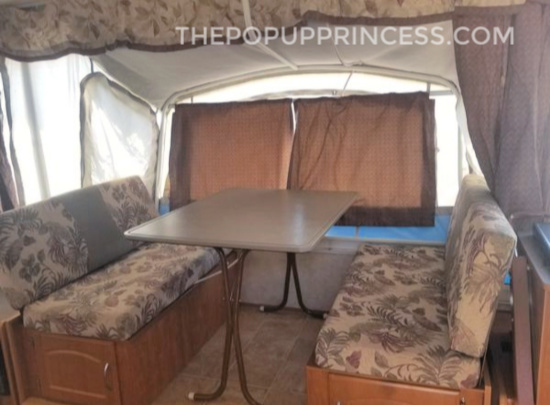 Her new camper was in great shape, but it was ugly. Because Shelly lives in Arizona, and it is brutal here–no joke–she decided to start with some indoor projects. She sewed cushion covers from canvas drop cloths (we like these on Amazon), which are easy to find at any home improvement store and inexpensive to boot. Initially, Shelly used Velcro on the sofa back but wasn’t happy with the results. She ended up buying cheap upholstery tack strips for the other cushions, and they worked like a charm.
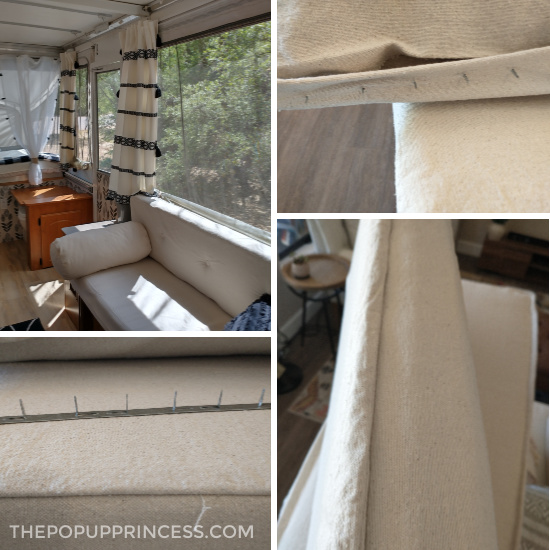 The tack strips allowed her to really pull the fabric tight. Then she used a hammer to pound the sharp tacks into the thin edge of the cushion board. To add some flair, Shelly hand-sewed a French seam around the dinette backs. She made matching buttons, which she used to add tufting to the sofa back. She says she loves how they turned out, but won’t be sad if she never has to sew another cushion cover in her lifetime. 😉
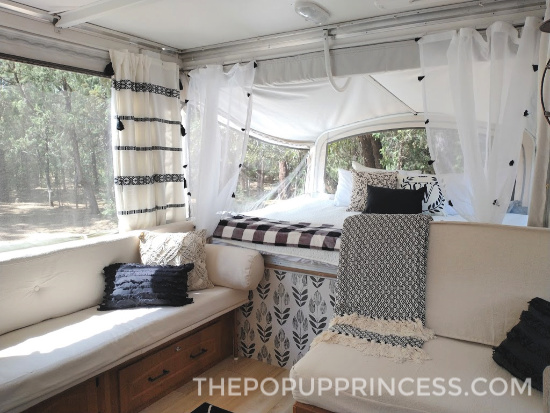 Shelly bought inexpensive sheers for the bunkends and shower curtains for the other windows. She cut them to length, hemmed them, and added tassels for some visual interest. She pulled the tabs off the old curtains, glued little hooks to them and added little rings to the sheer curtains for hanging.
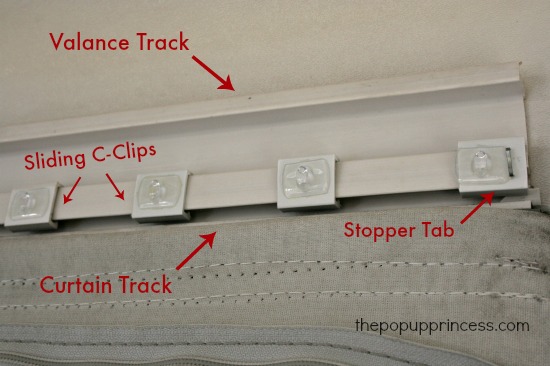 If you would like more information on this curtain method, be sure to check out our tutorial on curtains here. The shower curtains already had slits at the top for the shower curtain rings, so they hung perfectly on the little hooks. There was no need to add the rings to those panels.
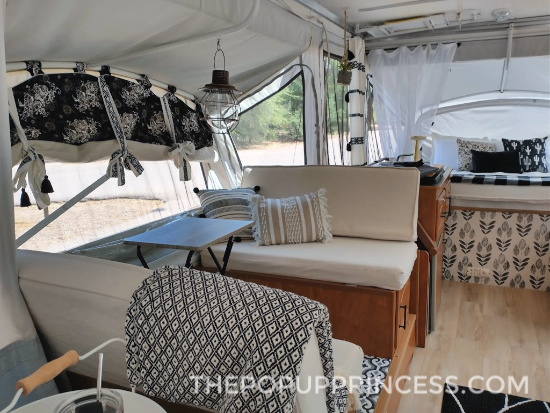 For the dinette window, Shelly had planned to make the magnetic roman shades that were featured on Caterina’s Pop Up Camper Makeover. Since she was running out of speed, and she couldn’t get into the camper for exact measurements, she made a roll-up version instead. Shelly lined some gorgeous floral fabric with leftover drop cloth. Then she put Velcro tabs at the top to hang on the bump-out frame. She used the leftover material from the bottom of the shower curtains, to make the ties. Didn’t it turn out amazing? I’m definitely impressed.
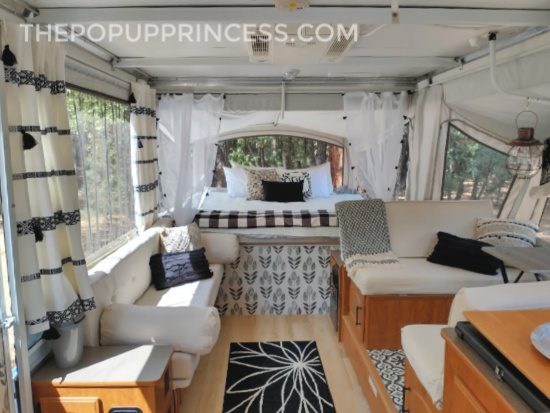 Shelly’s last sewing project was to sew corners into each new comforter so that they would lay nicely and not hang over the ends of the beds. Then she sewed the bottom of the fitted sheets to the bottom of the flat sheets. And because I know you’ll all ask… Sorry! 🙁 Shelly doesn’t have any pictures of this, but she says it makes the beds so much easier to make in the mornings. Sounds brilliant, right? I’m going to have to give that a try.
 Shelly got lucky, and Arizona had a random weekend of temperatures in the mid-90’s! That never happens during our summers. So Shelly took full advantage of it and enlisted the help of her good friend to finish up the interior. They had to start at 5:00 am to beat the heat and put in a couple of long days, but they got it done. Shelly and her friend gave the camper a good cleaning before adding peel & stick wallpaper (available on Amazon here) to the lower walls and door.
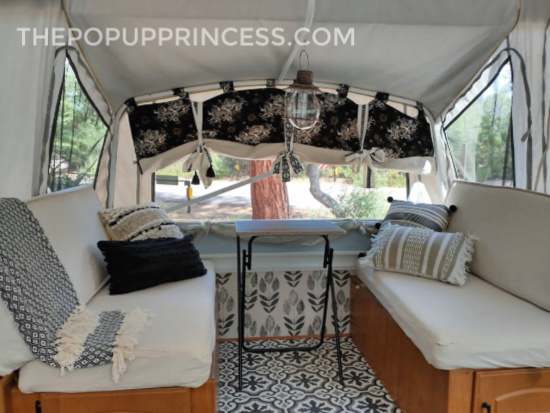 Because Shelly opted not to paint the cabinets, she decided to go bold with the flooring. She selected a neutral plank vinyl for the main flooring, but the dinette got a fabulous faux cement tile. She purchased both at Lowes and says this was by far the hardest part of her makeover. The tile itself wasn’t too difficult to work with, but it was so hot the adhesive backing was melting all over their hands. Everything they touched got glue on it. In the end though, that flooring pulled everything together, and Shelly couldn’t be happier with the results.
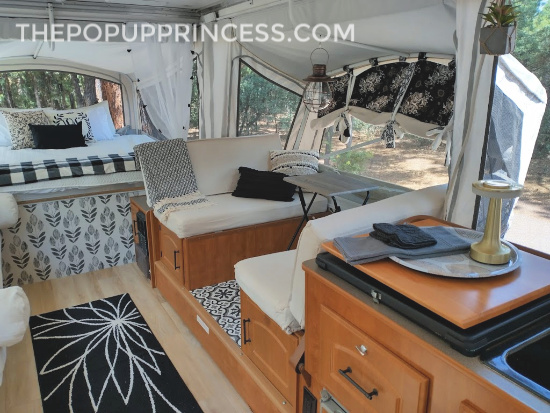
She added 2-inch memory foam toppers (these are our favorites) to the camper beds for added comfort. You can see more on how to make your camper beds more comfortable here. Shelly and her friend have already been glamping in her new camper—which they’ve christened Lady aEthelflaed (a nod to fans of “The Last Kingdom”). Shelly says it sleeps like a dream. They even have plans for three more girls only trips this summer. And just so her husband isn’t left out, she has two trips planned with him as well. 😉 Not a bad way to spend quarantine, eh?
I hope Shelly’s makeover has inspired you to take on a camper quaratine project or two of your own. I know the wheels in my brain have been turning ever since I saw this gorgeous trailer. Thanks for sharing, Shelly. Enjoy your new home away from home!
Disclaimer: This post contains Amazon affiliate links. The Pop Up Princess is a participant in the Amazon Services LLC Associates Program, an affiliate advertising program designed to provide a means for sites to earn advertising fees by advertising and linking to Amazon.com. This means that if you choose to purchase an item from a link in this post, The Pop Up Princess earns a small advertising fee to help pay for future projects and posts… so thank you!
Happy Camping!


What a great makeover!!!
omg how beautiful…she is in the wrong business….such a talented lady….love it
Love it Shelly!! I never thought about using peel and stick “wall paper”. Just bought some – I will have
to give it a try.
Thanks Larissa for posting again. I have missed seeing the Reader’s Feature- It is what inspired me to transform my amazing Pop-up. I am obsessed with POP-UPS!!!
Great makeover! Where did she get that lantern hanging above the dinette? It’s so cute!
Where did you get the light over your dinette table? I love it. How does it operate? Does it plug in? Did you use a drop cord? We have a 2001 Coleman Utah. Thanks!
Hi Kelley,
I just started checking out this site since my husband and I just bought a camper. I happened to do a search and found a very similar (if not the same) lantern at Big Lots.
https://www.biglots.com/product/battery-operated-industrial-pendant-lantern/p810324413?epik=dj0yJnU9UFFZb1d4V0w1T3MyUklmdE1tYmNaNlFpTUI4dnAyVG8mcD0wJm49UWJsSTctMkhwT3FRUkZFci0xRC1DZyZ0PUFBQUFBR0N5Z3NZ
Folks without your eye for combining pattern would shy away from it, but you show a masters eye. I like it.