


 I am so very excited to share the next pop up camper makeover with you all. Stephanie emailed me photos of her camper months ago, and I was floored. It is absolutely gorgeous. I had a long waiting list of amazing reader remodels to feature ahead of hers, but I promised to pencil her in for October. So now that October is here, Stephanie is first on my list! I just couldn’t wait to share all that she has accomplished with you. You will absolutely love this gorgeous makeover. It’s so girly and glamorous–definitely a glamper if I’ve ever seen one! 😉
 Stephanie and her husband own a photography studio (you can see her work at FarrellFocus.com) and in their free time, they love to get outdoors to take pictures. They both knew that having a camper would free them up to travel a bit more, and they could bring their little dogs as well. Stephanie had originally set her sights on a vintage hard-sided trailer, but after coming across the gorgeous reader remodels here, she quickly changed her mind.
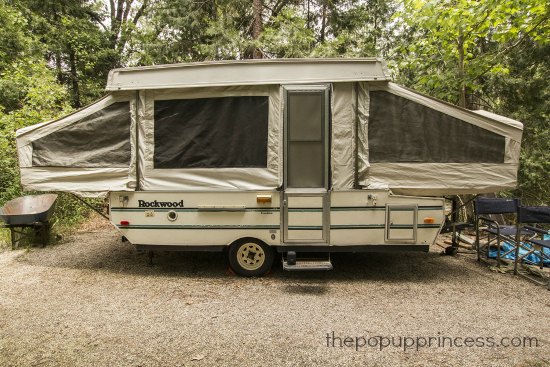 After searching Craigslist for awhile, she realized that most pop up campers were out of her budget. When she came across this Rockwood camper for $500, she jumped on it. It had some water damage, and it definitely needed some TLC, but Stephanie was up to the challenge. She called her husband, made him drop everything, and they were proud PUP owners a few hours later.
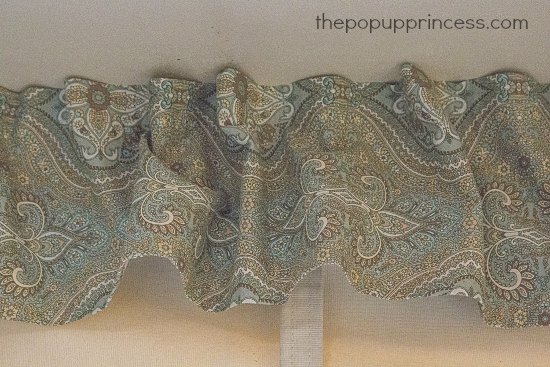 Stephanie’s inspiration fabric was this lovely print she purchased at Walmart. She wanted to incorporate calming, spa-like colors in her makeover, and this fabric fit the bill. She planned everything around that print. To make her valances, she followed our tutorial here, attaching them to the track with glide tape she purchased on Amazon.
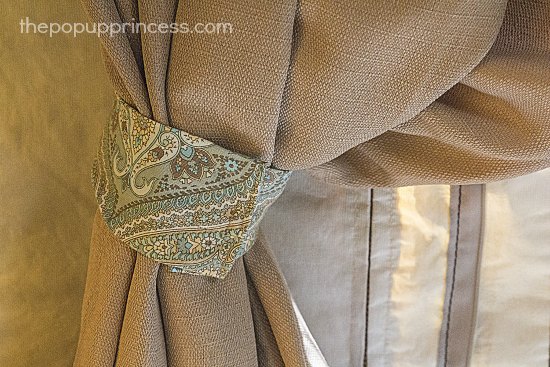 Stephanie was able to find some great curtains at Walmart for less than the cost of fabric. She purchased a few panels, cut them to size, and reattached the original curtain hardware to hang them. She also used that gorgeous inspiration fabric to sew tie-backs for the panels. Pretty, right?
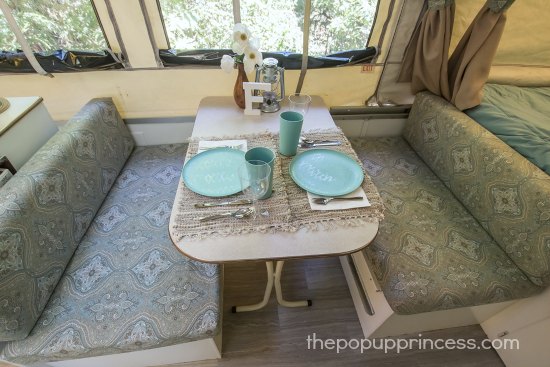 Since Stephanie loved her inspiration fabric so much, she used it to make covers for the camper cushions. She used a slightly different method than I did, and she has a great video tutorial on how she did it here. You’ll definitely want to check it out if you have been struggling with reupholstering your cushions. It looks so easy, and those cushions turned out beautifully.
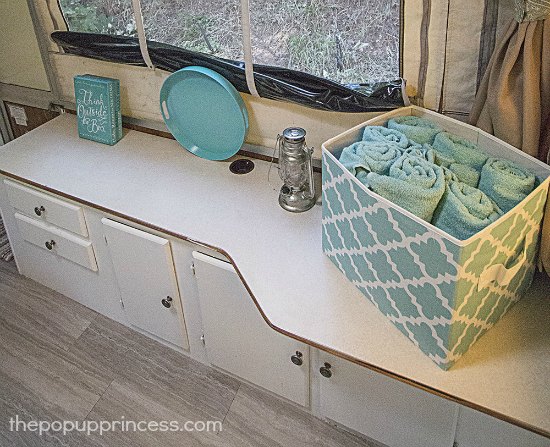 While Stephanie was sewing her little heart out, her husband and son painted the cabinets with a creamy white indoor/outdoor paint. They also reused the existing cabinet hardware (with the exception of the hinges). The countertops were in good shape, so they didn’t need to do anything with those.
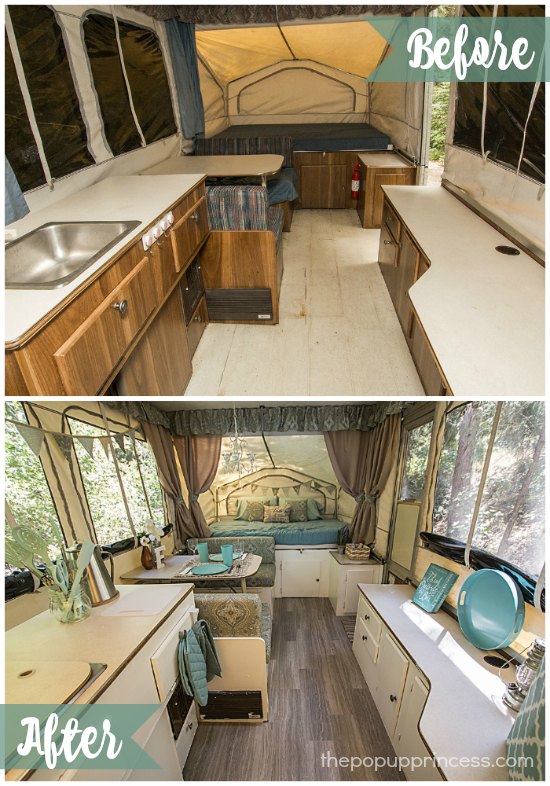
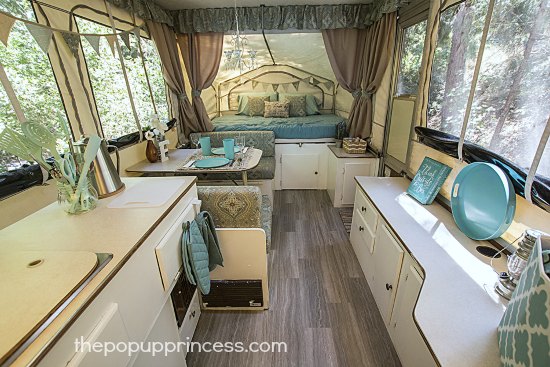 They installed a new floor while they were at it. Stephanie went with a Stainmaster peel and stick plank vinyl flooring in the color Chateau. I love that color. It is the perfect mix of grays and browns and great for a spa-like retreat.
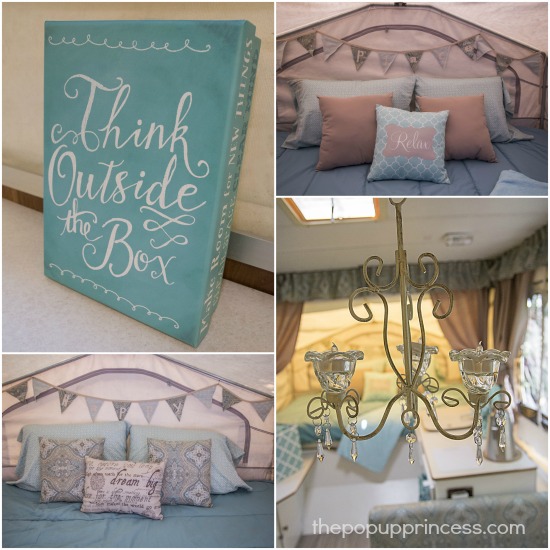 With all the major remodeling projects out of the way, it was time to move on to the details–and Stephanie did an amazing job with those. Stephanie tells me that she lives in a small town, so she doesn’t have many options when it comes to shopping. She purchased her fabrics and bedding from Walmart. She was able to make cute accent pillows and pennant banners for the bunkends. She also added 1.5″ memory foam toppers to the beds for comfort. (You can find our tutorial on sleeping comfortably in your PUP beds here.) I am absolutely loving that chandelier, though. It takes her makeover to a whole new glamour level.
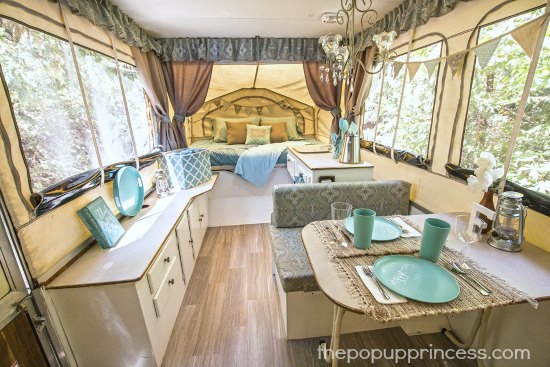 Stephanie bought her chandelier on Amazon, and she loves how she can hang it over the table inside the camper or take it outside to her easy-up canopy for a little mood lighting. She has battery-operated LED lights in it, and it is perfect for adding a little elegance to her camper. Stephanie is all about her creature comforts. 😉
 What an amazing transformation, right? I can hardly believe it is the same camper. If you’d like to see more details and take a video tour of Stephanie’s camper, you can visit her blog, Farrell Focus, here. She does a great job of explaining just how she took her $500 camper from drab to fab. Gorgeous job, Stephanie! Thank you so much for sharing your remodel with us. 😀
Happy Camping!
![]()
Disclaimer: This post contains Amazon affiliate links. The Pop Up Princess is a participant in the Amazon Services LLC Associates Program, an affiliate advertising program designed to provide a means for sites to earn advertising fees by advertising and linking to Amazon.com. This means that if you choose to purchase an item from a link in this post, The Pop Up Princess earns a small advertising fee to help pay for future projects and posts… so thank you! 🙂
Happy Camping!

What an elegant transformation! I love it!
Wow what an amazing transformation. You should be proud!
so totally cute!!! what a wonderful job!!!!
Gorgeous, just love it. I’m interested in the lighting in the chandelier. Do you know exactly what LED battery lights she used?
Thanks so much 🙂
Hi there, it’s Stephanie. In the chandelier, they are just little battery tea lights that I bought at Walmart.
Do you know of anyone who would renovate a pop-up 1992 Coleman for me I’m disabled and can’t do it myself. I live in West Palm Beach Florida Please let me know.
Curious as to the total cost of the renovation. The camper was 500$ how much was the total investment?
This remodel gave me a greater appreciation for my 98 Coleman Grandview. I was considering selling it, but I think I’ll keep it now. Thanks for keeping me from making a big mistake
How much fabric is needed total for curtains and dinette cushions?
That honestly depends on the size of your camper and width of your fabric, Nicole. Measurements that work for one reader might not work for another. I’ve found that this yardage calculator on the Sailrite site is helpful for calculating how much fabric to buy. 🙂
Hi Stephanie or Larissa – I love the chandelier! How did you attach it to the ceiling? Thanks so much!!!
I’m curious as well as to how the chandelier is supported to the ceiling, I had to replace the ceiling in my pop up and there is not much support up there at all so I’m wondering how it handles the weight of a chandelier…even a lightweight one?
I love the chandelier idea too and would love to know how it is secured to the ceiling.
We used to have a pop up. To make the vinyl windows neat, cut 1inch dowels to length. Unzip the window and, beginning at the top, start rolling the vinyl around the dowel. Keep rolling the dowel until all the vinyl is around the dowel. Snap the holders around it to keep in place. Thus looks very neat and tidy and makes a big difference.
What a great idea using curtains for upholstery!!! So frugal!!
Good job!
Did you grout the tiles ?
Some friends just bought a popup like this and we can’t figure out what the metal bar is on one of the dinette benches toward the bottom. The side away from the sink toward the bed. Can anybody tell us? Thanks!
If it is like our Rockwood, that metal bracket is for stove storage. Did the camper come with a countertop stove?
Curious on how there is now screen mesh over the beds instead of the vinyl fabric. I’ve never seen a popup with screen there instead of the vinyl
Did you use original mattresses and put 1.5” foam topper or did you buy new mattresses. If new, where did you buy them?
You can check out our post on making your beds more comfortable here, AnneMarie. There are lots of great tips. 😀