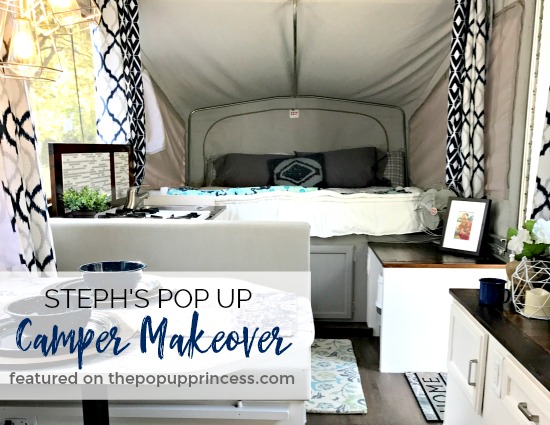
 This next makeover has given me the bug to work on our pop up camper again. Can you hear Mr. TypeTwoFun groaning over there? Yeah, I’ll have to work on getting him onboard… 😆 In the meantime, I can live vicariously through Steph. She and her husband, Jabin, live in Wisconsin with their two amazing tween daughters. Steph says that while “amazing” and “tween” usually don’t end up in the same sentence, in their case it’s true. Steph loves spending time with her little family. During the year they are busy with school and activities, but they always look forward to exploring their beautiful state over the summer. Steph and Jabin are avid fishermen and usually take an annual family tent camping trip. After a particularly cold and wet trip, they began talking about picking up a camper to make their vacations more comfortable.
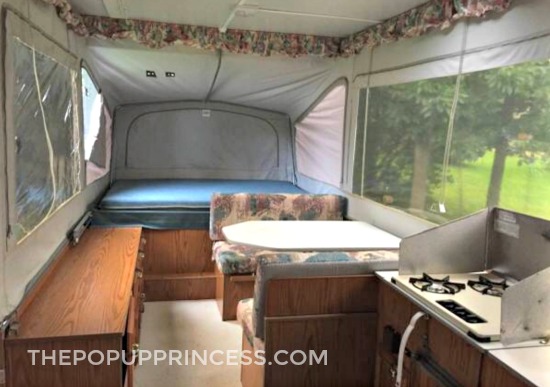
Jabin is a self-employed contractor, and Steph is very creative. They did a little online research and decided that with their abilities, they could remodel a PUP for much cheaper than many of the used campers for sale in their area. After scouring Craigslist, they found a 1995 Jayco J Series camper just about 3 hours north and made the trip out to see it. They purchased that little Jayco for $800, towed it home, and immediately got to work.
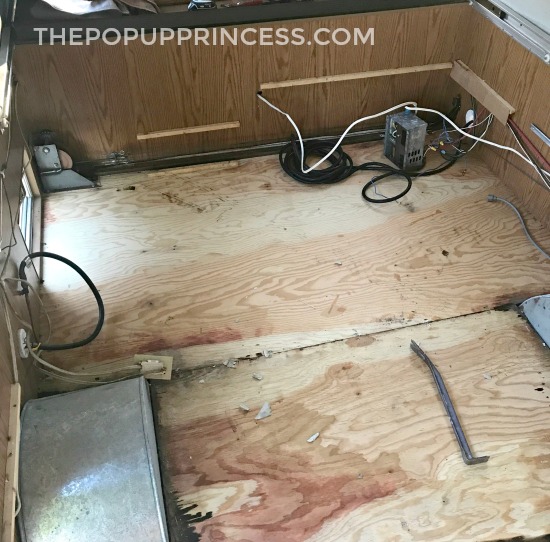
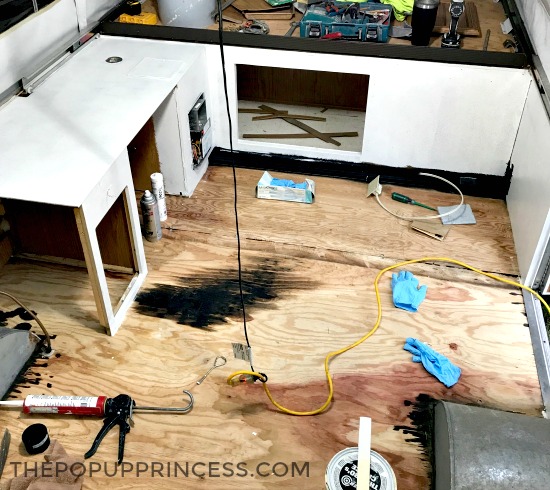
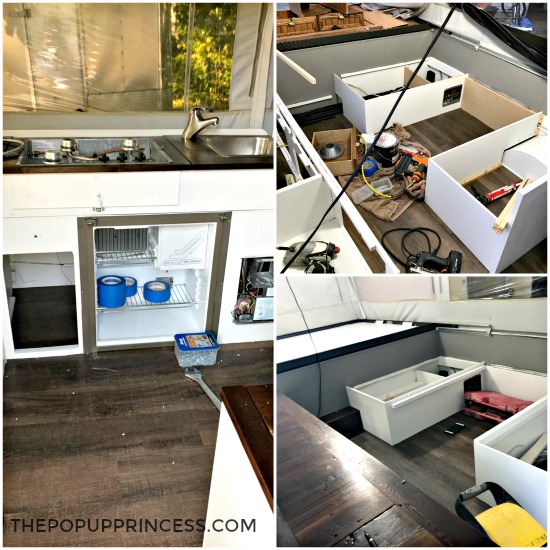
Their new camper smelled so strongly of moth balls, even after washing all the fabrics several times, that they knew they needed to completely gut it. The structure of the camper was solid, it just needed a little help to bring it out of the 90’s. Steph and Jabin ripped out all the cabinets and flooring. While the cabinets were out, they gave everything two coats of oil based Kilz primer.
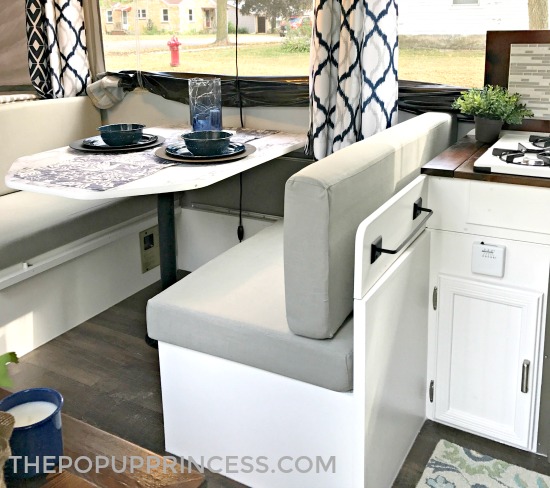
While oil based primer can be a pain to clean up, after years of remodeling their 1920’s bungalow, Steph and Jabin knew that the coverage was unbeatable. With all the cabinets primed and cured, Steph was able to paint them with Valspar exterior paint, which she had left over from painting her front porch columns. They opted for plank vinyl flooring in a wood grain pattern. Jabin installed the flooring in just a few hours, and it looks fabulous.
Although it stung at first, Steph knew they needed to ditch the old cushions, mattresses, and all the fabric in the camper. They just couldn’t get the mothball smell out of everything. They ordered new cushions from The Foam Factory, which Steph highly recommends. Their site makes measuring and ordering easy, and their foam arrived quickly.
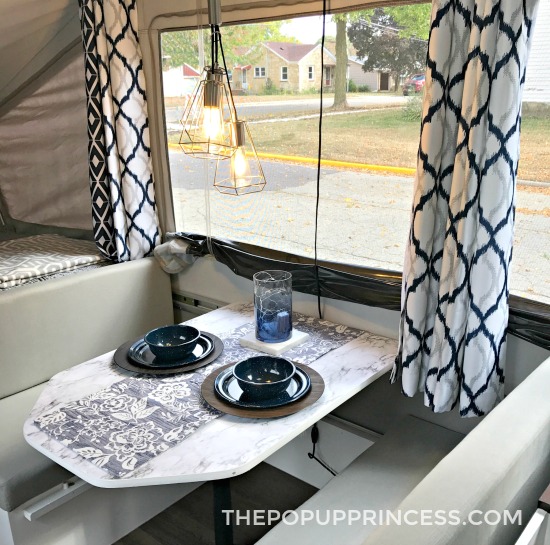
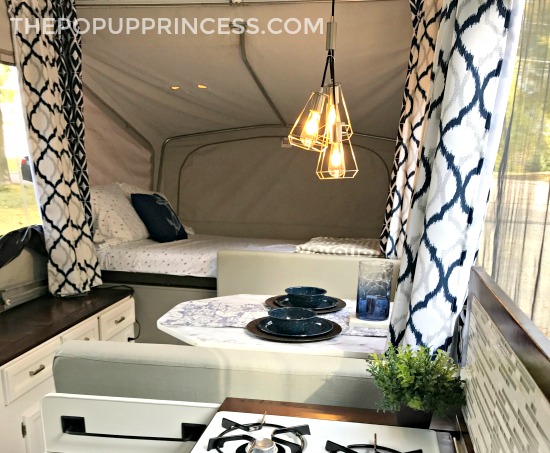
Steph had a pile of Kohl’s Cash, which she used to purchase curtain panels. While she and Jabin had remodeled lots of rooms in their house, her talents stop at sewing. Luckily, Jabin’s mom is a fantastic seamstress and was able to get the curtains tailored to fit the camper windows. Jabin’s mom is also a fantastic coupon shopper, and after combining sales with coupons at JoAnn Fabrics, they got the fabric for the dinette for less than $10/yard. The dinette table got the marble adhesive paper treatment, which Steph saw on Jess’s Pop Up Camper Remodel.
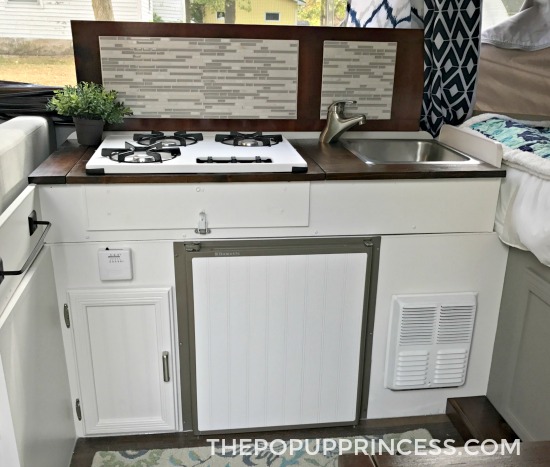
For the remaining countertops, Steph and Jabin wanted to do something different. They scoured the Internet for ideas and their carriage house for materials. They used old barn boards from the carriage house to make the countertops. They gave them a few coats of stain and some polyurethane for protection. The counters ended up being one of Steph’s favorite parts of the makeover.
In the carriage house, they came upon some old cabinet doors, and when Jabin saw them, he knew they would be a perfect fit for a backsplash in the kitchen area. Eager to use his tiling expertise, Jabin found some extra mosaic tile and got to work. He connected the backsplash with slide down notches, which allows the it to be pulled up and out for storage under the bed when traveling.
While Steph and Jabin do enjoy roughing it, they decided it was finally time to stop sleeping on an ever-deflating air mattress. They were ready to add a little comfort to their beds. They splurged on new foam mattresses, which they cut to fit the measurements of their bunkends with an electric kitchen knife. They added new bedding and a cute chandelier over the dinette, and their little vacation home was complete.
 They finished the makeover in just over three weeks, and had so much fun that they were actually sad when it was over. It’s contagious, I tell ya! 😉 Steph and Jabin started talked about doing another one, and just days later Jabin called to let Steph know he’d found a great deal on another camper. Now they are starting all over again with a new PUP. Thanks so much for sharing your makeover with us, Steph. We look forward to seeing the next one.
Happy Camping!


This makeover looks amazing. I especially love the bedding! Any info on where it’s from?
Can you show a detail of the removeable backsplash?
I’d love to, Mike, but I don’t have any photos of that. I can put the bug in Steph’s ear, though, and see if she has any. 😀
Yes I would love to see the slide down notches.
Great make over. But I’m looking at the the kitchen……does the sink pull down to the floor? It looks high. How does the top come down on it?
I think this may be my favorite makeover yet! How was the dinette hanging chandelier made? Or where was it purchased? Does it run on AC or DC? Thanks in advance for any answers.
I am also curious about the chandelier. I’d love to know where they got it and see how it is hung & wired. I’d also like to get a better understanding of how the back splash works.
I added a similar hanging fixture over our table and just affixed a Command strip swivel hook and plugged it in to the outlet. I take it down when travelling.
Is there a way of seeing a picture of the full light fixture and how it is attached? Also, would be interested in the making of the backsplash ! 😉
Unfortunately I don’t have any more pictures for you, Catherine. That was all Steph had available. 🙂