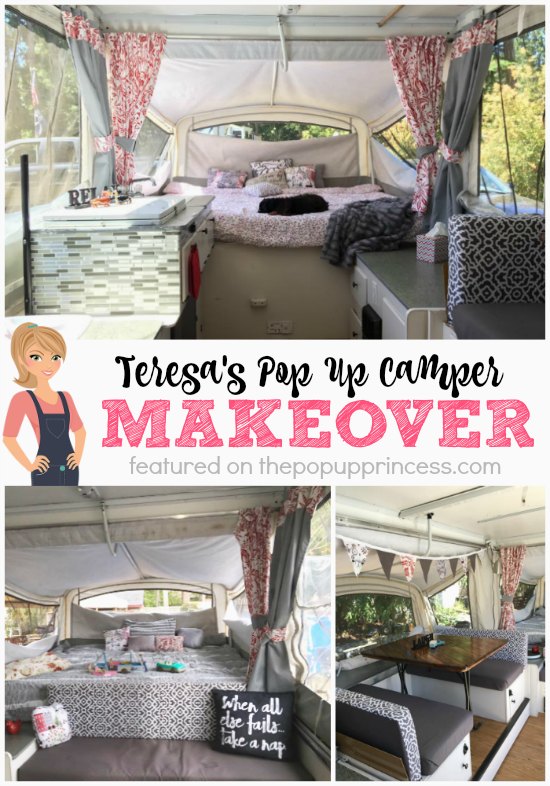
 I’m so very excited to share this next reader makeover with you. Teresa was all ready to purchase a vintage camper to glamp up when she came across the blog. After seeing all fabulous reader features here, it didn’t take long for her to change her mind. Soon she had a pop up camper of her own and was tearing it apart. She really went all out on her remodel, so here’s Teresa to tell us all about it. 🙂
We camped many years with our kids in a pop up camper, but as they grew up and moved out, we sold it. In hindsight, that was big mistake. At that time, I hadn’t found Larissa’s blog yet, but wanted very much to make over an older trailer. Fortunately, I found The Pop Up Princess before I found a vintage camper, and I fell in lo-o-ove with all the awesome makeovers here. From that point on, I was on a mission! 😀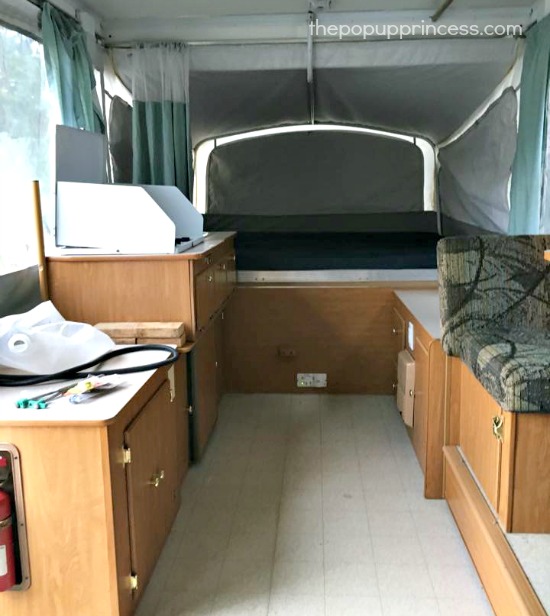
It turned out to be much harder than I expected to find a pop up camper for a decent price where we live. They just got snapped up so fast! Once I found this one, we jumped. The sellers kept showing me all the flaws and couldn’t fathom why I couldn’t care less. They didn’t know I was going to glamorize her, so I only saw potential. I used a lot of the ideas I found here. I really fell in love with Tiffany’s Pop Up Camper Makeover, and borrowed my color scheme from her. I also took our paint color “Coconut Ice” from another makeover featured here.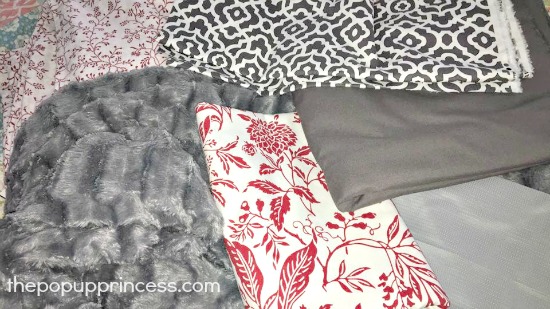 I set my budget at $300 and got to work. My first project was painting the cabinets. I removed all the cabinet doors and hardware and prepped everything. I decided to go with a quality paint, so I got Behr Paint and Primer in One. I also wanted to keep the existing hardware to cut costs, so I used Rustoleum Oil Rubbed Bronze spray paint to make everything look brand new.
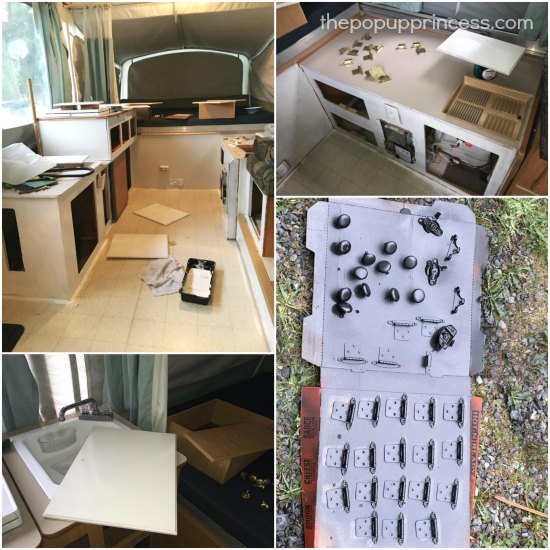
I wanted the countertops to match my new remodel, so I lightly sanded them and primed them with Zinsser primer. I borrowed Hollie’s countertop technique and painted them and blew crushed garage floor flakes across the top.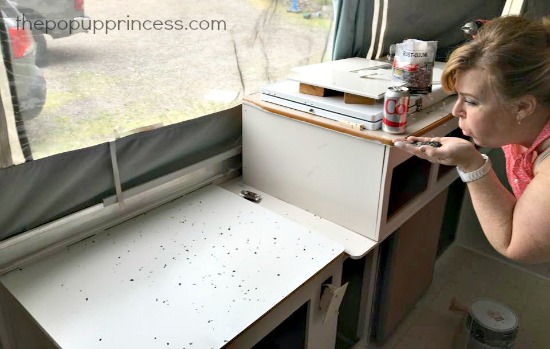
One day, I will need to replace the plastic t-molding, but for the time being, I just painted it with gray acrylic paint. The countertops turned out alright, but the color was just not making me happy. I wanted more contrast. I eventually decided to spray the counters with grey stone spray paint. That did the trick! Once dry, I coated the counters with a few coats of lacquer, and everything was perfecto! You can still see the garage flecks under the stone spray, which I love.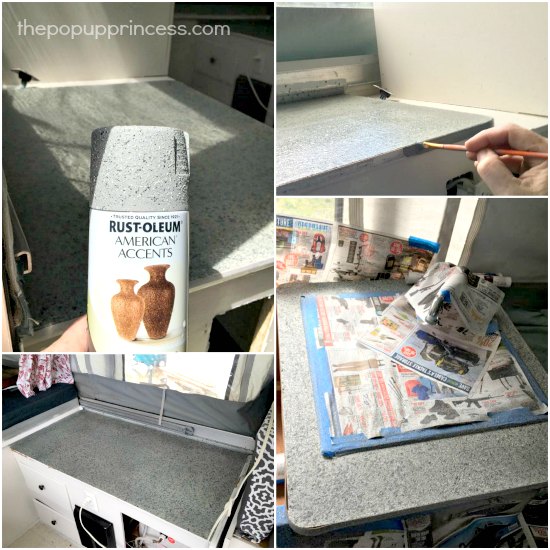
Next up… flooring! I splurged on that a little bit. I grabbed a gorgeous plank vinyl that was $40/box. We needed two boxes, so it was pricey, but so worth it. I had my handy husband install it for me while I worked on the curtains and cushions. We didn’t want to use quarter round to trim out the edges, so we ran a bead of caulk around the edge of the cabinets instead.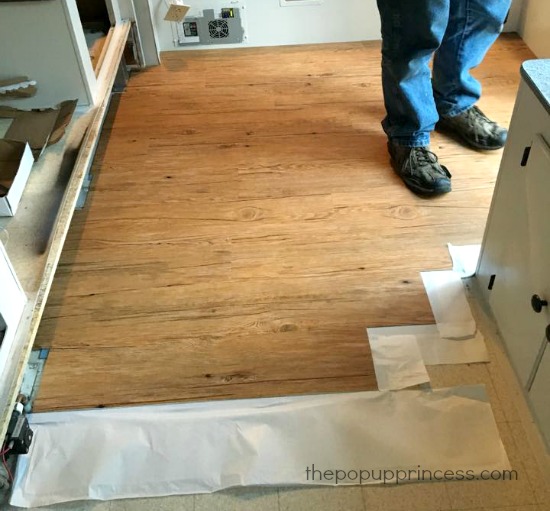
When I said I wanted to do this remodel on a budget, I meant it. My fabrics were surprisingly cheap. I scoured the local Goodwill for inexpensive options, and that is where I found my grey blackout curtains for $5 each. They only had two panels, but I found the exact same ones at Target–one was on clearance for $7, and the other was on sale for $9.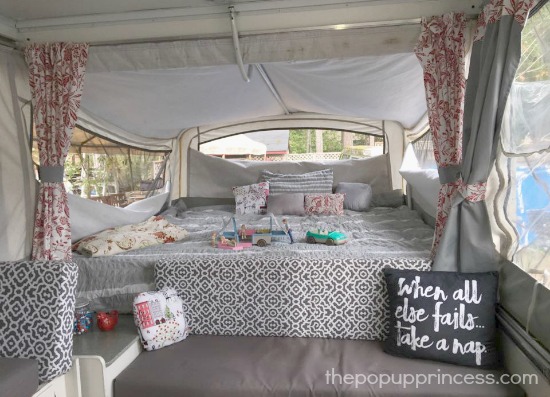
My fabrics all came from Walmart. I cut out the zippers from the original cushions and reused them to help cut costs. I used the “wrap and staple” method on the bottom seat cushions and sewed covers for the back cushions. I’ve never done something like that before, but was pleasantly surprised at how well they turned out. I found my red floral comforter set at Goodwill for only $5! The grey one was a Target set, but it was only $29. I sewed most of the pillows out of leftover fabric scraps, but I couldn’t resist purchasing the cute “When all else fails…” pillow from Walmart. 😉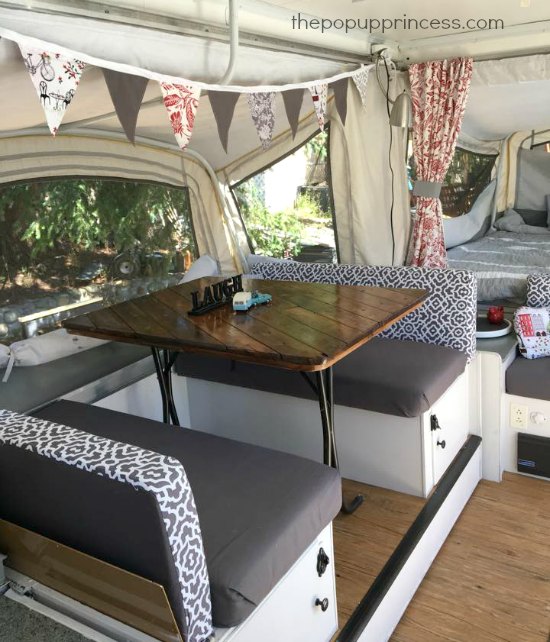 The dinette table was our last big project. My husband wanted to build it just like Becca’s table, but he was just so busy with work that he didn’t have much extra time. I decided one day that it couldn’t be terribly hard to do myself, so I did it. I screwed the boards onto the existing tabletop, cut them to the size and shape of the top underneath, sanded, stained, and coated with a few coats of polyurethane. I have no doubt my husband’s version would have been far better in quality than mine, but I’m pretty proud of my work. 😀
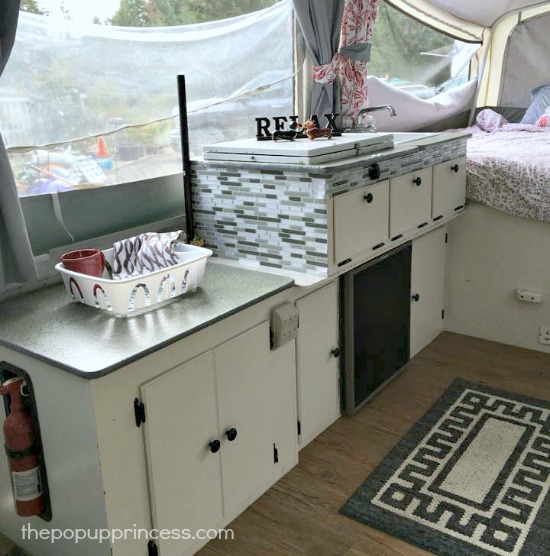 In the “kitchen” area, I added chalkboard vinyl to the front of the fridge, just like Larissa did. I also wanted to incorporate a tiled backsplash like she did, but I cook on our indoor stove quite a bit. I was concerned that the vinyl tiles would melt from the heat of the stove, so instead I added vinyl tiles to the outside of my fold-down galley. I just love how it turned out. 🙂
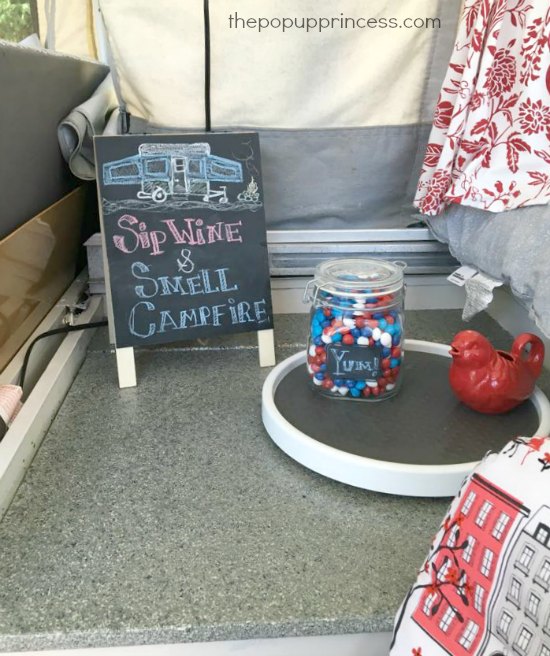
I also made a few pennant banners and signs for around the camper. I even came across a cute pop up camper toy at Goodwill, and I just had to have it for the grandkids. I love the way our space has turned out, and we were able to stick to our $300 budget, too. 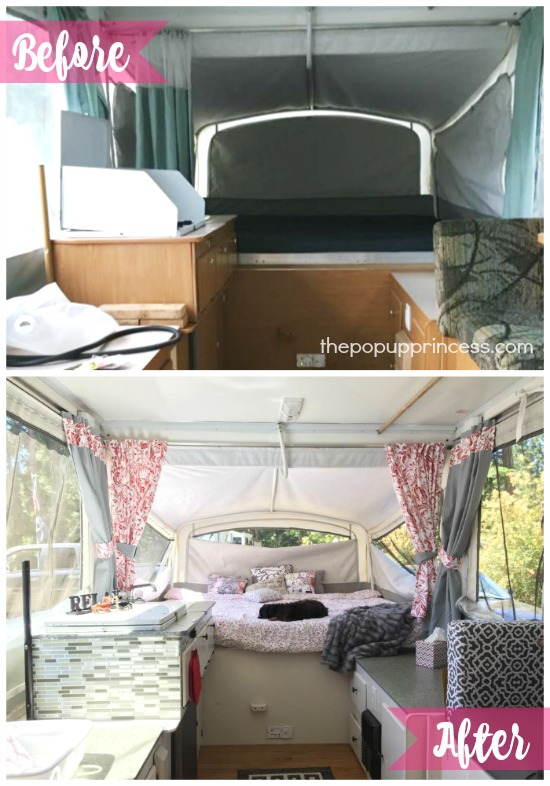 We still have a few more things to do on our “Poppy,” but they’ll have to wait until next year. This year, we are going to enjoy her with the family as much as we can. 🙂
Pretty amazing, isn’t it? I love it! Even better, Teresa tells me she is already out enjoying Poppy with her grandkids, which makes all the hard work worth it. Nice job, Teresa! Thanks so much for sharing.
Happy Camping!


Did you just spray paint the step up to the slide (metal trim piece) with oil rubbed bronze as well?
She did, Tasmin. Here’s a picture Teresa sent me. Thought you might find it helpful. 🙂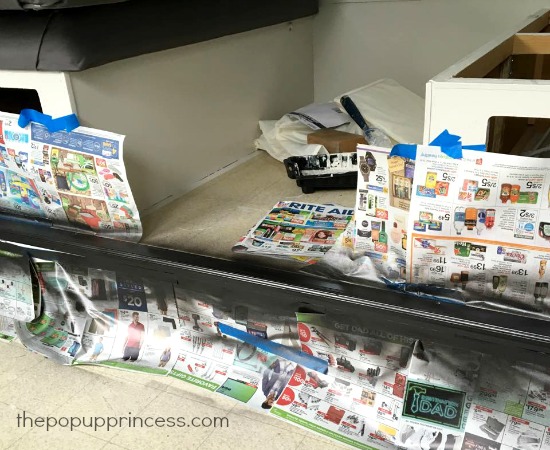
I love all the ideas!!!! We just go our 1991coleman popup for free from my brother in law and it definitely needs some lovin
Beautiful transformation! We just purchased our little Poppy, a 1998 Jayco and cant wait to get started. You are all such an inspiration!
Thank you for sharing!
Donna
Can’t wait to see yours! I got so many techniques and design colors/ ideas from this site. Thanks to all of you and The PipUp Princess for all the work she puts into this site.
Thank you, Teresa, for sharing specific details, and for crediting/referencing others from whom you took inspiration. Your makeover turned out great, and adds another possibility to my growing list of potential color schemes. Nice job!
We can’t wait to try out our pop-up camper when the summer heat passes! This site has me inspired to design a new interior!
Your grandkids will have good memories in your newly decorated Poppy! My grandson loves ours.
Thanks! We had some fun fun trips! But honestly their favorite part was the “jiffy pop” popcorn on the stove. They thought it was magic😍
We have a pop-up that needs an interior make-over. How do you attach the new curtains to the track? Did you reuse the sliders that were in the track? I’ve looked at a few different re-do’s and so far I haven’t found anyone who tells how to add new curtains.
Your blog does have a bit more info in the how-to part.
Thanks
Your curtain options are unlimited, Amy, but I find that people who use the original curtain tracks are happier with their outcomes long-term. Each pop up camper manufacturer used a slightly different tab for their curtains, so it is helpful to know what make your camper is. We did a two-part post on our camper curtains. If you have a Coleman, you can see how we did ours here:
POP UP CAMPER CURTAINS, PART ONE
POP UP CAMPER CURTAINS, PART TWO
I reused my “c” clamps but did end up having to buy more. I found them on Amazon amazingly cheap. But as Larissa says there are so many ways to hang curtains and blinds it’s unlimited. Search her site for what works best for you. 😉
You SHOULD be proud of your table and everything else! Great job!
I have an ultra light camper and most of these modifications are too heavy for me, but I still love to look and read! I especially appreciate that you set a budget and stayed within it!!!
Thank you!!! Yes I will say that table IS heavy. I’m lucky not to have to worry about the weight.
It looks awesome! I’ve just started remodeling my father in laws camper and I love the coconut ice color paint, or maybe I just like the name…. Any other recommendations for a great looking white/off white to paint the cabinets and walls?
Also I hear a lot about “Zinser” primer (don’t know if I spelled that right) should I be using that even if my paint has primer in it?
I did not use the primer on my cabinets. I did lightly sand them however. I lightly sanded the counters and used the primer on them before painting.
Happy camping! Teresa
Wow what an incredible transformation. I love getting inspired everytime I’m on here.
Love your transition. And the colours are so nice too.
Hi Teresa,
We bought our first pop up a few months ago. My friends don’t fully understand when I tell them I’m remodeling a tent trailer. Of course I show them the Pop Up Princess and yours is always the one I go to. Beautiful!
when doing the floors, did you apply the plank vinyl right over the original vinyl flooring?
You can do it either way, Dana. We removed the flooring in our camper before installing the new plank vinyl, but you can install it directly over the old linoleum.
Are there any challenges with the slide-out? Since I cannot see the edge of the flooring under the slide out, I am concerned that the slide out will not work if I add a layer of flooring. If I remove and replace, I am concerned because I cannot see / replace the edge detail under the slide out. Please advise!
Hi Robin, I had the same concern and there isn’t much I could find with how-to’s. We bought the thinner Allure flooring and covered the floor just barely under the slideout. We created an “L” shape for the end pieces that run behind the dinette. Surprisingly we have no problems at all. I can send a picture if it doesn’t make sense.
Hi Laurie, if I installed the new plank vinyl to the floor without removing the original vinyl , you think the slide out still work properly ? sliding in and out without any problem?
Please advise me, and send me the pictures that you offer to send to Robin.
Thanks in advance,
mili
I have this exact pop up, I cant wait till our weather gets better to do mine. You have inspired me.
Hi, We are remodling our pop-up camper, and we loved your counter top idea we are thinking of using it but we were wondering what kind of lacquer you used on top of the rustoleum stone accent paint?
Thank you!
I did a similar thing with my table top that you did with your counters. I used the make it stone spray paint and a lacquer after. A few weeks later it chipped off in a few spots. Did you have this happen to you or have any suggestions from stopping that?
Thanks
Hi I have a very similar camper and I’m in the middle of painting the cabinets. My question is about how you paint the sidewalls of the sliding dinette in the outside. As in between the adjacent cabinets. Did you just paint in as far as you could go? Help!! I’m struggling!!
Love how light it looks now
How did you change the colour of the walls ( as in over the bed) it looks a different colour to the before photo?
It’s just a trick of the light, Kim. Teresa was parked in the shade for the before shots. 🙂