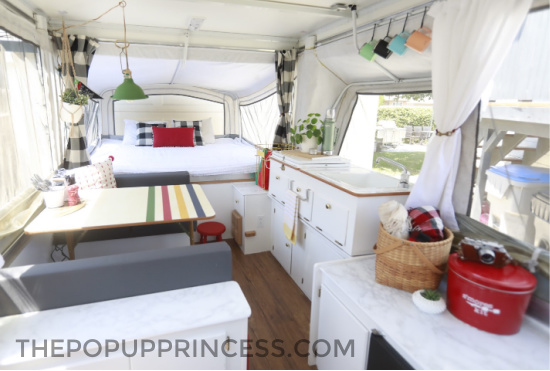
The humble pop up camper is all the rage right now. Seriously. Have you tried to buy one lately? You’ll notice they are in short supply and high demand. Quarantine and stay-at-home orders have made summer vacations difficult. So many families are turning to camping as a safer alternative to the typical summer vacation. Meet one such family–the Wights.
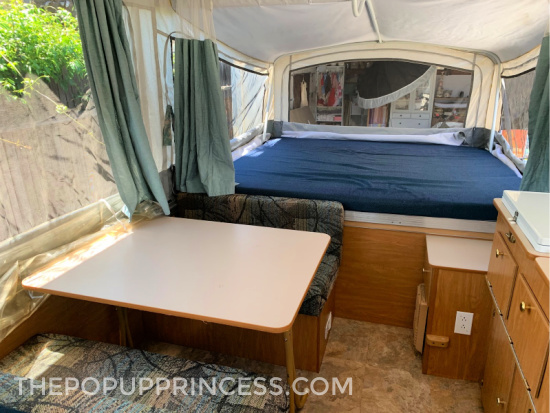 Shannon and Jared didn’t want to spend their summer cooped up inside, so they purchased a pop up camper to help them get out and enjoy the great outdoors–social distancing style. They managed to get their hands on a 2001 Coleman Tacoma. It was in already great shape, but when Jared suggested they fix it up a bit, Shannon was all in!
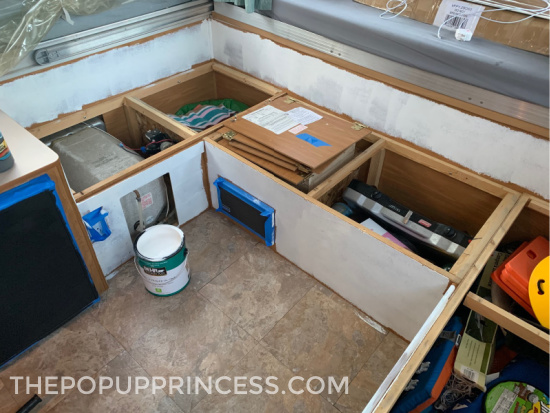 She started by painting all the cabinetry. Shannon decided to use a paint and primer in one. She selected a gorgeous semi-gloss white and gave everything three good coats of paint. The fridge got a coat of chalkboard paint to make it stand out. Want to know all our very favorite tips and tricks for painting your own camper cabinets? Be sure to check out the answers to all our frequently asked cabinet questions here.
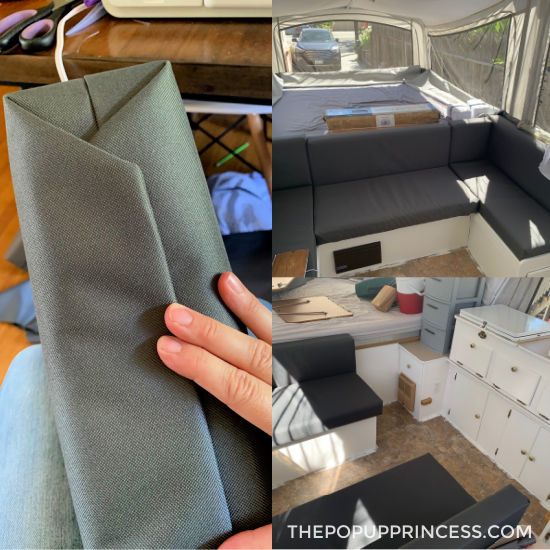 Once the paint was complete, Shannon turned her attention to the cushion covers. She selected a charcoal colored waterproof canvas duck cloth for all the cushions. Shannon made “envelopes” for each cushion. Then the foam went inside each envelope. The sides were folded over and stapled to the wood backing when possible. She stitched the envelope closed by hand if the cushion didn’t have a wood insert.
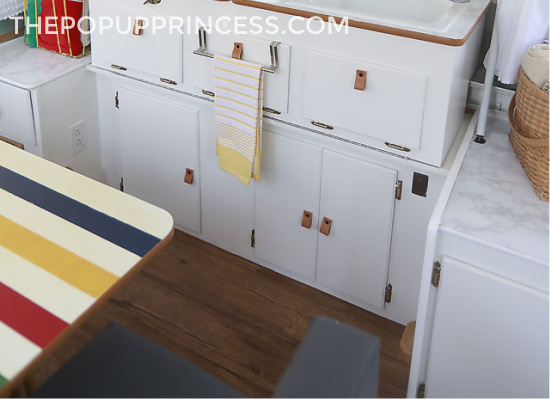 Then it was on to the flooring and countertops! For the flooring, Shannon and Jared selected an adhesive plank vinyl in a warm brown. Shannon says this was by far the most time consuming project in the camper. Look how it turned out, though. Gorgeous! 🙂
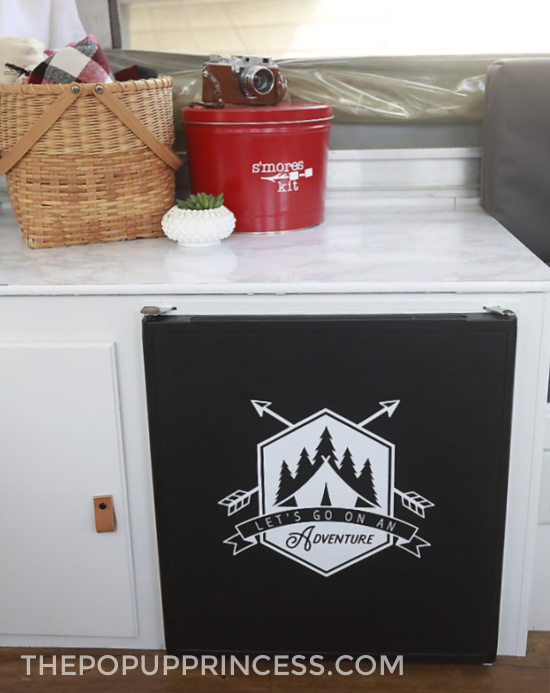 For the countertops, Shannon used adhesive vinyl paper that looks like marble (you can find it on Amazon here). It’s a little tricky to apply, but the results are amazing. She added some new white t-trim to the edges where she could. (Shannon had to buy two different sizes of t-trim, so she is still waiting on the remaining edging to arrive. She plans on replacing all the trim eventually, though.)
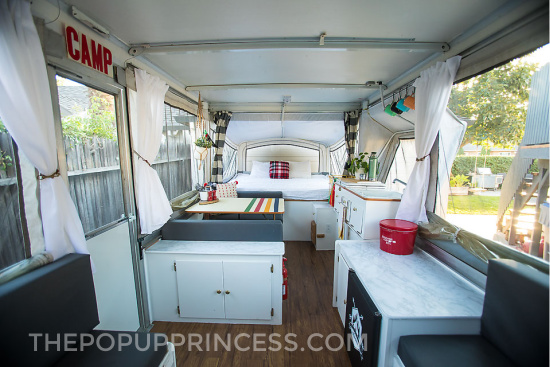 The Wight’s were going for a camp theme, but they also wanted to pay homage to their Canadian roots. Shannon based the design for her camper on the classic Hudson Bay Point Blanket, and the Wights nicknamed the trailer “Hudson.” They added pops of primary colors from the Hudson Bay color scheme around the camper.
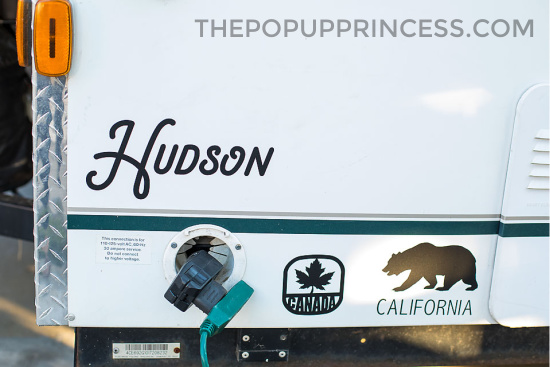 The dinette table got painted with a coat of the same paint she used on the cabinets. Then Shannon used Waverly chalk paint to add those classic Hudson Bay stripes, before finishing it all off with a coat of varnish. She even made cute decals for the exterior and fridge that tie in with her theme.
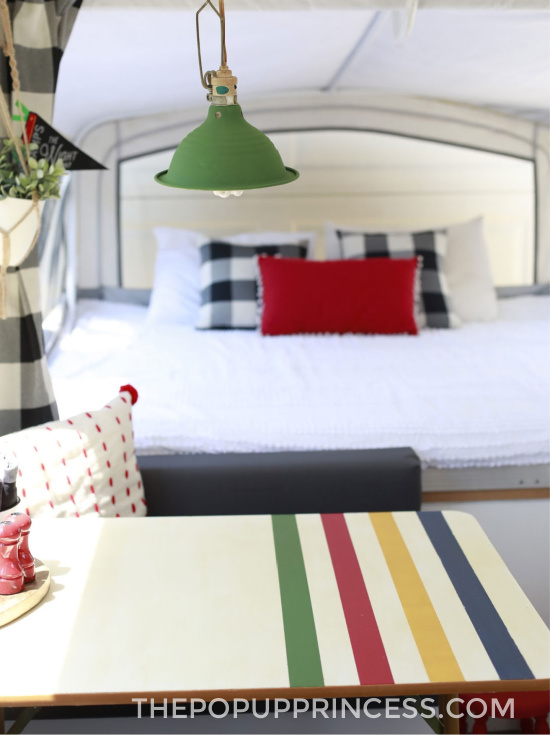 Shannon found an inexpensive clamp light (available here) and gave it a coat of green spray paint. She can hang it on a hook in her camper, and it can be easily removed when packing up. Best of all, it just plugs in to the outlet near her dinette.
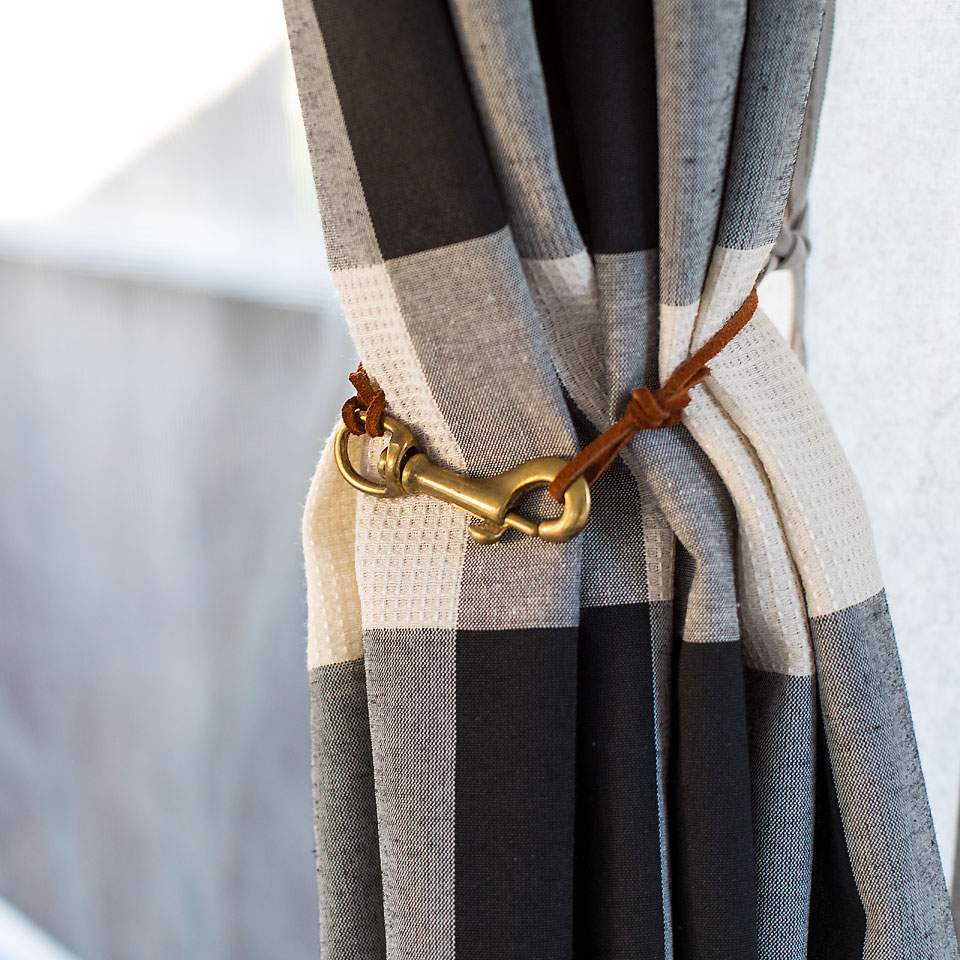 And how about those curtains? Shannon took inexpensive curtain panels from Walmart and cut them in half. She attached the curtain slides and hemmed them to size. Then she got creative with her tie-backs. She used hardware from her local home improvement store and leather cord she already had on-hand. Shannon says these new tie-backs make it easy to open up the windows and let the light in. She added coordinating leather door pulls, which she found on Etsy, to the cabinets.
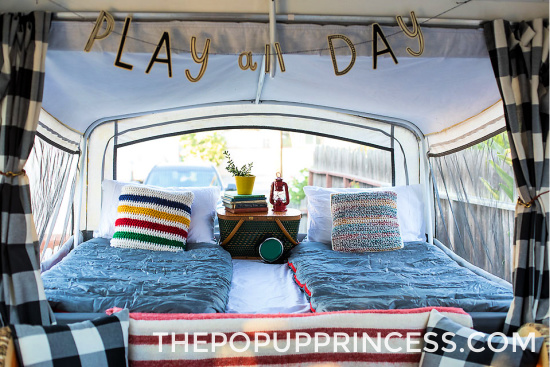 Then her little remodel project was complete. I love how Shannon created individual bed spaces for her kids by using separate sleeping bags. She even used a cute picnic basket to create a nightstand of sorts. It’s cute and functional, but also portable and easy to pack away. Genius, right?
 And now the Wights have a gorgeous camper that suits their needs and tastes. It’s the perfect getaway for the pandemic summer, because they can easily socially distance and let their kids experience an amazing summer vacation. I love it! If you want to see more pictures and follow along with the Wight’s, be sure to check out their blog post here. Thanks so much for sharing, Shannon! Enjoy your new summer home. 😉
Disclaimer: This post contains Amazon affiliate links. The Pop Up Princess is a participant in the Amazon Services LLC Associates Program, an affiliate advertising program designed to provide a means for sites to earn advertising fees by advertising and linking to Amazon.com. This means that if you choose to purchase an item from a link in this post, The Pop Up Princess earns a small advertising fee to help pay for future projects and posts… so thank you!
Happy Camping!


Fantastic job
I love the Hudson Bay Company theming! Sadly, we’re going to sell our pop-up instead of implementing any of the wonderful ideas I’ve garnered from your posts, but I’ll still enjoy the makeovers vicariously. Thank you for creating this venue to showcase everyone’s creativity.
So beautiful! Quick question, however,… is the flooring laid directly on top of existing floor and cut to go around the cabinets? Or are the cabinets removed so the old flooring can be pulled up? Thank you so much for the inspiration!!
You can do it either way. Just make sure to measure the thickness of your flooring if you are pulling up the cabinets. If you add too much extra height, the sides won’t slide in.
This might be my favorite remodel ever! Great job. Thanks for sharing.
Fantastic and well placed touches of red. great job.