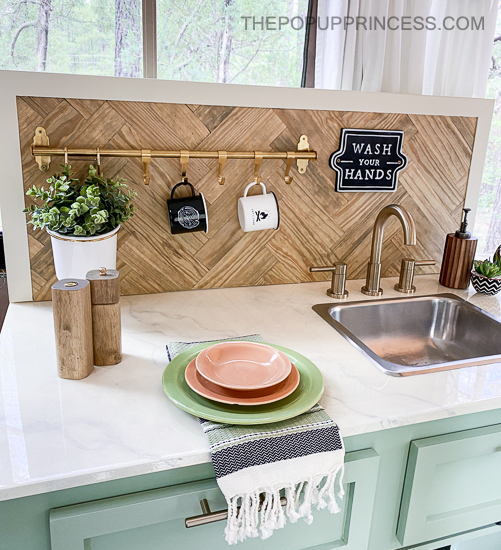
 Now that the crazy holidays are over, I finally have a little time to post the tutorial for the backsplash we made for Mohave. If you haven’t had a chance to check out the Rockwood pop up camper we remodeled, you can find it here. The backsplash we constructed is probably my favorite thing ever!
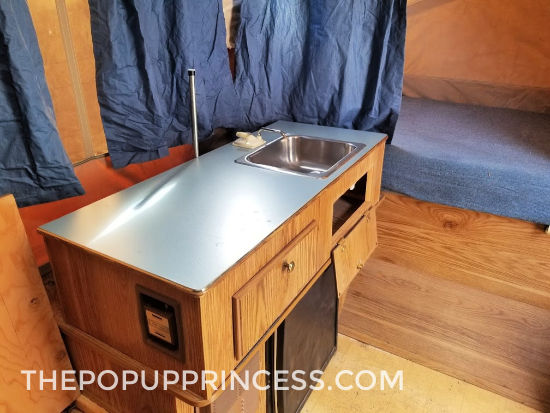 This is what the “kitchen” looked like before we started the makeover. There was no backsplash there, and we really wanted something to make the kitchen feel a little more like its own area. Mohave was small, so we needed to make the most of each space. We sketched out a quick plan and got to work.
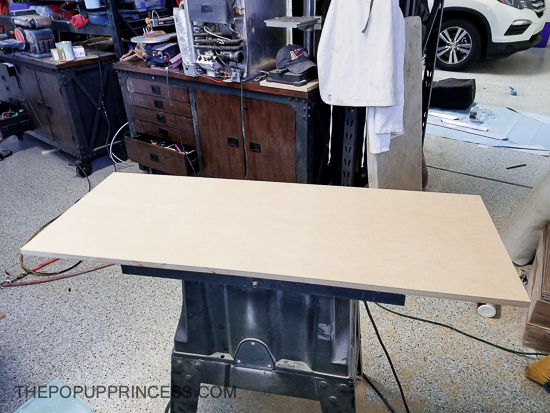 We started by cutting a piece of leftover MDF to the size we wanted. I wanted the backsplash to be the length of the counters and roughly about 18″ tall. Originally, we had used 12″ square tiles on the backsplash, and I made the board about the height of one and a half tiles.
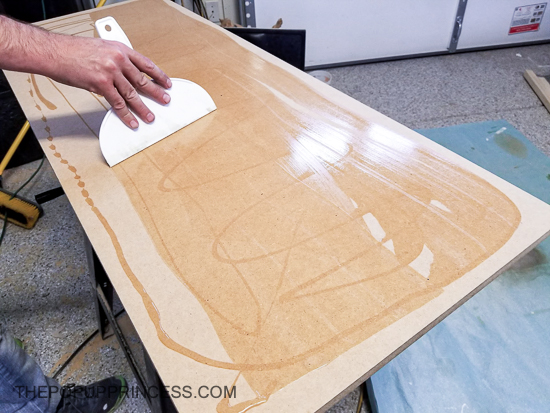 Because we were using those vinyl tiles, and I was concerned about how the adhesive would hold up in the Arizona heat, we applied glue to the MDF before we laid the tile. I figured this would really hold everything in place.
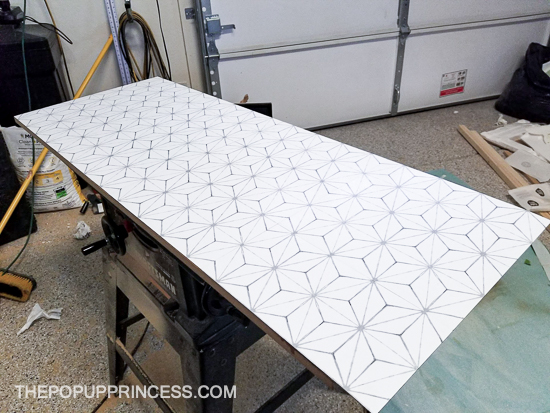 Then we laid all the tiles on the board, staggering the cuts. We used Floor Pop tiles we purchased on Amazon, because they had such great reviews. I’d originally wanted to incorporate them into the flooring, but since I was unsure how they’d hold up, I figured this was a good compromise.
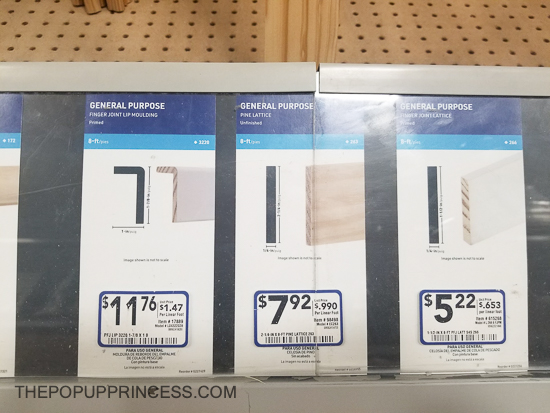 To finish out the edges, we purchased an L-trim molding from Lowes. It was pre-primed, and we just painted it with leftover white paint from the roof job. Then we mitered the ends and framed out the backsplash.
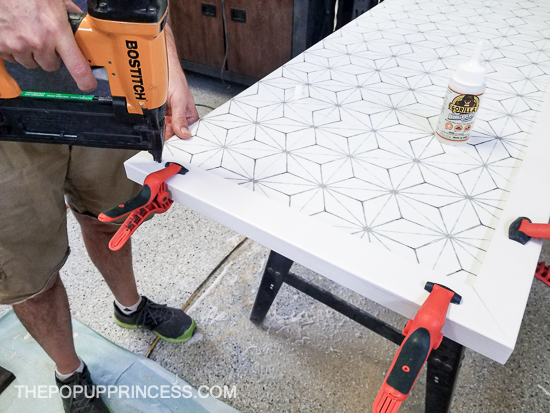 To attach the trim, we used a bit of Gorilla Glue and our nail gun. We did NOT frame out the bottom. I wanted the backsplash to appear as though it was a residential backsplash you’d find in a kitchen, so we left the trim off the bottom.
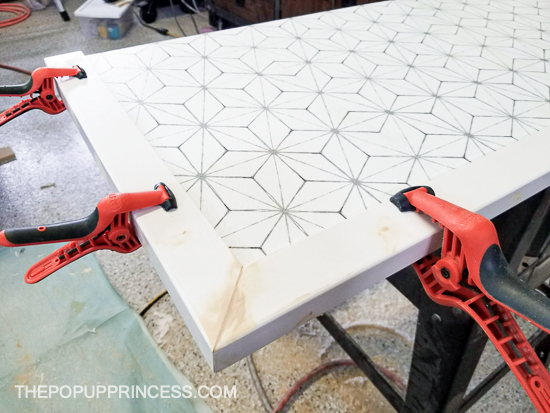 Then we filled our nail holes and seams with a bit of wood filler, sanded it smooth, and touched up the paint. Easy peasy.
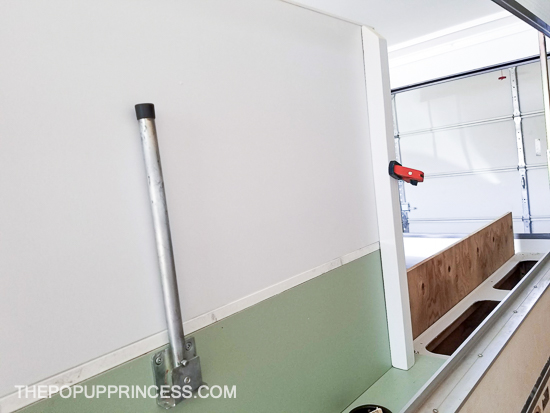 We attached “legs” to the back of the backsplash to hold it in place. Using 2 x 2 pine board, we cut each leg just tall enough to span the backsplash and the cabinet on which it sits. Then we beveled the ends so you wouldn’t see the tops of the legs over the board. We used clamps to hold everything in place so we could mark the proper position. The legs just touch the top of the cabinet behind the sink and are attached to the backsplash board with nails and wood glue.
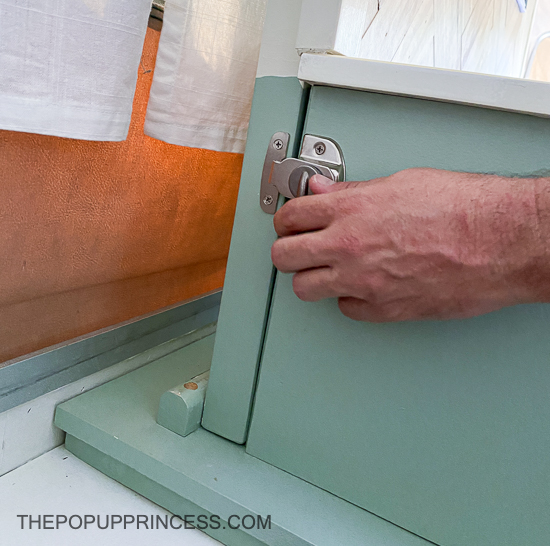
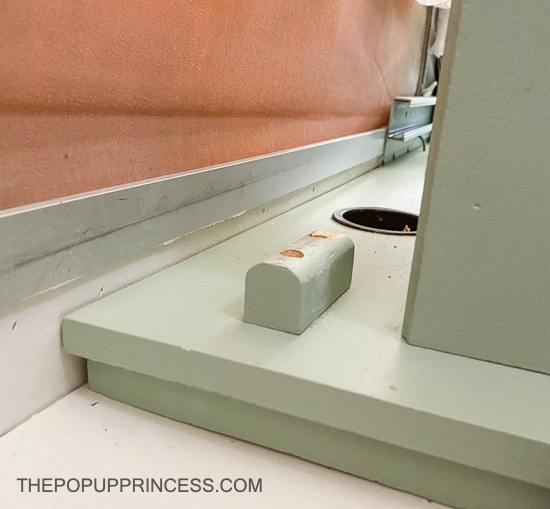 To hold the legs in place, we added wood blocks to the bottom kitchen cabinet. These blocks create a channel for the leg to sit in. This makes the backsplash pretty stable on its own. but we added sash locks to the sides to make sure everything is nice and tight.
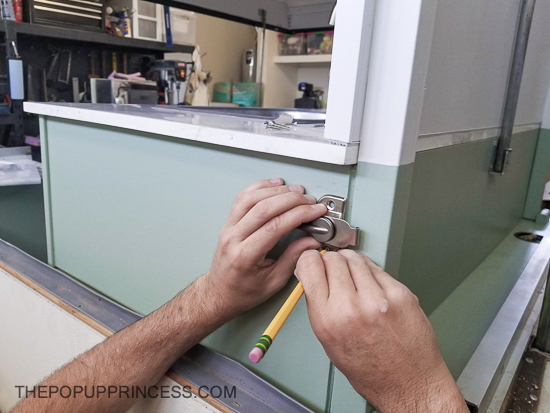 To attach the sash locks, we set the backsplash in place and marked the spot where the sash locks fit perfectly. We screwed the lock into the cabinet and the catch into the leg. (We painted the bottom half of each leg the same color as the cabinets so it would blend in seamlessly.)
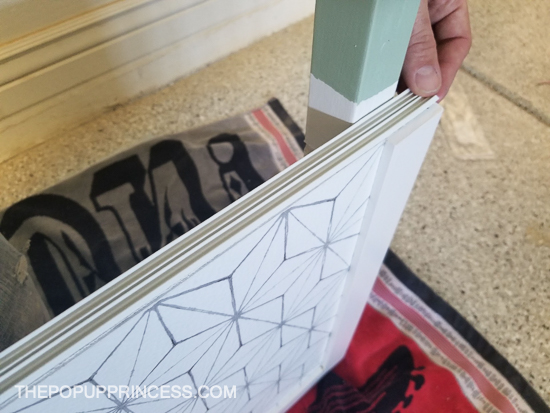 To cushion the edge of the backsplash and protect my new countertops, we applied a rubber window seal to the bottom of the MDF. We added it to the side with no L-trim–the part that would sit on top of the counters.
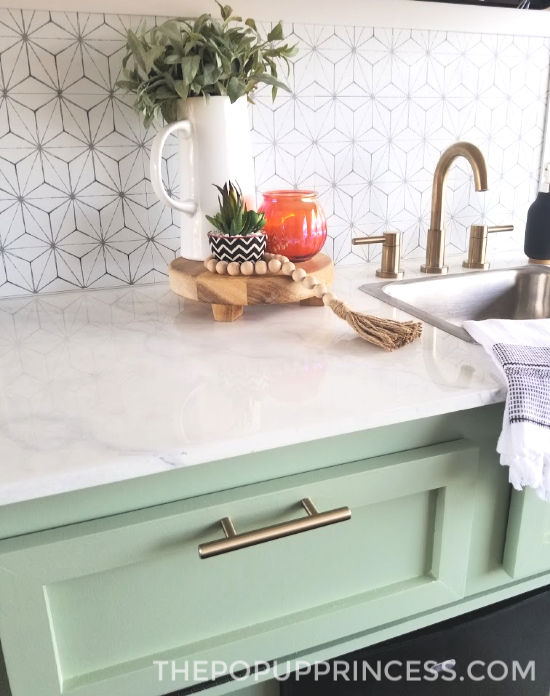 And project complete! Or so we thought… 🙁
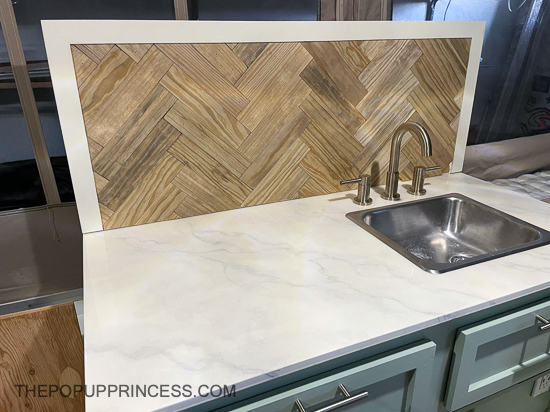 After a summer in Arizona, the Floor Pop tiles began peeling up. Even the extra adhesive couldn’t keep up with the intense heat. We ended up pulling those tiles off (yuck!) and using some extra lattice boards we had hanging around from the table we built. We staggered them to make a chevron type pattern and used wood glue and the nail gun to keep them in place. It was a much better solution.
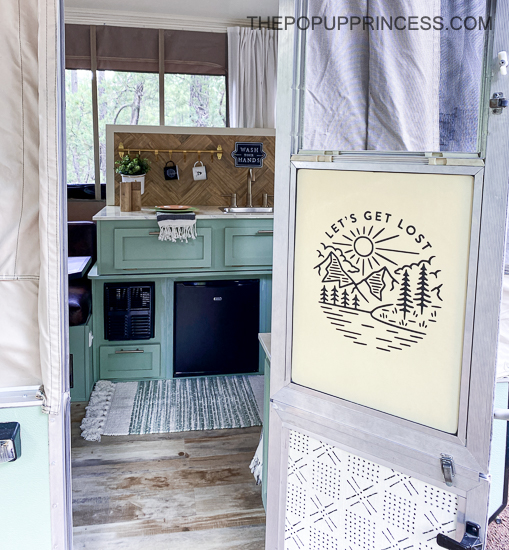
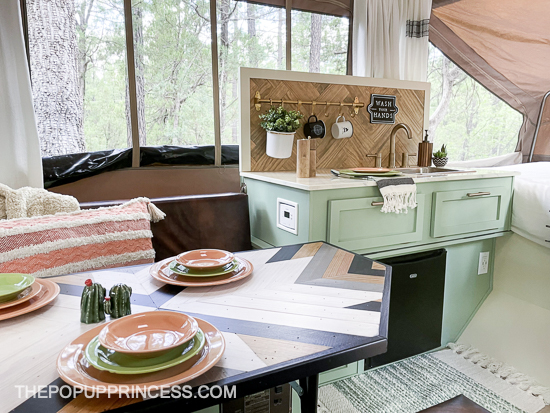 To finish things off, I added a towel bar from IKEA and a cute metal sign from Target. The towel bar has little hooks for mugs and cooking utensils, and we added a cup to hold flatware or a fun faux plant. I just love how it turned out.
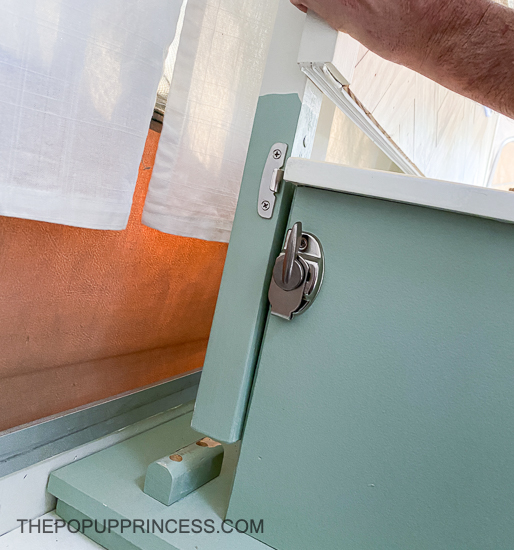 To put the backsplash up when we set up, we slide the legs into the channel behind the sink and lock the sash locks. To remove it, we unlock the sash locks and pull up on the backsplash. It lifts up out of the channel, and we store it on the folded dinette during travel.
 All in all, it is pretty easy to set up and take down. It takes up no extra space on the dinette, really, because there isn’t much we could store there anyway. I set a folded sheet or extra blanket on top of the cushions to protect them, just in case. I can’t imagine the backsplash would do any damage, but I like to be careful.
 I’m so thrilled with how well it turned out. It doesn’t affect the structure of the folding kitchen at all, and it adds so much character to the space. It is a little heavy. If you are planning on following our instructions, make sure you’ve accounted for the weight. The nice thing, though, is that is is removable, so if we are packing heavy one trip, we can always leave it behind.
 Have you built a backsplash for your pop up camper? We’d love to see pictures! Tag us on Instagram, so we can check out your projects!
Disclaimer: This post contains Amazon affiliate links. The Pop Up Princess is a participant in the Amazon Services LLC Associates Program, an affiliate advertising program designed to provide a means for sites to earn advertising fees by advertising and linking to Amazon.com. This means that if you choose to purchase an item from a link in this post, The Pop Up Princess earns a small advertising fee to help pay for future projects and posts… so thank you!
Happy Camping!


Leave a Reply