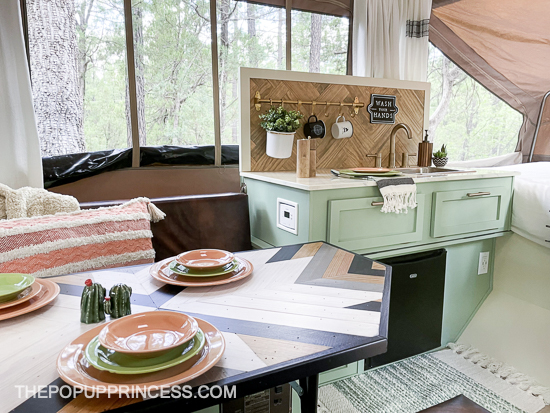
 I’ve been hinting at this reveal for a few weeks, and here she is! I’m so pleased to introduce Mohave, our 1995 Rockwood pop up camper. She was definitely a labor of love, and it took us much longer to finish her than we anticipated for a myriad of reasons. 😆 But she was worth it!
HOW IT ALL STARTED
 If you’ve been around awhile, you’ll know that this is what we started with. Mohave came to us from friends of my brother and sister-in-law. She was wasting away in their backyard, and they knew we could restore her to her former glory. She needed a lot of work. You can see all the before pictures and read about how we acquired Mohave HERE.
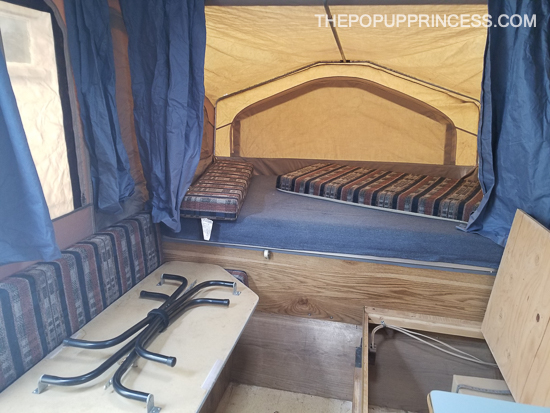 So much behind the scenes work went into getting this girl back in shape. She needed a new roof (you can read about that HERE), new lift cables, the bed slides had to be straightened out–I could go on and on. She really needed so much work, and I can hardly believe how far she’s come.
FLOORING, CABINETS, AND COUNTERTOPS
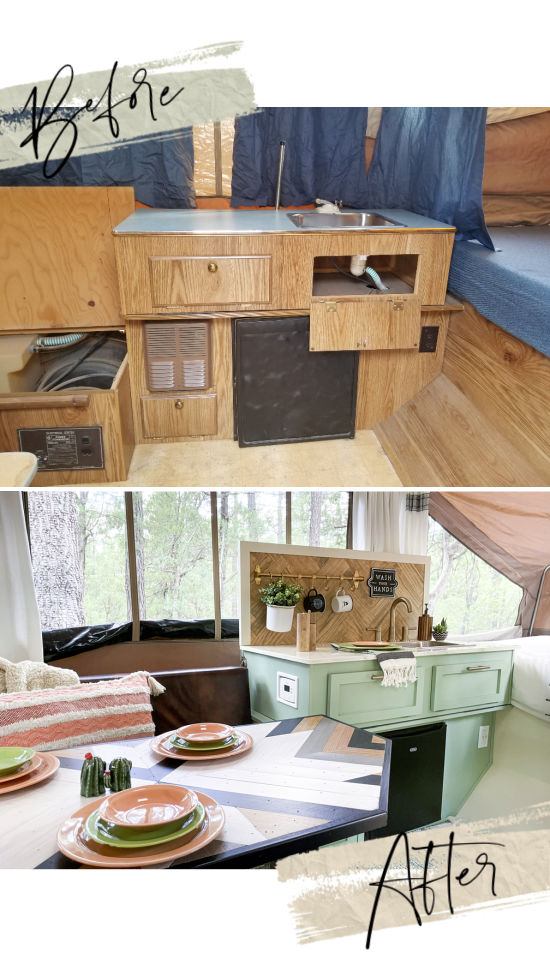
 We completely gutted this little trailer. Mohave got brand new sheet vinyl flooring, which you can read all about HERE. Once the flooring was in, we completely rebuilt her cabinets. We just couldn’t salvage the old ones, as they were pretty water damaged. Since we were rebuilding them anyway, we updated the doors and gave them more of a shaker look.
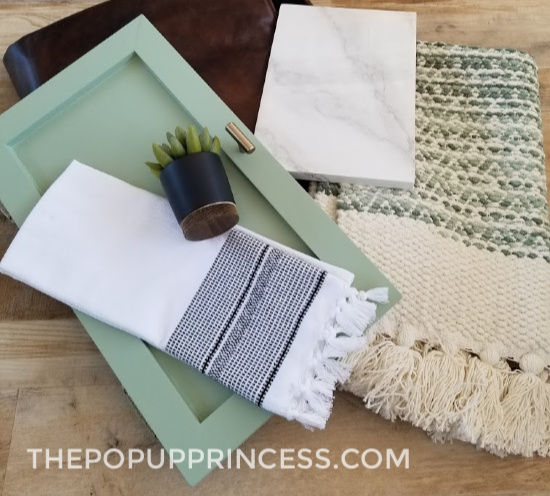 Since our Santa Fe had white cabinets, I really wanted to incorporate color in the Rockwood. We were going for a desert theme anyway, so I picked Dunn-Edwards Fresh Thyme. It reminded me of the cacti we have out here in Arizona, and I love green anyway, so it was a no-brainer. We selected an alkyd paint, which is much more durable than latex. Then we grabbed some pretty new hardware from Home Depot. You can read all about the cabinet rebuild HERE.
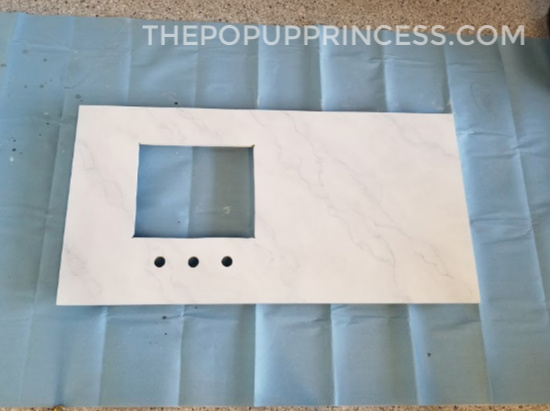 The countertops were in bad shape as well. They were water damaged and the Formica was peeling away from the boards underneath. Since I really wanted to lighten up the camper, I cut new countertops and used a faux marble painting technique to give them a clean modern look. You can read all about how we made our marble countertops HERE.
THE CANVAS
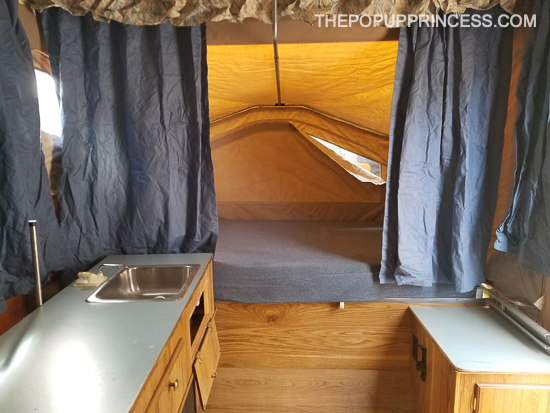 Although it doesn’t look it, the canvas was actually in really great shape. It was just really dirty and needed to be revitalized. Since we had the canvas removed anyway for the roof rebuild, we soaked it in a bathtub full of soapy warm water. Then I meticulously scrubbed every inch of it with LA’s Totally Awesome cleaner, which did a good job with the dirt. Since our “canvas” was vinyl, we treated the outside with our favorite ProtectAll vinyl cleaner.
 It’s really important to determine what type of canvas your camper has before you treat it with anything. We use 303 High Tech Fabric Guard on our Santa Fe, but it would be disastrous to use it on Mohave, as it etches vinyl. The right cleaning products are essential for prolonging the life of your canvas. If you need more information on cleaning and protecting your canvas, make sure to check out our post HERE.
THE GALLEY KITCHEN
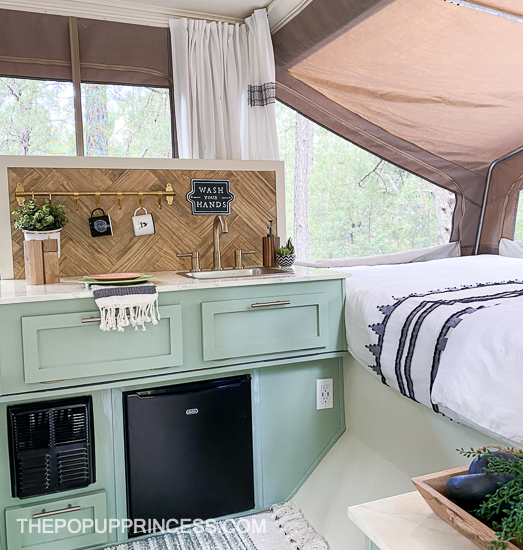
In the little kitchen, area we replaced all the electrical outlets with USB combo outlets. We removed the broken fridge and replaced it with a brand new dorm fridge. (The one we purchased is very similar to this one.) This means we can only use the fridge when we are hooked up to shore power, but the 3-way fridge in our Santa Fe is so unreliable on propane and battery, that we rarely use it anyway. We figured this one would be much more reliable when we have hookups, and we can use an ice chest when we are boondocking.
 The furnace grate got a coat of high-heat black spray paint, and we put in a digital thermostat. We replaced the pump faucet with a beautiful brushed gold bathroom faucet from Lowes. Of course, we had to add a water pump in order to use the water from our fresh water tank, but it was worth it. I hated that ugly pump faucet, and it was definitely not staying.
THE PIECE DE RESISTANCE: THE BACKSPLASH
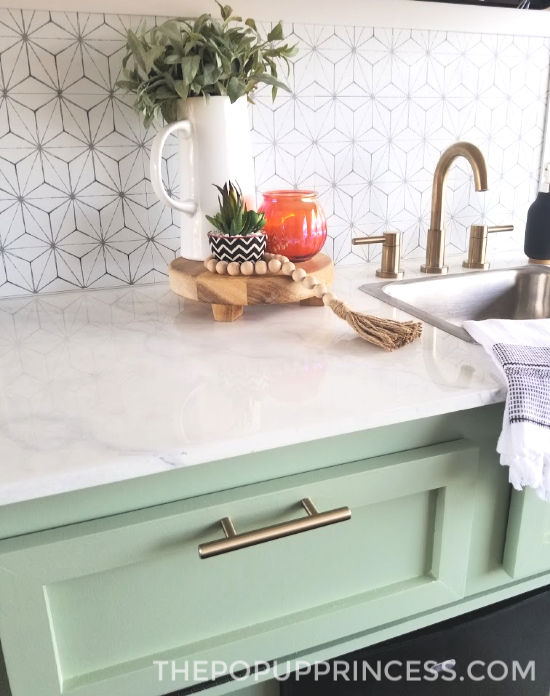 You may remember that when we first put in the countertops, we had built this backsplash with an adhesive Floor Pops tile on the front. Although it was pretty, it was a major fail. We had to take a several months long break from working on the camper, and when we opened it up to get to work again, the tiles were falling off the backsplash. The Arizona heat really destroys adhesives, which is why we never lay adhesive tile on the floors of our campers. We were really hoping this would work, though we had no such luck 🙁
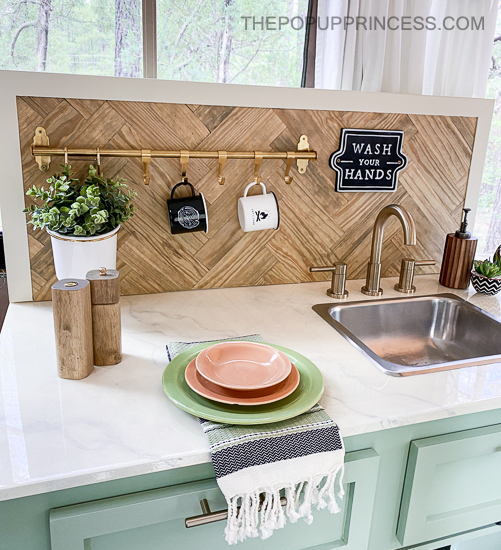 We had to come up with a new plan, since I was already attached to the idea of having that backsplash. There was no way we were scrapping that plan. I was really inspired by a couple of my favorite RV renovators on Instagram. @karleeandweston and @troopnashville are the bomb, and you should be following them if you aren’t already. They had both done natural wood wall treatments that I adored, so I incorporated something similar for the pop up camper backsplash. We’ll be sharing how we built the backsplash on here very soon, so keep an eye out for that.
THE DINETTE AREA
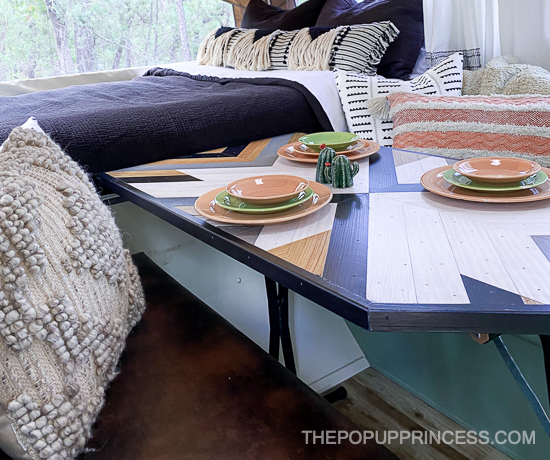 And the last major project for Mohave’s interior was the table. I wanted something that was unique and had the southwestern feel we were going for, and I think this really fits the bill. We’re pretty happy with how it turned out. You can see how we made this awesome little table HERE.
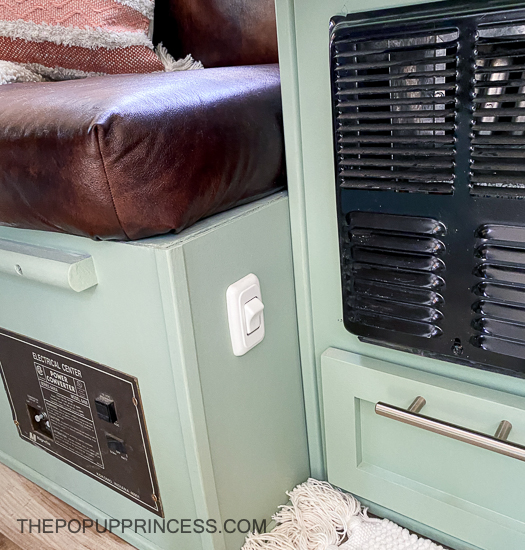 The cushions were covered in a faux leather that I purchased at Hobby Lobby. I added thin luan plywood to the back of each cushion and covered them using a method I learned from Christina over at TheDIYMommy.com. You can find that tutorial HERE. She used this method on her camper cushions, and I loved the way they turned out. You get a crisp, tailored corner that you just can’t get with the wrap and staple method, and you don’t have to mess with zippers either. Win-win! 😉
MATTRESSES, BEDDING AND DECOR
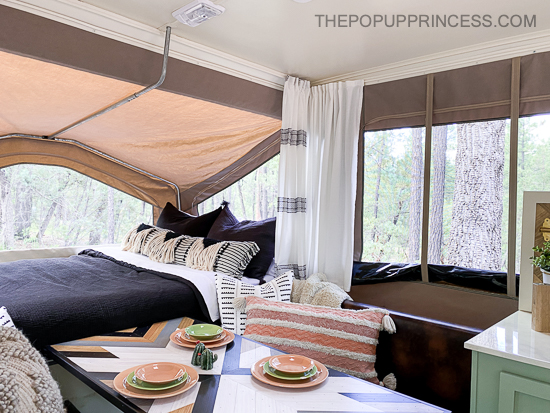
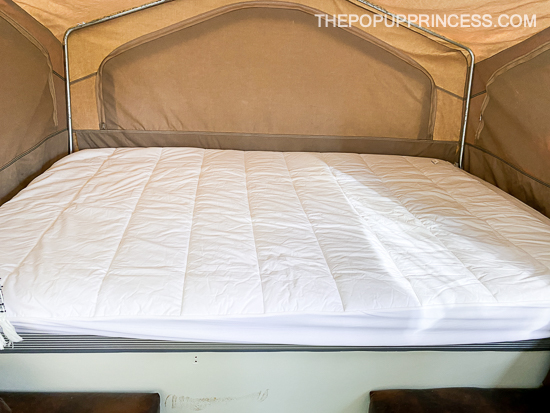 With all the heavy lifting out of the way, we got to move onto the fun stuff. Beds are always a priority for me. The whole reason we moved from a tent to a pop up camper was for comfort, so I want my beds to be posh. That meant the old, stinky mattresses had to go. The original roof had leaked, so the mattresses were full of mold. I didn’t want to deal with trying to clean that up, so we just replaced them altogether. We were lucky enough to find mattresses that fit our bunkends on Amazon. (These are the ones we purchased, although they come in and out of stock frequently.)
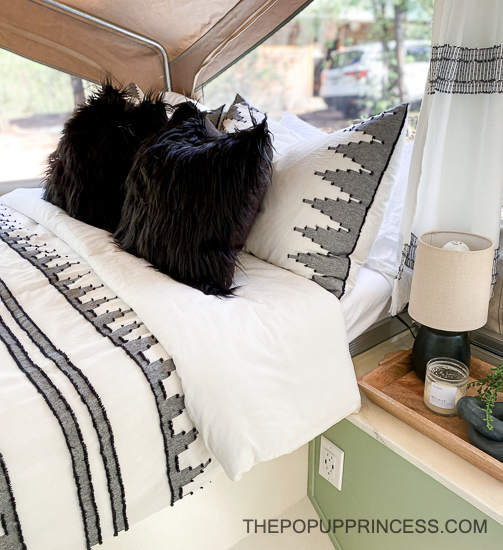 I love the bedding on both beds, even though they are very different. Because of the dark brown canvas, I was certain that we needed light bedding. Since I didn’t watch to be too matchy-matchy, I only bought one set of the white bedding. Even though it was on sale, it was from Pottery Barn Teen, so it was a bit of a splurge. It was really one of the first things I bought for this remodel, and it’s called the Mohave Cutwork Bedding. I loved everything about it–right down to the name, which is where this little camper got her moniker.
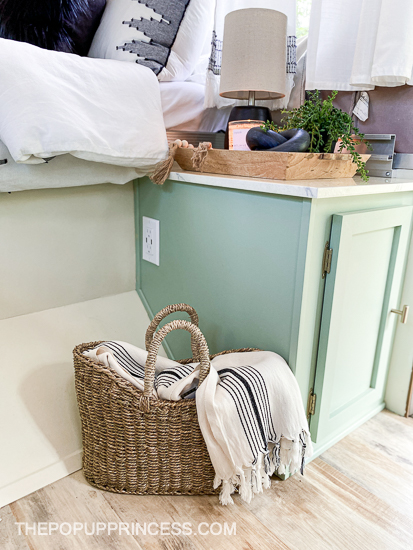
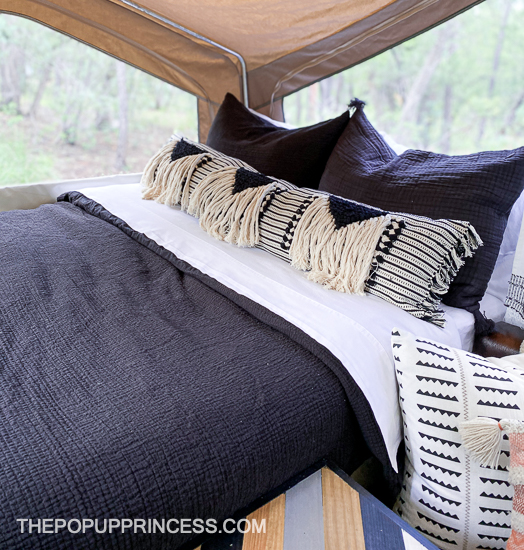 But that beautiful bedding was discontinued, so I was on the hunt for something to coordinate with it for the other bunk. When I spied this black bedding at Target, I had to have it. It is from the Nate Berkus collection, and it was darker than I wanted to go, but I think it works. The fun fringe pillow is also from Target. It really ties in the brown of the canvas. Most of the other throw pillows came from HomeGoods, as did the mattress pads we used to protect the beds. I love the extra cushion they add, and these pads are very similar to the ones we purchased. If you want tips on how to make your pop up camper beds more comfortable, be sure to check out our post on that HERE.
THE CURTAINS
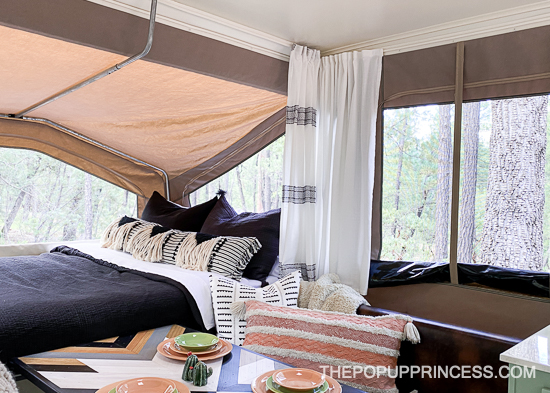 I removed the ugly valance and opted not to replace it. We added a decorative trim to the roof when we rebuilt it, so there was really no need for a valance. The side curtains are my very favorite IKEA Ritva curtains, hemmed to length. I sewed curtain track tape (like this) to the tops of the curtain panels and used the original curtain track to hang them. The bunkend curtains are Hearth and Hand by Magnolia shower curtains from Target. I found them on sale for $12/each and added the curtain glide tape to those as well.
THE DOOR AND EXTERIOR
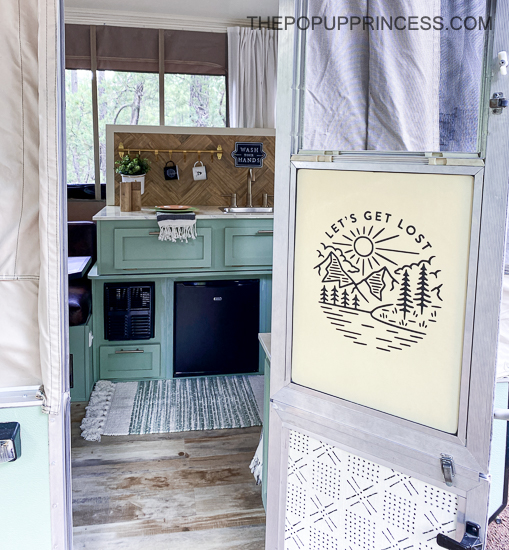 The door was in pretty sorry shape as well. The bottom panel was rotted out and the screen was missing. We replaced the bottom panel with a sheet of luan plywood, and I used Mod Podge to adhere a piece of shower curtain I had laying around to the front. Several coats of Mod Podge later, it is perfect. It wipes clean easily, and it adds a little visual interest to the door. We repaired the screen with a repair kit we found at Home Depot, and you’d never know it isn’t original.
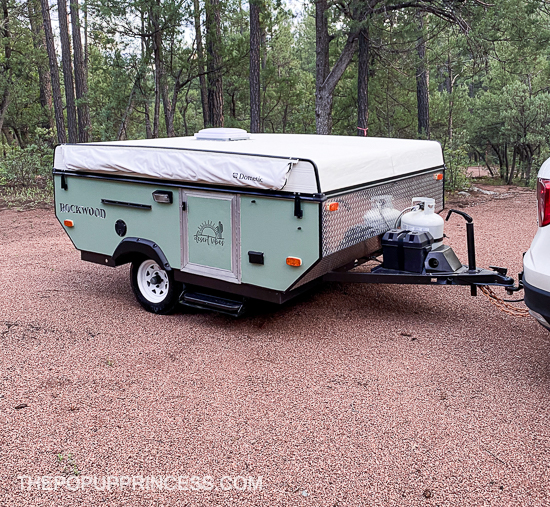 We also gave the exterior a big makeover, which is so intensive, I’ll have to detail it in another post. It turned out better than we ever thought it would. We used single stage automotive paint on the Santa Fe, and it was a huge undertaking. This time rolled on an exterior alkyd paint (after using an aluminum primer), and it was actually pretty easy. She looks like a brand new camper!
WAS IT WORTH IT?
 As I’m looking over everything, I realize just how much work went into this camper. It was definitely a labor of love, as I don’t know that we could ever get out of her what we put in–especially when you consider the time we spent on remodel projects. It’s a good reminder, though, that if you are taking on a pop up camper project to remodel for resale, make sure you buy one with good bones. Projects like roof rebuilds and cabinet construction are big drains on your budget.
Would we do it again? Probably. We really enjoyed the project overall. We’re always game for a good remodel, and once you are finished, you tend to forget how hard the process was when you were in the thick of it. I’m sure we’ll have another remodel going before the end of the year. 😉
See anything we missed? If you’d like to know more about a project or where we sourced something, feel free to ask in the comments section. You can also follow us on Instagram, as we post a lot of sources and tips there. Thanks for following along. We hope you enjoyed the journey as much as we did.
Disclaimer: This post contains Amazon affiliate links. The Pop Up Princess is a participant in the Amazon Services LLC Associates Program, an affiliate advertising program designed to provide a means for sites to earn advertising fees by advertising and linking to Amazon.com. This means that if you choose to purchase an item from a link in this post, The Pop Up Princess earns a small advertising fee to help pay for future projects and posts… so thank you!
Happy Camping!


Super inspiring as we are about to begin remodeling our recently purchased 2015 A-Liner. Thank you for sharing your resources and gorgeous work!
Beautiful!
You all did a great job! It’s beautiful!
Beautiful job! Your remodels are always so inspiring! We’re getting ready to start remodeling the inside of our second pop up and I would love to paint the exterior. It’s sad and weathered despite only being 4 years old. I’m looking forward to your post on how you guys tackled the exterior paint this time.
So glad to see the finished product. I love the colors!!
Thanks for sharing this. I’m pretty nervous that I have a ceiling repair to do on my newly purchased 2003 Starcraft Pop up. I also have some cosmetic issues with the counters, but I was planning to replace them in my design anyway. Thankfully the exterior, floors and canvas are in fantastic shape.
I would love to see how you created your back splash. I was planning to just remove the one currently on mine, but now I’m inspired to create a new beautiful version. Thanks for your posts, super encouraging and great inspiration.
Best of luck with your remodel! You can find the backsplash tutorial here.
Is there a spot that your explain how that splash back and faucet store away? Thanks
Yes, Julianne! You can find the tutorial for the backsplash here.
Hi,
Lovely reno! I’m wondering about that beautiful kitchen faucet. How is it possible that the camper folds down? Do you somehow take down the kitchen backslash and tap?
Sonya
Thanks, Sonya! The backsplash is removable. You can find the tutorial for that here.
I just picked up a 1996 Rockwood Freedom 1620 that needs some serious love. You did a great job on this project!
Are you planning on doing a post about the exterior at some point?
Thanks! I have some pictures and video to sort through, but we definitely need to get that exterior tutorial up on the website!
I absolutely love the faucet and backsplash. I would love to know where I can find the tutorial for the backsplash!
Thank you! You can find the tutorial for the backsplash here.
You have impeckable taste. I loved it all!