


 Flooring is an essential part of any camper makeover. If you are rehabbing an old pop up camper, chances are, your old linoleum looks something like ours did. You know that old 90’s style tile print linoleum that is probably yellowed and cracking by now. We had it in both of our pop up campers. Not very pretty, right?
 I get questions about camper flooring all the time. So many of you guys are really worried about taking the plunge on your flooring. I get it. It is an intimidating project–especially if you aren’t an experienced do-it-yourselfer. But why put all that time and effort (& money, amiright? 😆 ) into a pop up camper makeover if you aren’t going to complete the project? And for me, flooring really completes the project. I promise it isn’t as hard as it seems.
SELECTING OUR FLOORING
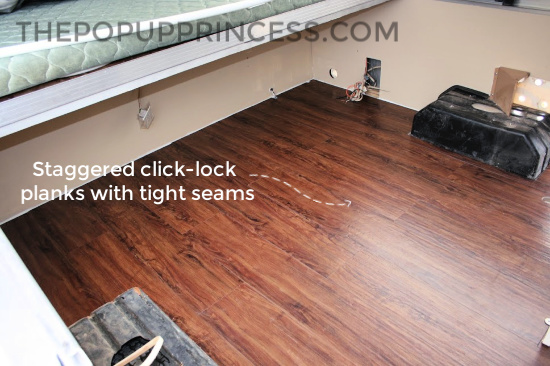 Selecting the flooring for this project was probably the hardest part. In the Coleman camper we rehabbed five years ago, we decided to go with a click-lock plank vinyl flooring. You can read a little bit about that here. It was a little bit thicker than an adhesive flooring, which we liked, but it was also flexible. It’s vital that you select a flooring that is flexible when you’re shopping for your pop up camper. Your little trailer will move around quite a bit while you are driving down the road. The floor needs to be able to flex.
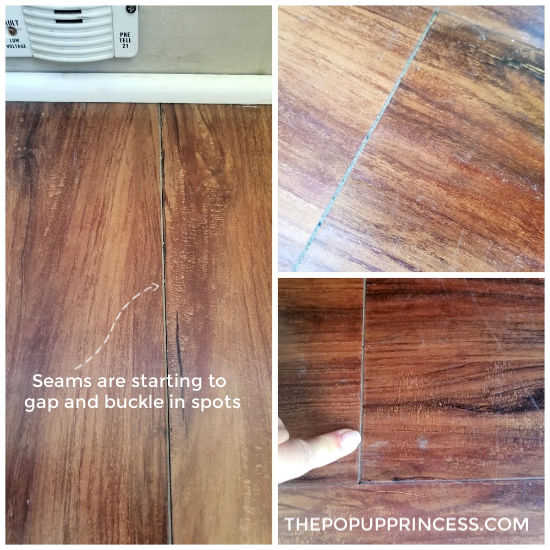 We really like the flooring in the Coleman camper, but after five years, the planks are starting to separate a little bit. It isn’t awful, and many people probably wouldn’t even notice it, but I do. Plank vinyl manufacturers usually won’t warranty any flooring installed in RVs. It’s too hard to control the temperature, and the movement of the floors can cause some issues. We didn’t have a problem with the spacing in our planks until this year, when we had to move the camper from the relatively cool garage to the backyard. The heat really did a number on them. Ignore my dirty floors and awful pictures. I was trying to get a good shot of the floor while the camper was closed up in the backyard. It involved some Cirque du Soleil inspired moves. 😆
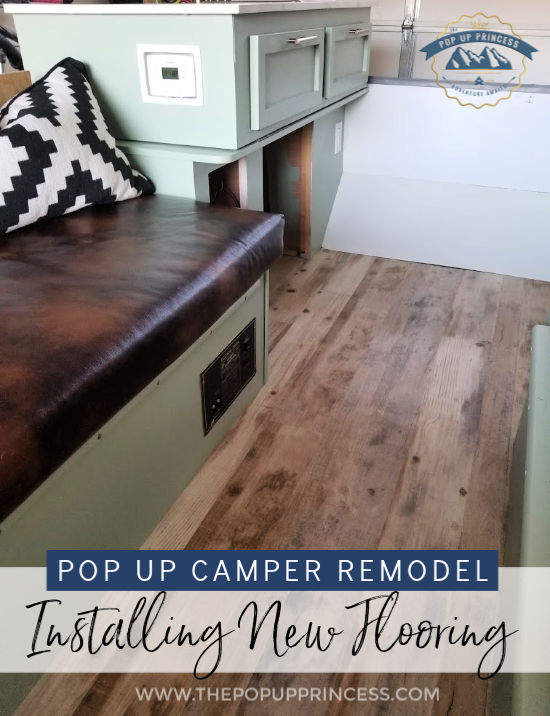
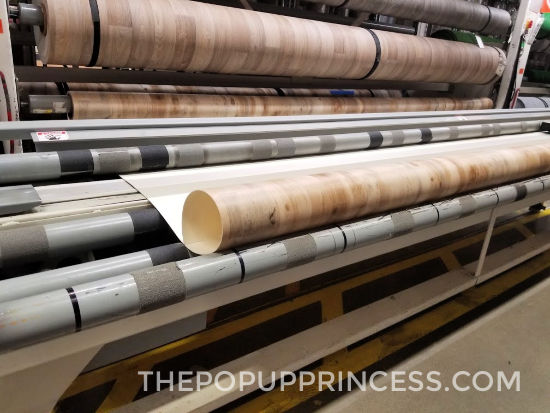 Because I was worried about the gapping in the seams of our Coleman floor, I decided to go a little bit different route on the flooring for the Rockwood. We considered adhesive plank vinyl, but every flooring guy we spoke with said Arizona summers are just too much for the adhesive–even with a primer applied to the subfloor. There were some really pretty sheet vinyl options at Home Depot, so we tallied up our square footage and found a linoleum that looked just like wood plank floors. It’s so much softer under foot than our plank vinyl, too. I really like it quite a bit.
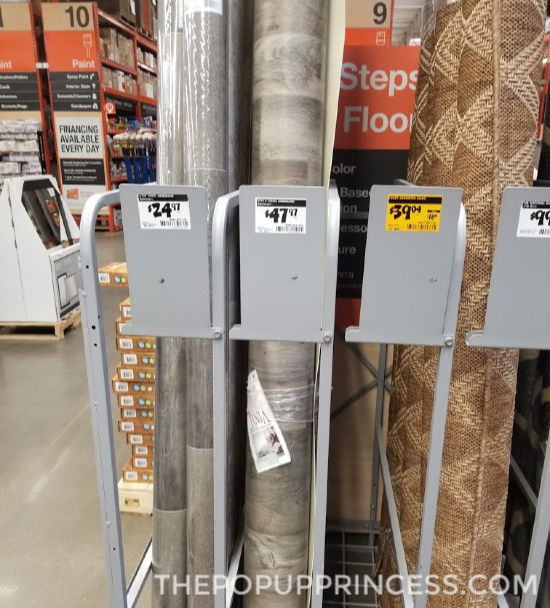 After we had the flooring cut, though, I was shocked at the price tag. Because of the way the planks run, it cost us around $125 for this sheet of vinyl. Unfortunately, we ended up wasting quite a bit of it, too. As we were leaving the flooring department, we passed an aisle near the area rugs that stocked pre-cut sections of sheet vinyl packaged and ready to go for under $50. That definitely would have been the way to go. Live and learn, I guess.
PREPPING THE SUBFLOOR FOR INSTALLATION
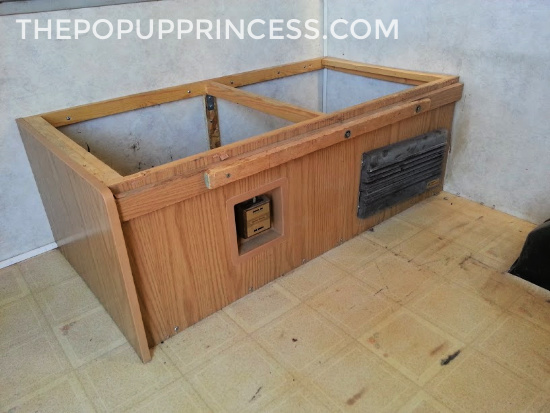
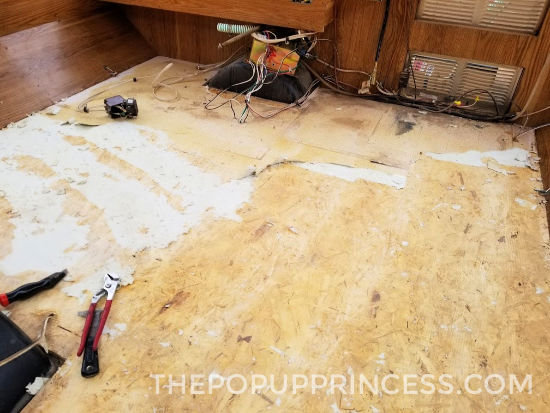 Once we had our flooring selected, we knew we needed to pull up the old linoleum. It was cracked and peeling in places, and it would have prevented the new flooring from going down smoothly. So we started ripping into the linoleum and pulling it up in small patches. The plastic came up fairly easily, but that paper backing was a beast to remove. It just would not come up. We got out our trusty heat gun (we like this one), and ran it lightly over the floor for a few seconds. Then with a metal putty knife, we pried the flooring up. Once the adhesive warms up, the flooring comes right up.
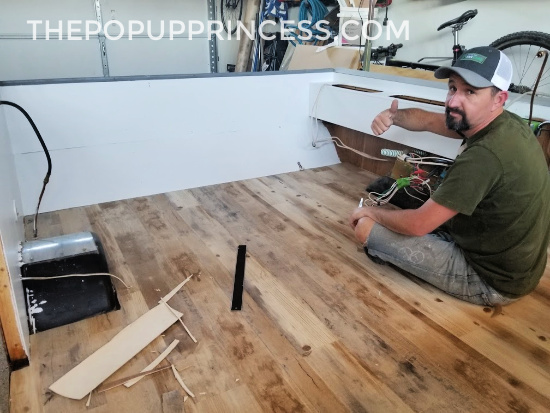
 At this point, you’ll want to decide how you are going to deal with the electrical wiring and plumbing. We left all the lines in place and cut holes in the flooring to feed them through the new vinyl. If you want a cleaner look, you might want to remove all the wiring completely and drill holes up through the subfloor from the bottom of the camper. Then you can reconnect all your electrical and plumbing. That is what we did with our Coleman camper. It’s a little more work, but it also looks a little nicer. 😉
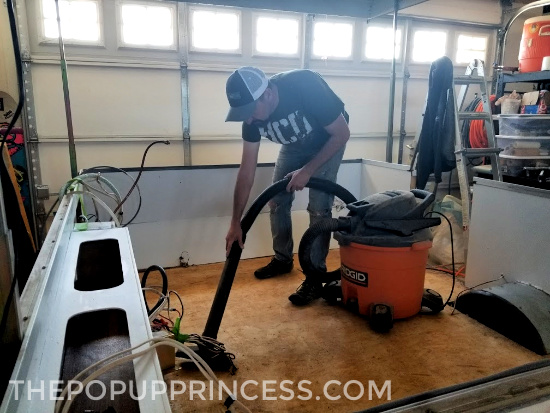 With the old flooring removed and all the electrical and plumbing lines taped up out of the way, we took a shop vac to the subfloor to remove any debris. Then we wiped the surface of the floor with a damp cloth, and we were ready for the new flooring.
INSTALLING THE NEW FLOOR
 We started by taking an approximate measurement of the floor of the camper. We added a couple of inches onto the length and width measurements to give ourselves some wiggle room. Then we did a dry fit of the vinyl on the camper floor. We lined up the straight side of our vinyl with one side of the camper. Then we made some rough cuts (leaving ourselves a little bit of wiggle room) and started fitting the flooring around the wheel wells and door.
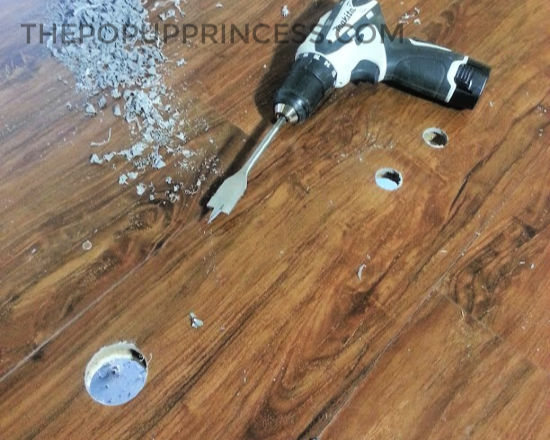
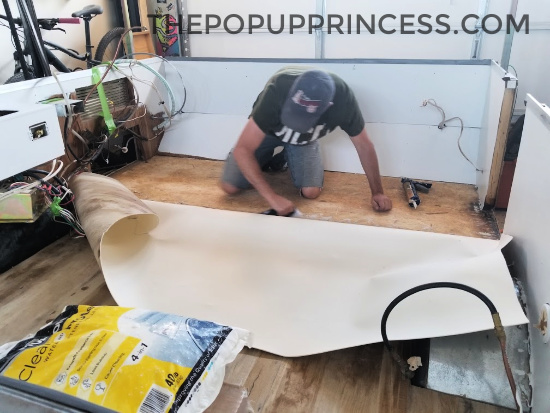
 Once we had a rough fit, we went through and trimmed up the edges to get everything perfect. We also cut holes (and a few slits) to accommodate that wiring and plumbing. Then we laid the flooring down and gathered all the heavy objects we could find in the garage. You know we love those 40 lb bags of water softener salt. 😆 They make great weights.
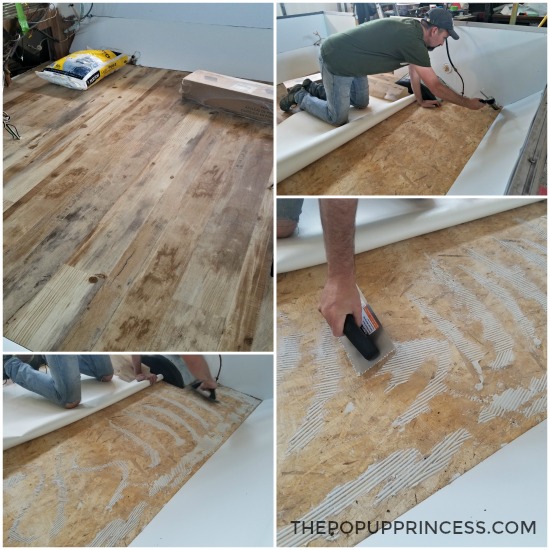 When we were satisfied with the layout, we moved all the weights to one side of the camper. Then we peeled back the vinyl on the opposite side of the weights and started applying adhesive. They make a specific flooring adhesive for sheet vinyl, but it was only sold in a large, expensive tub. We knew we didn’t need that much adhesive, so we opted to use a few tubes of Liquid Nails for Paneling. Two different flooring guys at Home Depot told us this would work just as well, and it was way cheaper. We used a notched trowel to spread it on the subfloor, then laid the flooring on top of it.
 We moved the weights to the opposite side of the trailer (don’t slide them!), and peeled back the vinyl on this side. We applied our paneling adhesive with a caulk gun and a notched trowel, starting where we left off on the other side and working our way toward the very end of the camper. We layed the flooring over the adhesive as we went along. Then we made any slight adjustments necessary and put weights down along this side of the floor as well.
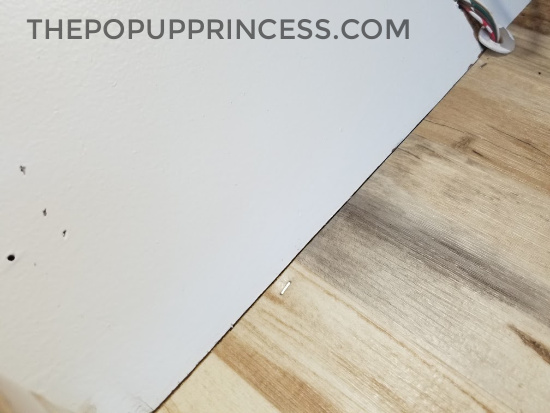 And because I am a fan of overkill, I asked Justin to pop a few staples along the edge of the flooring to keep it in place. 😉 It probably wasn’t necessary, as we screwed the cabinets down through the flooring and into the subfloor. We’ll add trim along the edge of the cabinets, and that will cover any staples. I’ll feel a little bit better knowing our floor is really secure.
 And that’s it! It was much easier than laying the plank vinyl, and it looks just as nice. Hopefully, this will help a few of you that are on the fence about flooring. Let us know what questions you might have in the comments section, as we definitely need to do a FAQ post on flooring really soon.
Disclaimer: This post contains Amazon affiliate links. The Pop Up Princess is a participant in the Amazon Services LLC Associates Program, an affiliate advertising program designed to provide a means for sites to earn advertising fees by advertising and linking to Amazon.com. This means that if you choose to purchase an item from a link in this post, The Pop Up Princess earns a small advertising fee to help pay for future projects and posts… so thank you!
Happy Camping!

This was super helpful! Just found some pre-cut sheets of vinyl at Menards for 20$ on the endcap! We’ll see how it works. 🤞
What would you do if the floor has water damage? We have a 1978 Rockwood we have recently acquired. We thought we would just need to do touch ups since it’s in fairly good condition, but when we pulled up the linoleum we found a ton a of water damage. What would you suggest? My husband is thinking some type of water proof primer to the original and then adding a new layer on top of it.
It really depends on how extensive the water damage is. You don’t want to add another layer of OSB (particle board), because that will add a lot of weight. They do sell a product called Git Rot (you can find it on Amazon here) that will harden a soft subfloor. If the damage isn’t too extensive, you could try that. You can see how Laura used it in here remodel here. If the damage is pretty bad, though, the only real solution is to replace the subfloor. 🙁
Flooring looks amazing. We used floating vinyl flooring in our PUP. It was a challenge to install, but we had not removed all of our cabinets, just worked around them. Everyone who visits our PUP, comments on how good it looks. We are on year 3 with the flooring now, and it still looks as good as when we installed it. With the temperature swings here in Canada, I did not want to chance plank style floors.
I’m so happy I found your website! I just bought my first pop up camper. It’s a 1998 Coleman/Fleetwood Bayside with a slide out. Does the sheet vinyl scratch easily? The pull out is very heavy and there were marks on the old floor from it resting. I also have a 50 lb dog that will be walking on the floor too. Also, even though I live in MI and don’t have to worry about heat as much (it rarely ever hits 90 **knocks on wood**) I don’t want to use planks due to the thickness for the slide out. Thank you in advance!
So, we have the thicker click-lock vinyl planks in our Coleman camper, Kate, and I feel like it scratches kinda easily. I feel like the sheet vinyl is a little more forgiving, but time will tell. I don’t have a slide-out, so I can’t comment there, but I wouldn’t hesitate to go with sheet vinyl again. 🙂
How hard was it to remove all of the cabinets? Were any damaged in the process? It looks great!
It wasn’t hard, just time consuming. And ours were already water damaged, so we weren’t super careful with them. We ended up rebuilding them from scratch. But we did remove the ones in our Coleman camper with no issues. We reused those (only reinforcing a couple spots), and as long as you are careful removing them, you should be fine.
I planned to work around my cabinets and lay new vinyl over our old vinyl that is in very good shape. No cracks just needs a scrub. Am I asking for trouble laying new vinyl over old if it’s oin good shape?
Nope. As long as the old flooring is in good shape, you should be okay. Are you using click lock or adhesive plank?
Hi from Prince Edward Island Canada! I’m going to repaint the cabinetry and update upholstery on the cushions in our Fleetwood. Would love to put down new ‘rich looking’ flooring. My question might sound silly, but do we take our slide off to ensure the flooring is secure under it? Was planning on just laying vinyl (sheet) over existing. Also is it necessary to remove cabinetry to as well or can I just have the new flooring in the open areas?
I don’t have any experience with sheet vinyl and slides, unfortunately. I’ve always wanted to own a pop up camper with a slide, but we’ve never been able to find one that fit our family. I have heard good things about installing plank vinyl under the slide, though. Readers who have done that haven’t ever removed their slides that I know of, and it has always worked fine. If you check out Debbie’s remodel (or Carolyn’s here), you can see how they took the face of the slide off to lay flooring. Neither removed the old flooring or the cabinets. Hope that helps! 🙂
Hi all, I opened my camper this spring to flooring separation as well. I just peeled it off (VERY carefully and slowly, prying up the short side with a thin flat screwdriver) and readjusted it. I only had about 6 planks to adjust so it wasn’t too bad. Next spring I will redo the floor using your bulk vinyl suggestion.
Hello! What did you use for the trim the floor? Looking for some options. Thanks!
We trimmed out the cabinets with a small shoe molding that we painted to match. You can see how we did that here.
Hi! How did you calculate how much flooring you would need? Love your site!
With the sheet vinyl, there isn’t much wiggle room. Unless you want seams in the camper floor, which we didn’t, you’ll have to lay it in one big cut. You just measure the length of the floor and the width. Multiply those to find the square footage; then order based on that. Because it comes in one big sheet, there will be some extra leftover. We are hoping we’ll just be able to use it on another project.
We live in Las Vegas – same heat at AZ – and just started renovations on a very clean and well kept 2009 Coleman. We waited for cooler temps to install the flooring and went with peel & stick vinyl planks, mostly because everywhere I read said that was the way to go. We definitely didn’t want to take up the cabinets or do any demo, so we laid them over the existing floors and had to make a lot of cuts around the perimeter. We noticed that the vinyl had a hard time adhering (maybe because it was fifty-something degrees that day?) and there were many gaps between planks and between the cabinets. I plan to use caulking to fill the gaps but I’m feeling some remorse for using the peel & stick and now reading about possible problems with the summer temps, do you think we’re in for a huge mess? We also opted for contact paper to cover the counter tops.. but again, the adhesive problem + climate makes me nervous. Camper is currently stored outside/full sun with a lightweight cover over it. Would I have better luck if I stored it in covered/shaded space?
I haven’t had any luck with adhesive products in the AZ heat. We made a backsplash for the Rockwood and lined it with peel and stick tiles. We even added extra vinyl adhesive. Because of a job change and the pandemic, the Rockwood spent the better part of a year outdoors in the elements. When we opened it up, the adhesive didn’t hold. The tiles were falling off the board, and all the edges had pulled up. 🙁 Definitely shaded/covered spaces help keep the heat at bay, and your mileage may vary. I wouldn’t sweat it too much. Just enjoy it, and if it needs to be touched up, you know what not to do next time. 🙂
Hi Larissa. I love your page. So happy to find you in instagram. We are planning to update the flooring in our PUP. Did you have any experience using the peel n stick vinyl planks? Your input is greatly appreciated. Thank you.
I think it really depends on your climate. We did a peel and stick flooring for the backsplash of the Rockwood. After a year in the heat, the tiles are just falling off the board. We used extra adhesive, too. The heat just kills anything peel and stick in Arizona, so I wouldn’t recommend it. Maybe your climate is more forgiving, though, so if you are willing to replace the floor if it fails, I say go for it. 🙂