


 Disclaimer: We are not professionals. We are just outlining the steps we took to rebuild our Rockwood pop up camper roof. There may be different (and better) ways to rebuild a damaged roof, and our experiences should not be construed as professional advice. We love sharing the process of our remodel with you all, but please don’t think we’re perfect. This is the first time we’ve taken on a roof rebuild like this. 😉
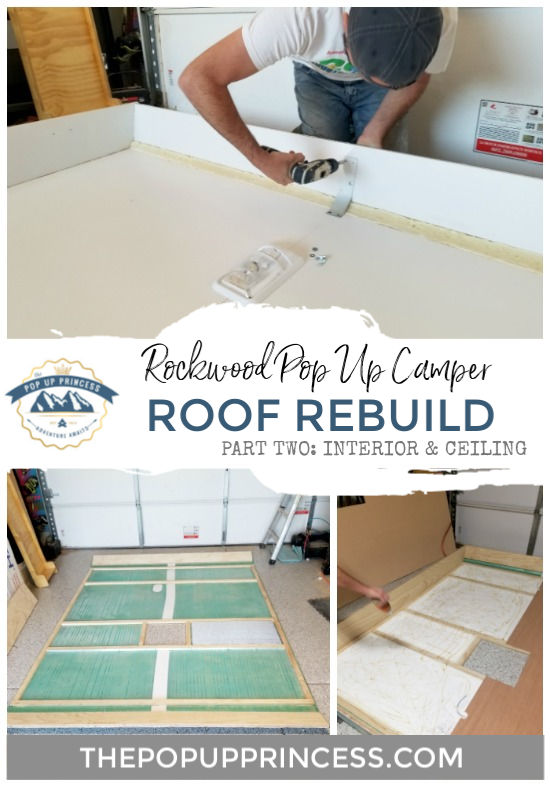
 A few months ago, we rescued a neglected Rockwood pop up camper from a family friend’s backyard. The camper was in pretty bad shape, and we knew it would need a roof rebuild. When we last checked in with y’all, we showed you how we took the roof apart to start the reconstruction. You can find that post here. Today we are going to show you how we rebuilt the interior and skinned out the ceiling.
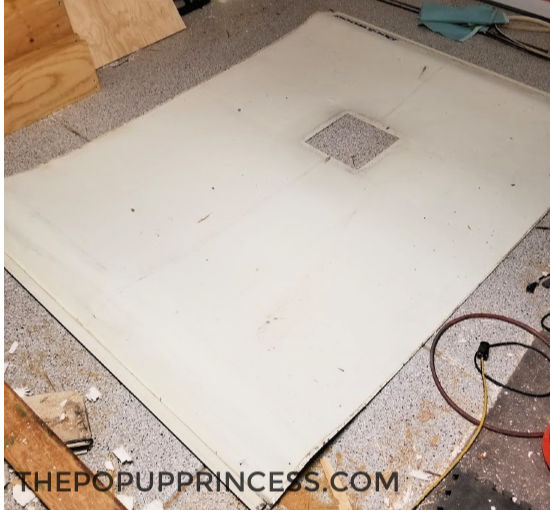
 We kept the pebbled aluminum exterior, as it was pretty hard (and expensive) to find a replacement. Justin cleaned the inside really well with acetone to remove any of the remaining adhesive. A couple of things to keep in mind for this step. Acetone is nasty stuff. Make sure you wear a respirator while cleaning the aluminum. If you are in the market for a good respirator, we love this one. Like we mentioned in the previous post, the aluminum is really fragile, so make sure you are really careful with this step. We swept our floor really well before we laid down the skin, so we wouldn’t damage the outside.
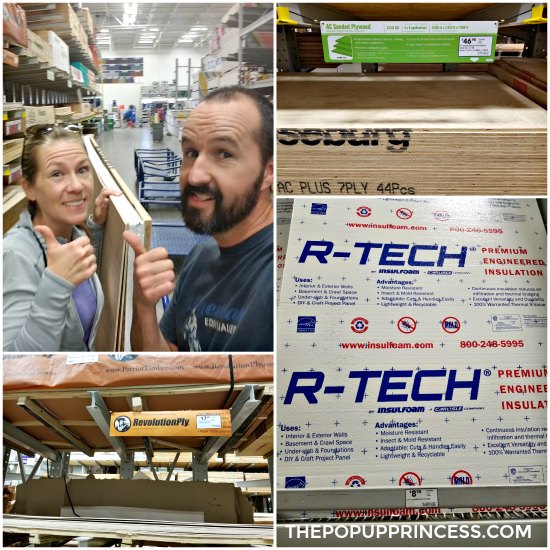 We purchased all the materials for the interior rebuild at our local Lowe’s. It was the only place we could find the foam insulation in 3/4″ thickness. Everywhere else carried 1″ thick foam sheets. For the interior of the ceiling, we used 1 x 2 pine lumber (which is actually only 3/4″ thick), 3/4″ plywood, luan paneling, and 3/4″ R-TECH styrofoam insulation. You want your foam to be the same thickness as your frame, so you if are using 1″ thick lumber, you can use 1″ foam. We could only source 3/4″ easily, so we just made some minor adjustments to our measurements and used what we could find locally.
 Then it was time to start putting the roof all back together. We applied Eternabond tape to the inside of the seam to help ensure a good seal. We also had a couple of tears in the aluminum from the previous owner, so we gently flattened them with a rubber mallet and applied Eternabond to the inside of those as well. We replaced the front, back, and side boards with the 3/4″ plywood. We used the original boards as templates and cut new boards to replace them.
 When we began the process, we were using Gorilla Construction Adhesive and a notched trowel to adhere the front and back boards to the aluminum skin. While the construction adhesive was drying, we used a whole lotta clamps. 😉 As we went along, though, we noticed that we much preferred regular old Gorilla Glue for adhering all the materials. This glue sticks to anything, and it foams and expands quite a bit, so it fills in all the little gaps. It is awesome. We ditched the construction adhesive early on and used regular Gorilla Glue for the rest of the rebuild.
 After we attached the front and back boards, we started building the ceiling framework out of the 1 x 2 pine boards. We pretty much followed the original framework, but we did end up adding an extra support beam for structure. We used the Gorilla Glue to adhere the frame to the aluminum skin, and it worked really well. I’ll say it again… That stuff is amazing.
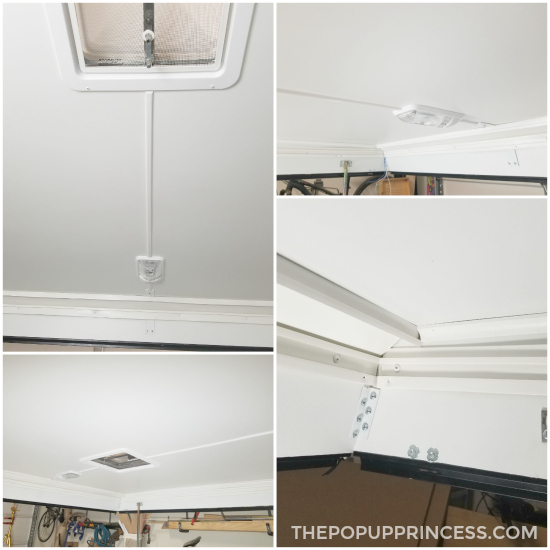
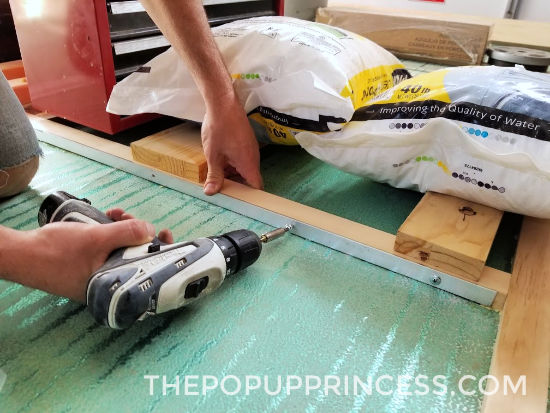 Originally, there had been only one steel brace on the board next to the ceiling vent. We wanted a little more structure, so we added a few more. We replaced the steel brace (it was old and rusted) with aluminum and added braces along the other boards as well. This helps make sure the frame won’t twist or sag. These braces are just long pieces of aluminum we bought at Lowes and drilled holes in. Then we screwed one to each board. We used 40lb bags of water softener salt as weights to hold everything in place while the glue dried.
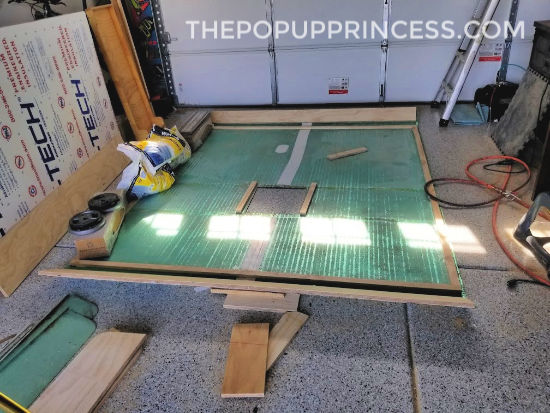
 Once the framework was in place, we installed the insulation. We cut the R-TECH styrofoam sheets to size by scoring them with a utility knife, then snapping along the score line. Then we applied Gorilla Glue to the aluminum with a notched plastic trowel and placed the sheets–white side down–on the glue. We used those 40lb bags of salt as weights again, but laid down a sheet of luan or some braces on across the foam, so we didn’t get any dents in the foam.
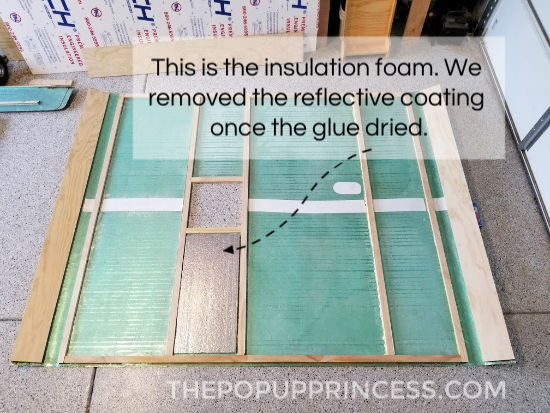
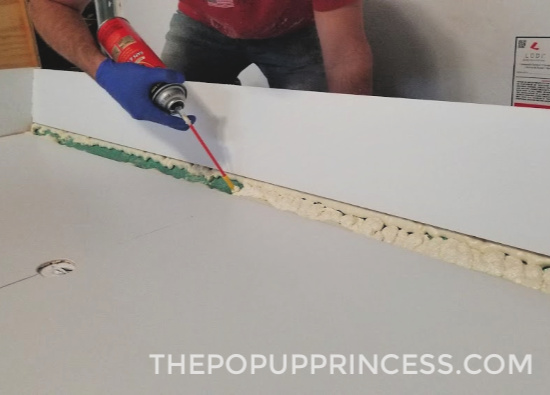
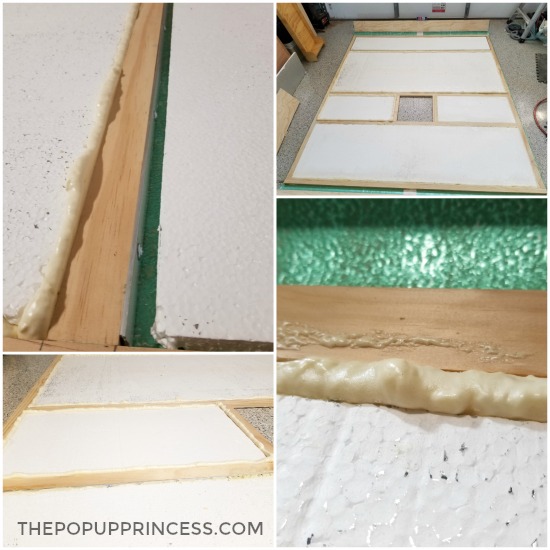 Once the glue was dry, we removed the reflective plastic coating from the top side of the foam. We did this so the glue would stick to the foam better when we installed the ceiling skin. Gorilla Glue actually does adhere to the reflective plastic, but the bond was much stronger on the exposed foam. It’s also worth noting, that we weren’t sure we could cut the foam to the exact dimensions of each opening. To make sure we still got a tight fit, we cut the foam about 1/2″ short on each side. Then we used Great Stuff Insulating Foam Seal to fill in the gaps. This worked perfectly.
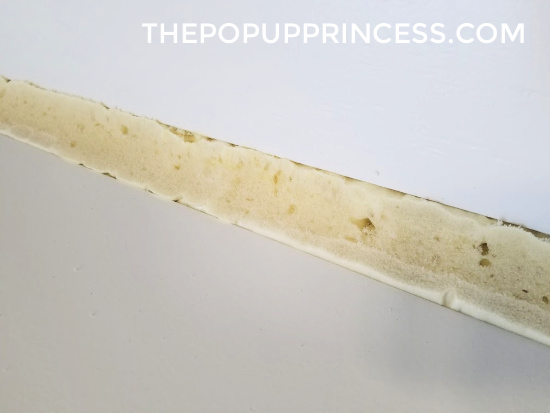
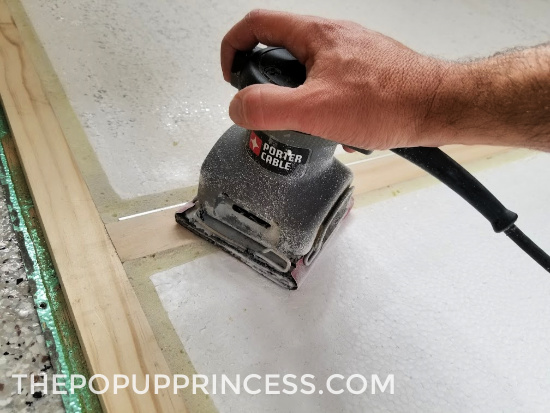 After the spray foam was dry, we just used a cheap utility knife to trim it. Then Justin took a palm sander and some fine grit sandpaper to the edge to make sure it was nice and smooth. Before we skinned out the ceiling, we attached the side new side boards to the roof. We cut these boards from the same 3/4″ plywood that we cut the front and back boards.
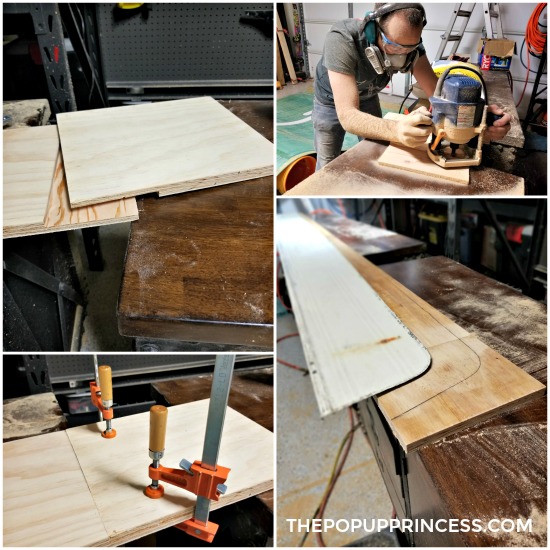
Our roof is just longer than an 8 foot sheet of plywood, though, so we had to get crafty. 😉 Justin cut a small piece of plywood the same height as the side board. He used the router to make a large channel on either side of the plywood so he could joint the boards. Once he was happy with how they fit, he applied Gorilla Glue to both sides, clamped it up, and let it dry. Then he came back with wood filler, filled the seam, and sanded it smooth. Voila! We now had a piece of board long enough to fit the side. Using the aluminum skin as a template, we cut new sideboards. Then we used the brad gun to attach the sides to the frame of the roof.
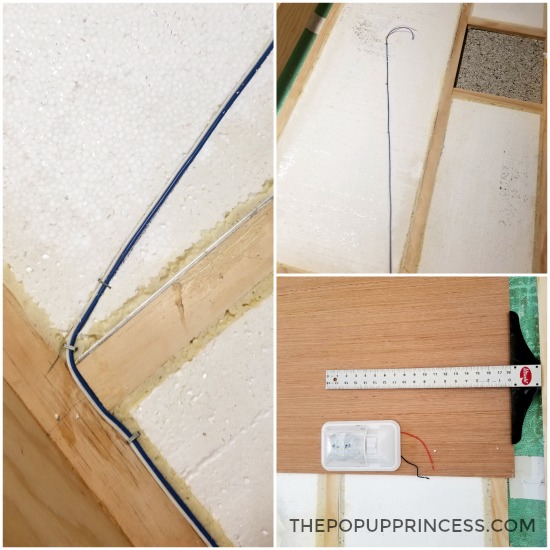 I like to make things difficult, so I decided to move the interior lighting. We used the router to make a shallow channel in the roof in the area where the new lights would be mounted. Then we laid the wiring in the channel. A couple of staples, and the wiring was flush with the rest of the ceiling materials. We used the luan we purchased at Lowes to skin out the ceiling. As much as I didn’t want a seam down the center of the ceiling, there was no way around it. Our ceiling was just too big, so we cut the skin in two pieces, making sure to cut out holes for the new lighting and the roof vent.
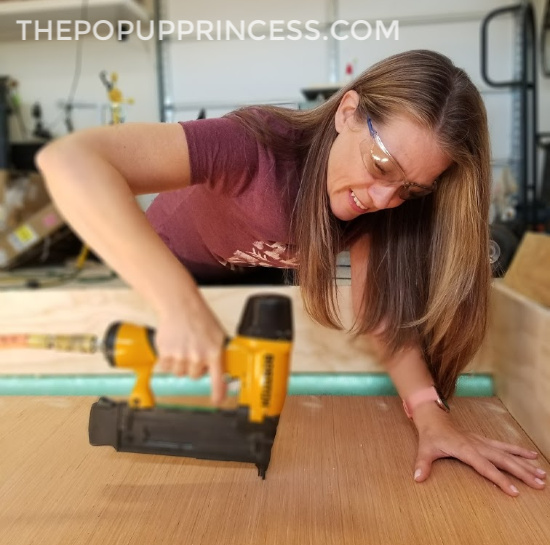 That Gorilla Glue came in handy once again, as we used it to attach the luan to the frame and foam in the camper roof. Then we used our nail gun to add a few brads along the wooden frame for a little extra security. Make sure you use wood filler and sand along the nail holes when you are all finished. That way, you’ll get a nice, smooth ceiling when you paint.
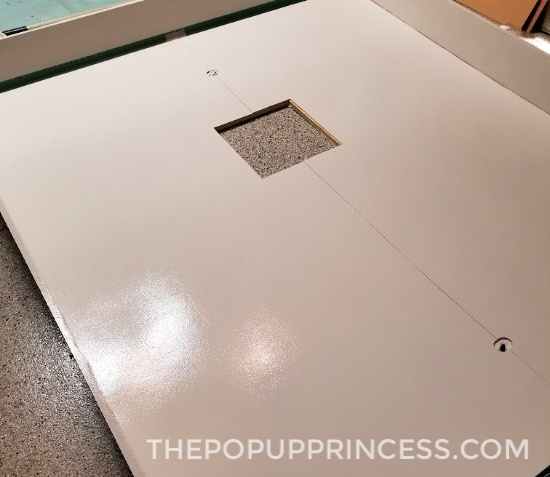 To paint the ceiling, we used a coat of Zinsser Cover Stain primer. Then we followed up with two coats of white Rustoleum oil based paint in a satin finish. We used a regular paint roller for semi-smooth surfaces and a long handle extension, which made the job super easy. The oil based paint gives the ceiling a durable, scrubbable finish. We’ve already had to clean fingerprints off the white paint, and it cleans up like a dream.
 The roof rebuild was really starting to come together at this point, and we were pretty encouraged by how it was turning out. To replace the foam insulation in the front and back curves of the roof, we decided to use the Good Stuff spray foam again. It seemed like a good replacement for the scored styrofoam that was in there originally. Once the Good Stuff foam is dry, you can easily cut and sand it to shape.
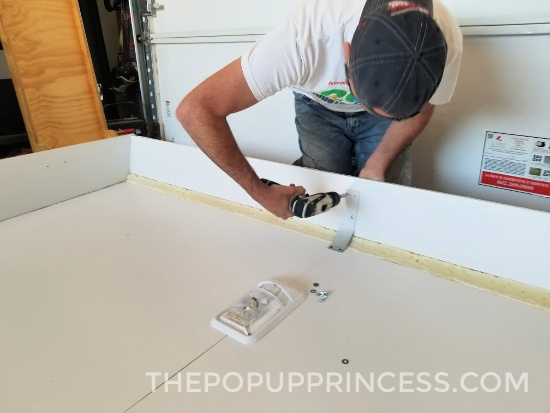
 Justin fit his drill with a wire brush wheel attachment and used it to carve the dried foam into the curve necessary to accommodate the trim. Just make sure you protect your newly painted roof or the brush will scratch the paint off. You’ll have to touch up your paint… or so we’ve heard. 😆
 With most of the tough stuff out of the way, we starting puting everything back together. We installed the new LED light fixtures and reattached all the original brackets and hardware. To attach the brackets that hold the lift arms in place, we used the old sideboard to mark the location of the original screw holes on the new boards.
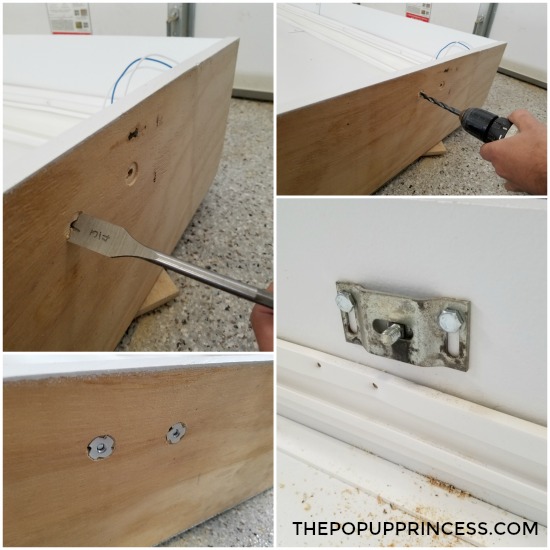 Then we used a countersink bit to make an indention for replacement t-nuts that we purchased at Home Depot. We attached the lift arm brackets, then used our trusty Gorilla Glue to adhere the pebbled aluminum skin to the outside of the plywood boards.
 After that, it was just trimming everything out. We gave the original curtain and canvas tracks a good cleaning. Then they got a coat of plastic primer and two coats of white Krylon spray paint. We also added white cove molding to the interior where the sideboards meet the ceiling and a small white trim piece over the top seam in the luan. To give it all a clean finished look, we caulked all the trim. (The pictures show the newly installed roof vent, but we’ll cover that installation in a future post.)
 Remember all those pictures we’ve been snapping along the way? They really came in handy once it came time to put the trim and brackets back in place. We used them as an instruction guide when we put the roof back together, so if you are taking on a roof rebuild yourself, don’t skimp on the pictures. They’ll be lifesavers! That about wraps up the interior and ceiling rebuild. It looks amazing, and we really are so happy with how it is coming together. Feel free to shoot us any questions you might have, and if you’ve approached your roof rebuild differently, we’d love to hear about it in the comments section below.
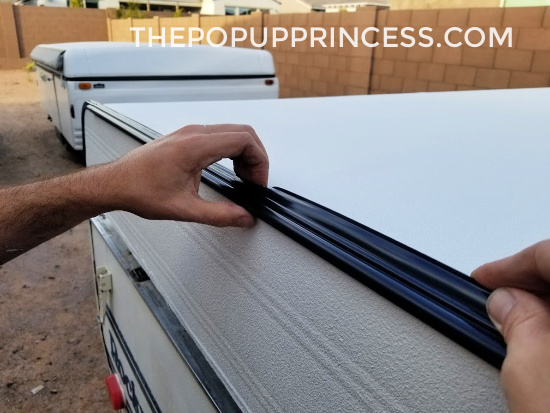
Next week, we’ll show you how we repaired and painted the exterior of the roof. Here’s a little sneak peek. It’s turning out better than we imagined, so you’ll want to check back in for this one. 🙂
Disclaimer: This post contains Amazon affiliate links. The Pop Up Princess is a participant in the Amazon Services LLC Associates Program, an affiliate advertising program designed to provide a means for sites to earn advertising fees by advertising and linking to Amazon.com. This means that if you choose to purchase an item from a link in this post, The Pop Up Princess earns a small advertising fee to help pay for future projects and posts… so thank you!
Happy Camping!

Thank you so much for this, we need to rebuild our Palomino Pony rood and this is going to be s huge help!
Jessica- wondering how the pony rebuild went? We will be starting the same in a 1986 soon.
Nice job! Looking forward to your next post.
I love seeing how you are rebuilding the camper. Now if I could just get the energy to open our camper….
As an alternative method, I recently rebuilt the sideboards on my old Viking. Instead of using a lap joint, I used a biscuit jointer and used wooden biscuits to lengthen the plywood out to 12 feet. The aluminum skin was shot so I used aluminum roof flashing and contact cement to skin the outside. The skin with the biscuit joints is plenty strong. Re-installing the aluminum track along the bottom edge further strengthens the unit.
My camper doesn’t need a new ceiling, but there are some places where screws have pulled loose. Especially for the screen door attachment brackets and tracks. Do you have a recommendation for what to patch those holes with? I don’t know what the ceiling is made out of.
Hi Larissa
Ive enjoyed reading through all your remodeling adventures! Our 1981 Starcraft ceiling, that is showing, is cardboard. I want to cover it with a simple idea. I know you used luan but I dont think that will work for us because we will be leaving the ceiling in place and I dont know how to support the luan while drying-above us.
What do you or your readers think about: mod podging maps or pictures, removable wallpapering, etc?
Also, have you had to remove the canvas and was it easy to reinstall?
Thanks for your time.