


Here is how to build a simple farmhouse style camper table for under $100 using a Kreg Jig. It’s a perfect way to replace a worn or missing RV table and can be customized to fit your style and decor.
 I’ve featured some beautiful custom camper tables from a few of my readers over the past couple of years. In fact, it is one of the projects that I am most often asked about. I first featured Becca’s table a couple years back. Becca attached weathered planks to the top of her original table, and the results were gorgeous. She really was the one who inspired so many other readers.
 Readers like Tracy, who wanted to build her own custom camper table to complete her remodel. Tracy was inspired by Becca, but wanted her table to reflect her own tastes. She put a unique spin on her planked table, and the result is nothing less than stunning. Everyone loves this table, and it’s not hard to see why.
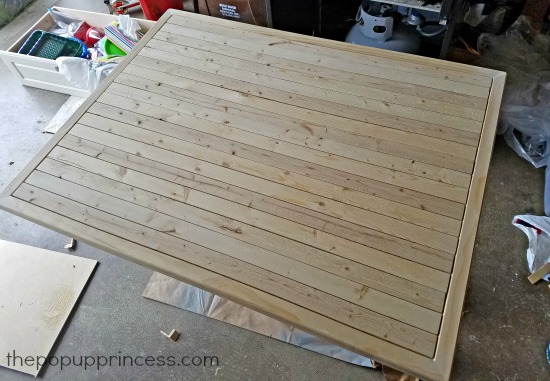
Tracy attached inexpensive wood lath strips to her existing table top, then used a dry brush technique to make her planks look weathered. Even though she used brand new wood strips, the table has a beautiful rustic finish. Didn’t she do an amazing job?
 I have been itching to make a few changes to our pop up camper for a few years now, and a new table seemed like the perfect project. I am a huge fan of farmhouse decor and have two farmhouse tables in my own house. One is made from 100+ year old barn wood, and I just love it. Naturally, I wanted to build a table that would make our camper feel like home, so a farm table was a no-brainer for me.
Full Disclosure: We are not master woodworkers. We have build several pieces of furniture for our home, and we love how they have turned out. We don’t claim to be experts, but are absolutely willing to answer any questions you might have on how we constructed our table. 😉
Building the Camper Table
 Selecting the right wood was essential for this project. While I love the look of 100+ year old barnwood, it wasn’t practical to use it for the camper table. We needed something much cheaper but also very sturdy. Most of the time, our camper table serves as a base for the extra bed, so it needed to be able to support a person’s weight. We found that inexpensive stair treads worked perfectly for us.
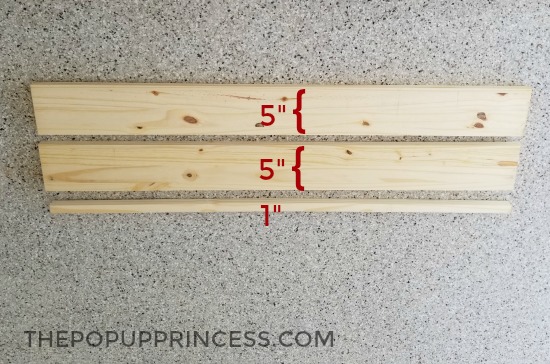 Each 11 1/2″ wide stair tread is made up of several individual boards. The grain of each board alternates. You can see that in the pictures above. This makes the stair tread much stronger than a simple 1 x 12 board. We bought four treads at $12.97 each. Each tread made two 5″ wide boards. Make sure that you start at the straight edge when ripping your boards. You’ll have just less than 1″ left over after you cut two boards, and that 1″ should be the rounded edge meant for the stair.
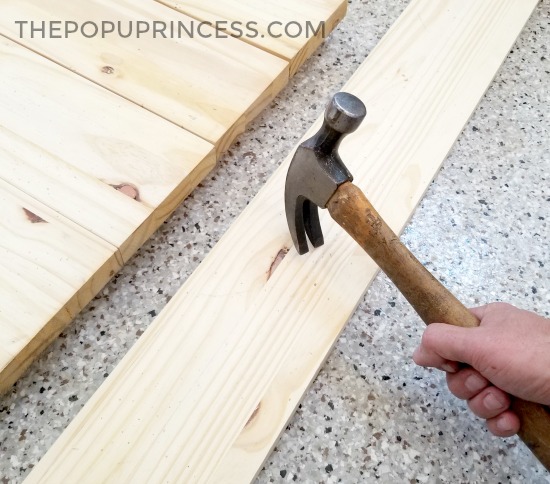
 Then we laid six planks to form the center of the table. We examined each side for knots and cracks, but we also looked for cupping and warping. The nice thing about using stair treads is that the boards themselves are pretty straight. Once we were satisfied with the layout, we numbered the planks and used a hammer and a few screws to distress the them a bit.
 There are a couple ways to join the boards to make the table top, but our favorite way to build furniture is using our Kreg Jig. If you build a lot of furniture, this thing is a must. I love it. You drill a pocket hole in the back of your board, then screw a special Kreg Jig screw through the hole and the adjacent board. You don’t see any screws on the front of your project, and you don’t have to countersink and fill screw holes either. 🙂
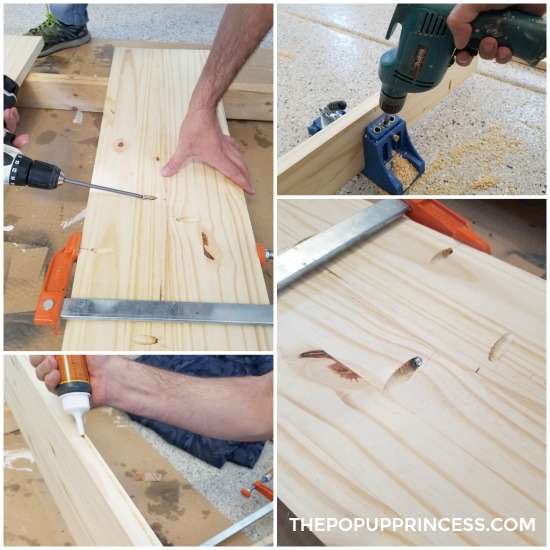 We cut our center boards 29″ long and gave them a small bead of Gorilla Glue on the joints. Then we used the Kreg Jig method to join the boards together. It was incredibly easy. If you don’t have a Kreg Jig, you can simply glue the planks together at the joints and brace them from underneath with a strip of 1 x 2. Just make sure that if you are using fold away legs, you don’t interfere with the placement of the leg brackets.
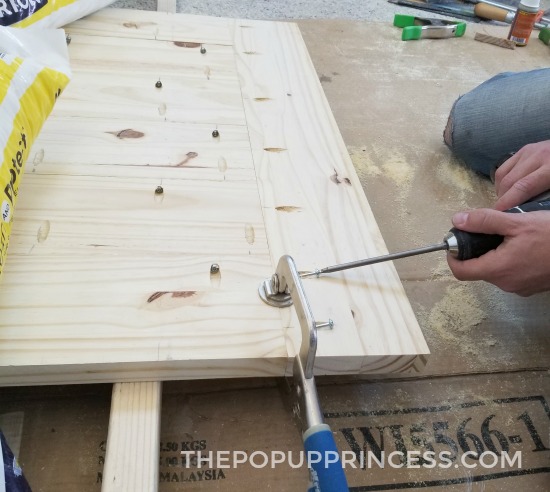 Once we got the center of the table put together, we attached the breadboards to either end. The final width of the table is 30″ so we cut the breadboards just over 30.” Next we attached them to each end of the table with Kreg Jig screws. Lastly, we squared everything up with our t-square and handheld circular saw. This removed about 1/4″ of the width from either side.
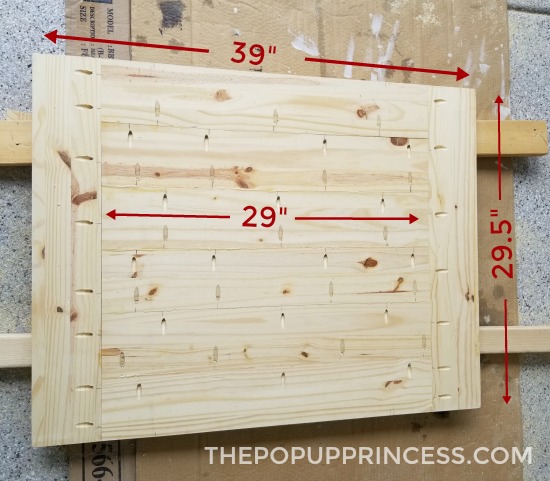
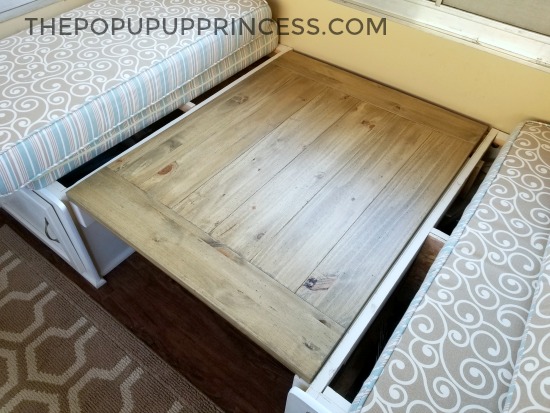
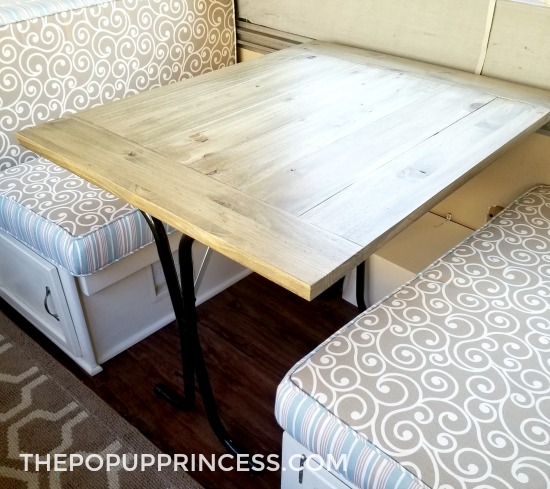
Here’s what the table looks like from the underneath. You can also see the final dimensions. We double checked that it fit along the brackets under the dinette and laid flush, which it did. If you don’t like the look of breadboards, you can simply cut your table planks to 39″ and join them together.
Finishing and Sealing the Table Top
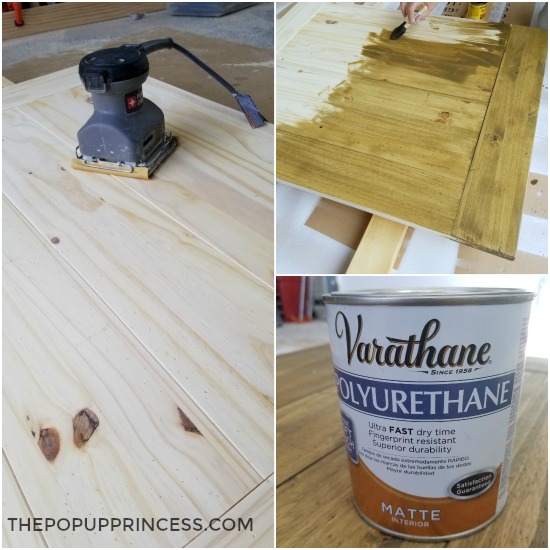 Once the top was complete, I gave it a thorough sanding. I started with 150 grit sandpaper and worked my way down, finishing up with 400 grit sandpaper. I wanted the table to look weathered, but I didn’t want splinters in our elbows either. Mr. TypeTwoFun gave the whole thing a single coat of our favorite Minwax Driftwood stain. I love this color. It isn’t too gray, but it isn’t too orange either.
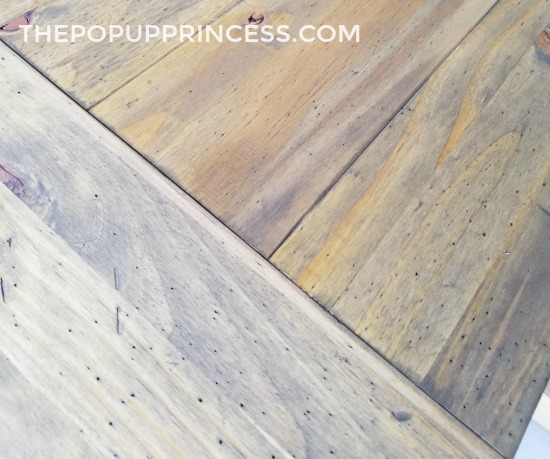 It is really hard to photograph how it actually looks, but above picture is a more accurate representation of the color. My camera makes it look orangey for some reason, but it really isn’t. It looks like driftwood you’d find on the beach. Once the stain was dry, we followed up with three coats of Varathane Matte Polyurethane. This clear coat is great because it really is very matte. You can hardly tell there is a protective coat on the wood at all, but it does a fabulous job repelling stains. Spills wipe right up.
Adding the Legs
 We considered spray painting the original legs and attaching them to the new table top, but decided against it in the end. I loved our new farmhouse table so much, I wanted to be able to keep it if we ever sold the camper. That meant looking for replacement legs, but authentic Coleman pop up camper folding legs are SO pricey. I found sets online that were running around $150, and that was definitely out of our price range.
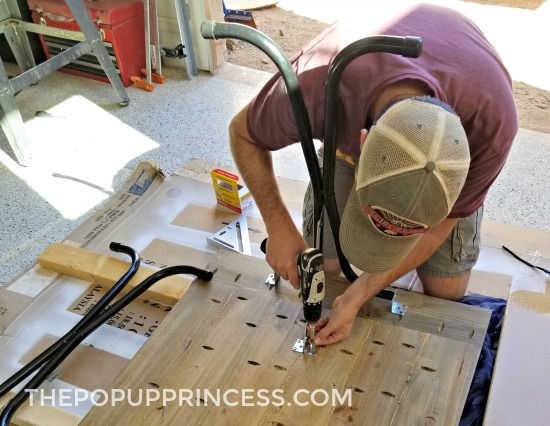
 We settled on these generic RV legs, which I purchased on Amazon. These legs are almost a perfect match for the original table legs. Even better? A set of two legs only cost me less than $40. Like the originals, these legs fold up and out of the way when we are putting away the camper or using the dinette as a bed. We set them back 10″ on one side to accomodate the wheel well. If your wheel well is located under the dinette, you’ll want to do the same.
 All in all, we kept the cost of the table under $100 total. We already had a Kreg Jig and a large stash of stains and polyurethanes at our disposal, so that helped us stay within budget. Considering that replacement Coleman tables are going for around $200 used, I thought we did pretty well. You can definitely make this table on a slimmer budget by selecting construction grade pine boards and reusing your original table legs, if you still have them.
 Now, of course, I want to make more changes to our camper. It’s been four years. It’s time, right? 😆 I’ve promised Mr. TypeTwoFun we won’t do anything major until after our big summer trip, but I can dream for now.
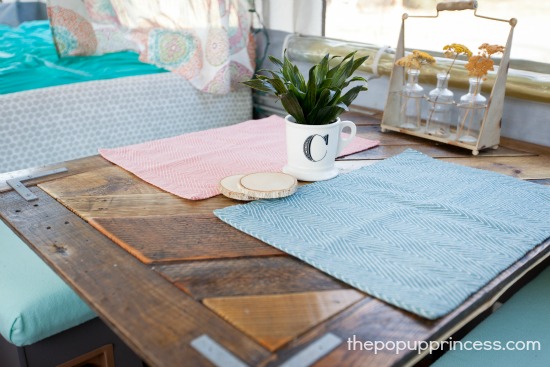
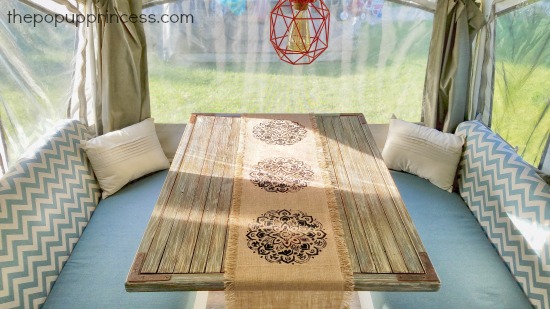
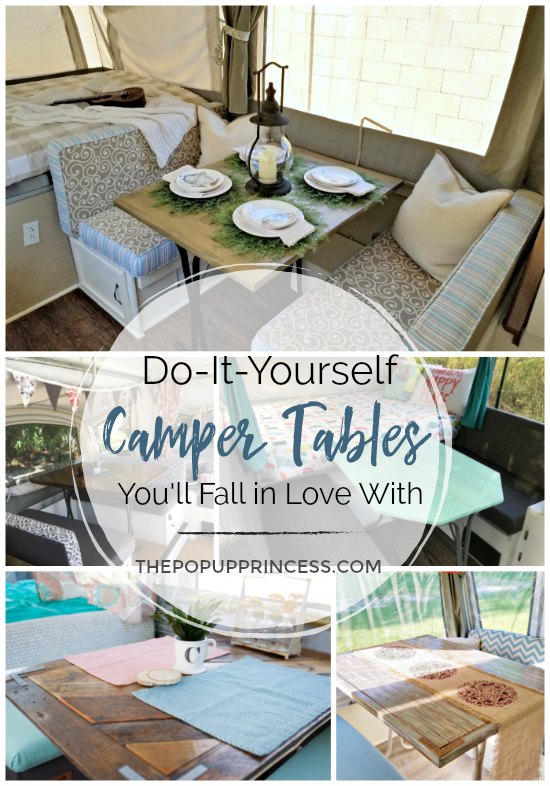
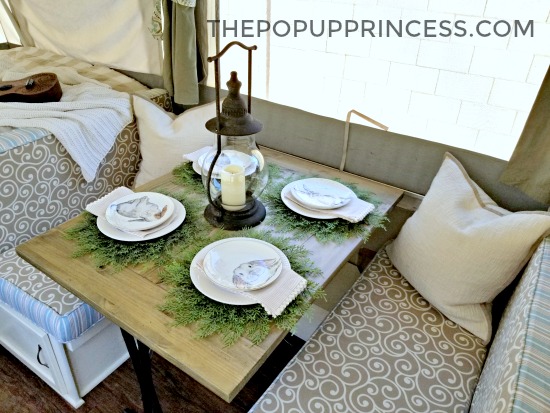 And since I still had some of our Easter place settings out on the dining table in the house, I just had to stage the dinette for a few pretty pictures. It will NEVER look like this when we are camping, but the PUP is set up in the backyard right now, so I can play (and dream) in it when I have a few extra minutes.
 Just look at that gorgeous finish! It is so pretty that I am never going to want to use this table as a bed. The kids can sleep on the floor, right?
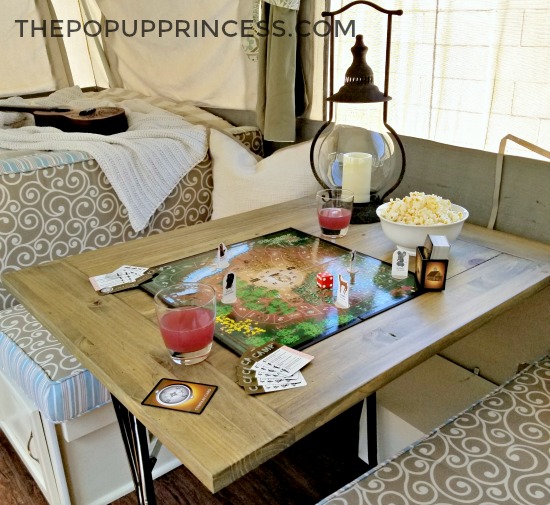 There you have it! It was such an easy project, but I love knowing that we made it together for our family to gather around. I can definitely see us playing games–or even enjoying a meal in stormy weather–around this table for years to come. And if farmhouse style isn’t your thing, check out some of our other features for some more creative table projects. You are sure to find something that fits your style.
MORE DIY CAMPER TABLES
Disclaimer: This post contains Amazon affiliate links. The Pop Up Princess is a participant in the Amazon Services LLC Associates Program, an affiliate advertising program designed to provide a means for sites to earn advertising fees by advertising and linking to Amazon.com. This means that if you choose to purchase an item from a link in this post, The Pop Up Princess earns a small advertising fee to help pay for future projects and posts… so thank you! 🙂
Happy Camping!

Not table related but did u have your cushions custom upholstered ? They look fab and i am in love with that table
No, we did them ourselves! You can read all about that HERE, Cari. 🙂
Looks great! I want one.
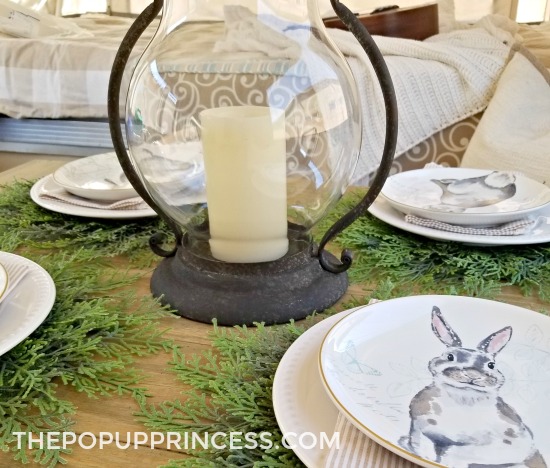
Are those bunny plates from Pier1? They look familiar. 😊
They are! I stole them from my kitchen tablescape. 😆
May I ask how you mounted the table legs? I have ordered a set but it states the are no instructions.
We used our old table as a guide to know where to place them. They are a little off-center to accommodate the wheel well. I can’t remember if it came with mounting hardware, but I think we used our own wood screws anyway. 🙂
Is there a small ledge along the wall to rest your table on when you turn it into a bed? Not able to tell from picture but looks like it. Do you have a blog in how to build the seats with storage
No, we don’t have a ledge along the wall. We built a wooden box around the wheel well, and that is probably what you are seeing. The table rests on two wooden bars along the front of each bench. We do have a tutorial on how to add doors to the storage dinette, if that is what you are looking for. You can find that here.
The table looks great! I’ve used the Driftwood stain on several projects, and I always love the finished product! Mr. Type Two Fun would be so bored without you and your creative mind!
Hi, what kind of finish/stain did you use on your table? I just love it.
Rustoleum Driftwood. 🙂
How much does it weigh?
I don’t know the exact weight, Julie, but it is VERY comparable to the original. It might even weigh a little less.
I want to get rid of a jackknife couch and put in a dinette that can turn into a sleeping area. Do you have any instructions on how to do that? Thanks
I do not. We’ve never had a camper with a jackknife sofa, but I’ve always wanted one. I guess the grass is always greener on the other side… LOL
The table looks absolutely great, and I was planning on doing the same with our new-old pup. I’m not exactly sure what the pocket holes serve since you also edge glued the boards together? I am so glad that you mentioned the offset of the legs, because I was baffled when I saw the picture until I read the text. I really enjoy the website. You write ups are fantastic.
Because this table is being used as a bed, I wanted to make sure it was extra strong. That’s what the pocket holes screws are for. I don’t trust the glue on it’s own. One of my kids would break it. 😆
Do you have the link for the table legs?
Yes, Crystal! It’s in the post above, but you can also find it here.
Our table feels rather light, cheap and fairly unstable. We have a 2006 Fleetwood Santa Fe. Not sure why it feel so wobbly and cheap. Feels like the legs are just crap. Did your original table feel that way? Does the new one? Just would like a more substantial table that doesn’t feel like the slightest bump from our kids will knock over any drinks on the table lol. Would those new legs you got help? Heavier top like you made make a difference? Any help or thoughts appreciated. TIA….love your blog!
Well, the new table legs are definitely more stable than the old ones. Maybe try tightening up screws in the old folding legs and see if that helps. Honestly, I don’t think these pop up camper folding tables are super sturdy anyway, but we just finished a new table for the Rockwood, and tightening up the legs worked wonders. You may also want to check and make sure that the leg screws aren’t pulling out of the bottom of the table. Often those tables are made of MDF, so screws don’t hold as tightly and pull out easier than they would in solid wood.