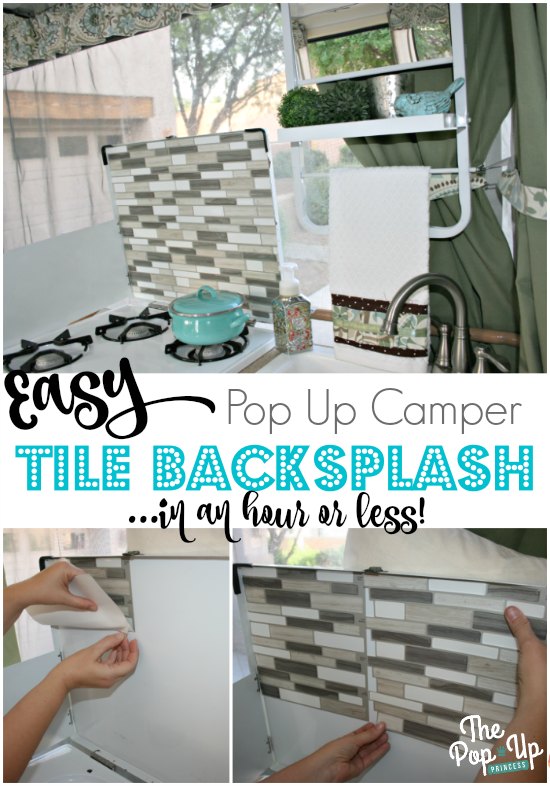
 Adding a tile backsplash to my camper is something I’ve wanted to do since we first bought our little Coleman Santa Fe. It adds so much visual appeal and makes the kitchen area feel a little more homey. I wasn’t sure how to incorporate the tile look into the kitchen of our camper, as we don’t have a traditional backsplash, and I didn’t want to add the extra weight of ceramic tiles. A few months ago, one of my RV friends told me about adhesive vinyl tiles, and I thought they would be a perfect solution to the weight issue, but I still didn’t have a place to put them.
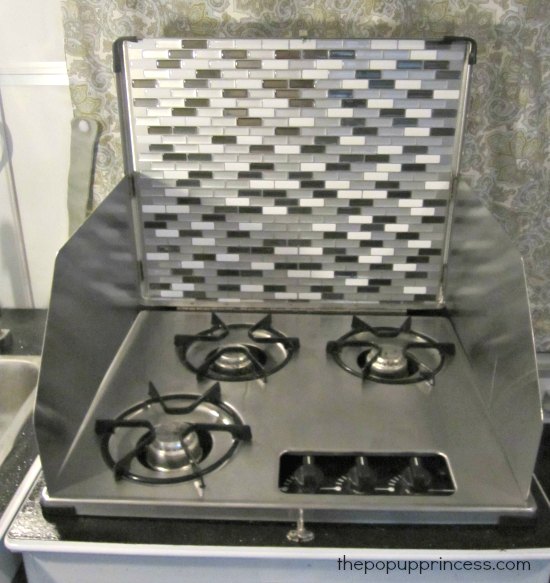 Then I saw Jessica’s remodel last month, and it clicked. Tiling the inside of our stove would be the perfect way to incorporate the tile look I so desperately wanted, and it would also cover up some stains on the inside of the stove lid. It was genius! Thanks, Jessica! 🙂 (Just a little side note… if you cook quite a bit on your indoor stove, you may not want to install vinyl tiles directly to the interior of the stove lid. We rarely use our indoor stove, so this little project serves as a cute way to cover up some scratches and stains on the stove without having to repaint. You can find more info at the bottom of this post.)
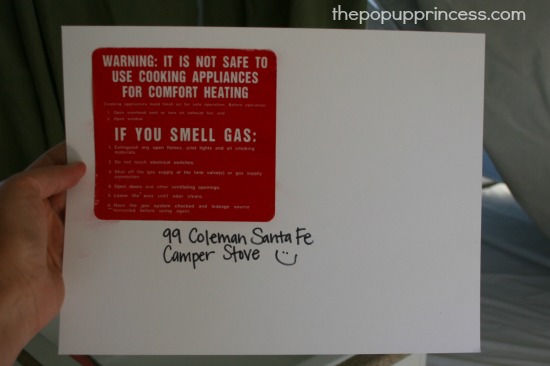
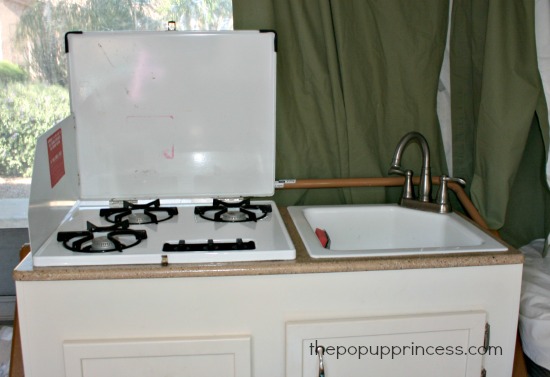
This is what my stove looked like when we bought it. It was in great shape, but pretty ugly. I had planned to repaint the stove, but I never got around to it. Years of abuse from the previous owner had left it looking shabby, and there was a red warning label that had rubbed off on the inside of the lid. I removed the label, but being the anxious person that I am, I adhered it to a piece of cardstock to keep with the other camper paperwork. If I ever sell the camper, it will be all there for the new owner. 😀
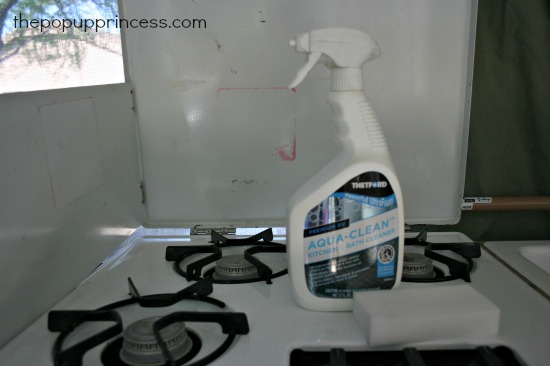
 Then I got to work cleaning the inside surfaces. I used my Thetford Aqua-Clean and a Magic Eraser to remove most of the grime. A little Goo Gone removed the rest of the adhesive. Then I wiped everything down with rubbing alcohol.
 I searched several Home Depots in my area, but I only found one that carried the Smart Tiles, and they only had one sheet of the color that I needed. I spent a few hours on Amazon–they honestly have a great selection of adhesive vinyl tile--but in the end, I was impatient and didn’t want to wait to have the tiles delivered. We made a quick trip to our local Lowes and hit the jackpot! They had at least five different styles of adhesive vinyl tiles in stock, and one was just perfect for our color scheme.
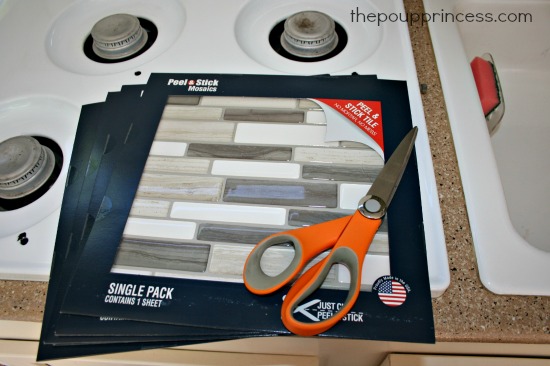 Each package contains one sheet, and I estimated I needed about 4 sheets to complete my backsplash. Each sheet was $7.98. I bought an extra sheet for good measure, and the whole thing cost me $43. I figured I could return whatever I didn’t use. I got my tiles home, ripped open the package, and stuck the first tile on the backsplash. Big mistake! Don’t do that! 🙁
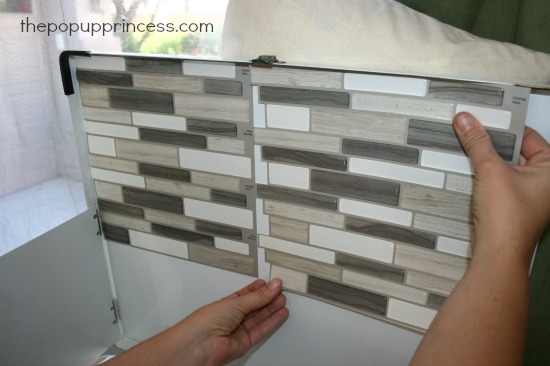
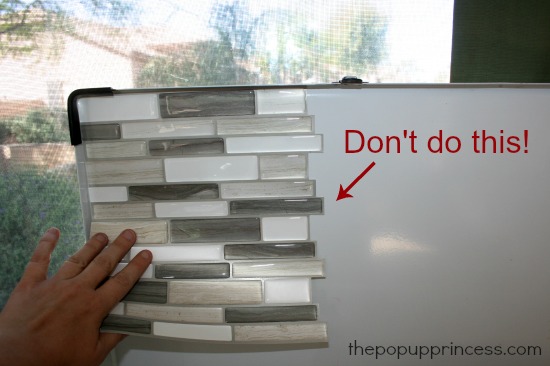 A little planning would have saved me that extra tile I bought and also shielded my kids’ tender ears from a few choice curse words. 🙁 In my haste to start the project, I didn’t plan things out very well. In my defense, the instructions are more than a little sparse. Here’s what I learned from experience: Don’t cut off the side that has the “overlap here” tags printed on it. You need that side to line the tiles up properly. Start by cutting the uneven side of the tile straight. Line that up with the edge of your backsplash or stove lid. Leave those “overlap here” tags in place. Like this:
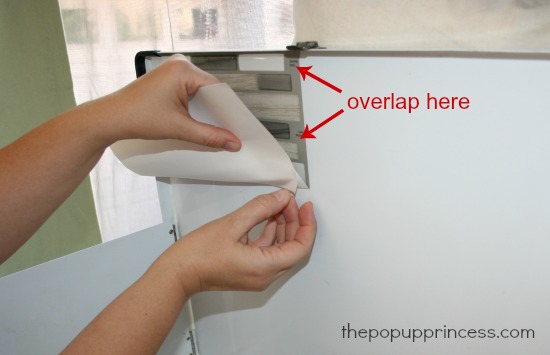 Once I pulled the first tile off of the stove lid, it was pretty much ruined. I also learned that things will go much smoother if you only remove part of the paper backing. Press the tile into place, and then remove the bottom half of the paper backing. This worked much better. Once you get that first tile in place, you can then begin to overlap your tiles.
After that initial setback, the rest of the installation was a breeze. Just keep lining up the tiles and removing the paper backing. Once you hit the end, you can use scissors to trim down your tile pieces. They cut easily with sharp scissors or a utility knife and a straight-edge.
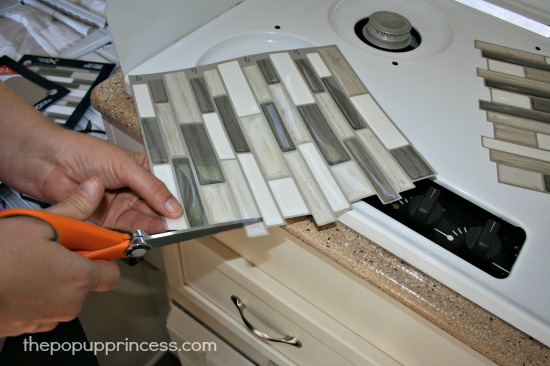 Keep the extra pieces of tile, as they all fit together rather like a puzzle. You can cut the leftovers into smaller pieces in order to use as few tiles as possible. I used my scissors to round the corners of the tile so it would fit snugly inside the lid of the stove.
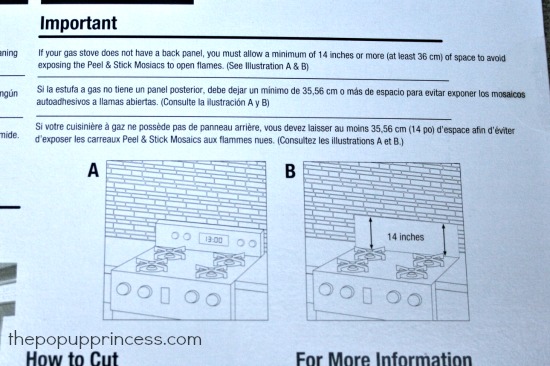
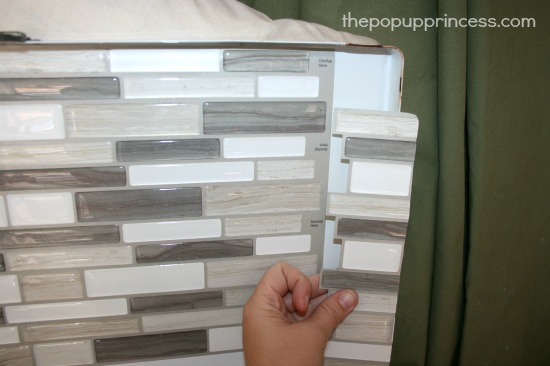 And that’s really all there is to it! It took all five tiles to complete my backsplash, but had I not made the little mistake above, I could have completed the project with just four. It’s also worth noting that the package recommends keeping the vinyl tiles away from open flame. They recommend installing the mosaic tile at least 14″ away from the stove burners.
I didn’t do that primarily because I didn’t like the look it would have given my backsplash, 😉 but I also figure that we use the stove infrequently enough that it likely won’t be a problem. If you constantly cook on your camper’s indoor stove, you may want to heed the manufacturer’s advice.
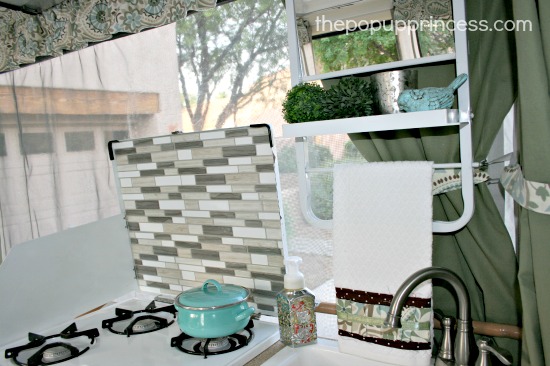 I am absolutely thrilled with how it all turned out. We also installed a Coleman Vanitymate that we bought off eBay last weekend. It hangs over the sink and holds towels and toiletries (although, I loaded it up with candles and cute stuff for the pictures 😉 ). I’m not sure how I feel about it yet, as we had to drill into the ceiling, and that’s something I don’t really like to do. It also made closing up the camper a little harder. I’ll keep posted you all on our thoughts about it once we’ve used it a bit more.
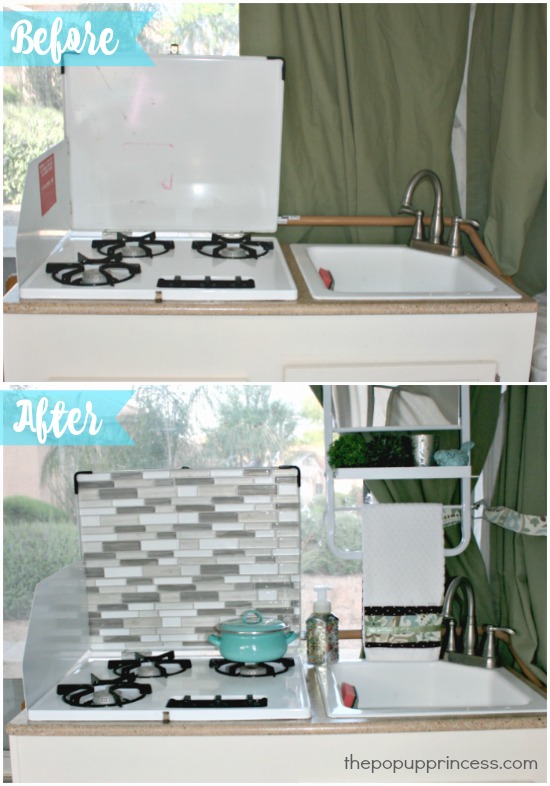 Those two little weekend projects completely transformed my kitchen area. I love how the vinyl tiles covered my stained stove and made it look brand new again. What a difference, right?
So have you installed a backsplash or used those awesome vinyl tiles in your camper? I’d love to hear your tips and see your pictures. You can email them to me at larissa@thepopupprincess.com or head on over to our Facebook page and post them there.
Happy Camping!
Disclaimer: This post contains Amazon affiliate links. The Pop Up Princess is a participant in the Amazon Services LLC Associates Program, an affiliate advertising program designed to provide a means for sites to earn advertising fees by advertising and linking to Amazon.com. This means that if you choose to purchase an item from a link in this post, The Pop Up Princess earns a small advertising fee to help pay for future projects and posts… so thank you! 🙂
Happy Camping!


This looks great!!! I so want to tackle this. It is a very nice look!!!
Love this!! I have been wanting to use those in my Teardrop galley…. GREAT job and thanks
I absolutely LOVE all of your ideas! You inspire me more and more. Thanks for posting everything. Good and Bad.. Hahaha
Aw, thanks, Renee! 😀
I love the faucet that is in the little lady.. mine is the typical pump type.. can it be replaced to one of these beauties?
It can, Julie, but if you would like to use the sink while dry camping, you’ll need to install an electric pump somewhere. It certainly isn’t as simple as replacing the faucet, but it is doable. 🙂
Larissa, you’re such an inspiration! Im almost done with my Coleman Sedona ‘Myzen’s makeover!! I am amazed at myself 🙂 I have used some of your ideas and incorporated a little of my own and am thrilled at what has developed thus far. Checking out yoour flooring segment next… that’s my next step 😉 Luv your blog! ~janie
Hey just found your blog and I’m loving it! We’re new to folding campers (although not to camping!) And have recently bought a sterling pennine and its in really good shape so we won’t be doing any major renovations. However I’m loving picking up all these great tips on improvements. I wondered what the hanging kitchen organiser I spotted in some or your pictures is? Where did you get it and how it it attached?
Thanks
Lindsay 😊
Aw, thanks, Lindsay. 😀 That organizer is a Coleman Vanitymate. They are extremely hard to come by, but there may be a few more left on eBay. Honestly, I’m still undecided on whether it was a good idea. It tends to make the camper a little harder to close up.
Larissa, with your Coleman and your handy hubbie and your three kids (who never fight, right?!?), you so remind me of our family…. a Coleman Bayside Elite, bought used and needing some freshening up, a handy hubbie, and three kids – two boys and a girl for us – (who NEVER fight…heeheeheeeeeeee!!!), and long road trips. We have been going to Prince Edward Island every summer now for ten years, usually for two weeks, but this year we lucked out and are going for four whole weeks! Everyone is so excited. I am trying to deal with the fact that we will be living in the camper for so long, with more stuff needed, and how to find room for it all. Everything has to have a place with me. But we love it. You have given me such good ideas. Thank you so much. I love your creativity! 🙂
Oh, yeah, Jasmine. They never fight. 😛
Have fun on PEI. It sounds like a blast! Send pictures!
love all the Modifications everyone has done… we just bought a used 2001 Palomino and have started cleaning (lots of mold from the prior owners putting it away wet 🙁 ) and making it ours…. will send pictures as we go along…. big question I have is most of the plumbing is missing and was hoping someone could provide some pictures of what it should look like (or what I need to put into this to make it useable )…. also were does everyone get the reflective bubblewrap sheets for the windows…
Thank you
Congrats on the new camper, Scott! You should be able to find an owner’s manual at PopUpPortal.com that may have more information about the plumbing in your camper. You can get the Reflectix for the windows at HomeDepot, I hear. Never done it, but I hear it makes a big difference. 🙂
Has anybody tried sewing pockets on the curtains/drapes to hold light weight personal belongings? Perhaps on the interior areas of the bunks…
We’ve been stumbling around the internet and found your blog along the way.
We love your work! What a great corner of the internet 🙂
Hi Larissa, I love all your pictures and ideas, keep them coming. I just purchased a 1999 Coleman Santa Fe 3 days ago. I am so excited and am going to borrow some of your ides, especially the vinyl on the stove. It is in pretty good shape and can hardly wait to get started. I have yet to get her a name 🙂
Brenda
Hi Larissa. I know this is an older post but I was wondering: I use my stove all the time an it is an ugly stainless mess. Has anyone had any suggestions on what to do to cover the lid and make a nice backsplash when you do use your stove?
Help m Ms. Wizard!!!
Check out Monte & Maria’s camper makeover here. Maria had her stove powder coated to hide the years of abuse. I know you can also use high heat spray paint on your stove. They make some that is specifically for ovens and grills. 🙂
I’m loving all your ideas! I was wondering…since some time has passed now, do you you still sorta regret the coleman vanity (since it made it harder to close up the camper?)? Just wondering since we are doing some renovations and trying to figure out how to better organize that area. And I really liked that vanity! 😉 thank you!
I like our VanityMate a lot, Patty. It made the last trip with teenagers so much easier. It does put a little bit of stress on the roof, though. Those VanityMates are tough to find, so it may not even be an option for you. I’ve had trouble locating one for a friend. If you come across one, I’d snag it up quick. 🙂
This looks adorable, but with the recommended 14″ space between these tiles and a burner, how do the plastic tiles not melt or ignite when they are SO close to your gas burners? How have they held up since you posted this? Just curious on the long term result. thanks!
We don’t use the indoor stove a whole lot, but we haven’t had any issues the few times we have. These tiles are holding up really well. 🙂
Where is the mirror from??
It is called a Coleman Vanitymate, Jess. Coleman doesn’t make them anymore, but you can sometimes find them on eBay.