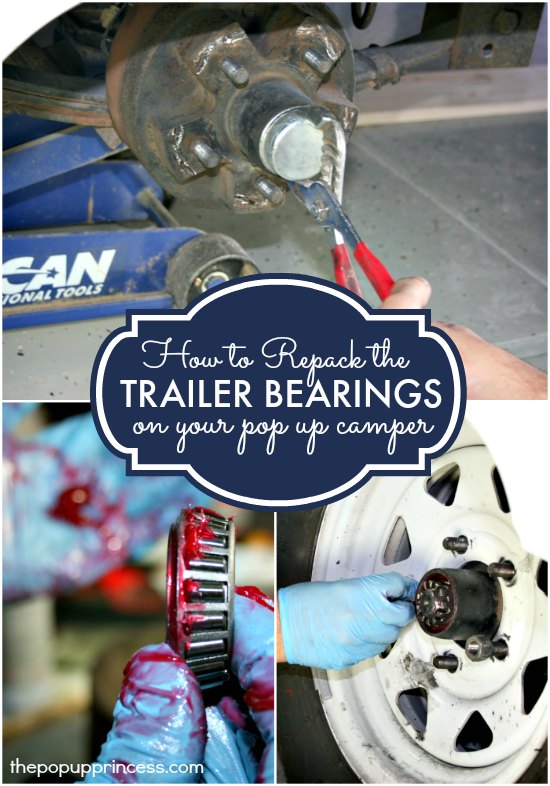
 Today’s post is on a subject that intimidated me for a very long time. Mr. TypeTwoFun came from a handy family, so this was no big deal to him, but for me… well, let’s just say the thought of writing a post on trailer bearings made me want to cry. Can’t we just talk about curtains …and bedding …and paint again? Pleeeease? 😉
As intimidating as this subject is for me, though, I realize how important proper maintenance of your camper really is. In fact, proper maintenance of your trailer bearings is just about the most important service you can perform on your pop up camper. It’s like changing the oil in your car, in that it is a fairly simple thing to do, but neglecting it can have catastrophic effects. The grease in your hubs keeps everything moving around freely. If that grease isn’t checked regularly and properly maintained, increased friction can cause your wheel bearings to overheat and seize. Once the hub seizes, which will most likely be in the middle of a long trip, you’ve got a costly repair on your hands. It’s best to just keep on top of bearing maintenance right from the start.
Let me start by saying that every trailer is different. You should always refer to your camper’s user manual for instructions that are specific to your trailer. Even though this is not new stuff for Mr. TypeTwoFun, we still broke out that manual to make sure there wasn’t something specific to our trailer that we were missing. This is what the wheels on our 1999 Coleman Santa Fe look like. Yours may look a little different on the outside, but the inner workings should be nearly the same.
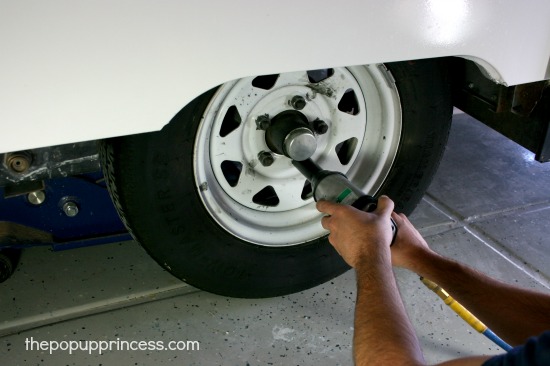
We started by removing the wheel. Mr. TypeTwoFun used an impact wrench to remove all the lug nuts and then slid the wheel off and set it aside.
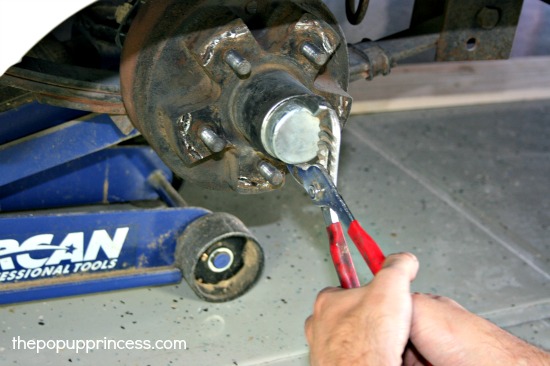
Once you’ve got the wheel off, you’ll want to remove the dust cap. We did this with a pair of channel locks. Clamp the channel locks onto the dust cap and wiggle them up and down until the cap comes loose. You can also use a flathead screwdriver to pry the dust cap off, but we found this method easier.
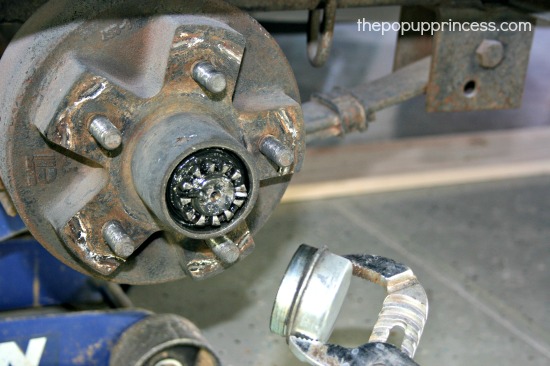
With the dust cap off, here’s what it should look like inside. From here, you can see the spindle and castle nut (or spindle nut). If you look closely, you can also see a cotter pin, which is inserted through the spindle. The end of the cotter pin is bent at an angle to lock the castle nut in place.
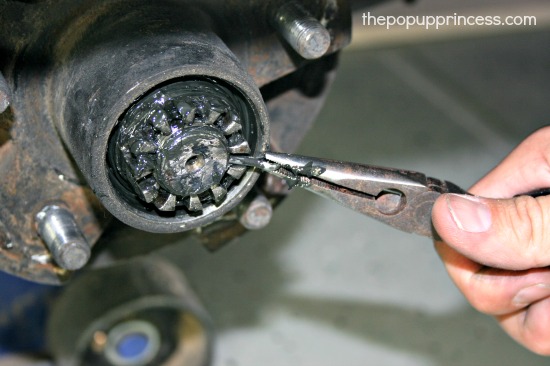
Simply straighten out the end of the cotter pin and pull it out with a pair of needle nose pliers. Remove the castle nut from the spindle.
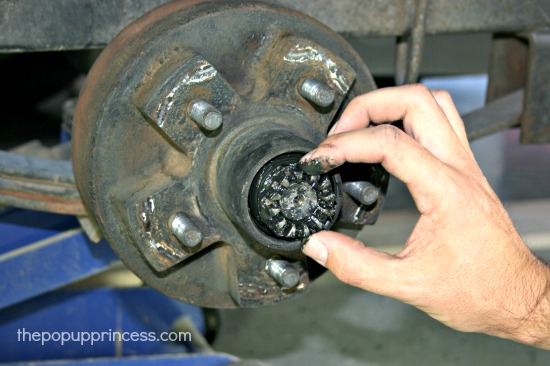
Now jiggle the hub slightly to loosen the outer bearing. Usually, this will loosen the outer bearing enough to remove it by hand. You might also have a washer here between the castle nut and outer bearing. Our Coleman didn’t have a washer, and there was no mention of it anywhere in the user manual either. When we visited our local trailer shop, the mechanic said that some assemblies have them and some do not. Your assembly might be different from ours, especially if you don’t own a Coleman camper. In either case, remove the castle nut, bearing, and washer (if you have one), and set them aside in a clean container.
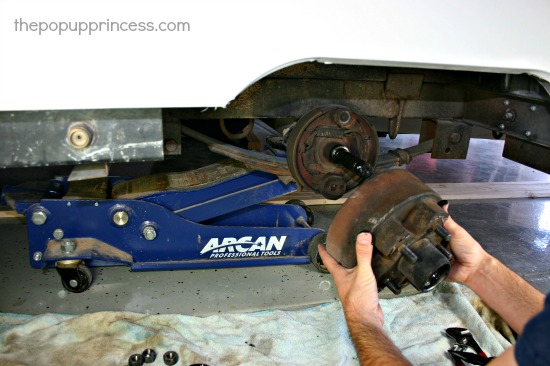 Now you need to remove the inner bearing and grease seal. Pull the hub off the spindle and place it with the wheel studs facing up on a stable surface. Mr. TypeTwoFun took a wooden dowel that roughly fit the center of the hub and placed it against the inner bearing. Then he used a mallet to tap the wooden dowel, forcing the bearing and grease seal out of the other end of the hub. You may also be able to pry the grease seal up with a flathead screwdriver and remove the inner bearing by hand.
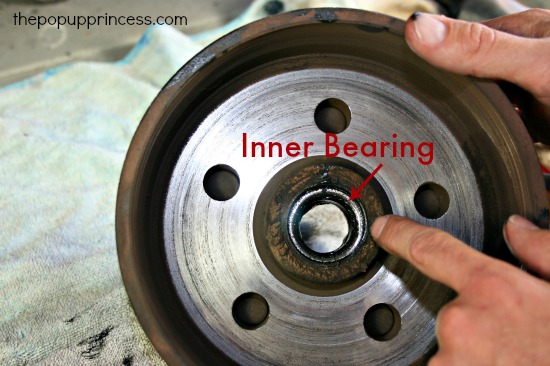 Once you’ve removed the inner bearing and grease seal, you can place the inner bearing with the outer bearing and castle nut in a clean container. You can discard the old grease seal. It should be replaced every time you remove it to repack the bearings. You can find replacement seals on Amazon or at your local auto or trailer parts store. Our hub assembly requires these seals, which we were able to find at a local trailer parts store. Take note of the numbers stamped in the rubber part of the seal, as those will help you locate replacement seals. If you can’t find part numbers on your seals, you can always measure the inner and outer diameter of the old seals to determine the size of seal you’ll need.
You’ll need to clean and inspect your used bearings well before reinstalling them. Start by wiping your bearings and castle nut down with paper towels to remove the excess grease. While you are wiping them, inspect them for pitting, scratches, excessive wear, discoloration, or other damage. Look for nicks in the roller and dents in the roller cage. If you see any of these on your used bearings, discard them and purchase replacement bearings. If your bearings past muster, you can reuse them, but you’ll need to clean them with a solvent–like acetone or mineral spirits–first. Soak the bearings and castle nut for about an hour and wipe them down with a dry paper towel. Then allow them to drain free of the solvent.
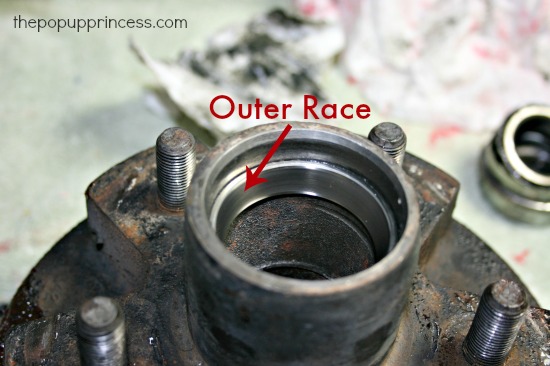
While your bearings are soaking, it’s a great time to inspect your inner and outer races. Wipe any excess grease from inside the hub and examine the races as you did the bearings. Look for pitting, nicks, and discoloration. If you races look good, you should be able to reuse them unless you are replacing your bearings. As a general rule, whenever you replace the bearings, you will also need to replace your races. We didn’t need to replace our races, so we inspected them and cleaned them well without removing them.
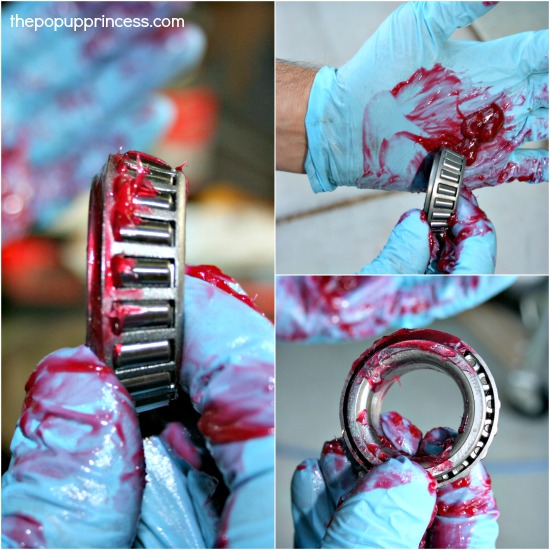 Once your bearings are dry, you should repack them with a high quality grease. Mr. TypeTwoFun likes to use the red high temperature grease made specifically for bearings, which is usually available at your local auto parts store. You can use a bearing packing tool like this one, but it’s also just as easy and effective to pack the bearings by hand. Place a good sized glob of grease in the palm of your hand, and use the wide end of the bearing to “scoop” the grease up. Mr. TypeTwoFun says it’s like taking a chip and scooping up dip. You want to use enough pressure to force the grease up through the bottom of the bearing and out through the rollers on the side. Turn the bearing a quarter turn and repeat this process. Continue turning and scooping until your bearing is completely filled with grease. Now flip the bearing over and repeat this process on the other end. It’s really important to make sure there is enough grease in your bearing, so be generous with your grease.
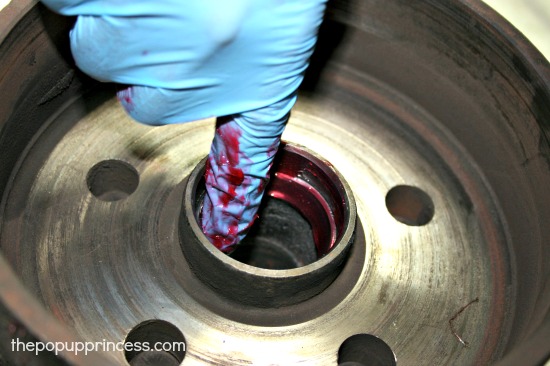 If you haven’t already, clean the inside of the hub. Make sure any old grease or buildup has been removed. Then run a good sized glob of grease around the inner race.
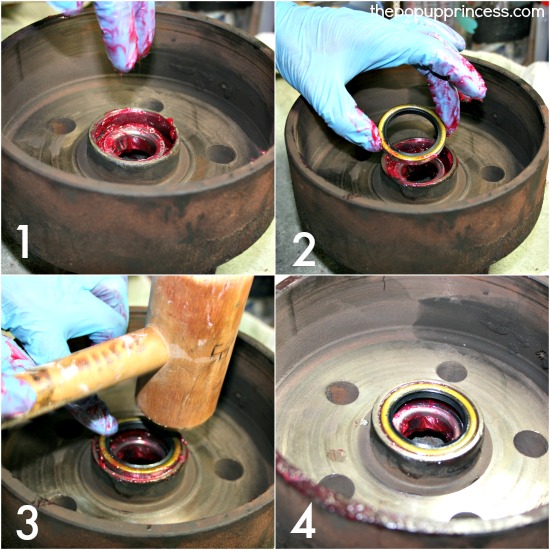
Place your newly packed inner bearing into its place in the hub. Next install the grease seal and tap gently with a wooden mallet until the seal sits flush. Wipe off any excess grease.
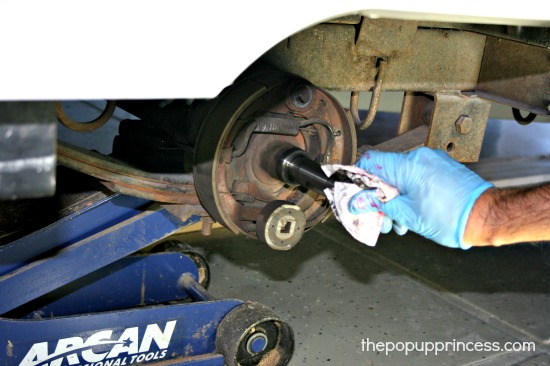
Before you put the hub back on, you’ll want to clean and inspect the spindle. Remove any excess grease or debris and check the spindle for nicks or excessive wear. If your hub slid right off when you removed it earlier, you should be good. If it was difficult to remove or there is damage to the spindle, you may need to replace it.
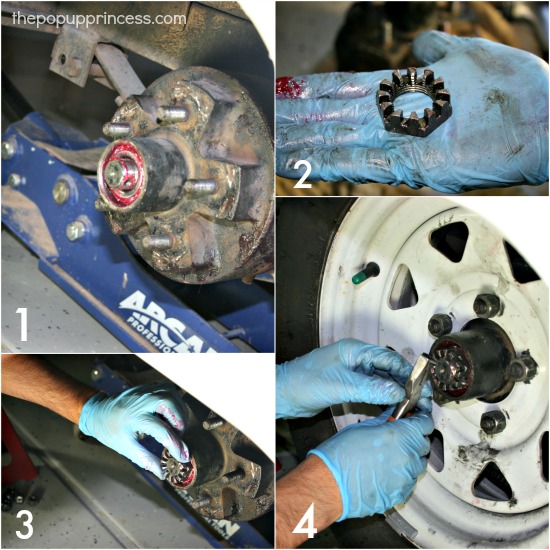 Grease the outer race and slide the hub onto the spindle, taking care not to damage the spindle or the grease seal. Slide the outer bearing into its place within the outer race. Make sure the bearing is seated, and if you have a washer, replace that as well. Take your clean, dry castle nut and thread it onto the end of the spindle. Tighten the nut until it stops or becomes snug. Rock the hub and push it in to make sure it is fully seated. If necessary, tighten the nut again until snug. Here you can put the wheel back on the hub. Be careful not to get debris in your bearings and tighten your lug nuts one at a time in a diagonal or star pattern. Once you are sure everything is seated properly, loosen the castle nut about a quarter turn. If the bearings are too tight or too loose, they will fail prematurely. You can experiment with the castle nut to feel the difference in play when the nut is too tight or too loose. This will help you find the perfect adjustment. You want the wheel to rotate freely without excessively play. When you rock the wheel front to back, you should barely be able to feel the hub move. If the castle nut is too tight, it will hinder wheel rotation. Once you are satisfied with your adjustment, insert the cotter pin and bend the end to lock it into place.
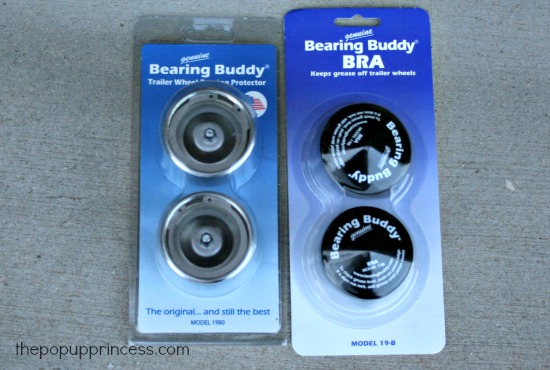
You can replace your dust cap at this point, but we really wanted a better way to grease and maintain our bearings. Another pop up camper owner recommended Bearing Buddies, so we ordered a set off Amazon for the camper. The Bearing Buddy website has a great chart here for determining what size you need to order. We measured our hub bore using a cheap set of calipers and found that our hub measured approximately 1.98 inches, so we ordered the Model 1980. We also ordered the Bearing Buddy BRA to keep the excess grease off our trailer wheels.
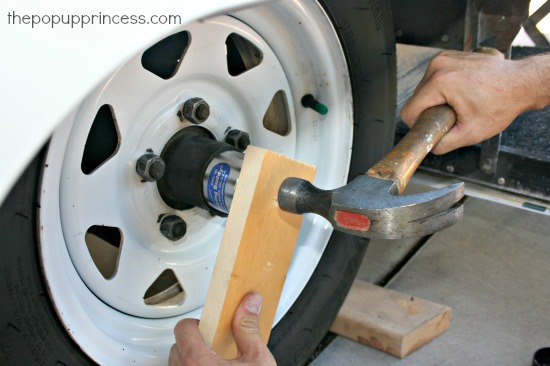
To install them, you simply hold the Bearing Buddy against the hub with a small piece of wood and use a hammer to drive it–making sure it stays straight–into place. It should fit tightly in the hub.
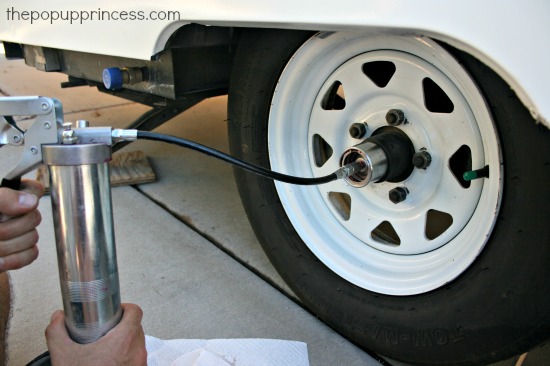
You can use a hand grease gun to easily add grease to your bearings as needed. You can check your lubricant level by pressing on the edge of the piston inside the Bearing Buddy. If you can rock the piston, the hub is properly filled. If the piston doesn’t move, add grease until the piston moves outward about 1/8 inch. How often you need to grease your bearings will depend on how frequently and in what conditions you use your camper. Definitely check your lubricant levels before you head out to camp. When towing the camper, it is always a good idea to periodically check your hubs to make sure they aren’t overheating. When we are on our road trips, Mr. TypeTwoFun checks our bearings, by reaching down and feeling them, every time we get gas. If they are abnormally hot, he’ll add more grease. It gets super annoying, but I know he’s doing the right thing. An ounce of prevention and all that… 😉
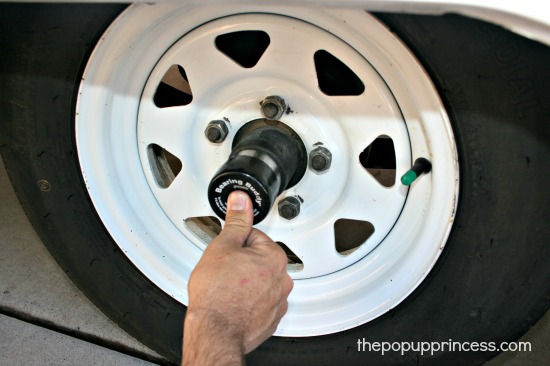
To keep excess grease in and dirt out, we use the Bearing Buddy BRA. They are super simple to install. Place the BRA over the Bearing Buddy and, using your thumb, press the center of the BRA until it slides into place. Pressing in the center of the BRA expels the air and creates a snug fit.
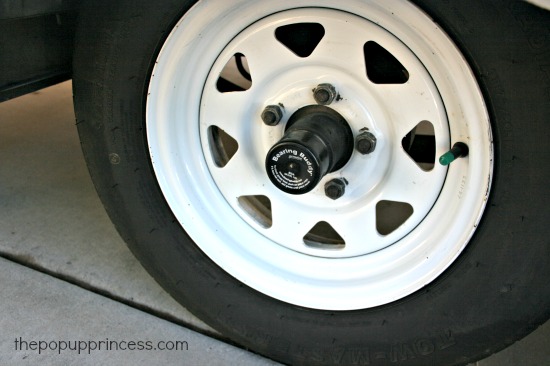
That’s all there is to it! Aren’t they pretty? I love how clean and neat my wheels look now… and while maintaining your trailer bearings might not be as fun as decorating the camper, it is definitely more important. Maintaining the working parts of your pop up camper will ensure that you can enjoy that pretty new interior for a long time to come. 🙂
Happy Camping!
Disclaimer: This post contains Amazon affiliate links. The Pop Up Princess is a participant in the Amazon Services LLC Associates Program, an affiliate advertising program designed to provide a means for sites to earn advertising fees by advertising and linking to Amazon.com. This means that if you choose to purchase an item from a link in this post, The Pop Up Princess earns a small advertising fee to help pay for future projects and posts… so thank you! 🙂
Happy Camping!




Hi Larissa,
I found your blogs couple of weeks ago when I was cruising Pinterest looking for some camping meals. (My mom and I are tent campers and just finished a short little weekend trip) Regardless, I’ve read every single post on your blog these past two weeks and between that and my mom getting older (shh don’t tell her I said that) and seeing all the popups at the campground…I’ve been inspired. I was searching Craigslist all day today and am going to check out some tomorrow. I’m super excited to remodel a PUP (<– see I've learned the lingo too 😛 ) and I was just wondering if you had any tips for me while looking for a PUP to buy. We're not afraid of fixing things but we don't want this to be a giant project. Any tips or advice???
-Bridget
(P.s I love your blog!)
Hello, Bridget! Glad you stopped by. Pop up campers can become seriously addicting. 😉
When shopping for your first PUP, you want to make sure that you find one with “good bones.” Walk the floor and make sure there are no soft or low spots. Make sure the roof doesn’t leak. It’s a good idea to use a hose to spray the roof while the camper is popped up, then check for leaks in the roof and the canvas. Check the canvas for leaks and mildew. Mildew can be cleaned, so it isn’t a deal breaker, but it is a lot of work. Check your plumbing. Make sure your faucet runs from both the city water hookup and the water tank. Check the lights and electrical, too. Make sure everything is in good working order and that the owners show you everything before you purchase it. Here’s a great guide for buying a used pop up camper. Let me know how it goes! 🙂
Hello,
First off I have to tell you I love your blog. I just purchased my first pop up last week and am completely redoing it. I am starting with all the maintenance aspects of the PUP before I start on the inside. I am reading your article on greasing bearings and I want to make sure I followed correctly. The first portion is one method and when you explain how to do it with the bearing buddy that is another method? The Buddy bearing method seemed a lot quicker and easier since I have never done any kind of DIY, the quicker method is very much appealing to me. Am I correct in the way i read the article?
Thanks.
Hi, Kelly! So glad you are having fun with the blog. We’re having a lot of fun here, too. 🙂
The Bearing Buddies are not meant to replace the process of cleaning (or replacing) and repacking your bearings. If you just bought a used trailer, you should absolutely have a look at those bearings, since you really have no idea how the previous owner maintained them. There is no easy way to get around taking the axle apart to get in there and examine them. Where the Bearing Buddies help is the routine maintenance of adding grease to the hubs. The Bearing Buddies replace the dust cap that we pulled off in the beginning of the tutorial. They make it much easier to check the grease levels and add additional grease as necessary. Does that make sense?
That makes perfect sense. Thanks again as your blog truly inspired me to buy a PUP instead of a brand new TT.
Hi,
After reading your How to Grease and Repack Your Trailer Bearings, I looked into bearing buddy and after so many alternate reviews I’m not sure which one is true. After you put on your bearing buddy, have you since checked your bearings and does it work? On sites that I have tried to read, a few users say they’re amazing, a few say they are junk and will break your seals/breaks/bearings. I would like to hear from someone that has them on and after trying them if you still recommend. Have you heard of “Spindle Seal” for use with Bearing Buddy® on trailers with brakes or as replacement seals. Thanks for your time.
We’ve had the Bearing Buddies on for a year with no complaints, Joe. They came highly recommended by our local trailer shop, too. Now, we haven’t repacked the bearings, and don’t anticipate having to for a while, but we check and grease them often and are still very happy with them. 🙂
I just purchased a 1998 Viking pup. I had no idea what to do. I’ve never owned a camper before and I had no idea you could remodel. I found your site and it has helped me so much thank you !
Approximately how long should this take? Trying to make sure I have enough time set aside to do it!
It took Mr. TypeTwoFun a few hours to do both sides, but it will really depend on your skill level and what you find when you get in there, Doug. 🙂
I have always heard that “Bearing buddies” were to be used on boat trailers, to help in keeping the water out of the axle. It’s a good practice to take the hub off and clean as stated above and then add new grease.
Thanks for the input, Terry. I’ve heard mixed things on Bearing Buddies, but we have loved having them on our axles. We’ve checked the bearings and hub periodically, and have been really pleased with them. I’d put them on the trailer again in a heartbeat.
Great web site, I’m becoming a used PUC do-it-my-selfer with a big thanks to you. A tip I might add that it a great earlier warning system on the road is the purchase and use of a laser infrared thermometer temperature gun every time you stop, such as to get gas or at a rest area. Just shoot it at your wheel ups and get to know your heat readings. Then if you see them spike you know you have problem brewing. A simple trailer trick for under $15.
Just a warning about the possibility of overgreasing bearings with Bearing Buddies on electric brake hubs. Grease can sometimes be pushed through the seal and get onto the surface where the magnet contact the hub making the brake ineffective. Also cotter pins are single use items and should be replaced same as the grease seal. On a safety note, a jack should not be relied upon solely. Get an axle stand in there before wheel removal.
I forgot one other point. Always use a new cotter key when repacking the bearings.