We’ve been gearing up for the new year this month. I’ve been busily planning this summer’s epic vacation, and since we’ve decided to be on the road three weeks this year, I knew the camper would need a few modifications. Keeping all of our toiletries and wet clothes neatly corralled on a long trip always proves to be a challenge. I’m excited about our tension rod shelving, and I think that will help a lot. One thing we’ve always struggled with, though, has been wet towels. We’ve had several methods over the years, including the mod where you mount clothesline under the bunkends. Yeah, that was an epic fail. None of these solutions we tried ever worked well for us. While I was looking for ideas on Pop Up Portal, I came across this awesome project. I can’t take credit for the idea–it wasn’t mine–but we’ve made a few modifications that I like a lot, so I thought I’d share them with you. 🙂
- 3/4″ diameter wooden dowels in the length you want for each bunkend (We used hardwood for extra durability.)
- 1″ webbing straps (We bought this at Hobby Lobby.)
- Medium metal grip clips
- #12 finishing washers
- #10 flat washers
- 3/4″ wood screws
The first thing we did was cut our wooden dowels to size. We put a 3′ length dowel on each side of the full size bunkends and used 4′ dowels on the king sized ones. Then we stained them the color we wanted and gave them a coat of Helmsman Spar Urethane to waterproof them. While they were drying, we cut our webbing to size.
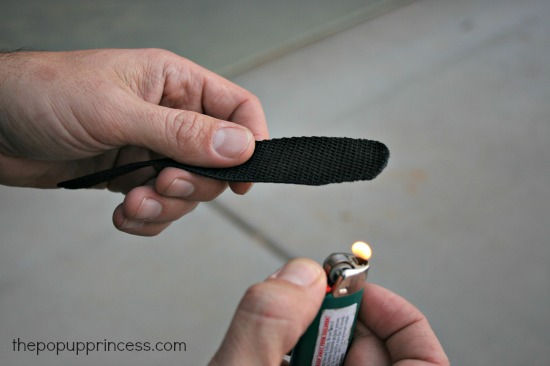
We cut all the webbing straps at 6″ and, to prevent them from fraying, we heat treated them with a lighter. We wanted a nice clean look on the towel bar, so we rounded one of the ends of each strap.
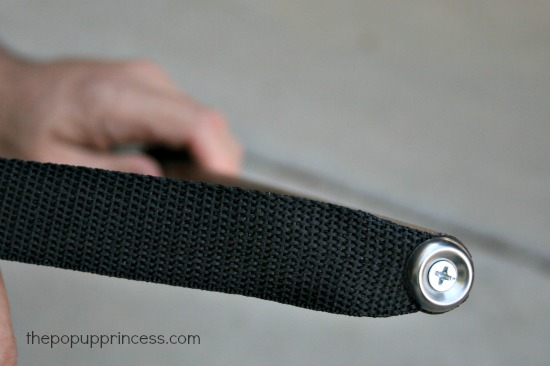
Then Mr. TypeTwoFun put the #10 flat washer inside the #12 finishing washer and used a wood screw to attach the webbing straps to each end of the wooden dowels. Like this…
Once you attach a webbing strap to each end of the dowel, you have your towel rack. When we had all four towel racks made, we attached them to the camper. We used our wood screws and #10 flat washers to attach the other end of the webbing strap directly to the underside of the bunkend.
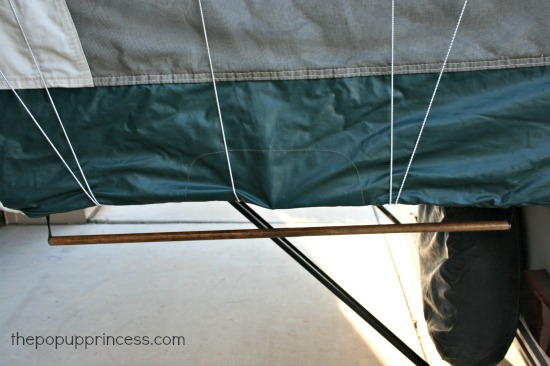
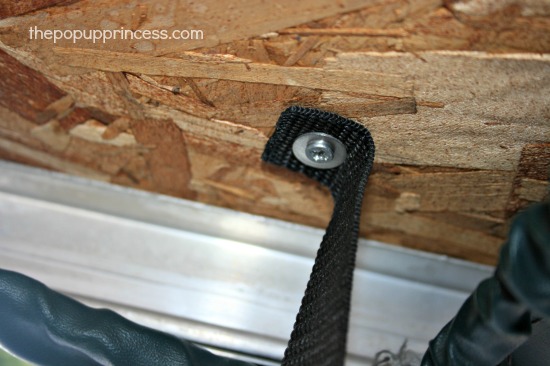 So now that you have your towel bars attached to your bunkends, they should look like this. We hung ours close to the outside edge of the bunkend so our kids wouldn’t have to reach too far underneath the camper to hang their towels.
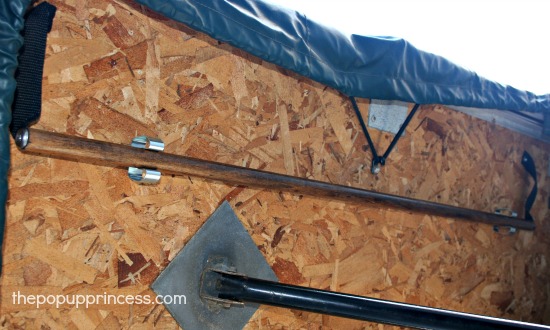
To keep the towel bars out of the way when we close up the camper, we installed metal grip clips underneath the bunkends. These are very similar to the ones that keep our bunkend support poles stowed and out of the way when we fold up the camper. We found ours here on Amazon, after an exhaustive search of both the orange and blue big box stores.
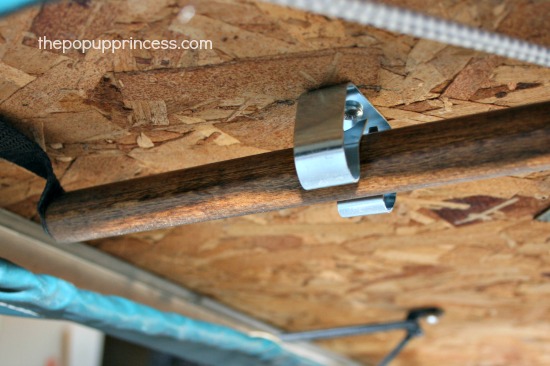 Mount your grip clips to the plywood underneath your bunkends. We offset our clips a bit so that we wouldn’t hit them when hanging our towels. When we are ready to fold up the camper, we just pop our towel bars into the clips on the bunkends and they are out of the way. We slid the bunkends in and out several times to make sure the clips didn’t get caught when we closed up the trailer. It all worked perfectly.
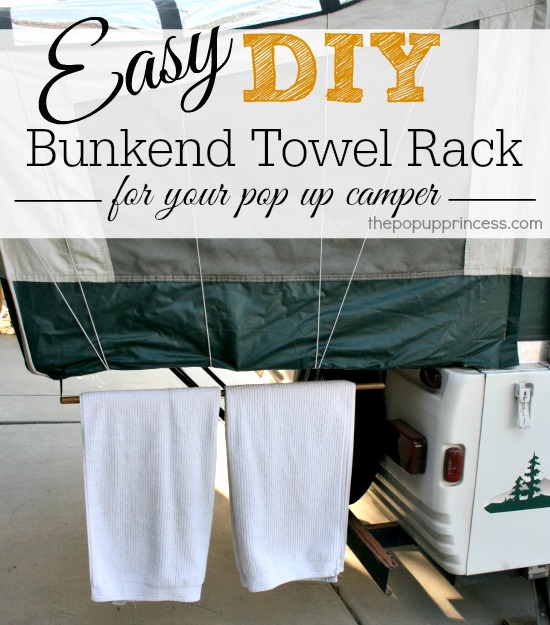
When we need them, we just pop them out of their grip clips and they hang at the perfect height for towels. They are actually quite long, and can accommodate several towels and swimsuits. It’s a much better solution for all our wet clothes and towels, and I’m thinking I can use it as a clothesline in a pinch, too. After getting stuck in Bear Lake without laundry facilities, I’m always on the lookout for easy ways to clean and dry our clothes. 😉
That’s all there is to it! It was a super simple modification that took us only about 45 minutes to do. The hardest part was waiting for the stain and urethane to dry. I can’t wait to take a camping trip and try my new towel racks out. What is your system for hanging wet items at the campsite? Have you found a system that works for you, or have you already tried this mod on your own camper? We’d love to see it! 🙂
Happy Camping!
Disclaimer: This post contains Amazon affiliate links. The Pop Up Princess is a participant in the Amazon Services LLC Associates Program, an affiliate advertising program designed to provide a means for sites to earn advertising fees by advertising and linking to Amazon.com. This means that if you choose to purchase an item from a link in this post, The Pop Up Princess earns a small advertising fee to help pay for future projects and posts… so thank you! 🙂
Happy Camping!






Amazing! I’m getting ready to gear for spring, and I think we just might have to make these! It looks like an inexpensive solution to hanging up towels. Love it!
Also, how did you take all the cabinets out to paint them? I’m looking into painting the laminate/paper-wood stuff in our pop up too, but I’m not sure I can undertake gutting the thing!!
Thanks, Tenessa! 🙂 The cabinets are all screwed into the walls and floor of the trailer. We took out all the screws and carefully brought them out. There isn’t much to them once they are unscrewed, and they can be quite unstable, so be careful. And take lots of pictures so you’ll know how to put it all back together again. Of course, you don’t have to take the cabinets out to paint them. Both Ramie and Cassie painted their cabinets while they were still in the trailer. Just make sure to clean the cabinets well and use a good primer (we like Glidden Gripper or Zinsser Cover Stain) before you paint. Let me know if you have any questions when you finally decide to take the plunge!
The bunk end towel rack mod looks great! However, in considering this, I have some reservations about whether the screw through a particle board bunk end may hold when you add weight of wet towels. Have you considered that or could you help me relieve this concern? thanks
May, before we did this towel rack mod, we were using clothesline and plastic cable clips screwed into the particle board. We loaded those clotheslines up with wet towels, shower lanyards, and swimsuits. We had the plastic cable clips break on us all the time, but the screws never pulled out of the particle board, so we felt pretty confident with this mod. We took a quick overnight trip a few weekends ago to test the new towel racks out. The weight of weight towels was no problem whatsoever. Hope that helps. 🙂
Great website! I just found you via a pin on Pinterest. We are new to the PUP camping world, and I’m looking for ways to improve are 2008 Fleetwood E3 (yes, we knew about the leaking roof problem from the get-go; we Rhino lined the roof and replaced the vinyl ceiling and wood layer with interior paneling from Home Depot. I’m currently looking for storage mods and how to keep the PUP warmer during colder months. I looked forwards to investigating your site more.
Any tips on having a toddler camping in the PUP?
We had an older pop up and never (I mean NEVER) used the stove or icebox (that explains how old it was). So, we took that whole cabinet section out and it was the perfect size for a pack n play. As the kids got older, we used plastic drawer units there, but could have reinstalled it or made a new cabinet with stove and fridge had we wanted.
Awesome write up on the under bunk rods. I’m actually going to follow your instructions and do 4 on my pup on about 5 minutes
Thanks, Ryan! You’ll have to let me know how it goes! 🙂
I’m working on adding towel bars. I plan to switch the locations where the clips and straps are mounted. That way the bars will be set back about 6 inches, which should offer a bit more protection from rain.
We thought about that, but were concerned that the towel bars would be too difficult for the kids to access if we put them back any further. I didn’t want them bumping their heads on the pull-out bunks or using the towel bars to steady themselves. We had a very wet camping trip a couple of weeks ago, and our towels stayed surprisingly dry. I was pretty happy. I’d love to see pictures of your mod when it’s all done. 🙂
Hi! Great ideas and I’m so excited to get started on adding them to our PUP. In this post about the bunkend towel rack, you mentioned you use the same clips to keep the bunkend supports out of the way when you push in the beds. Do you have a photo of how you have them screwed into the bed? We always put them in the front outside storage box but would rather not since that box gets loaded up quick with other supplies.
You can find those pictures in the post, Pam. See the silver metal grip clips holding the towel bars up and out of the way? They come with a screw, which we used to attach them to the plywood bottoms of the bunkends. 🙂
I like this idea. However, my popup does not have the clearance for the clip grips so I have 2 plastic buckles like on parachute cord bracelets. I have two mesh screwed in under the bunk with female adaptor buckle attached to the ends. The dowel had the male adaptor buckles on the mesh ends. I store it under the mattress. It may be more work to attach it but it works well. Thanks for the idea!!!
Matthew
We too didn’t have the clearance to place the rod in the metal clip, so we stapled shoe strings to the underside of the bunks and on the end of each rod we used the webbing material (really recycled lanyard pieces and made a loop of fabric screwed into each end of the rods. We store the rods next to the mattress also.
Thank you for sharing!! I am so glad that I found your website, I am so excited about this towel rod idea. We bought a 2008 Fleetwood/Westlake pop up a
little over a year ago and greatly appreciate all the wonderful ideas. We are new to the camping and pop up camper world and are learning new things eveey day. Thanks again.
Ingenious! This worked so well, I continued the application inside using bamboo garden rods found at Ocean State Job Lots for 1.39 each. They are very cool looking; didn’t need to be treated as bamboo is naturally moisture/mildew resistant. This also works for privacy curtains inside; I mounted along the roof support and have tab curtain panels that I just used shower curtain rings for; easy up and easy down! thanks for the great idea… morphed into something I hadn’t even thought of too. Happy Glamping! ~janie
Oh! Good idea, Janie! Glad to hear it worked so well for you.
Loved this ideas so I went ahead and installed as described.
We have a ’94 Jayco and there just wasn’t enough clearance for the broom clips or the wood dowel when tucking away the bunks. I put snaps on the straps and the ends of the dowel. I just unsnap the dowel and tuck under the mattress for stowing. Hung a wetsuit and towel, works like a charm. Will be doing the same on both sides of both bunks.
Thanks for the inspiration.
I’ve seen that mod, Jason! Glad to know it works so well for you! 😀
Great idea I’m going to do the same thing to my camper!!
Great idea im pinching this one too!
Our PUP is a 1995 and the support posts for the bunkends store in the camper not under, so we don’t have the space for the grip clips. Any suggestions? I don’t want to detach the rods each time if I don’t have to.
Thank you for all the great ideas. I’ve only camped with my family twice and after seeing your website we went out and bought a PUP which we are renovating and hope to have ready for spring 2017. I can’t help but notice in one of the pictures above you appear to have a bunk end support. Please could you confirm if you have purchased or customized something. My camper is 20 years old and only has 2 support poles for a queen sized bunk end. I’m nervous about it collapsing. (metal fatiguing or the plywood giving way) thoughts?
Cheers,
We haven’t modified anything. If you are referring to the metal supports that run along the plywood base, those were standard. If your camper is older, you might want to replace the particle board bunkend bottoms, though. Especially if they are sagging. 🙂
Ace hardware had everything needed for this project! Was hoping for a quick project instead of waiting for Amazon. Yay!
Thanks for the great idea!
i ADDED ONE TO MY FOLDING TABLE FOR OUT SIDE THE CAMPER ALSO THANKS
An easy way to add some hanging space inside the camper is to use the straps that hold the door up to put a rod through. Granted things can be in the way somewhat depending where your kitchen is in relationship to the door, but if it’s raining and you need to hang things inside to dry it works great. This works in a Coleman/Fleetwood camper with the one piece door, but I don’t know about other brands that don’t have the one piece door.
We tried that idea, Nancy, but found that the hanging items were always in the way. It’s a good idea, though, and would work great for a different layout.
We always hang the broom from those straps when they aren’t holding up the door in our 2006 Santa Fe.
Love the towel holder idea!
Thanks for All the directions and tutorials, from recovering the cushions and curtains to adding doors to the dinnette chairs! I have been completely remodeling my popup with your site! Just finished my last projects with the stove backsplash and these towel racks! Love this site for all the ideas! We love our popup. My twins are 6 and I also have a little 4yo girl, and my family loves camping in our old but new home away from home!! This is coming from a person with no experience in anything!! 😂😁Thank you!!!!