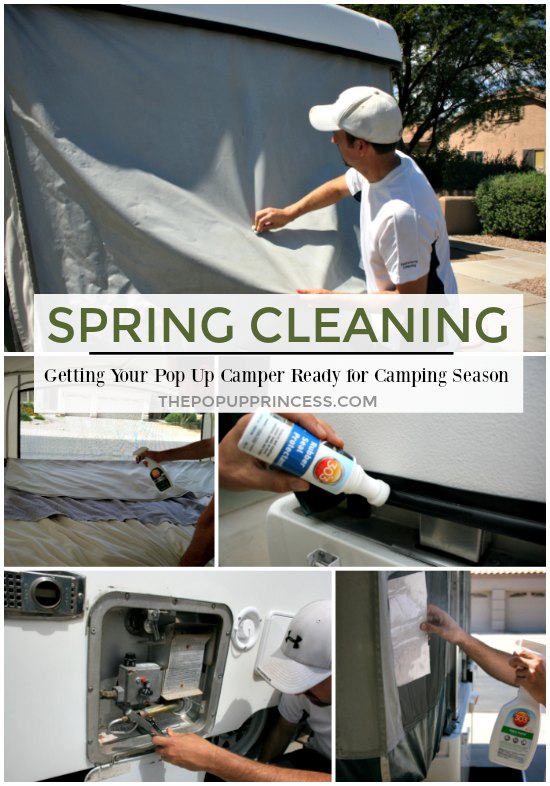
 It’s that time of year again! When the weather warms up around here, we start to get the bug. I’ve already begun planning for our summer trips, and I want to make sure our pop up camper is ready for the long haul. Because I get asked quite frequently how we get our camper ready for the season, I thought I’d share our process with you. Keep in mind that this is just what works for us. Your spring cleaning process may be completely different than ours, but I thought sharing our system with you might help those newbies going through their first camping season.
Our spring cleaning to-do list is quite long, so I’m breaking it up into two separate posts. Today, we will be talking about all the things we do to the exterior of the camper to get it ready for the summer. Next week, we’ll talk about the interior. It seems like a lot of work, but we are usually able to knock both the exterior and interior maintenance out in two weekends or less. I promise, it isn’t that bad–and you can always break these up into individual projects and work on a task here and there. Just remember that some of these things are quite important and should be done at least once a year, so don’t neglect your maintenance. Okay, with that out of the way, let’s dig in! 😀
Clean and Waterproof the Canvas
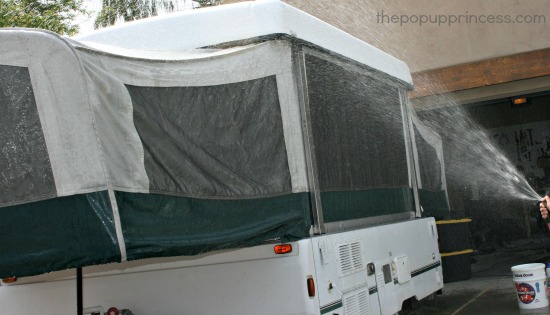 The very first thing–and I would argue one of the most important–we do is clean and waterproof our camper canvas. Pop up camper canvas is pricey, so I want to make ours last as long as possible. We have fabric canvas. The top section (around the windows) is made of Sunbrella fabric. The bottom (green stripe) and tops of the bunkends are vinyl. If you have “canvas” that is completely vinyl (like the canvas on our Rockwood camper), you’ll follow a slightly different process.
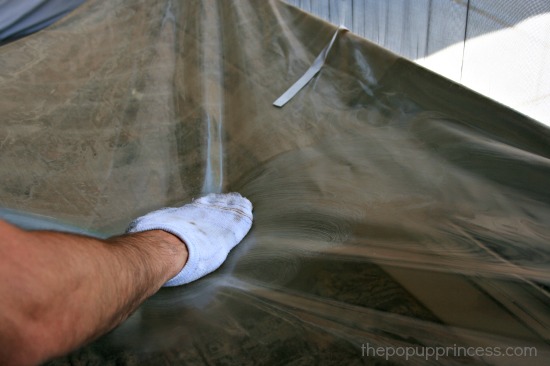
To make sure our fabric tenting doesn’t suffer unnecessary wear, we clean it well to remove dust and debris before it works itself into the fibers of the canvas. Once we are satisfied that our canvas is clean, we spot check the waterproofing. When your waterproofing is still good, the water should bead off the fabric. We’ve demonstrated what it should look like in the video below.
If the fabric has begun to absorb water, you’ll need to apply a good waterproofing product. We love 303 High Tech Fabric Guard. It is easy to apply, relatively inexpensive, and it is recommended by Sunbrella, the manufacturer of our canvas fabric. Best of all, it works great! If your canvas is vinyl, DO NOT use the High Tech Fabric Guard on it. You won’t need to waterproof vinyl, just protect it from sun damage. Need more info on how to care for your canvas? We’ve detailed just how we clean and waterproof our tenting in a post you can find here.
Clean and Protect the Vinyl & Windows
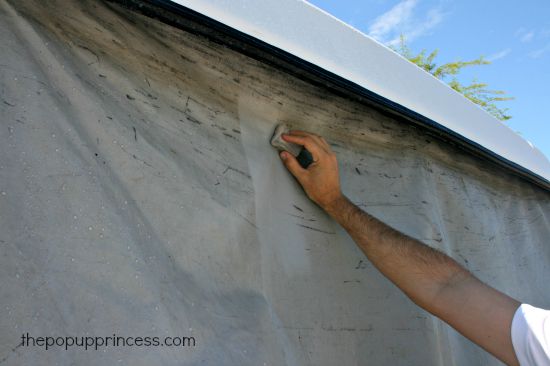 Once we’ve got the fabric cleaned, it’s time to give all the camper vinyl some love. If you have all vinyl tenting, you can use this method to clean your canvas. We clean all the black marks and dirt from the tops of the bunkends with a Magic Eraser and a good cleaning solution. We like either 303 Multi Surface Cleaner or LA Totally Awesome Cleaner (also available at DollarTree). Once we’ve gotten the vinyl clean, we condition it with either ProtectAll (also available at Walmart in the RV aisle for much cheaper) or 303 Aerospace Protectant. I like both, and it really just depends what I have on hand. Want more details on how we clean and treat our vinyl? Check out this post.
To clean and protect the windows, we use ProtectAll. We have been so happy with how well it has worked for us. When we first got the camper, the windows were disgustingly dirty and yellowed. One application of ProtectAll, and they looked new again. In fact, our windows looked so amazing that we put that project on our yearly spring cleaning to-do list. This prevents the windows from becoming dry and brittle. We have also used a similar product called PlastX, and it works pretty well, too, so if you can’t find ProtectAll in your area, that is another option. You can read more about our window cleaning process here.
Clean the Exterior and Apply Seal Protectant
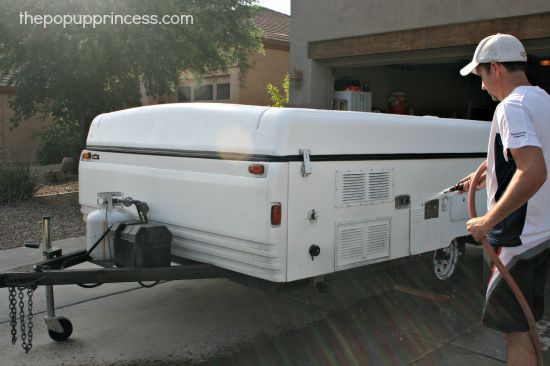
With the canvas and vinyl out of the way, we usually close up the camper and get to work on the exterior. This is usually a pretty big job. Those front panels are almost always covered in squished bugs and road grime, and they are a little difficult to clean. 😛 We’ve found that LA Totally Awesome cleaner and a Magic Eraser work wonders on the bugs and dirt. I was skeptical at first, because the Totally Awesome cleaner really is only $1 at DollarTree, but that stuff rocks! Once the exterior is clean, we usually apply wax to the paint. We like 303 Quick Wax, because it is so easy to apply, and it makes my little PUP shine.
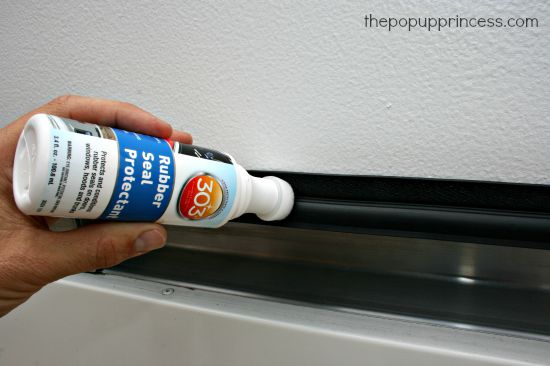 Then we apply a seal protectant to the roof seal to keep it from drying out and cracking–because those suckers are expensive, too. You could probably use just about any rubber protectant here, but I love 303 Rubber Seal Protectant because it comes in an easy applicator bottle. The product is only applied to the areas I want it to be, and I don’t have to worry about overspray or drips. It works great, too. My roof seal still looks brand new, and it is over three years old! Here is a post on how we clean and care for the exterior of our camper, if you’d like to see more.
Inspect, Grease, and Repack the Trailer Bearings
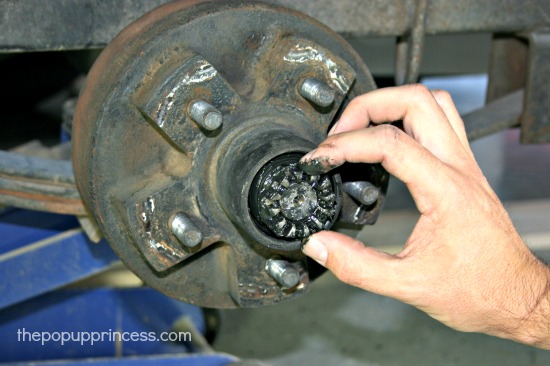
If this is something you’ve never done before, you should definitely put it on your annual to-do list. Greasing and repacking your bearings is essential to ensuring that your wheels keep moving freely and don’t overheat and seize. It sounds pretty intimidating, but I promise it is much simpler than it sounds. Don’t believe me? Check out this post for a tutorial with all the details. If you don’t feel confident in your abilities to do this job yourself, it usually isn’t too expensive to have it done at your local trailer or RV repair shop. Either way–have it done!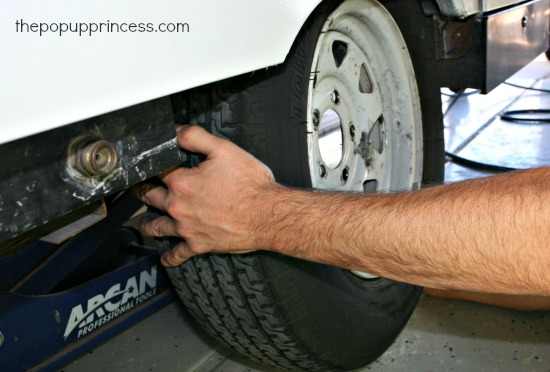
Note: While you are down there working on your bearings, it is probably a good time to inspect the tires for excessive wear and make sure they are properly inflated. You’ll also want to make sure your spare tire is in good condition, just in case you need it.
Grease the Lift System and Inspect the Cables
Sadly, I don’t have a picture or a tutorial of this yet. Taking pictures of the underside of the camper is pretty difficult, but this step is important enough that I just could not leave it out. Because each manufacturer uses a different lift system, you’ll want to consult your owner’s manual for specific instructions. Justin also inspects the cables while he is under the trailer greasing our whiffle tree (Coleman lift system). It doesn’t mean we won’t snap a cable unexpectedly, but it is nice to see what shape they are in so we can potentially head off any disasters. 😉
Check and Charge the Battery
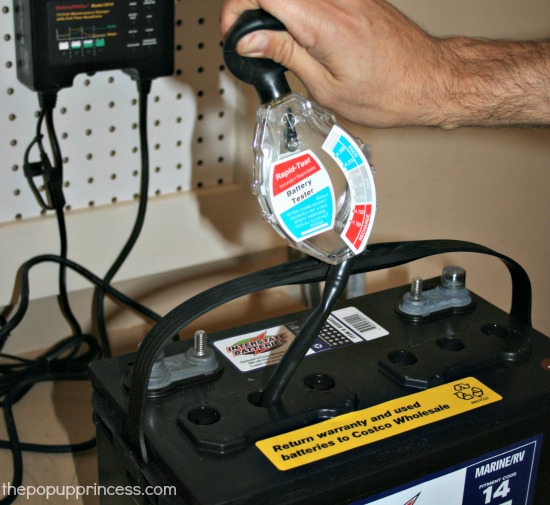
Although it technically isn’t spring cleaning, battery maintenance is still on our spring to-do list. We want to make sure our battery is ready for camping season and won’t leave us without power when we need it most. We keep our battery on a trickle charger to maintain it–we use the BatteryMINDER 2012–and make sure it lasts as long as possible, but we still visually inspect it for corrosion, low electrolyte fluid, and outer case damage. If you’d like more in-depth information, check out our battery tutorial here.
Clean and Flush the Fresh Water System
I will freely admit that I am a little paranoid when it comes to the water in our fresh water tank, so this is a biggie for me. We clean and sanitize the tanks in our pop up camper at least twice a year, sometimes more often. It’s a good idea to start this task first thing in the morning to allow the tank sit for a few hours while you are completing other tasks. You can come back at the end of the day to drain and flush the system.
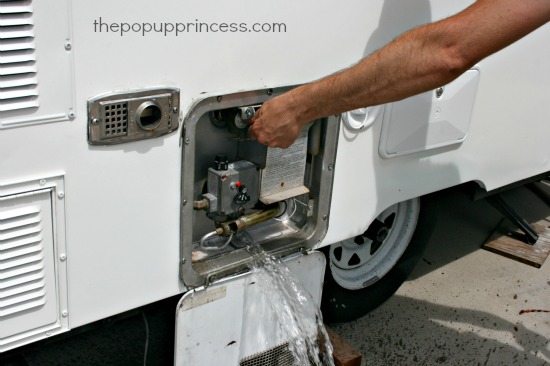
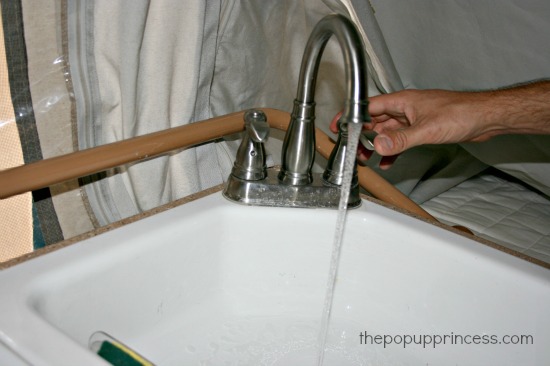
We start by draining the hot water heater (if you have a pump sink, you can skip this step) and fresh water tanks completely. Then we refill the tanks with potable water, adding 1/4 cup of bleach for each 15 gallons. Since we have an 11 gallon tank, I add just a little less than 1/4 cup of bleach. Next we turn on the pump and run both the cold and hot water faucets until we smell bleach. From there, we turn off the water and let the bleach water sit in the tanks for 12 hours. After 12 hours has passed, we drain the tanks and refill them with fresh water. Then we open the faucets and let them run until we no longer smell bleach.
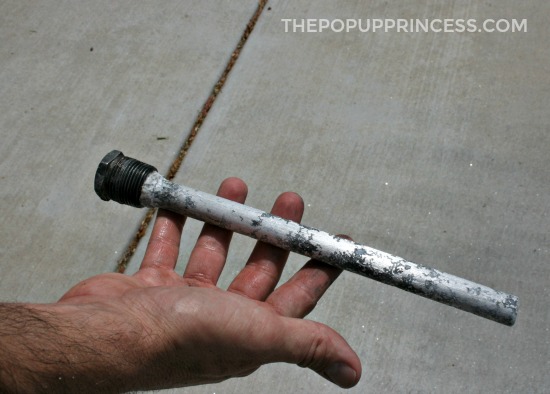
We usually check the anode rod in the hot water heater while we are maintaining the tanks. The anode rod is a metal rod in your hot water heater than is used to attract corrosive elements in your water that could damage your tank. It protects your hot water tank from becoming corroded and should be inspected periodically to make sure it is in good condition. Ours has always looked good, but if yours looks pretty corroded or eaten away, you should replace it.
Caution: You should never drain your hot water tank when it is hot or under pressure. We always make sure the camper is unplugged and the water heater turned off before we drain the water from our tank.
That about sums up the first part of our spring cleaning series. I’d love to hear what’s on your spring cleaning to-do list. Feel free to comment below, and don’t forget to swing back by later this week for part two in the series, where we talk about all our interior spring cleaning tasks. 😀
Disclaimer: This post contains Amazon affiliate links. The Pop Up Princess is a participant in the Amazon Services LLC Associates Program, an affiliate advertising program designed to provide a means for sites to earn advertising fees by advertising and linking to Amazon.com. This means that if you choose to purchase an item from a link in this post, The Pop Up Princess earns a small advertising fee to help pay for future projects and posts… so thank you! 🙂
Happy Camping!


Dear Larissa,
Please get Mr. Two Types of Fun to show us how to check the anod rod in the water heater. I have no idea how to get to it. We are in the beginning phases of our remodel, but will keep you posted. Right now I’m trying to figure out why our toilet doesn’t flush, but more about that later.
Just got a new to us Palomino Pony and used your cleaning technique on the canvas — Woolite and warm water with a plastic scrub brush and some sponges. A few hours of effort and It looks almost new! I then applied the 303 Fabric Guard. Thanks.
Hi. I love your blog!!!! I had to fix our front panel and could not find a replacement, so I went to work on it. Thank you. Thank you, thank you.
So my next question… how do i find out why my battery drains so quick? I don’t know what I’m doing wrong. We dry camp and by that evening, I have a dead battery. We charge it, and it’s a good battery. I just don’t know if maybe the wiring is wrong???
Kim,
If you know that the battery is good, then it’s likely that something in the trailer is pulling a lot of power. It could be bad wiring as well, but you would normally see signs of that as lights or other components not working properly. The best and easiest place to start reducing the load on the battery is to replace all of the old incandescent light bulbs with new low power compact fluorescent or LED bulbs.
If your furnace (if you have one) is all electric, that could be a pretty heavy power draw as well. Also, most camper fridges have the option to run off of the battery or off of propane. They usually cool better on propane, and use a lot less electricity that way so use that option if you can.
That said, you mentioned that your battery is dead by evening, meaning that it is being drained during the day when you’re probably not using lights or the furnace very much, and you need to take a close look at what is being used during the day to figure out what is draining the battery. If you can’t figure out what is causing it, disconnect the battery from the trailer and check it with a volt meter and leave the meter connected to the battery with nothing else for a while to be sure the voltage remains steady. If it drops when nothing is connected then there’s something wrong with the battery. You can also have a local shop like Checker, Auto Zone or O’Reilly. Most of them will check a battery for free.
Once you are sure the battery is good, hook it back up to the trailer and then disconnect EVERYTHING electrical in the trailer including all of the lights, furnace, fridge, CO2 detector, sink pump if you have one, lift motor (if it’s electric), etc. Watch the voltage on the meter with the battery hooked up but nothing plugged in. If it drops, then there’s still something connected and drawing power, or you might have a wiring problem. If it stays steady, reconnect the electrical components one at a time and watch the voltage as you do it until you find the power greedy items that need attention.
If the power hogs are things that you feel that you need to have running during the day, or that can’t easily be fixed or replaced to reduce the power drain, maybe look into getting a portable solar panel to help keep the battery charged up during the day so you have power left at night when you need it.
Do you dilute the LA Totally Awesome before cleaning vinyl?
Yes, Jon! I have used it full strength on a couple of difficult stains, but for the most part, I dilute it about 50/50.
How much of each product do you use? Is one 32oz bottle enough for each product or will I need some more for my PUP?
I’m assuming you are talking about the 303 High Tech Fabric Guard. It will really depend on how big your canvas is, and how much waterproofing is needed. If the canvas has never been waterproofed, or has been recently scrubbed, it may soak up a whole lot of product. In general, though, we find a 32oz bottle more than enough for our Santa Fe.
How about using 303 Aerospace Protectant on the windows, have you ever tried that?
Super odd question, but don’t you do all of this cleaning before you put your pop up away for the season? I don’t like to store it dirty, so we do all the cleaning, water proofing, etc. at the end of the season so it is ‘ready-ish’ to use come summer. I would love some more information on the wheel bearings as I know ours need to be fixed – they make a squeaking sound when moving so I know they need some love.
We actually don’t have an off-season in Arizona, Rachael, so ours never really gets put away. We can camp in December, and do. 🙂 But if you put the camper away for the winter, you could totally do all these things before you put your PUP away.
Here’s the tutorial on repacking the bearings for you. It’s not as hard as you might think.
I’m curious about how much of the bass pro shop product to use. Is one or two bottles enough to do the whole canvas. My canvas is pretty dirty but not horribly stained. Little tiny black specks in the fabric. We just bought a 2007 Fleetwood Westlake.
I am not sure, Tori. I’ve never done it myself. I would think with light mildew, two bottles would be more than enough. Let me know how it goes.
Love your blog! We just bought a used Coleman 12ft box. We are excited to get going. To clean the canvas, do I clean in and out with Woolite? Not sure how well it is waterproofed so don’t want water getting in there when cleaning the outside. Thanks!!
We clean the inside and outside with Woolite. You will probably have to reapply waterproofing to the outside if the canvas is older. If you have a lot of dirt and debris, it takes a little bit of scrubbing to remove it, and that can also remove your waterproofing. The good news is that the 303 High Tech Fabric Guard is easy to apply. 🙂
I am so excited to have found your blog! I am getting ready to purchase a 1996 Starcraft that will need a lot of work! Possible roof and floor repair. I am getting it dirt cheap though… a little cash and a little trade 🙂 my husband loves camping… but I prefer to camp comfortably with our family of 5. We are also located in AZ so we will be able to use it nearly year round… even if it’s mostly in the backyard for my daughters sleepovers! A lot of Jesus and a lot of wine 🍷 will go into my remodel!!
Hello. New here. Is there a reason you don’t use good old fashion Armor All?? It cleans and protects vinyl all in one step. It’s THE GO TO stuff for cars – why not pop ups??
While Armor All isn’t necessarily bad, it isn’t the go to stuff for most car and camper enthusiasts. There are much better products out there. Every time I have used Armor All, it has left a greasy residue. I don’t want to use it on my camper vinyl for that very reason. Since the vinyl comes in contact with the canvas when I fold up the camper, I risk getting that residue on my fabric. I have never had an issue with ProtectAll or 303 Aerospace Protectant, which is why I use them. Hope that helps. 🙂
Hello… just saw your article and am wondering what you use to clean the inside of the canvas? Thank you for sharing your ideas!
I usually use either Dreft or Woolite and water. If there is quite a bit of dirt, I will use 303 Multi-Surface Cleaner.
Do you have a list of all of the products you use to spring clean your pup? Would love to have a simple list to take shopping.
I don’t have a list, yet. I’ll definitely work on one. 😉 Most of the products we use to clean the camper aren’t found in stores, Stephanie. We grab those on Amazon. You might be able to find some of them in an RV supply store (like Camping World), but Amazon is generally cheaper.
I love all of your ideas!
Do you ever replace/repair the caulking on the roof? Some of mine looks like it may be pulling away. Do you remove the old first? And do you just use normal caulking? Thanks!
Because our Coleman has an ABS roof, we’ve never had to do that. We recently rebuilt our Rockwood roof, though. For that we used Dicor lap sealant. You can find more information on that post HERE.
Hello. First off, you are the reason we began our camping journey. Brand new pop ups were out of our price range then we found you, got a 1997 Coleman PUP and fixed it up. Thanks!!!
My question is about the LA Totally Awesome cleaner. Can it be used on the plastic window lining to get the yellowish color out or do you only suggest using 303 product?
Thanks.
Julia
Check out this tutorial for the windows. I like ProtectAll or PlastX for those. Both do a great job cleaning them.